How to Draw Zizi from The Monsters Labubu: Easy 10-Step Guide
Bring Zizi from The Monsters Labubu to life with this screen-free drawing activity designed for young artists. You will need a pencil, an eraser, and a piece of paper to follow along. This tutorial focuses on building confidence through simple shapes, helping children master character proportions while having fun.
🎯 Final Result

Step-by-Step Instructions
Step 1: Sketching the Expressive Face

Start by drawing the face. Use curved lines for the furrowed brows and eyelids to give Zizi that signature look. Add eyelashes of varying lengths along the lids, and place a small, round nose right between the eyes. Teacher's Tip: Keep the eyes close together to maintain that cute, compact character aesthetic.
Step 2: Defining the Head and Mouth

Draw a large oval to frame the face. Add a wide, curved line for the smiling mouth, and use small 'V' shapes below it to create sharp, monster-like teeth. Teacher's Tip: Use a light touch for the oval so you can adjust the shape if it looks a bit lopsided.
Step 3: Adding Texture to the Head

Use long, sweeping curved lines for the sides of the face. Connect them at the top with a series of short, jagged lines to create a furry, tufted appearance. Teacher's Tip: Vary the length of your jagged lines to make the fur look more natural and less uniform.
Step 4: Drawing the Ears
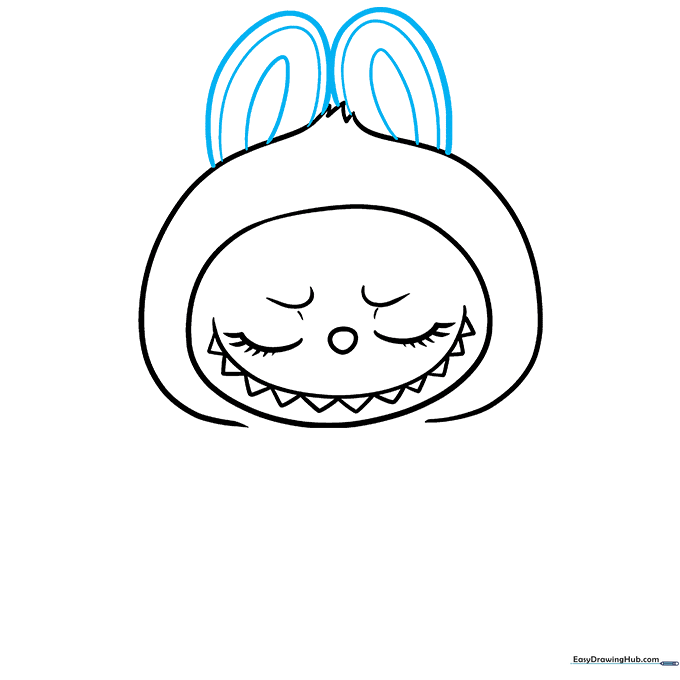
Sketch Zizi's long, rabbit-like ears. Use a series of 'U' shaped lines that get progressively smaller toward the tips. Teacher's Tip: Make the ears slightly asymmetrical to give the character more personality.
Step 5: Sketching the First Arm
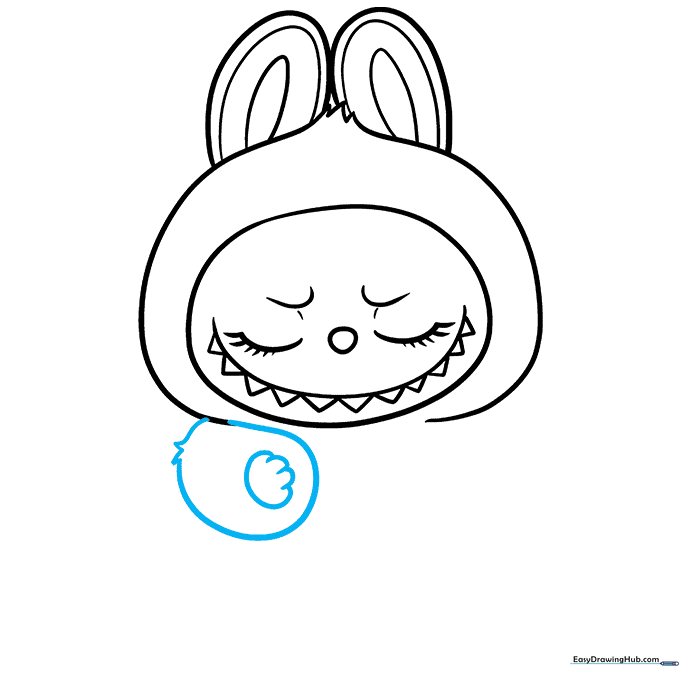
Draw a long curved line for the arm. At the shoulder, add short, jagged lines to represent fur. Finish the hand with small, overlapping curved lines. Teacher's Tip: Focus on making the hand look rounded and soft, like a plush toy.
Step 6: Adding the Second Arm
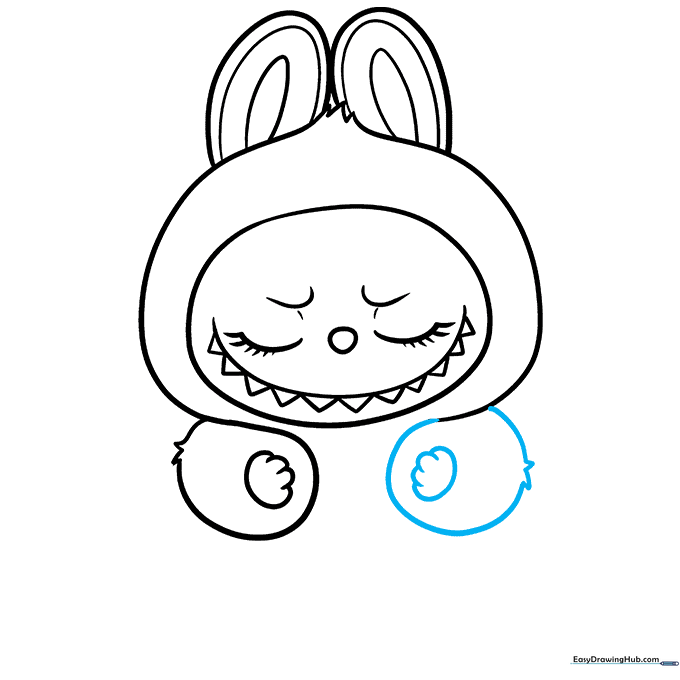
Repeat the process for the second arm. Match the length and the furry shoulder detail to keep the character balanced. Teacher's Tip: If you want Zizi to look like she is waving, angle this arm slightly higher than the first one.
Step 7: Drawing the First Foot
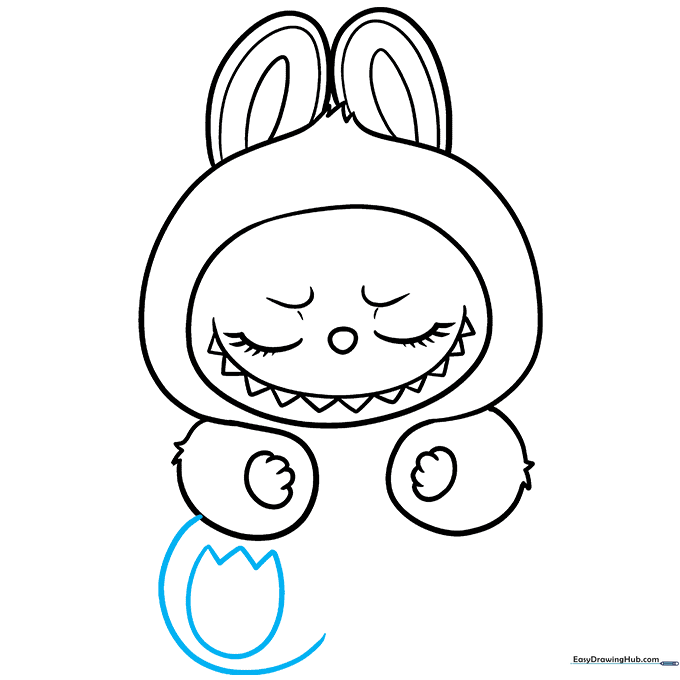
Draw the tulip-shaped foot using a large 'U' line connected by a 'W' shape. Enclose the leg with a curved line leading up to the body. Teacher's Tip: The 'W' shape creates the toes, so make sure it's centered at the bottom of the foot.
Step 8: Drawing the Second Foot
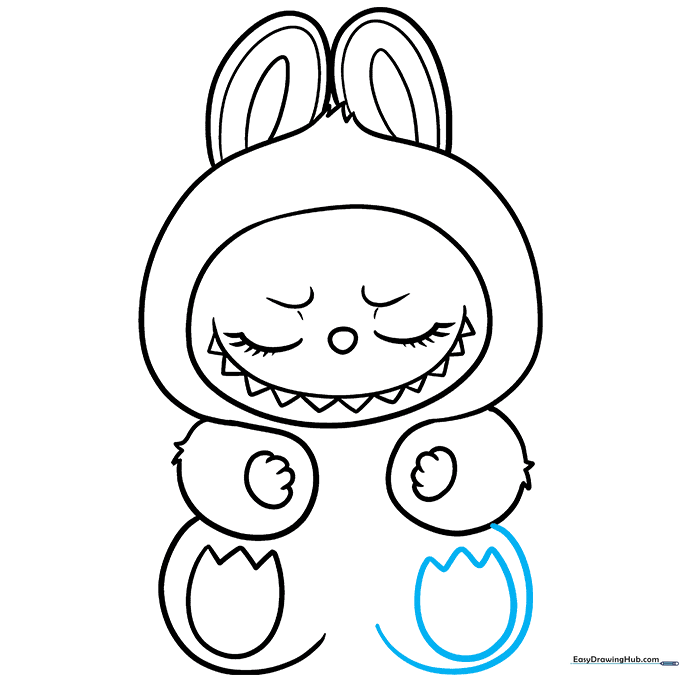
Draw the second foot to match the first. Ensure the 'U' and 'W' shapes are consistent in size. Teacher's Tip: Drawing the feet slightly apart will make your character look like it's standing firmly on the ground.
Step 9: Finalizing the Outline
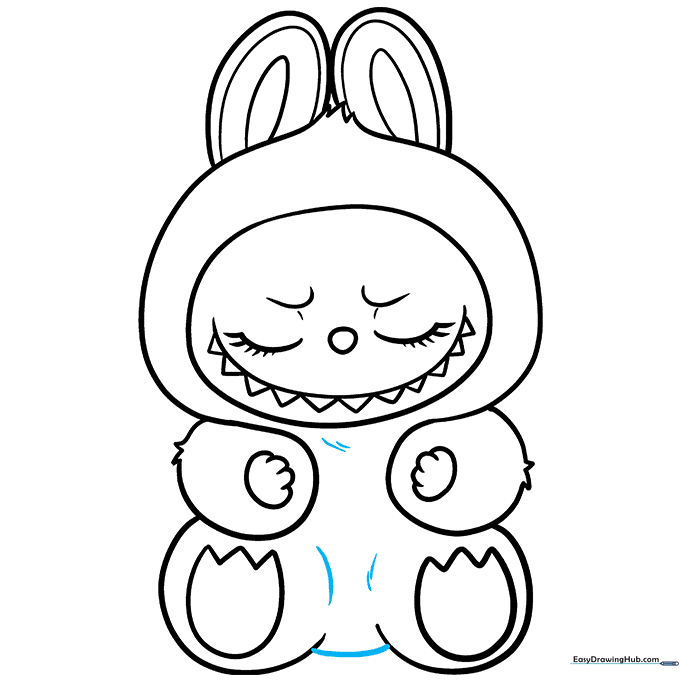
Connect the legs with a short line to close the figure. Add small, curved contour lines around the neck and legs to suggest depth and fur texture. Teacher's Tip: Use a slightly thicker pencil line here to make the character pop off the page.
Step 10: Adding Color

Bring Zizi to life with color! Use a soft peach for the face, a light purple for the fur, and a vibrant reddish-orange for the nose. Teacher's Tip: Use light, circular motions with your colored pencils to get an even, smooth finish.
More Tutorials


