How to Draw Zero from The Nightmare Before Christmas: Easy Guide
Bring Jack Skellington's ghostly pup to life with this beginner-friendly drawing guide. Designed for artists ages 5 and up, this activity requires only a pencil, paper, and an eraser. Follow these steps to capture Zero’s playful, floating spirit while practicing your fluid line work.
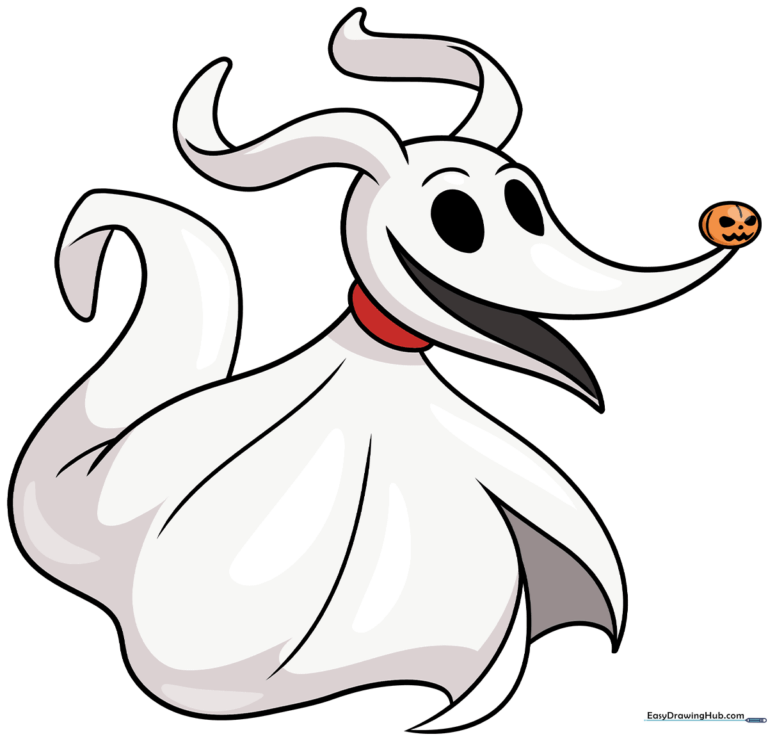
🎯 Final Result
Step-by-Step Instructions
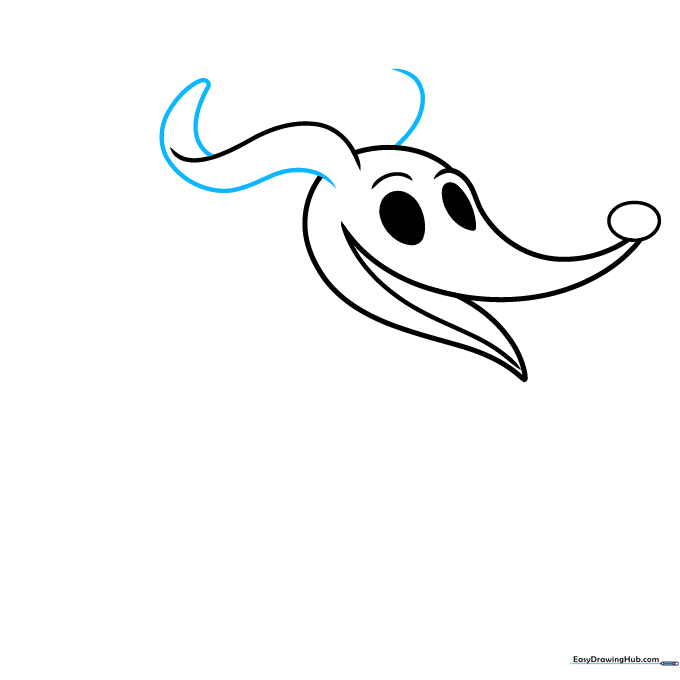
Step 1: Sketching the Head and Snout
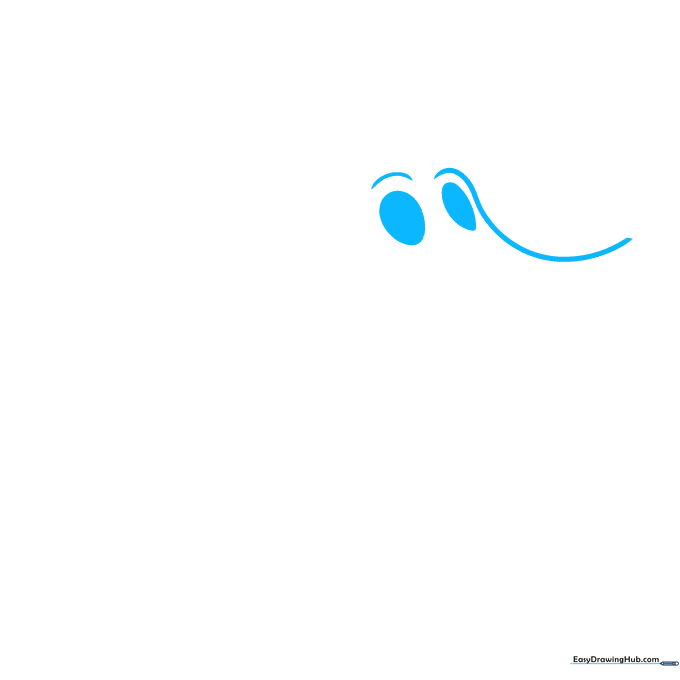
Lightly sketch an oval for the head and a lemon shape for the snout. Add a gentle hill curve above the oval and a sweeping line over the lemon shape. Teacher's Tip: Keep your pencil pressure light so these guidelines are easy to erase later.
Step 2: Forming the Ghostly Body
Draw a circle to the right to represent the body. Add a long, flowing curve beneath the head and a wavy triangle shape to suggest his spectral form. Teacher's Tip: Use loose, flowing wrist movements to make Zero look like he is floating.
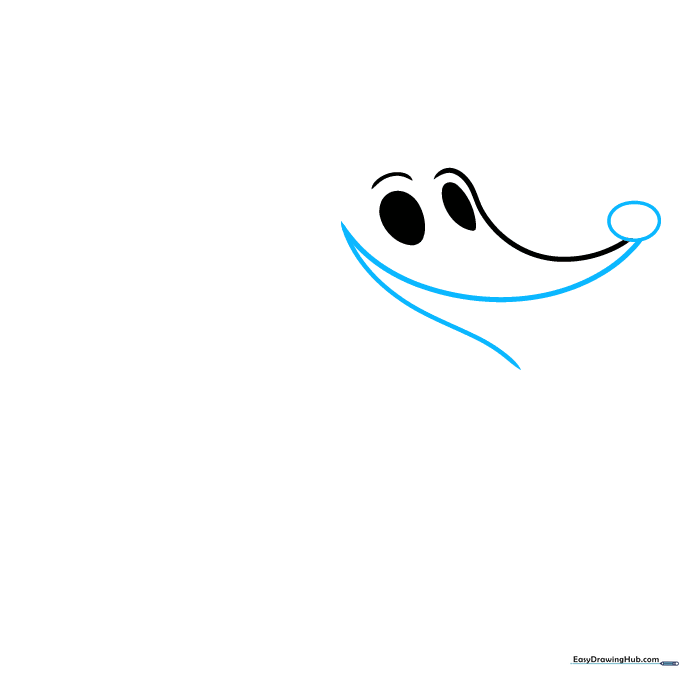
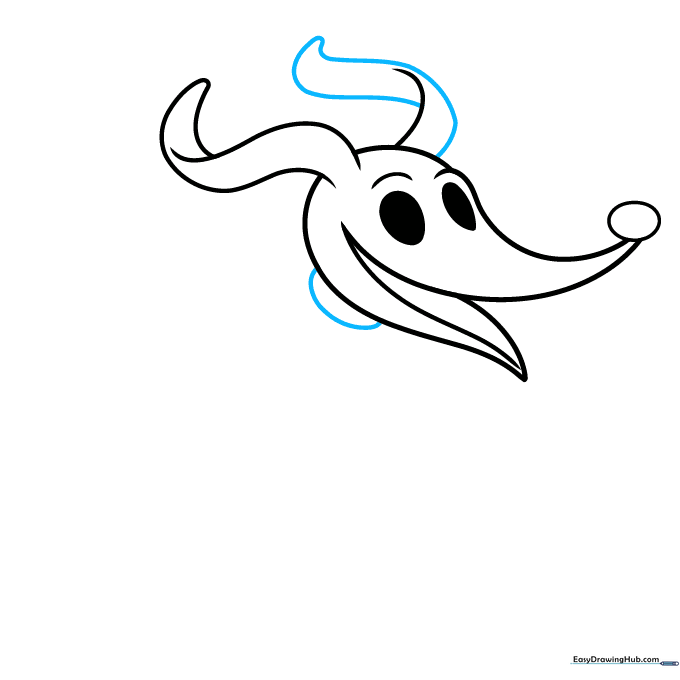
Step 3: Refining the Head and Mouth
Sketch a curved line inside the mouth area and outline the head with a soft, rounded curve. Add a wavy line on top of the head for his ear. Teacher's Tip: Focus on smooth, continuous lines to capture his gentle, friendly expression.
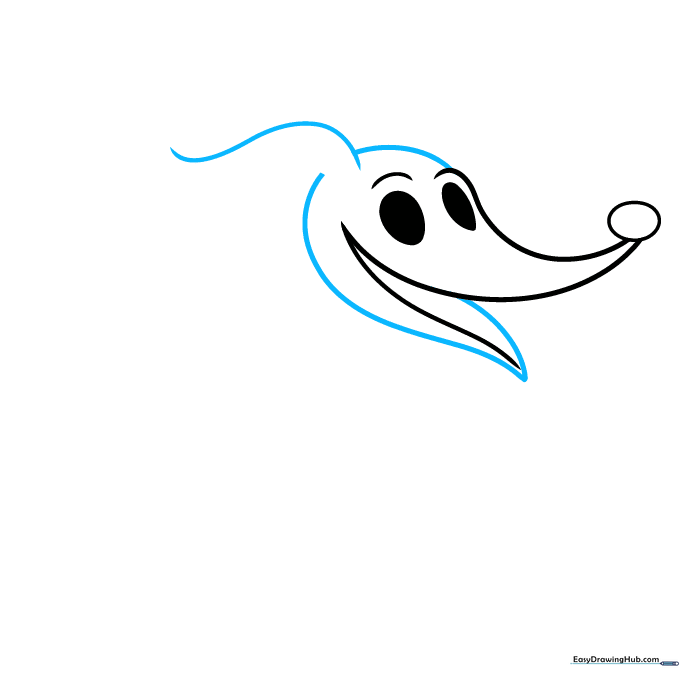
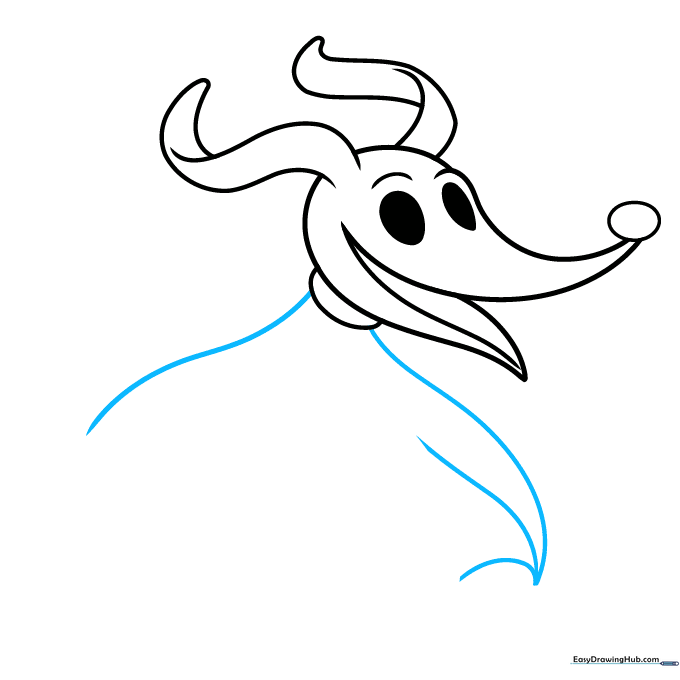
Step 4: Completing the Ears
Complete the left ear by drawing a wavy line and a rounded triangle. Sketch a curve to the right to balance the shape. Teacher's Tip: Zero's ears are floppy and long, so don't worry if they look a bit uneven—it adds character!
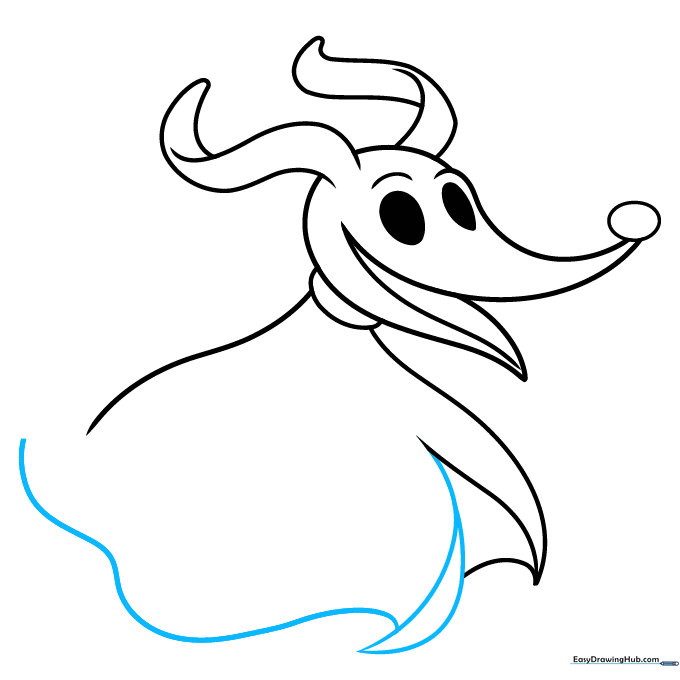
Step 5: Adding Body Structure
Add a semi-oval beneath the head. On top, sketch two wavy lines that form a rounded triangle for his collar. Teacher's Tip: This is where the character starts to take shape; keep your lines clean and purposeful.
Step 6: Detailing the Body
Draw a wavy diagonal line on the left side of the body. To the right, add a curved diagonal line and a shorter curve with a line in the middle. Teacher's Tip: These lines create the folds in his ghostly sheet.
Step 7: Drawing the Tail
Sketch a banana shape to the right, then connect it to the body with a curved line. Outline the rest of the body with a long, wavy line. Teacher's Tip: Think of the tail as a soft, flowing ribbon.
Step 8: Adding Final Features
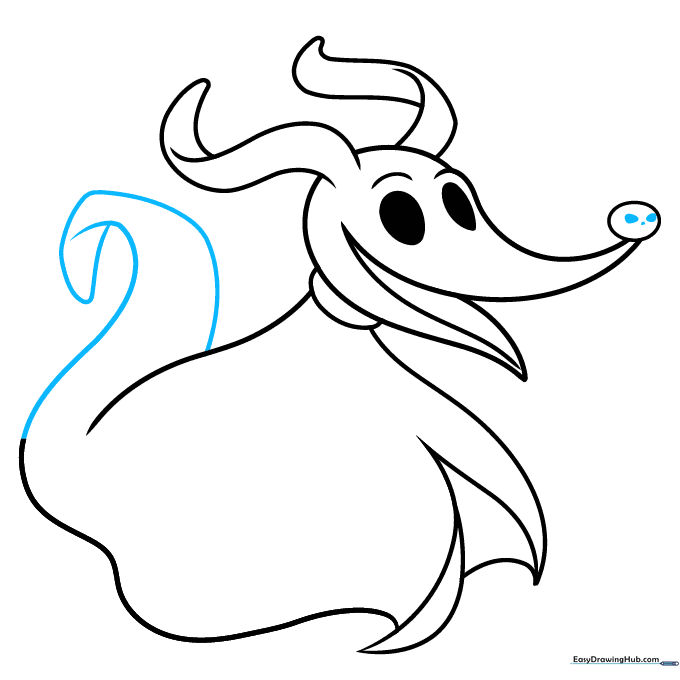
For the tail, draw a hook shape, then sketch a curve around it and add a rounded triangle. Add a dot and two small lemon shapes inside the nose. Teacher's Tip: The nose is his most iconic feature—take your time to get the shape right!
Step 9: Outlining and Final Touches
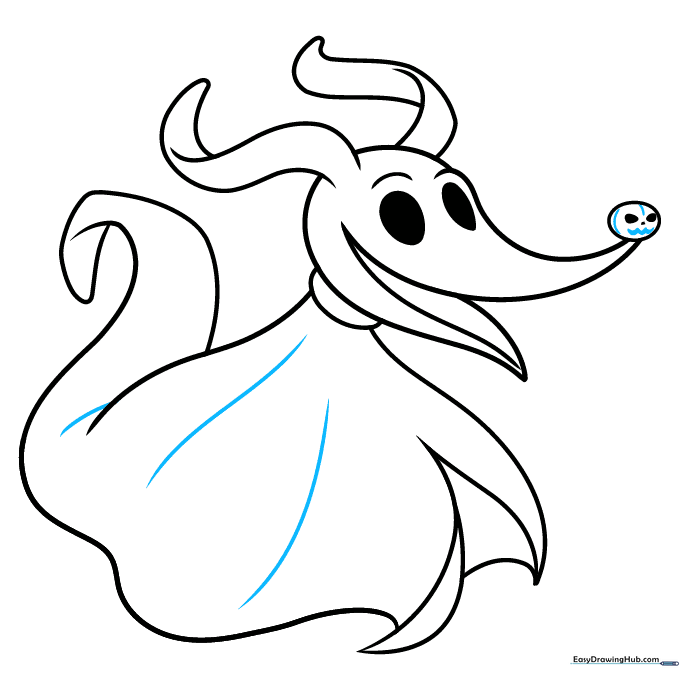
Add three lines inside the body for texture. Inside the nose, sketch two thin curves and a jagged line. Outline with black ink and fill in the eyes. Teacher's Tip: Use a steady hand for the outline to give your drawing a professional, crisp look.
Step 10: Bringing Zero to Life with Color
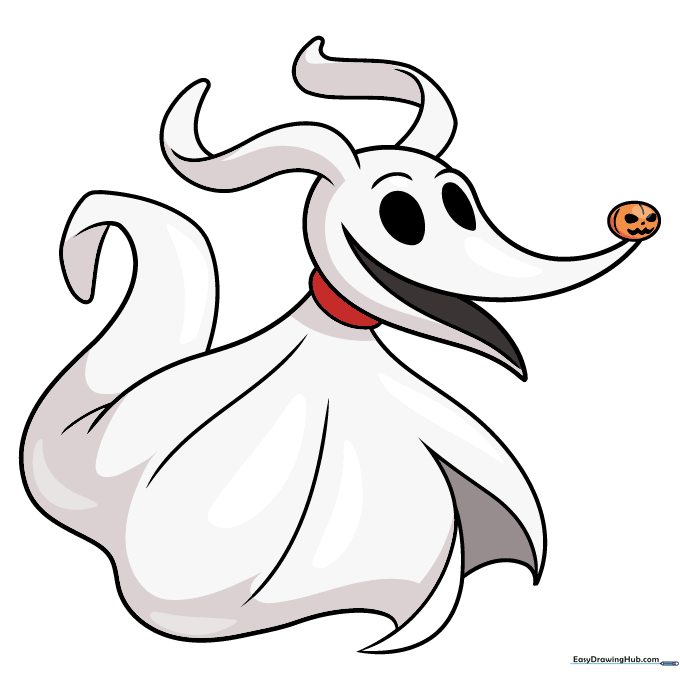
Add subtle grey shadows to the body while leaving the rest white. Use vibrant red for the collar and bright orange for the pumpkin nose. Teacher's Tip: Use light, circular motions with your colored pencils to create smooth, even shading.
More Tutorials


