How to Draw Yoshi: Easy 10-Step Guide for Kids
Ready to bring your favorite video game companion to life? This tutorial is perfect for artists ages 5 and up. All you need is a pencil, an eraser, and some paper to master Yoshi's iconic look in just 15 minutes.
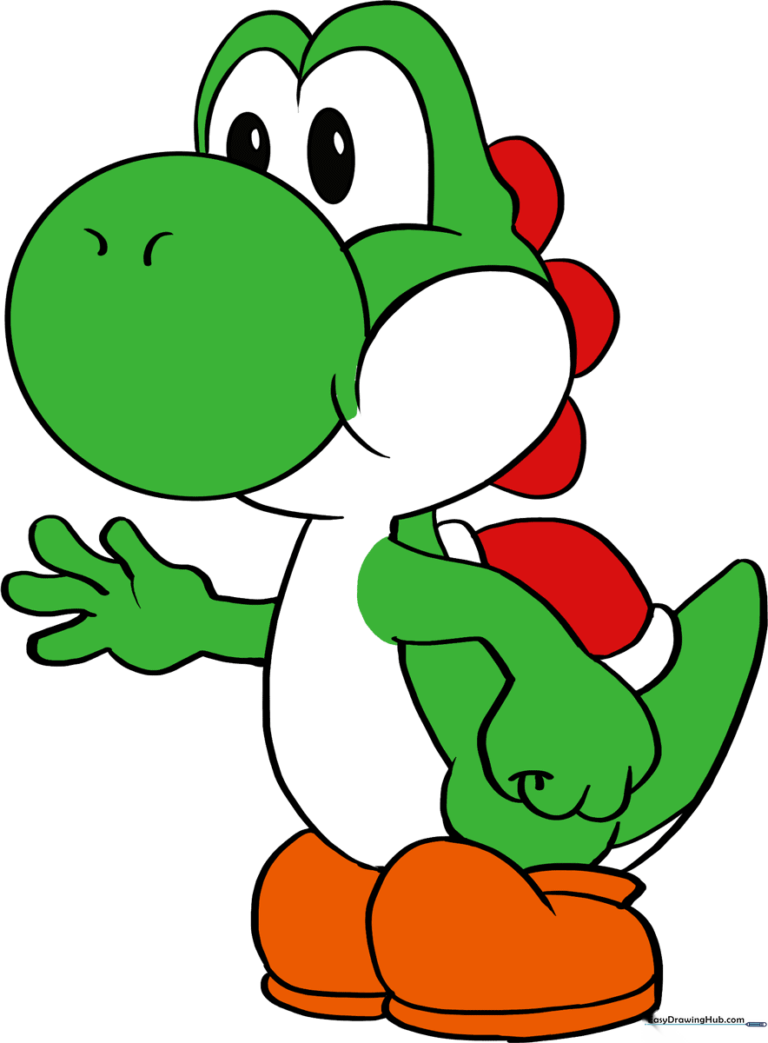
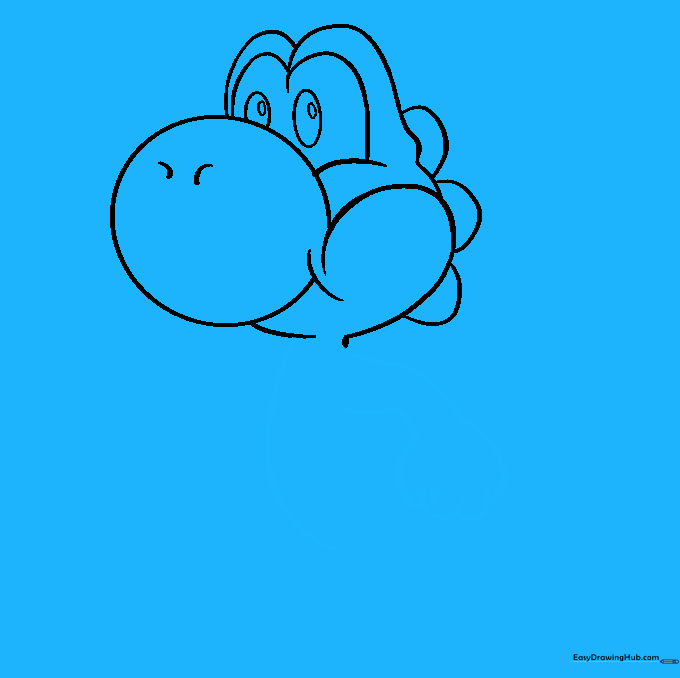
🎯 Final Result
Step-by-Step Instructions
Step 1: Sketching the Snout

Start by drawing a simple circle. This will serve as the base for Yoshi's snout. Teacher's Tip: Keep this circle small and near the center of your page to leave room for his head and body.
Step 2: Defining the Face
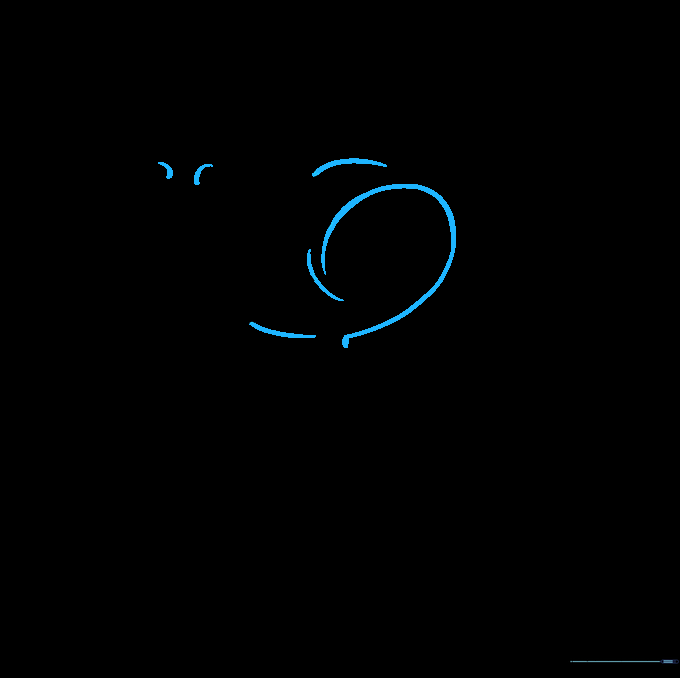
Extend curved lines from the snout to create the lower half of his face. Add two small curves at the very tip for his nostrils. Teacher's Tip: Use smooth, flowing motions to make his face look friendly.
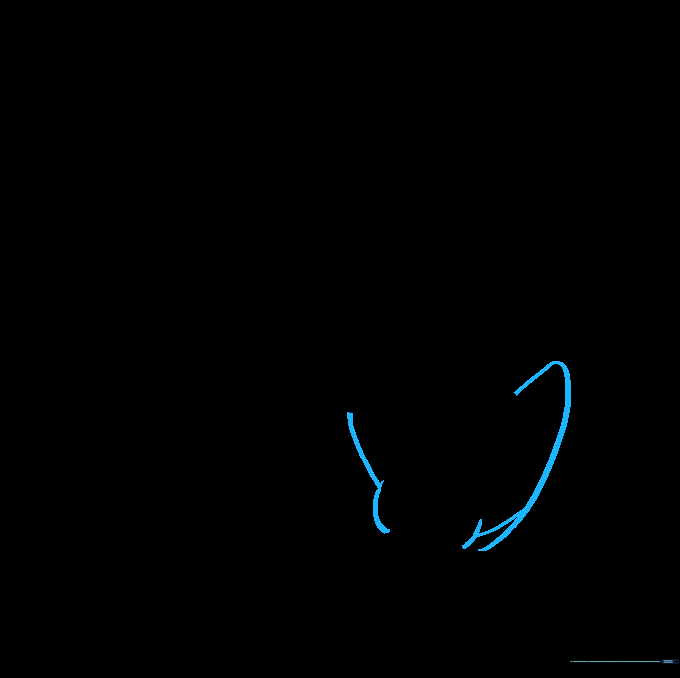
Step 3: Creating the Eye Ridges
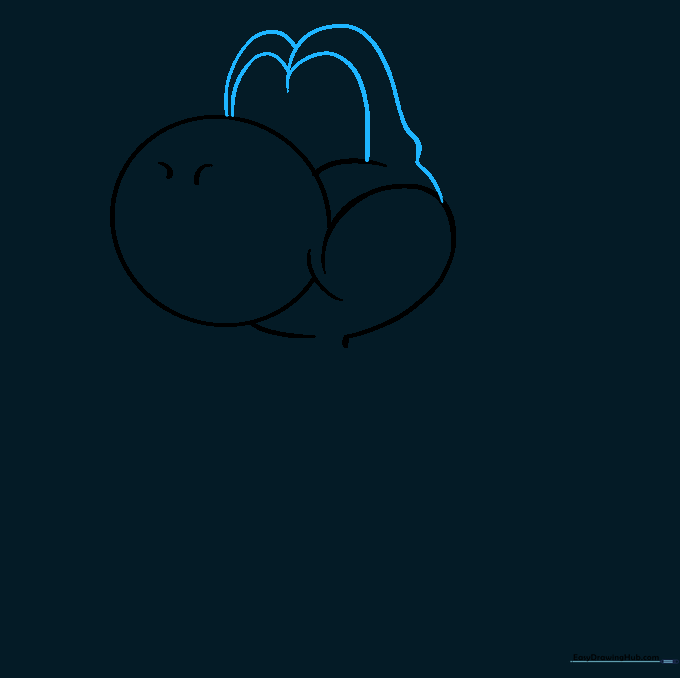
Draw an 'M' shaped line above the snout to form the eye area. Add a curved line to define the brow. Teacher's Tip: Think of these as little hills sitting on top of his head.
Step 4: Adding Eye Detail
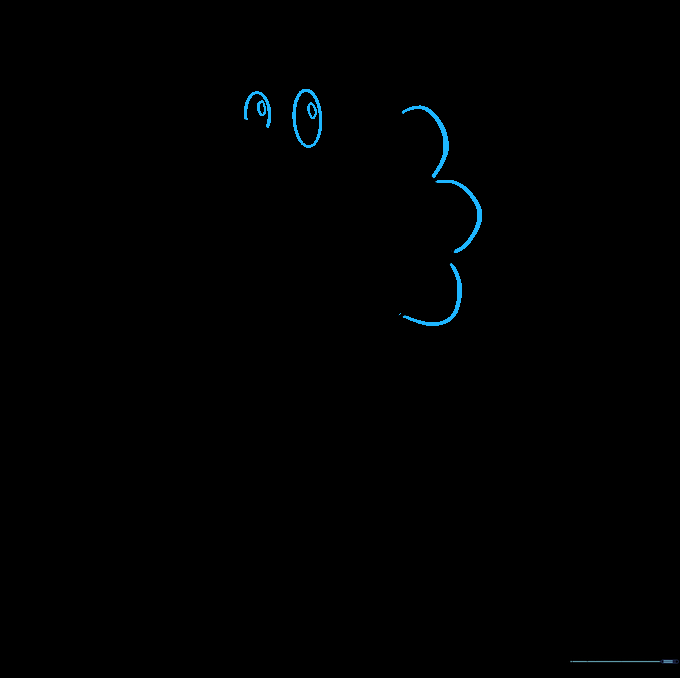
Draw ovals inside the eye ridges and add half-circles on the back of his head. Teacher's Tip: Make the eyes large to give Yoshi his signature cute, wide-eyed expression.
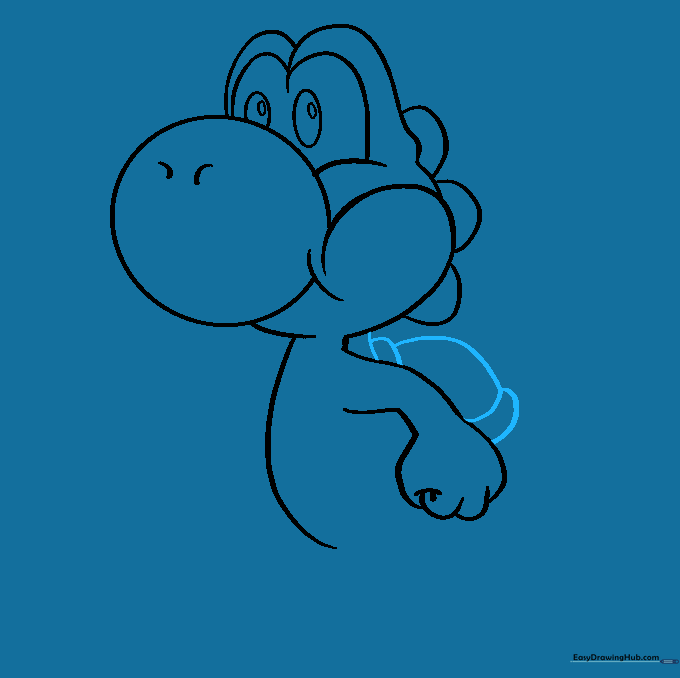
Step 5: Sketching the Arm
Outline the chest and the arm using curved lines. Draw the fist with overlapping curves. Teacher's Tip: Don't press too hard; overlapping lines can be tricky, so keep your eraser handy!
Step 6: Drawing the Saddle
Connect the head to the back and draw the oval-shaped saddle. Teacher's Tip: The saddle should look like a small turtle shell sitting comfortably on his back.
Step 7: Adding the Legs
Use curved lines to define the tail, upper leg, and stomach. Teacher's Tip: Keep the curves soft to maintain Yoshi's rounded, cartoonish appearance.
Step 8: Drawing the Boot
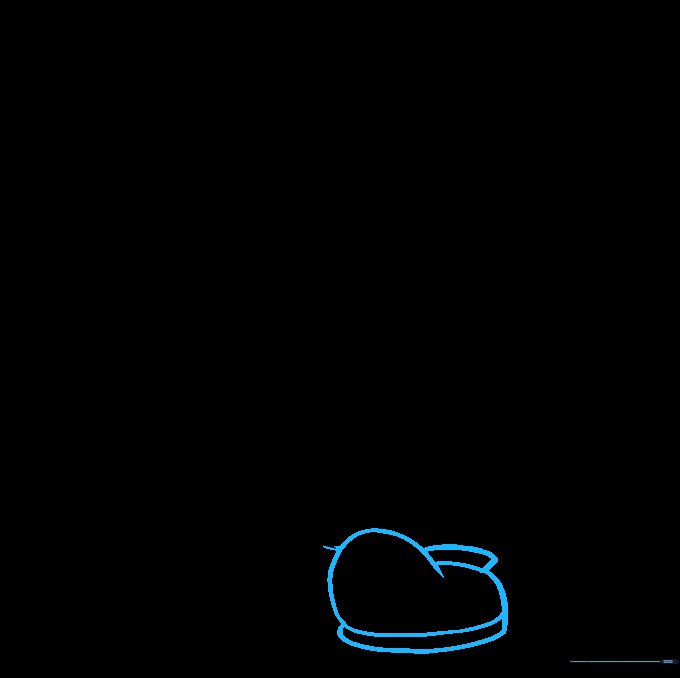
Sketch the boot using an irregular shape for the sole and ankle. Teacher's Tip: Yoshi's boots are chunky, so make sure the base looks sturdy.
Step 9: Finalizing the Outline
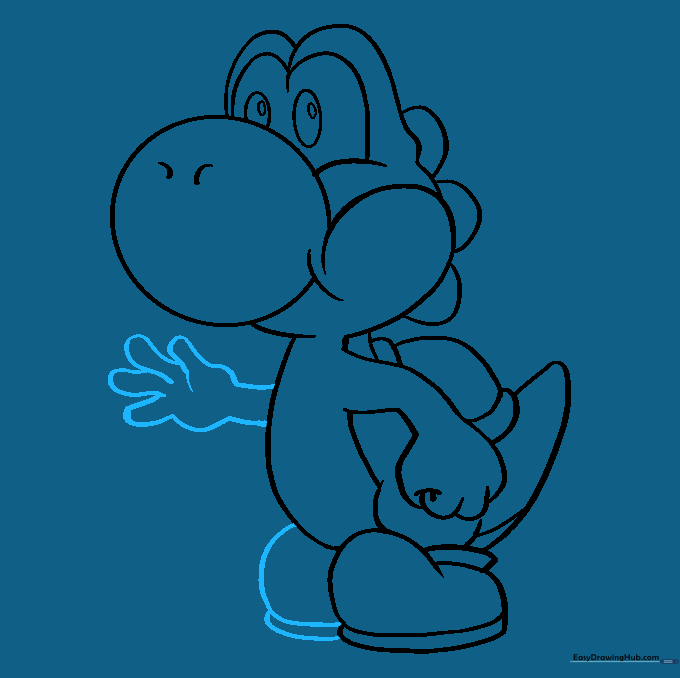
Draw the second boot and the extended hand. Use 'U' shapes for the fingers. Teacher's Tip: Check your proportions—make sure the hand looks balanced with the rest of the body.
Step 10: Coloring Your Yoshi
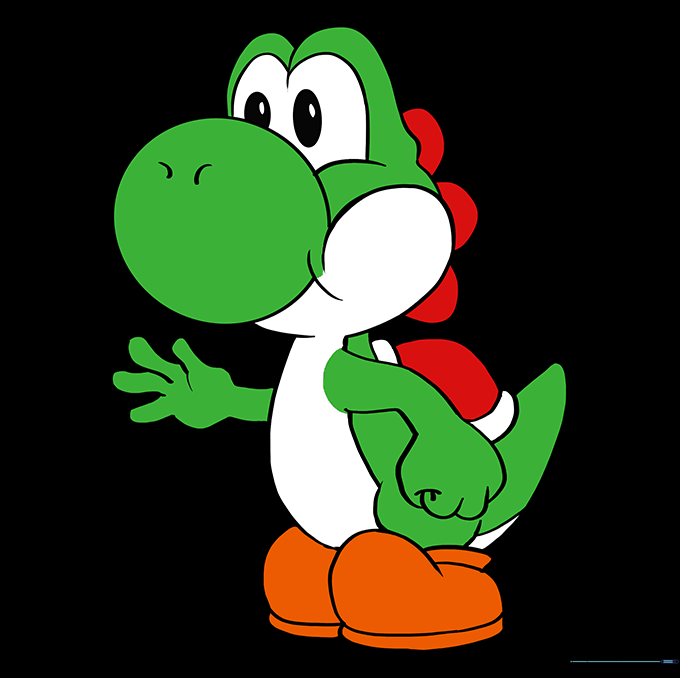
Time to bring him to life! Use green for his body, white for the belly, orange for the boots, and red for the saddle. Teacher's Tip: Use light pressure with your colored pencils to create smooth, even shading.
More Tutorials


