How to Draw Winnie the Pooh: Easy 10-Step Guide
Bring the Hundred Acre Wood to life with this simple, step-by-step tutorial designed for artists ages 5 and up. You will only need a pencil, an eraser, and a piece of paper to capture Pooh's iconic, friendly expression. Follow along to build confidence in your sketching skills while creating a classic character everyone loves.
🎯 Final Result
Step-by-Step Instructions
Step 1: Sketching the Head

Draw a light circle to serve as the top of Pooh's head. Teacher's Tip: Keep this circle about the size of a golf ball; drawing it lightly makes it much easier to clean up your sketch later.
Step 2: Defining the Muzzle

Extend a curved line from one side of the circle to the other to create the muzzle area. Teacher's Tip: Think of this as a soft, rounded 'U' shape attached to the bottom of your circle.
Step 3: Sketching the Body

Extend a long, curved line beneath the head and loop it back to form a pudgy, pear-shaped body. Teacher's Tip: Pooh is known for his round tummy, so don't be afraid to make this shape nice and wide!
Step 4: Drawing the Legs
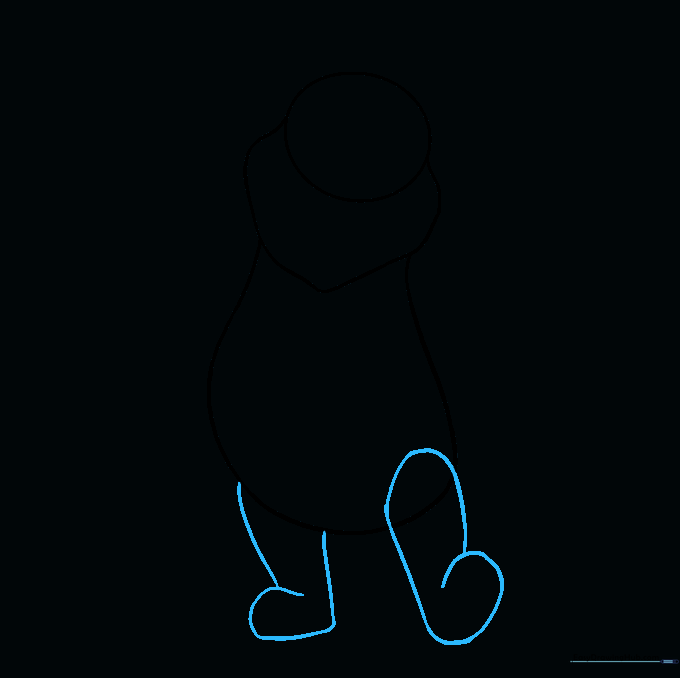
Use pairs of curved lines to form the legs and feet at the base of the body. Teacher's Tip: Keep the feet rounded and flat at the bottom so it looks like he is standing firmly on the ground.
Step 5: Cleaning Up

Carefully erase the overlapping guide lines inside the face and legs. Teacher's Tip: Use a clean eraser and gentle strokes to avoid smudging your drawing.
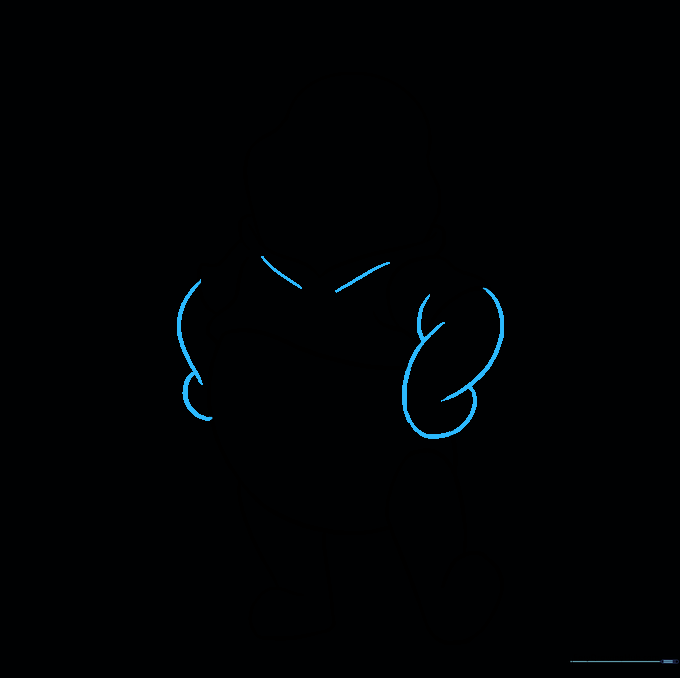
Step 6: Adding the Shirt

Draw the collar and sleeves of his iconic red shirt using curved lines. Teacher's Tip: Make the collar look like a soft 'V' shape to give it a natural, folded appearance.
Step 7: Refining the Shirt

Erase any extra lines inside the shirt area to keep your drawing neat. Teacher's Tip: A clean drawing makes it much easier to color in later without confusion.
Step 8: Adding Fabric Details and Arms
Add small, curved lines to the shirt to show fabric folds, and draw the arms resting at his sides. Teacher's Tip: Keep the arms simple and rounded to match Pooh's soft, cuddly character design.
Step 9: Drawing the Face
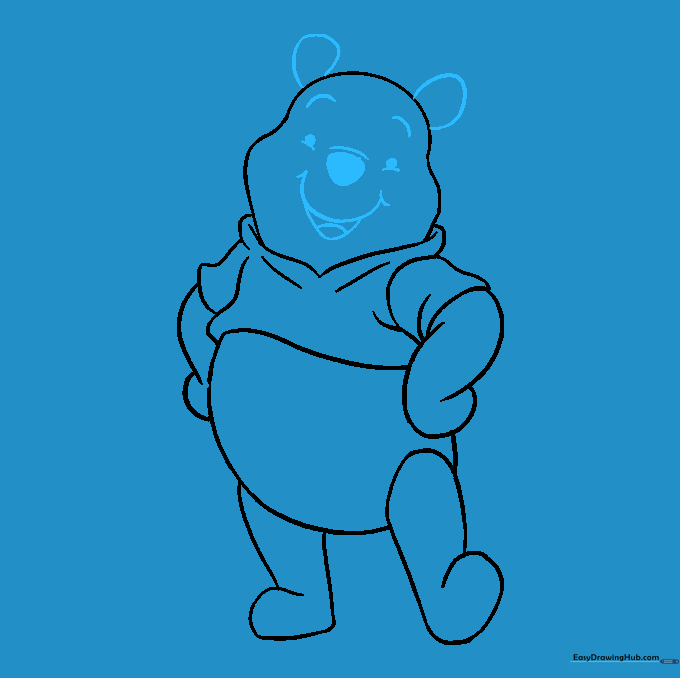
Add the ears, nose, eyes, and a happy, open mouth. Teacher's Tip: Use a small, shaded triangle for the nose and keep the eyes simple dots to maintain his sweet, innocent expression.
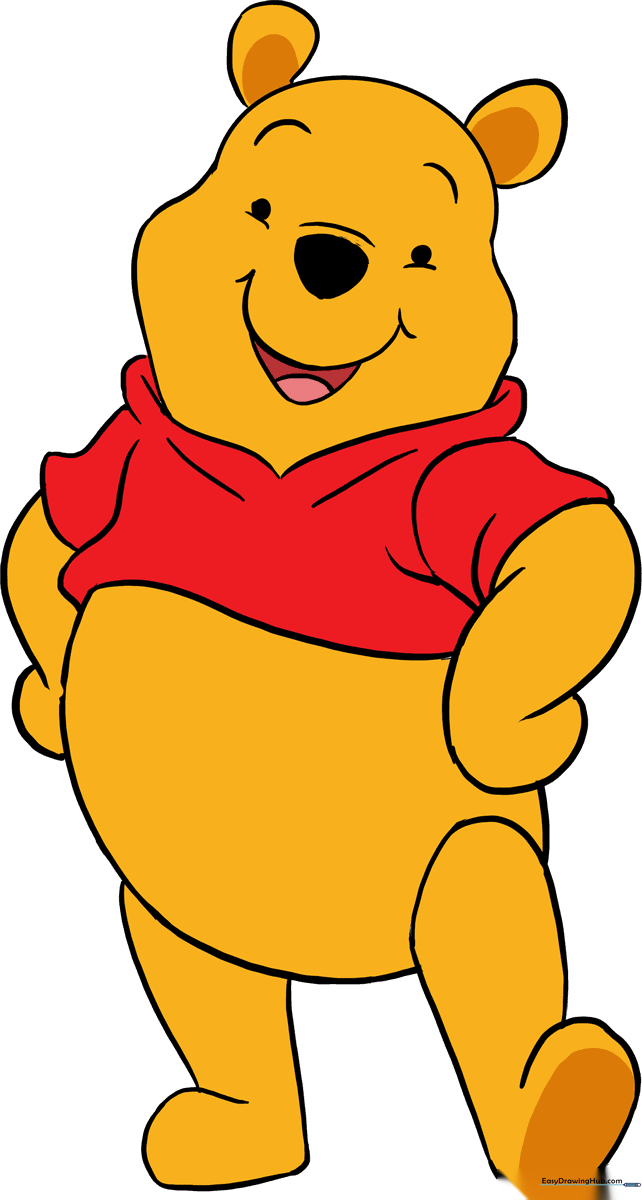
Step 10: Adding Color
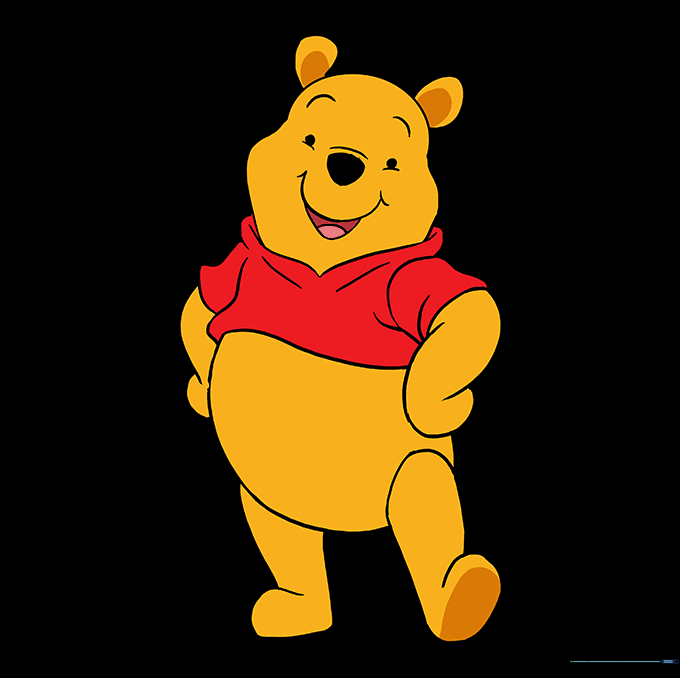
Color Pooh in his classic golden yellow with a bright red shirt. Teacher's Tip: Use light, circular motions with your colored pencils to get an even, smooth coat of color.
More Tutorials


