How to Draw Wild Robot Roz: Easy 10-Step Guide
Bring Roz, the resilient robot from The Wild Robot, to life with this step-by-step guide designed for young artists ages 6 and up. You will need a pencil, an eraser, and a sheet of paper to complete this character study. Follow along to master the geometric shapes that form her iconic, friendly silhouette.
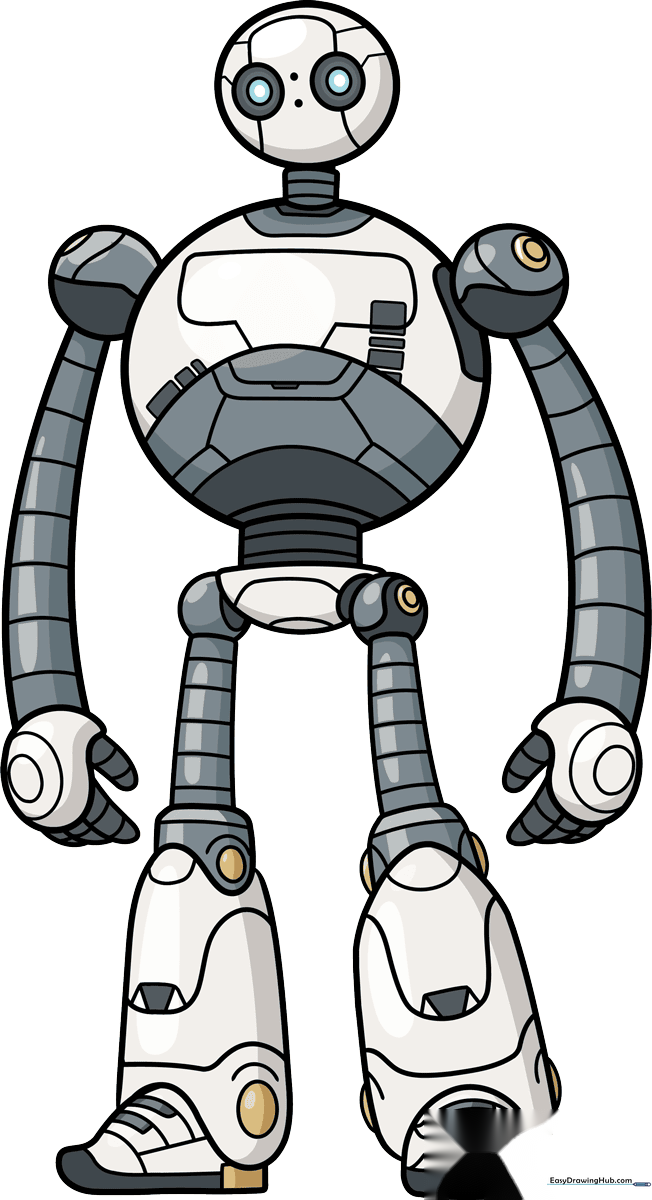
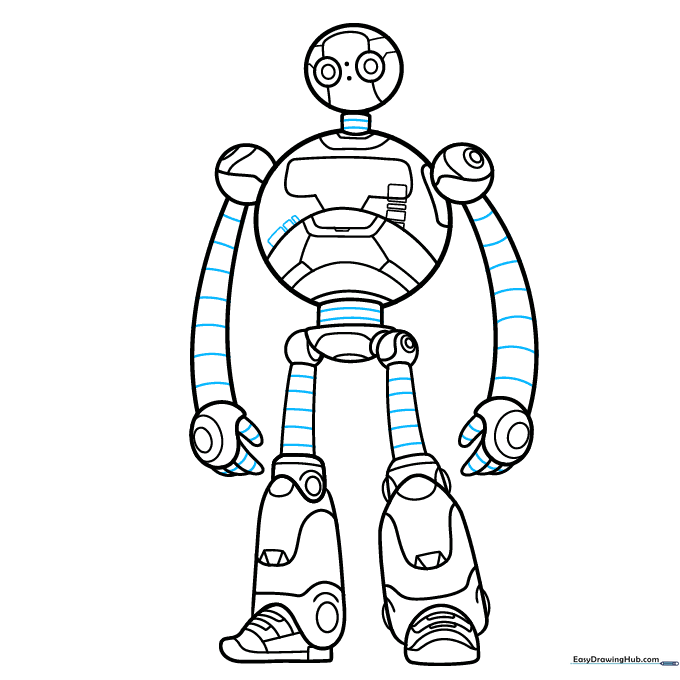
🎯 Final Result
Step-by-Step Instructions
Step 1: Sketching the Head and Frame

Draw a large circle near the top of your page for the head. Above this, sketch a smaller circle containing four ovals and two dots for her sensory array. Add a circle on each side of the torso area, then sketch cylinders for the upper and lower arms. Teacher's Tip: Keep your pencil pressure light so you can easily adjust these guide shapes later.
Step 2: Defining the Arms and Hands
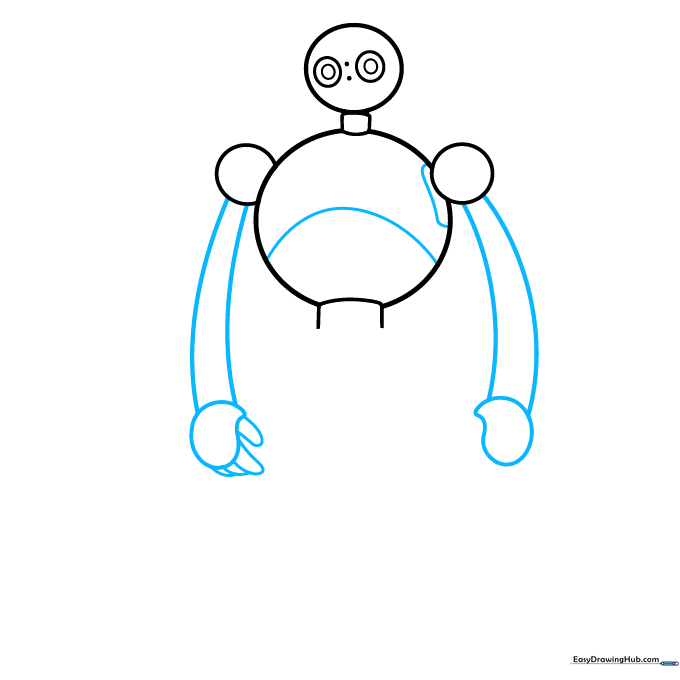
Sketch large teardrop shapes for the hands and connect them to the shoulders with curved lines. Use small, rounded 'hot dog' shapes for the fingers. Inside the main body, draw a curve and an oblong shape to establish her mechanical chest. Teacher's Tip: Focus on the flow of the lines to make her look like she is in motion.
Step 3: Building the Lower Body
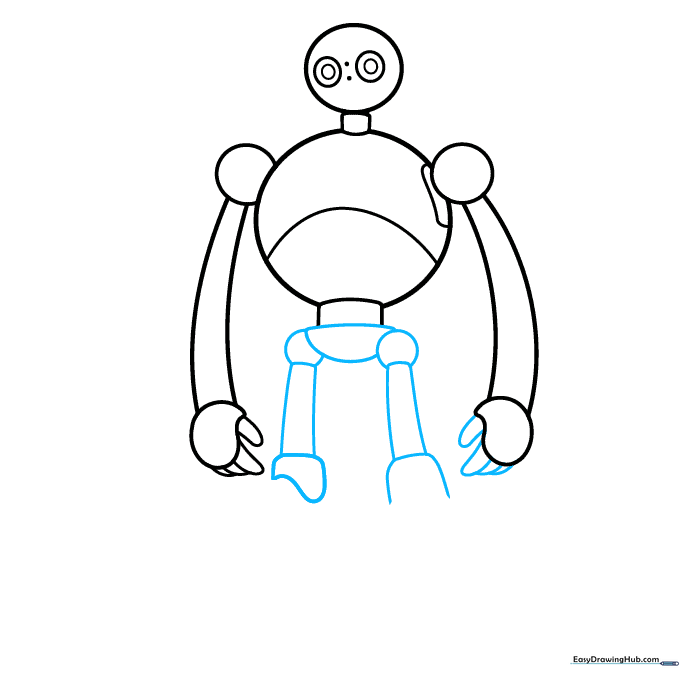
Add the fingers on the right hand. Sketch a semicircle beneath the torso, then add a circle on each side for the hip joints. Draw an oblong shape on the left and a semi-rectangle on the right, connecting them with vertical lines for the legs. Teacher's Tip: Ensure your vertical lines are parallel to keep her looking balanced and sturdy.
Step 4: Shaping the Feet
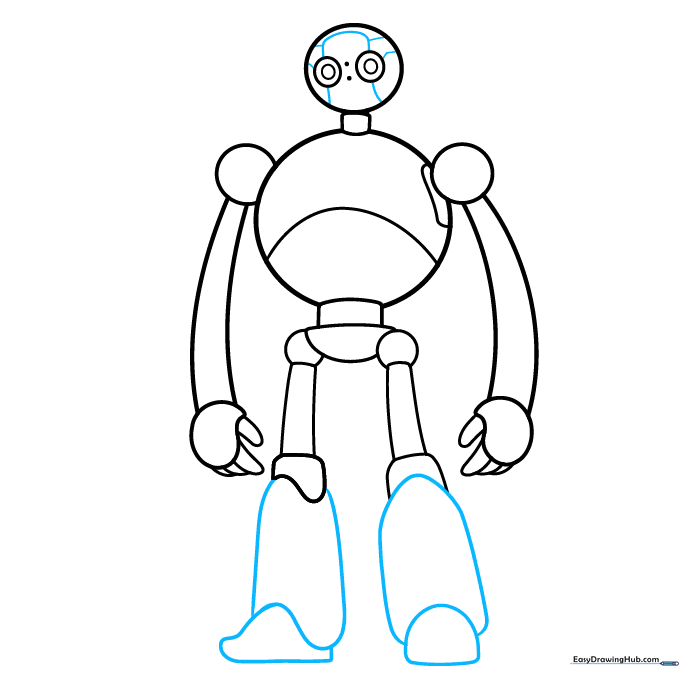
Draw a semicircle for the right foot, with an oblong oval tucked behind it. On the left, sketch a 'hill' shape with a flat bottom, then add curved lines around it to show the mechanical plating. Teacher's Tip: Think of these as heavy boots; making them slightly wider at the base gives the character a grounded, realistic look.
Step 5: Adding Mechanical Details
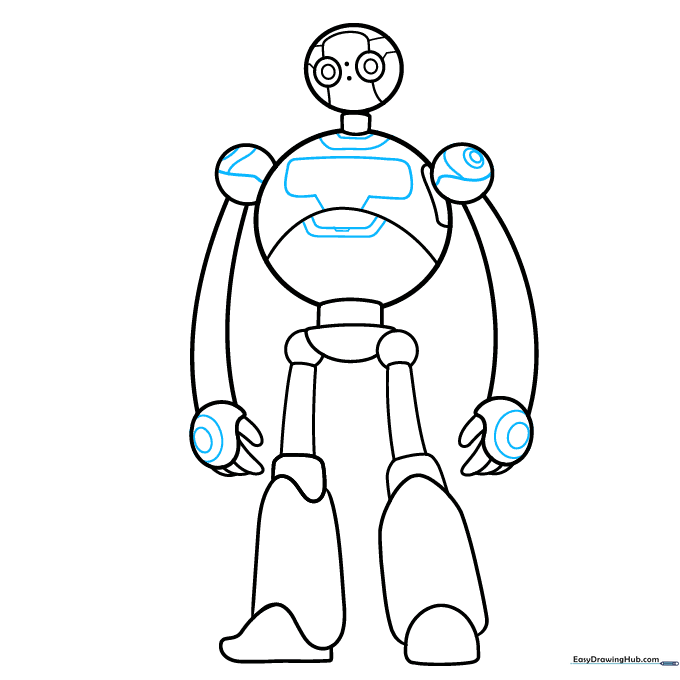
Add small circles inside the hands to represent joints. Draw more circles and curves on the shoulders, then sketch lines and blocky shapes inside the chest area. Teacher's Tip: Don't worry about perfection here; robots are made of many small parts, so slight variations in your shapes add character.
Step 6: Refining the Torso
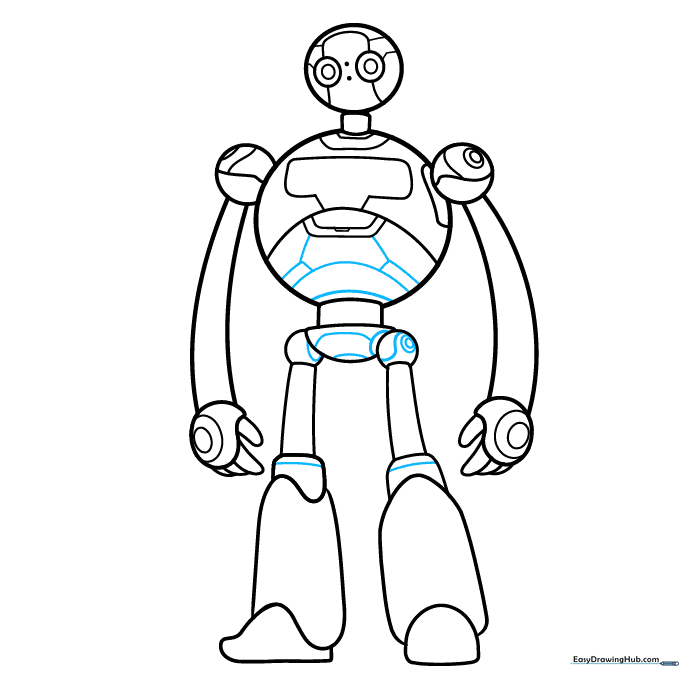
Sketch additional lines and geometric shapes inside the body to suggest panels and circuitry. Teacher's Tip: Use a ruler if you want the lines to be perfectly straight, or freehand them for a more organic, 'wild' look.
Step 7: Leg and Joint Details
Add more lines, curves, and diamond shapes to the legs. Sketch semi-ovals on the outside of the right leg to represent the knee joint. Teacher's Tip: These small shapes create the illusion of depth and texture.
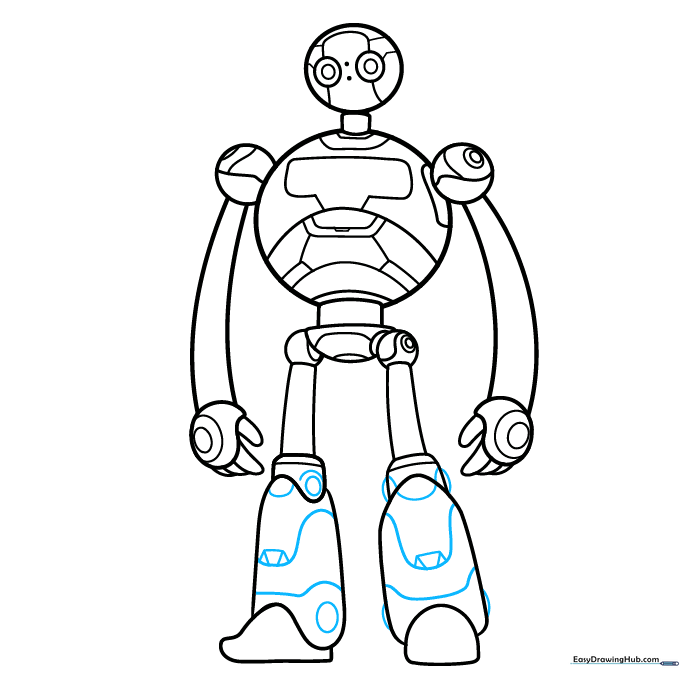
Step 8: Finalizing Chest and Feet
Draw rectangles on the right side of the chest to show plating. Add more curves and rectangles inside the feet to finish the mechanical look. Teacher's Tip: Look at the spacing between your lines to ensure they look symmetrical.
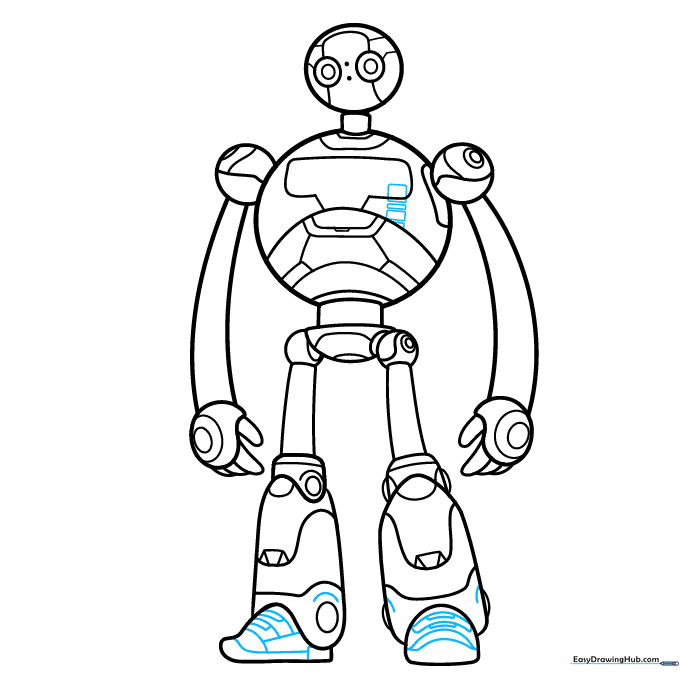
Step 9: Final Touches
Sketch three rectangles on the left side of the chest, then add curved lines throughout the body to unify the design. Teacher's Tip: Take a step back from your drawing to see if any areas look too empty; you can always add a small line or circle to balance it out.
Step 10: Inking and Coloring

Outline your drawing with black ink, using thicker lines for the main contours and thinner lines for internal details. Once the ink is dry, erase your pencil marks. Color the arms, legs, and midsection in shades of grey, use blue for the eyes, and gold for the accents. Keep the body mostly white with soft grey shadows to give her a clean, metallic finish.
More Tutorials


