How to Draw a Werewolf: Easy 10-Step Guide for Beginners
Ready to bring a classic monster to life? This tutorial is perfect for young artists ages 8+ looking to practice character design. Grab your pencil, eraser, and paper, and let’s master the art of drawing a werewolf with these easy-to-follow steps.
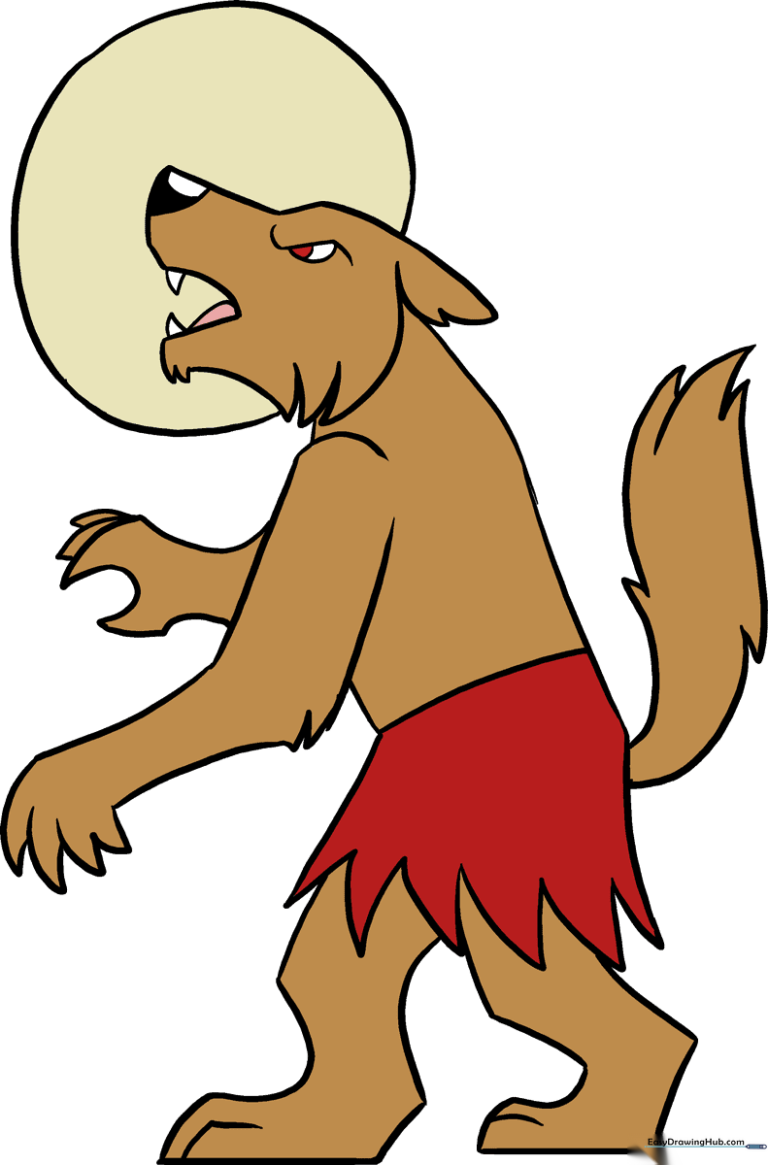
🎯 Final Result
Step-by-Step Instructions
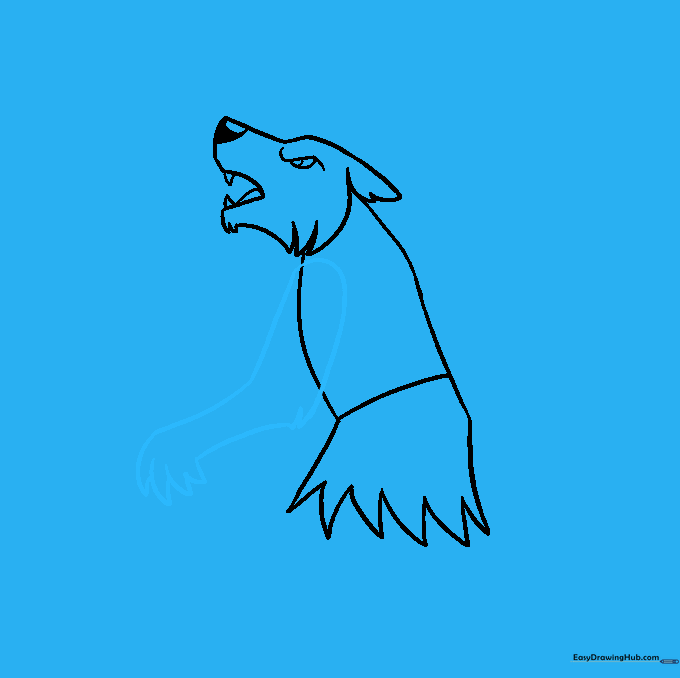
Sketching the Snout and Ears
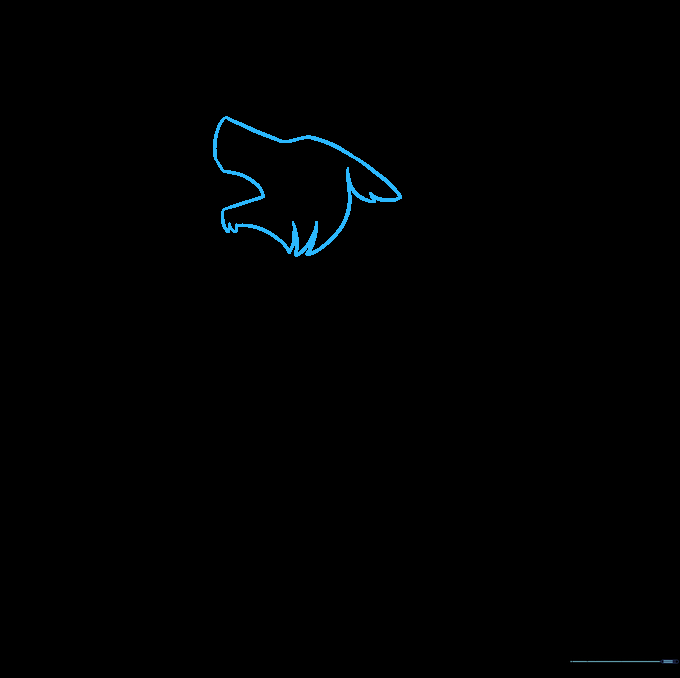
Outline the werewolf's snout using curved lines to create a rectangular shape. Extend the line up to the brow and loop it back to form the ear. Tip: Use short, jagged lines for the neck scruff to give it a wild, furry look.
Adding Facial Features
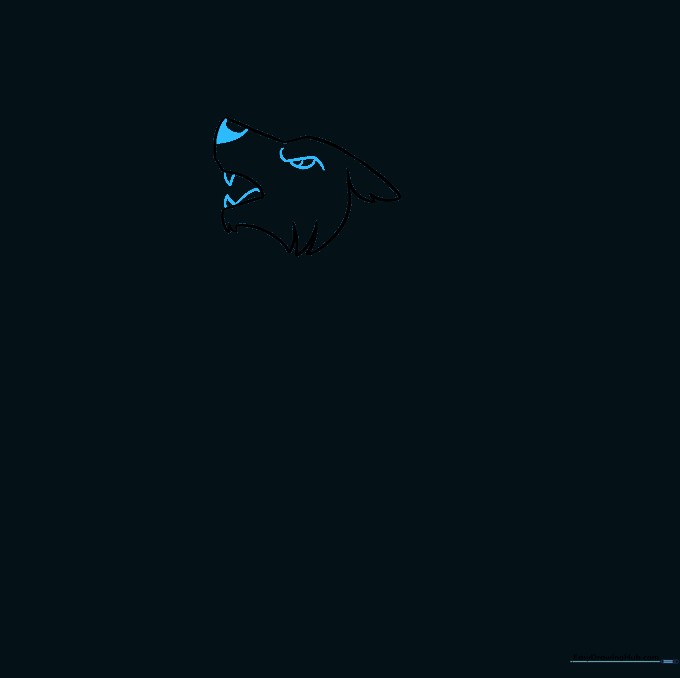
Draw a curved line for the nose and shade it in. Add an 'S' shaped brow and a semicircle for the eye. Don't forget the tongue and sharp triangular teeth! Tip: Keep the teeth small and pointy to make the werewolf look fierce but cartoonish.
Outlining the Torso
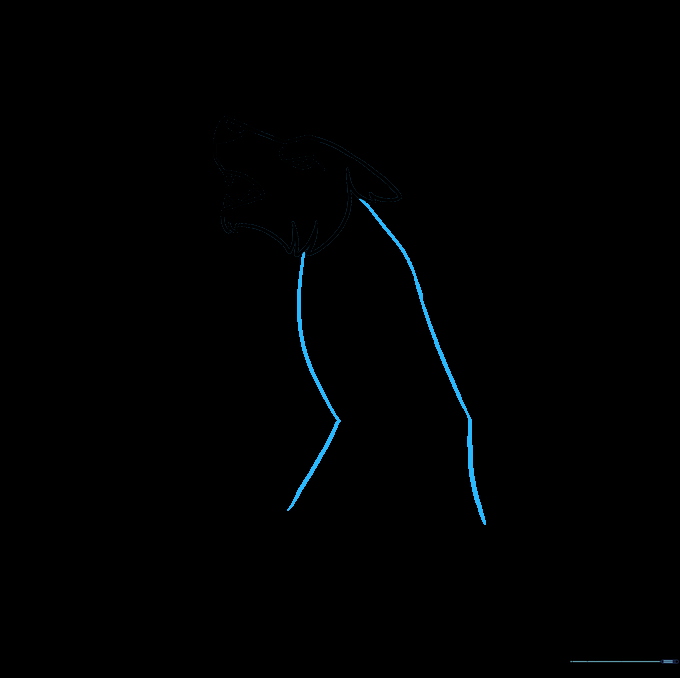
Use long, sweeping curved lines to define the body. Pay attention to the bend in the lines near the hips to give the werewolf a natural, hunched posture. Tip: Imagine the werewolf is ready to pounce!
Adding Clothing Details
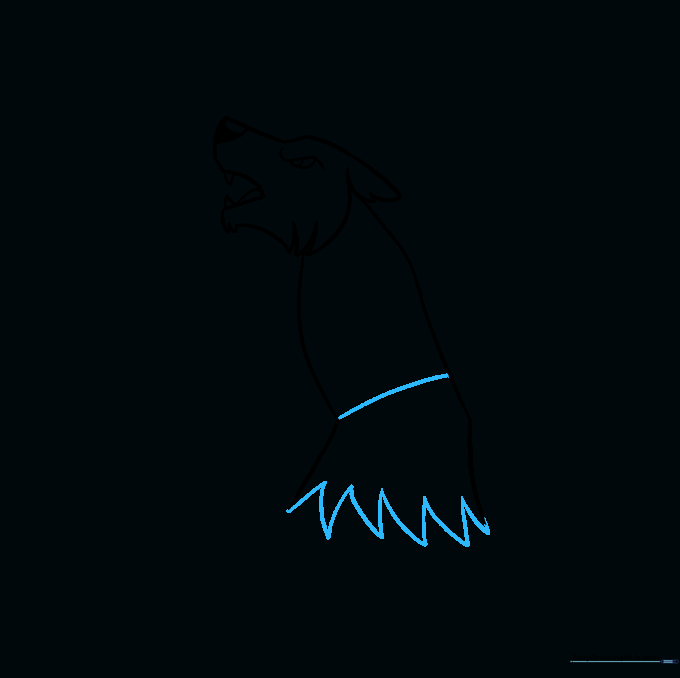
Draw a curved line across the abdomen to suggest tattered clothing. Use short, jagged strokes to make the edges look ripped. Tip: This adds character and tells a story about your creature.
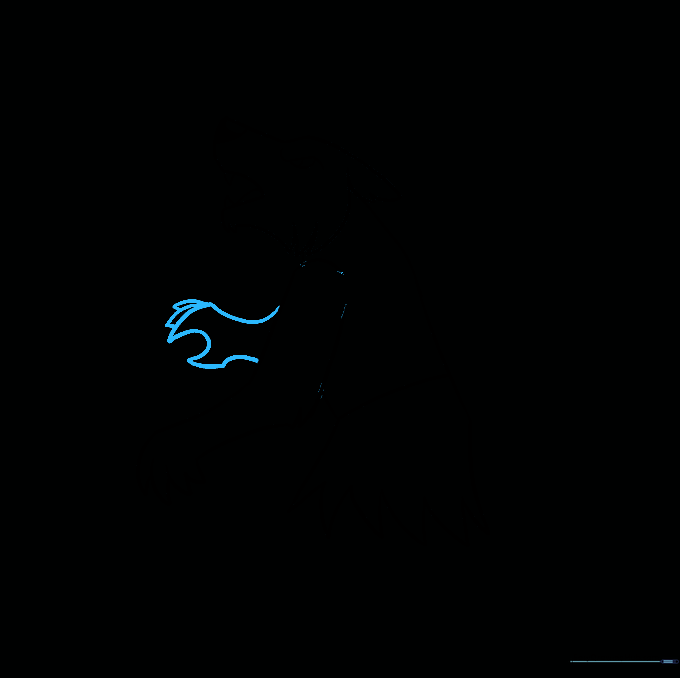
Drawing the First Arm
Sketch the upper arm as an elongated oval. Add jagged fur lines at the elbow and use open triangles for the fingers. Tip: Keep the fingers slightly curved to show the werewolf is reaching out.
Adding the Second Arm
Draw the far arm using a series of lines that mirror the first. Use a backwards 'C' shape for the palm and add more fingers. Tip: Overlapping lines help create depth, making the arm look like it's behind the body.
Sketching the Legs
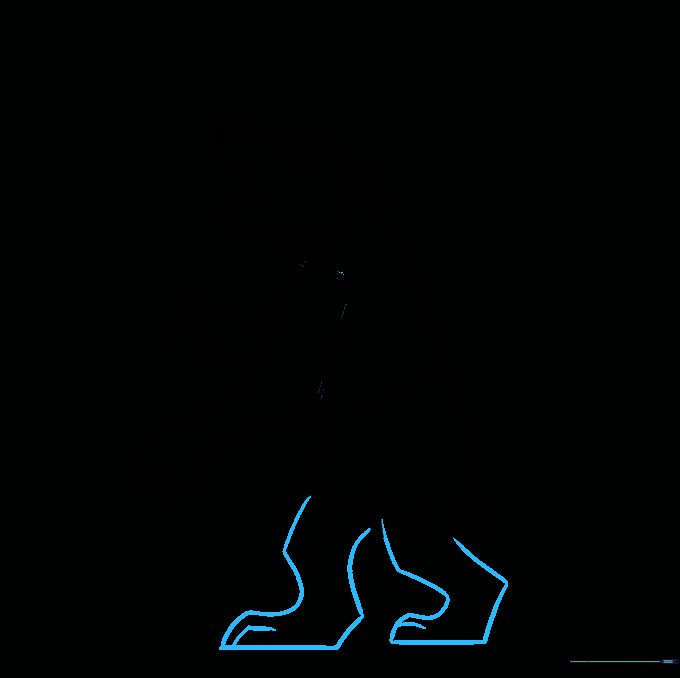
Use a combination of straight and curved lines to form the legs. Make sure to emphasize the knee and ankle joints. Add small curved lines at the bottom for toes. Tip: A flat bottom line for the foot helps ground the character on the page.
Adding the Tail
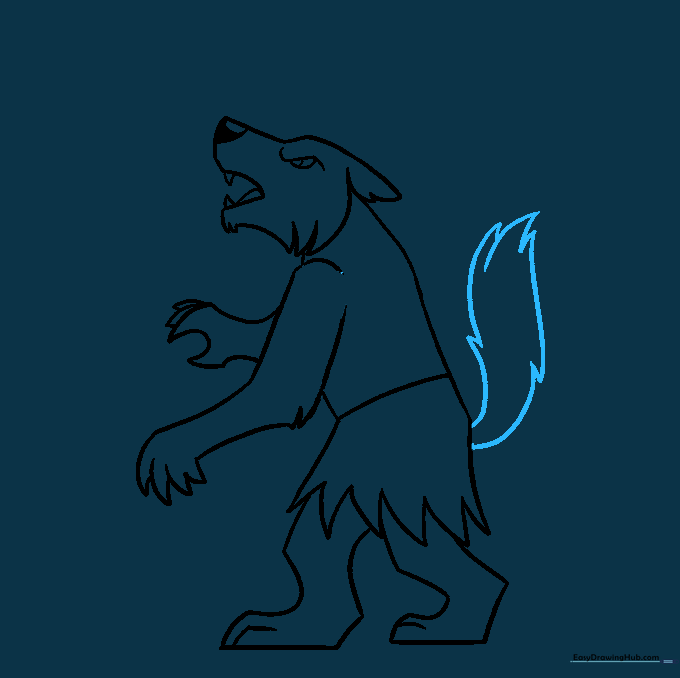
Draw a bushy tail using various lengths of curved lines that meet in sharp, furry points. Tip: Varying the length of your lines makes the fur look thick and realistic.
Setting the Scene
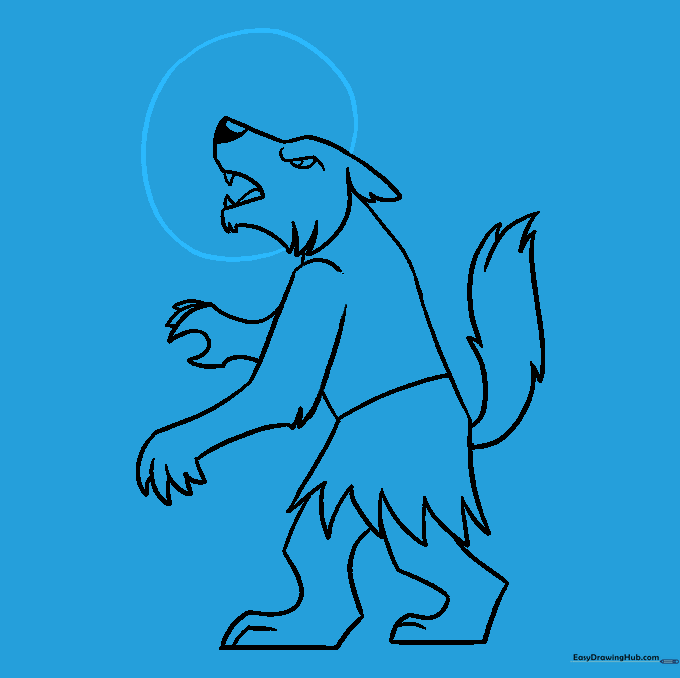
Complete your drawing by adding a large circle behind the werewolf's head to represent the full moon. Tip: Use a light touch so the moon doesn't distract from the main character.
Coloring Your Werewolf
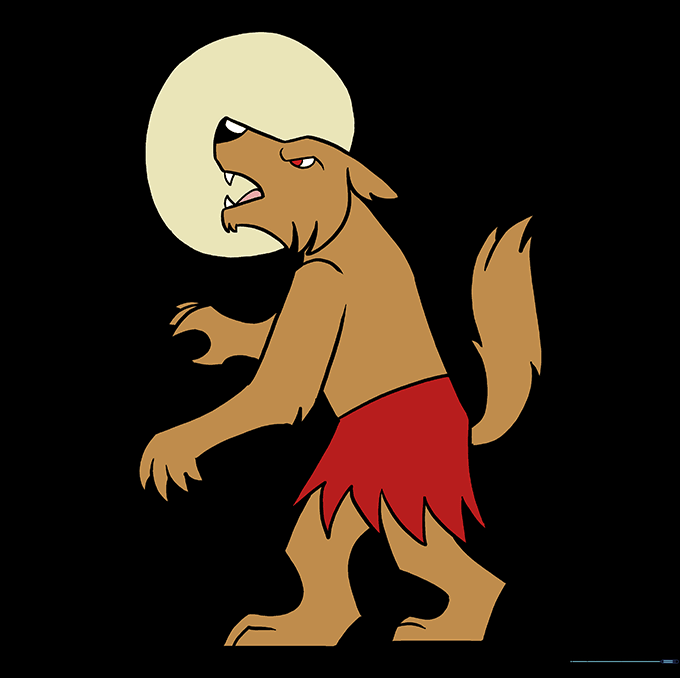
Bring your werewolf to life with color! Use shades of brown, grey, and black for the fur. Tip: Add a little bit of blue or white to the moon to make it pop against the dark creature.
More Tutorials


