How to Draw Vines: Easy 10-Step Guide for Beginners
Bring your garden drawings to life with this step-by-step guide to sketching climbing vines. Designed for budding artists ages 6+, this project requires only a pencil, eraser, and paper. You will learn how to structure a trellis and add organic, flowing details to your plant illustrations.
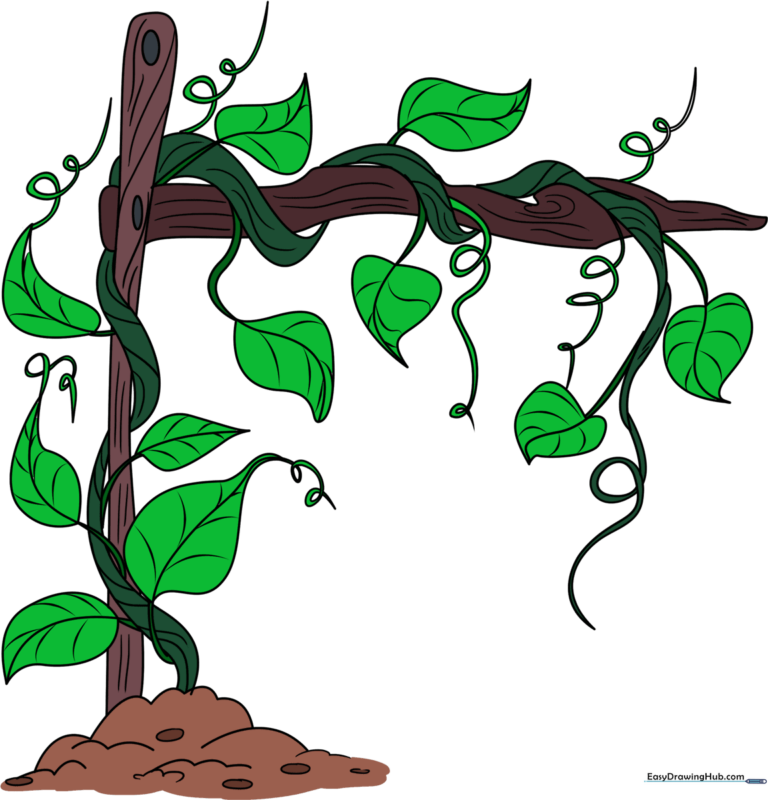
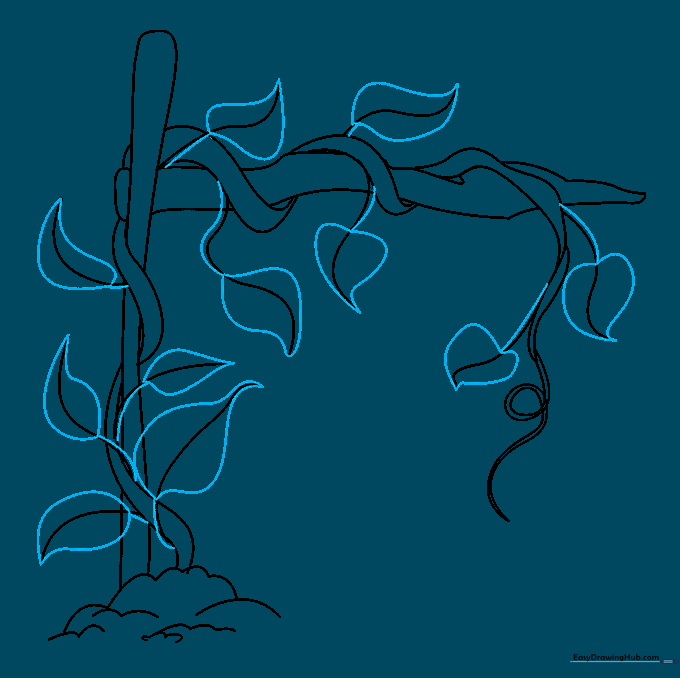
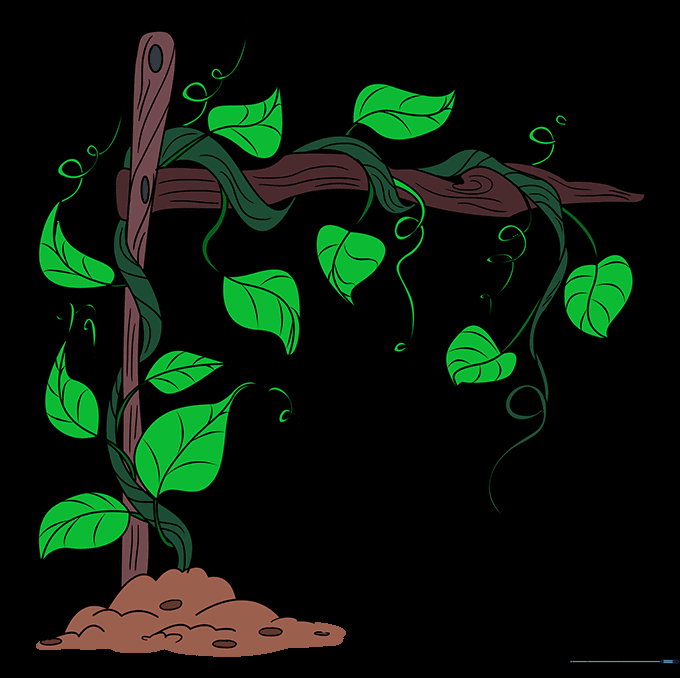
🎯 Final Result
Step-by-Step Instructions
Step 1: Sketching the Base and Trellis

Start by drawing the soil mound using connected 'U' shapes. Then, draw the vertical wooden stake using two long, parallel curved lines. Teacher's Tip: Keep your pencil pressure light here so you can easily erase the trellis lines later when the vine overlaps them.
Step 2: Adding the Crossbeam
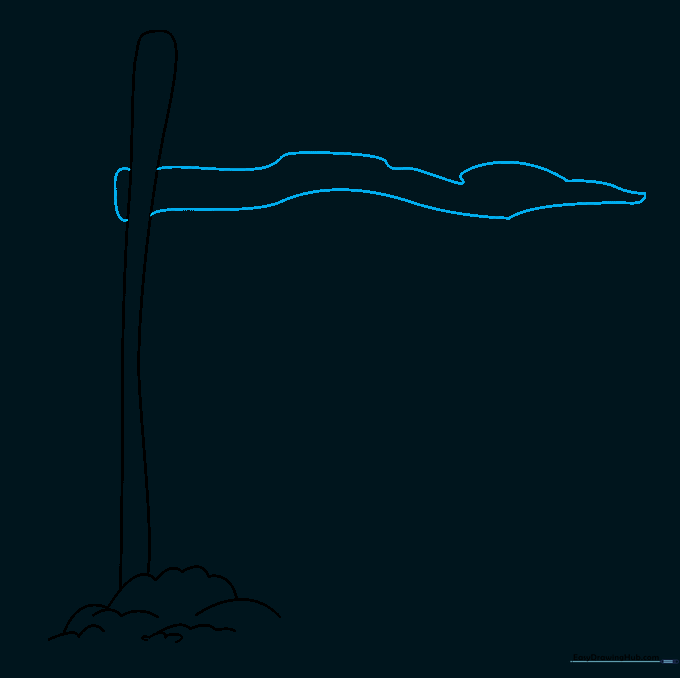
Draw a horizontal beam extending from the stake at a right angle. Use two curved lines to give it a rounded, wooden look. Tip: Make sure the beam looks like it is attached to the stake by slightly overlapping the lines.
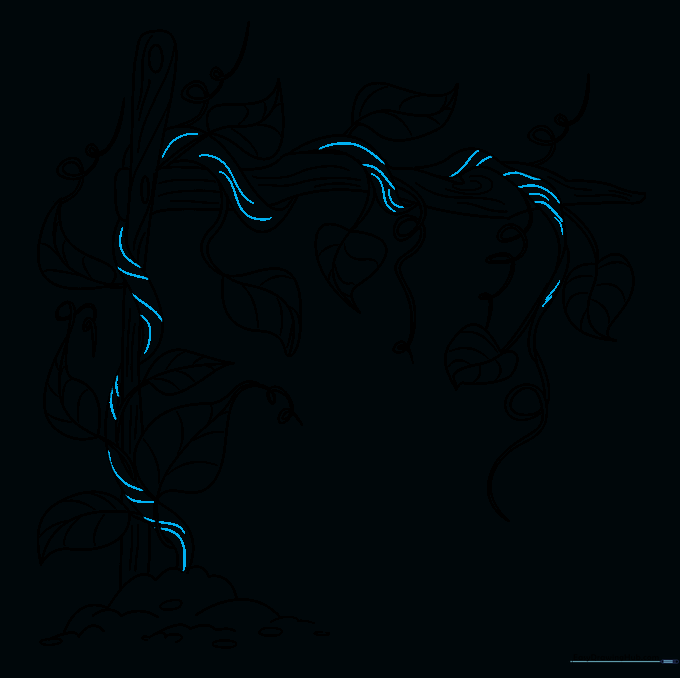
Step 3: Creating the Vine Path
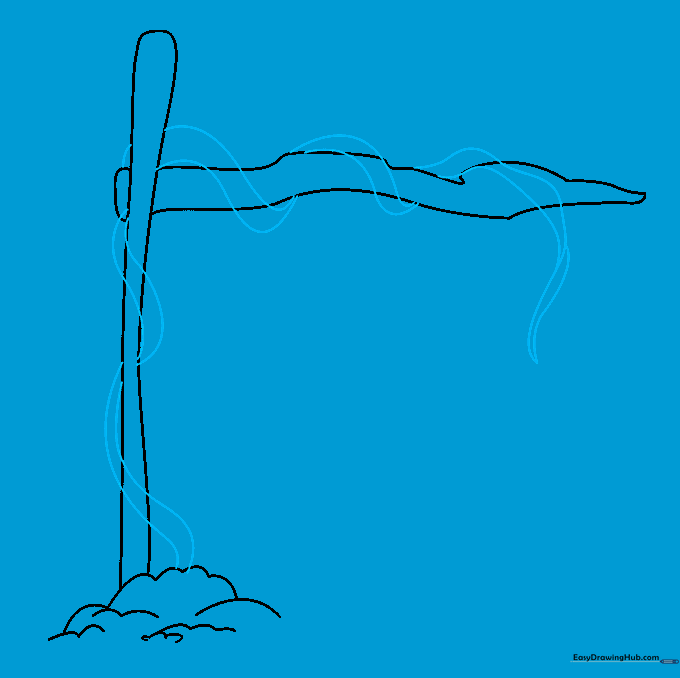
Sketch pairs of 'S' shaped lines that weave in and out behind the trellis. This creates the illusion that the vine is wrapping around the wood. Tip: Vary the thickness of the vine slightly to make it look more natural and organic.
Step 4: Refining the Vine and Twigs
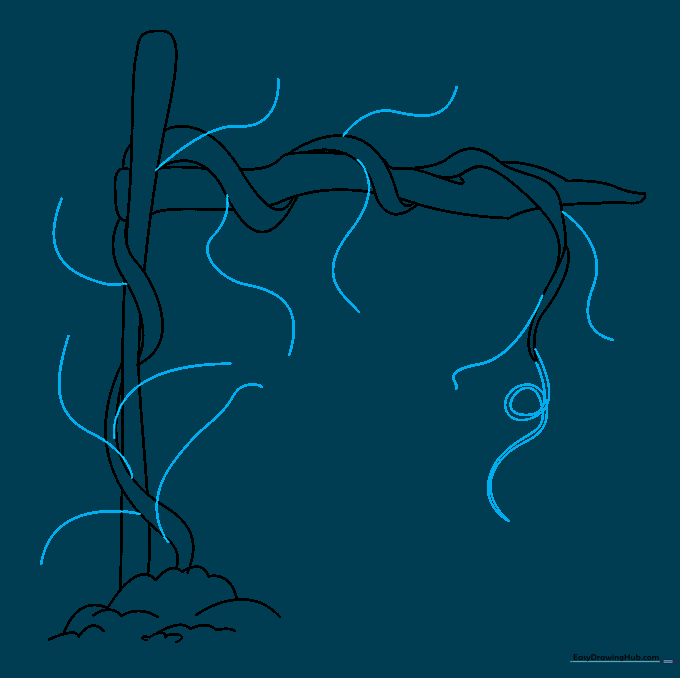
Erase the trellis lines that are hidden behind the vine. Add small, curved lines branching off the main stem for twigs. At the very top, draw a spiral 'curly Q' to show new growth. Tip: Use a sharp pencil for the spiral to keep it looking delicate.
Step 5: Drawing the Leaves
Draw two curved lines meeting at a point on each twig to form heart-shaped leaves. Tip: Don't make every leaf the same size; varying them makes your drawing look much more realistic.
Step 6: Adding Leaf Veins
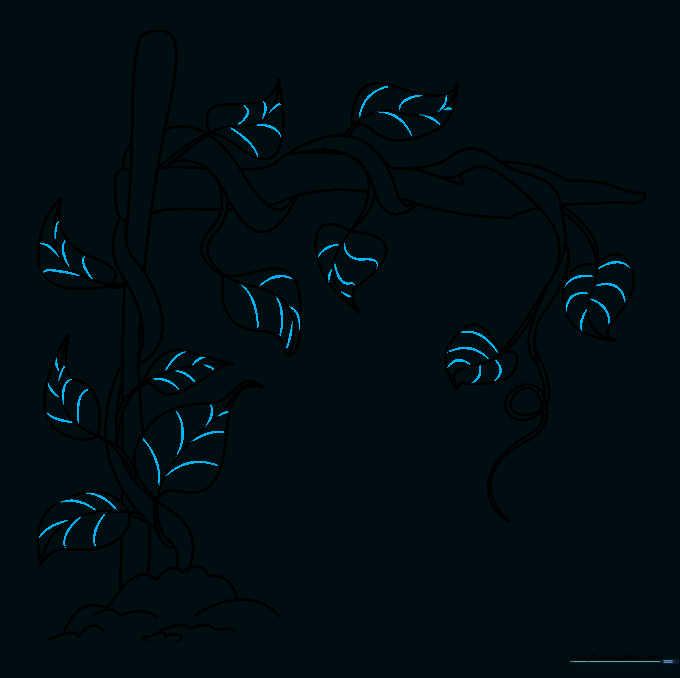
Add small, diagonal lines inside each leaf to represent the veins. Tip: Start from the center vein and draw outward toward the edge for a clean, professional look.
Step 7: Adding Tendrils

Draw several spiral 'curly Q' tendrils reaching out from the vine. These are the plant's 'hands' that help it grip the trellis. Tip: Make these lines thinner than the main stem to show they are delicate.
Step 8: Texturing the Wood
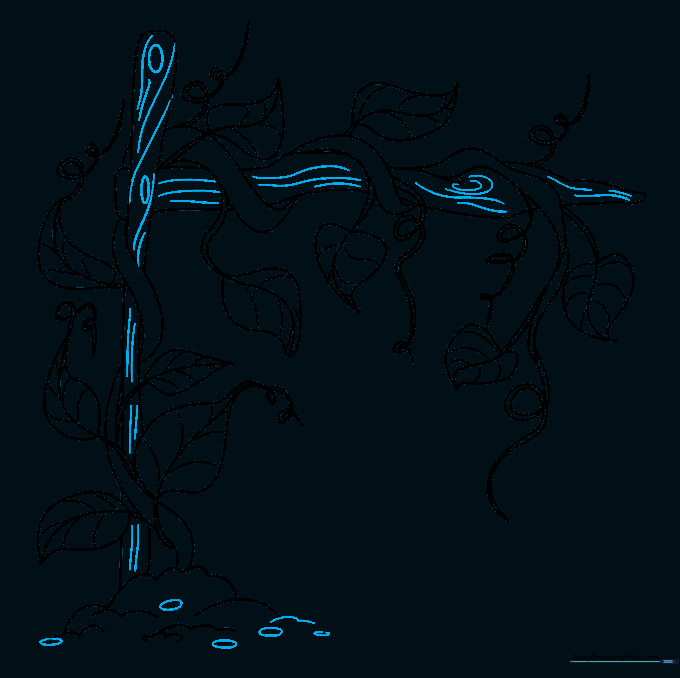
Add small circles and short, curved lines to the trellis to give the wood a natural, weathered texture. Tip: Don't overdo it—a few marks here and there are enough to suggest wood grain.
Step 9: Finalizing the Vine Texture
Add subtle, curved lines along the length of the vine to give it a rounded, three-dimensional appearance. Tip: Follow the curve of the vine with your pencil to keep the volume consistent.
Step 10: Coloring Your Masterpiece
Bring your drawing to life with vibrant greens for the leaves and earthy browns for the wood. Tip: Use a darker green for the shadows under the leaves to make them pop! Now, try adding flowers or fruit to your vine to complete your garden scene.
More Tutorials


