How to Draw Venom: Easy Step-by-Step Guide
Ready to bring the iconic Marvel anti-hero to life? This tutorial is perfect for young artists ages 8+ looking to master comic book expressions. You'll only need a pencil, an eraser, and a black marker to capture Venom's signature snarling look.
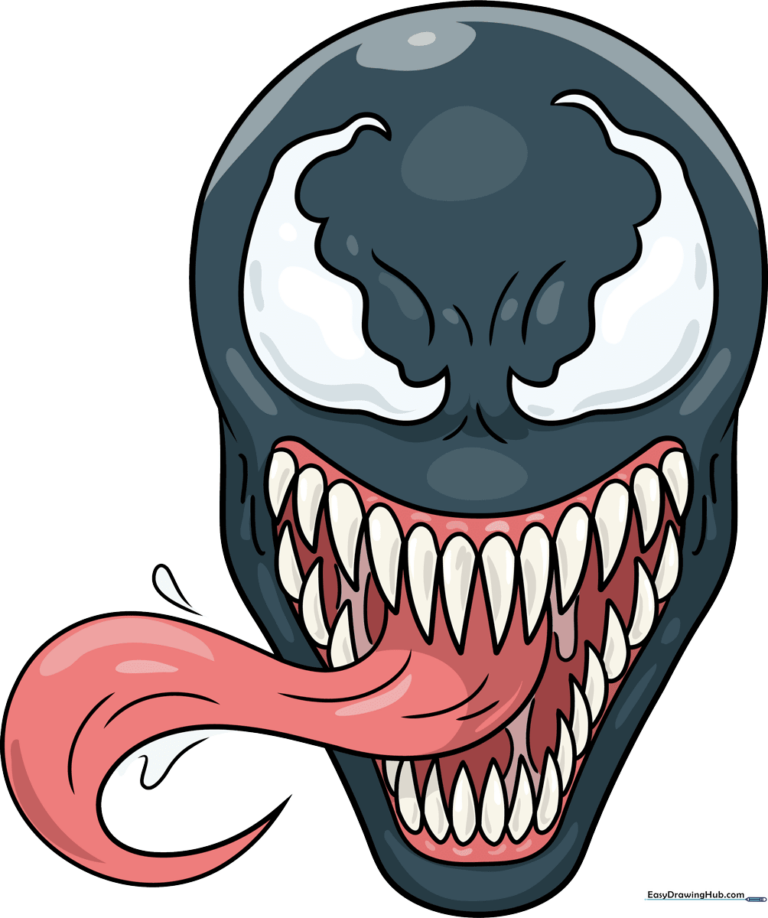
🎯 Final Result
Step-by-Step Instructions
Step 1: Sketching the Eye Bases

Start by drawing two wavy, squiggly lines to map out the top of Venom's eyes. Teacher's Tip: Keep your pencil pressure light here; these are just guidelines for the aggressive shape of his brow.
Step 2: Defining the Eye Shapes
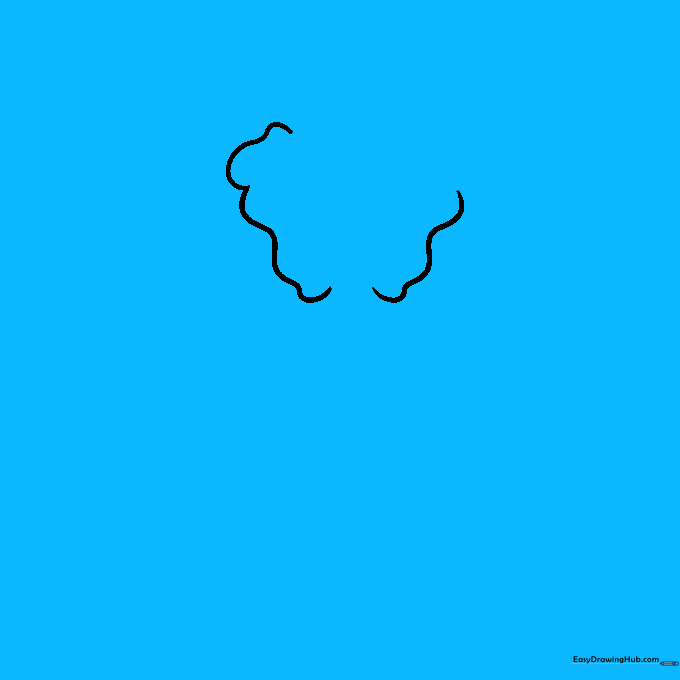
Extend curved lines from the ends of your first marks to close the shapes into distorted crescents. Teacher's Tip: Make them look uneven and sharp to give Venom that classic, menacing comic-book look.
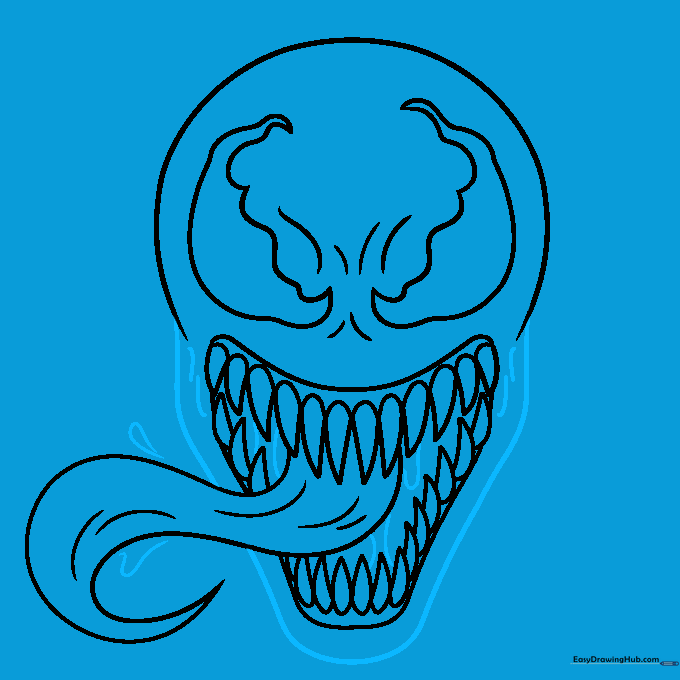
Step 3: Establishing the Head and Mouth

Sketch an incomplete circle around the eyes for the head, then add a wide 'U' shape below for the mouth. Add small, angled lines between the eyes to create a furrowed, angry brow. Teacher's Tip: Ensure the mouth line curves downward at the edges to emphasize the snarl.
Step 4: Adding the Gums and Upper Teeth
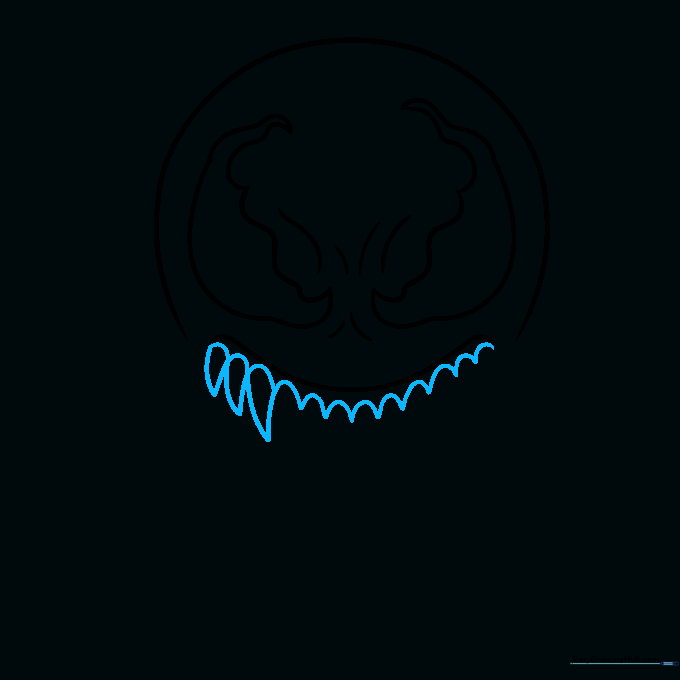
Draw a series of connected 'U' shapes under the mouth line to form the gums, then add sharp, triangular teeth descending from them. Teacher's Tip: Vary the size of the teeth slightly to make the drawing look more organic and scary.
Step 5: Filling the Upper Jaw

Continue sketching sharp teeth along the entire gumline. Teacher's Tip: Don't worry about making them perfectly symmetrical; Venom is a chaotic character, so slight imperfections add to the realism.
Step 6: Drawing the Tongue

Extend two long, curved lines from the mouth to create a swirling, pointed tongue. Add small lines for texture. Teacher's Tip: Use a fluid, 'S' motion with your wrist to get that natural, slimy look.
Step 7: Sketching the Lower Jaw

Trace a blunted 'V' shape for the lower jaw and add more sharp, teardrop-shaped teeth. Teacher's Tip: Keep the teeth pointing slightly inward toward the tongue.
Step 8: Connecting the Jaws

Continue the lower teeth until they meet the upper jaw, connecting the sides with short lines. Teacher's Tip: This creates the 'hinge' of the mouth, making the expression look more aggressive.
Step 9: Final Details and Saliva
Enclose the head with a final outline and add teardrop-shaped droplets of saliva inside the mouth. Teacher's Tip: Adding these small details makes the drawing look much more professional and 'alive'.
Step 10: Bringing Venom to Life with Color

Color your drawing using black for the suit, white for the eyes, and vibrant red or pink for the tongue. Teacher's Tip: Use a white gel pen or leave small white spots on the tongue to create a 'wet' highlight effect.
More Tutorials


