How to Draw a Turkey Dinner: Easy 10-Step Guide
Ready to capture the spirit of Thanksgiving on paper? This tutorial is perfect for artists ages 7+ looking to practice organic shapes and food textures. Grab your pencil, eraser, and paper, and let's build a delicious-looking holiday feast from scratch.
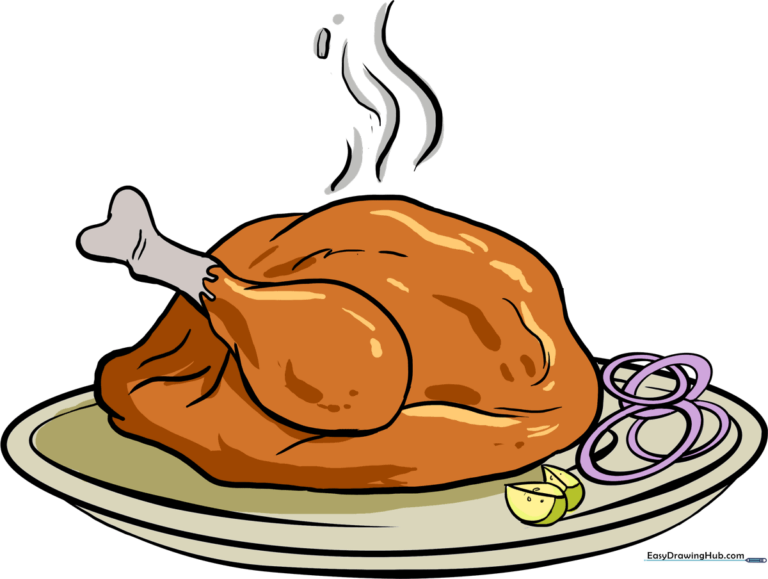
🎯 Final Result
Step-by-Step Instructions
Step 1: Sketching the Main Roast

Draw an irregular, rounded shape to form the body of the turkey. Teacher's Tip: Keep your pencil pressure light here; we want a soft outline that represents the plump shape of a roasted bird.
Step 2: Adding the Drumstick

Sketch the drumstick attached to the side of the turkey. Focus on the 'M' shape at the end of the bone. Teacher's Tip: Use overlapping lines to show that the leg is resting against the body.
Step 3: Cleaning Your Lines

Carefully erase the overlapping guide lines inside the drumstick area. Teacher's Tip: Use a clean eraser and gentle circular motions to avoid smudging your paper.
Step 4: Adding Texture and Detail

Add jagged, wavy lines across the turkey to mimic the texture of roasted skin. Add small details to the bone end. Teacher's Tip: Vary the length of your wavy lines to make the turkey look more realistic and less uniform.
Step 5: Drawing the Platter

Draw a large, wide oval underneath the turkey to create the serving platter. Teacher's Tip: Make sure the oval is wide enough to leave space for side dishes later!
Step 6: Adding Depth to the Platter
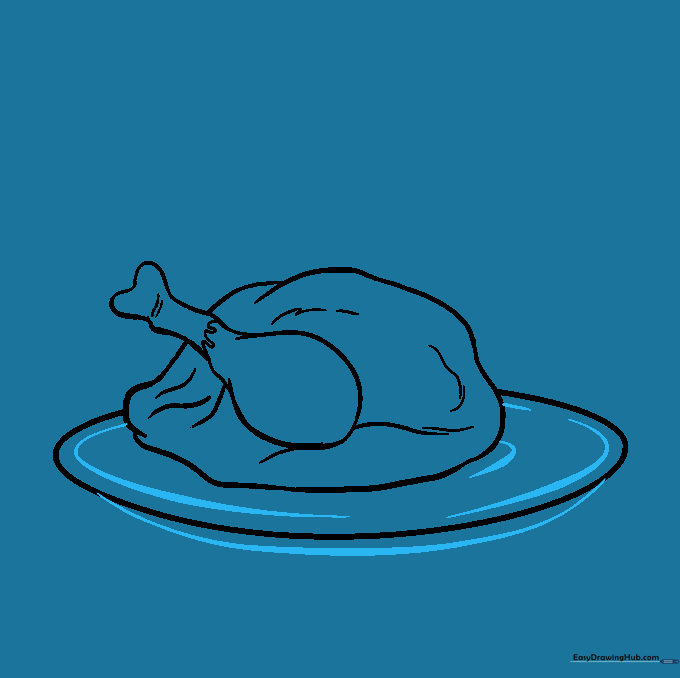
Add a second curved line inside the platter edge to give it thickness. Teacher's Tip: Parallel lines are the secret to drawing 3D objects; keep the distance between lines consistent.
Step 7: Adding Vegetable Sides

Draw circular onion slices on the platter. Teacher's Tip: Draw a small circle inside a larger one to create the ring effect. Don't worry if they aren't perfect circles—vegetables are naturally irregular!
Step 8: Adding Lemon Wedges

Draw teardrop-shaped lemon wedges with a line down the center and small dots for seeds. Teacher's Tip: Use a sharp pencil to make the tiny seed dots stand out.
Step 9: Adding Steam

Draw soft, curving lines above the turkey to represent rising steam. Teacher's Tip: Keep these lines very light and wispy to suggest heat.
Step 10: Adding Color
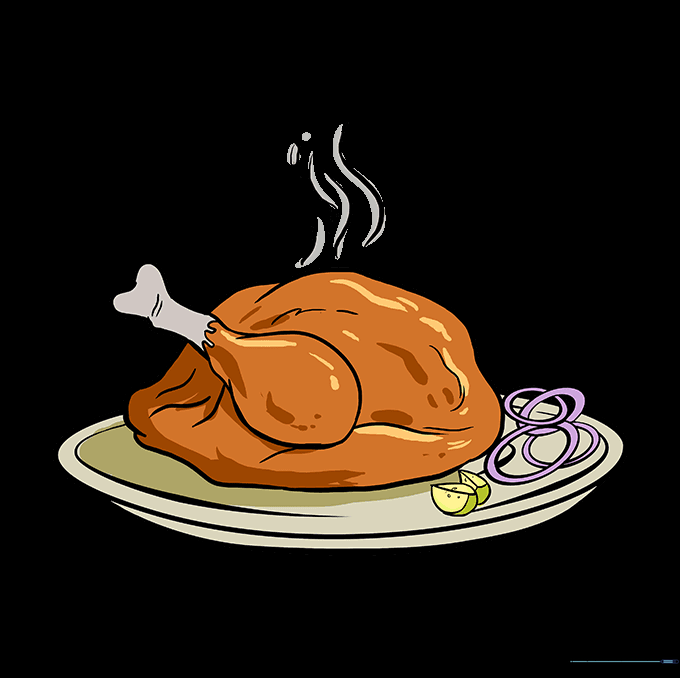
Bring your drawing to life with color! Use golden browns for the turkey and vibrant colors for the vegetables. Teacher's Tip: Use light pressure for the skin and press harder for the shadows to create a delicious, roasted look.
More Tutorials


