How to Draw the Virgin Mary: Easy Step-by-Step Guide
This guided drawing tutorial is perfect for children and beginners looking to create a respectful portrait of the Virgin Mary. You will only need a pencil, an eraser, and a piece of paper to get started. Follow these simple steps to build confidence in your portrait sketching skills while creating a beautiful, meaningful piece of art.
🎯 Final Result

Step-by-Step Instructions
Step 1: Sketching the Face Shape
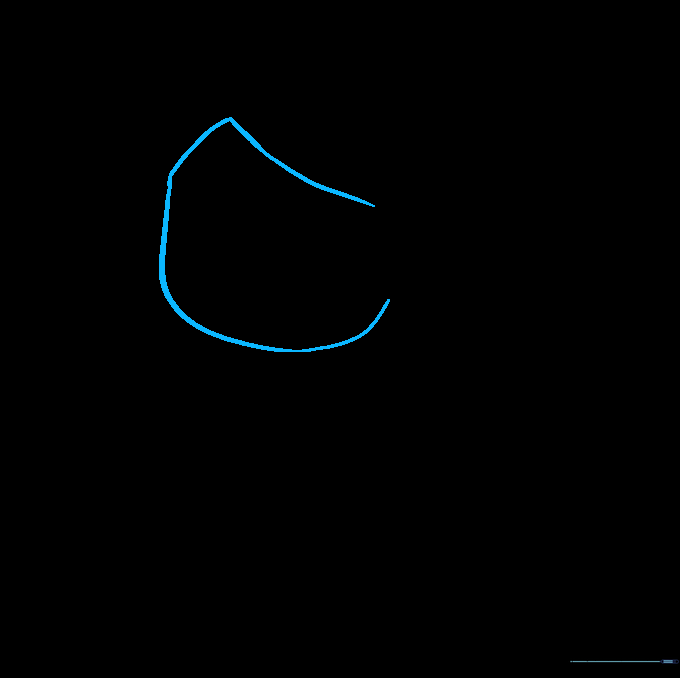
Begin by sketching the maiden's face. Use a soft, curved line to create a wide 'U' shaped jaw and an inverted 'V' for the hairline. Teacher's Tip: Keep your pencil pressure light so you can easily adjust the shape if it looks a bit lopsided.
Step 2: Outlining the Headscarf
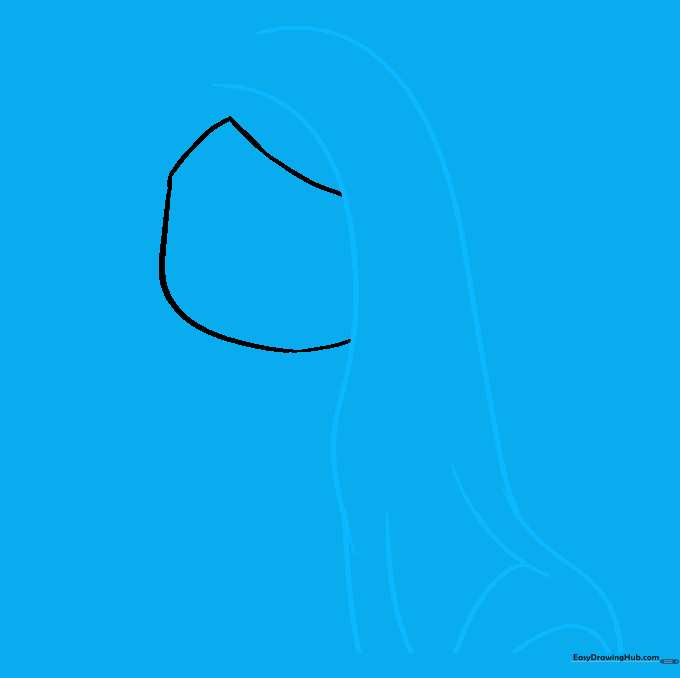
Extend a long, curved line from the hair to frame the face, then draw a second parallel line to represent the headscarf. Add a few smaller curved lines to suggest the natural folds of the fabric. Tip: Think of these as soft, flowing ribbons of cloth.
Step 3: Completing the Head Covering
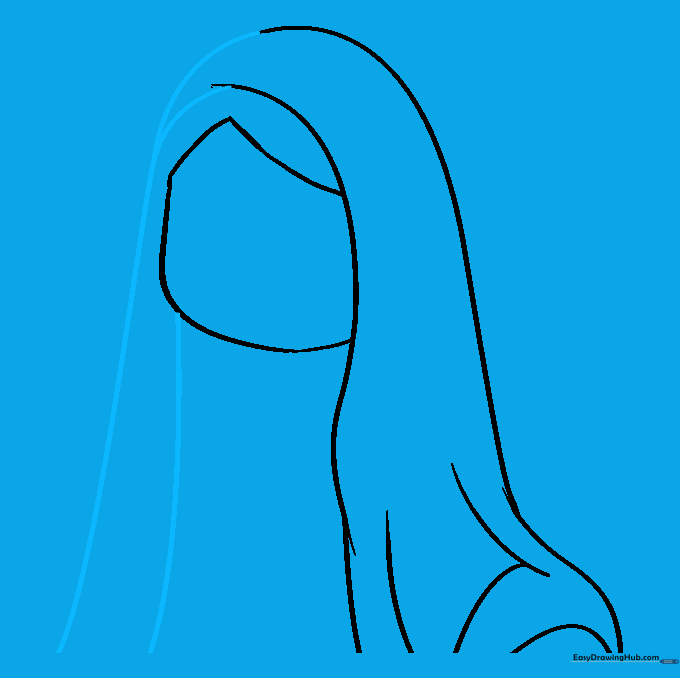
Bring the headscarf lines together at the top of the head to form a point. From there, draw a long, sweeping curve down to the cheek to complete the drape. Tip: Use a fluid motion with your wrist to get a smooth, natural-looking curve.
Step 4: Drawing the Neckline
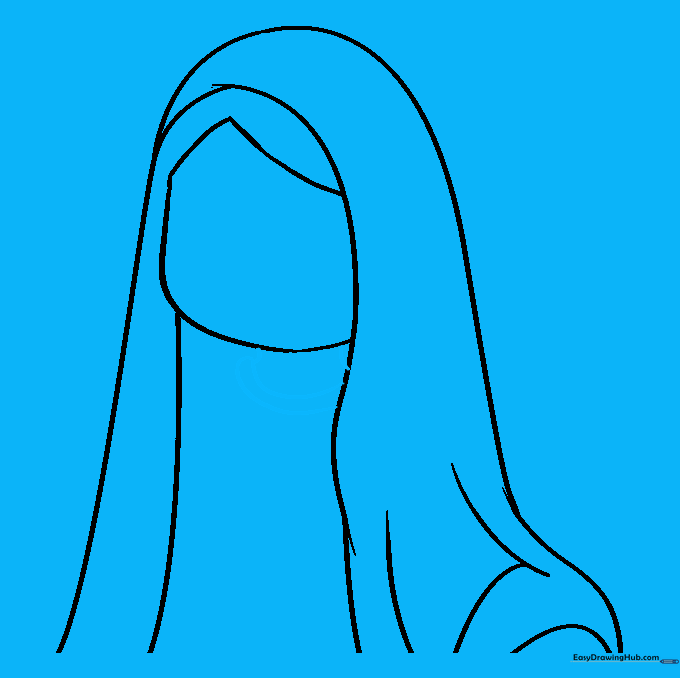
Draw two short, curved lines beneath the chin to form the neck. Enclose these with a parallel line to create the collar of the garment. Tip: Keep the neck narrow to maintain the proportions of the portrait.
Step 5: Sketching the Bodice
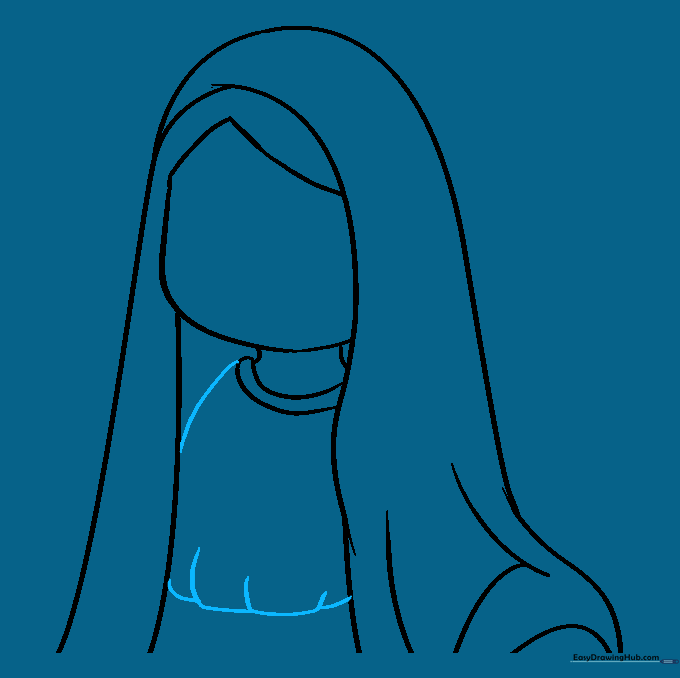
Connect the neck of the garment to the headscarf using curved lines. Use overlapping strokes to suggest the bodice of the dress. Tip: Overlapping lines help create a sense of depth and fabric texture.
Step 6: Adding the Sash

Draw a horizontal curved line across the bodice and connect it with short vertical lines. Add small zigzag lines on the sides to represent the sash or belt. Tip: Zigzags are a great way to show where fabric is bunched or tied.
Step 7: Adding Facial Features
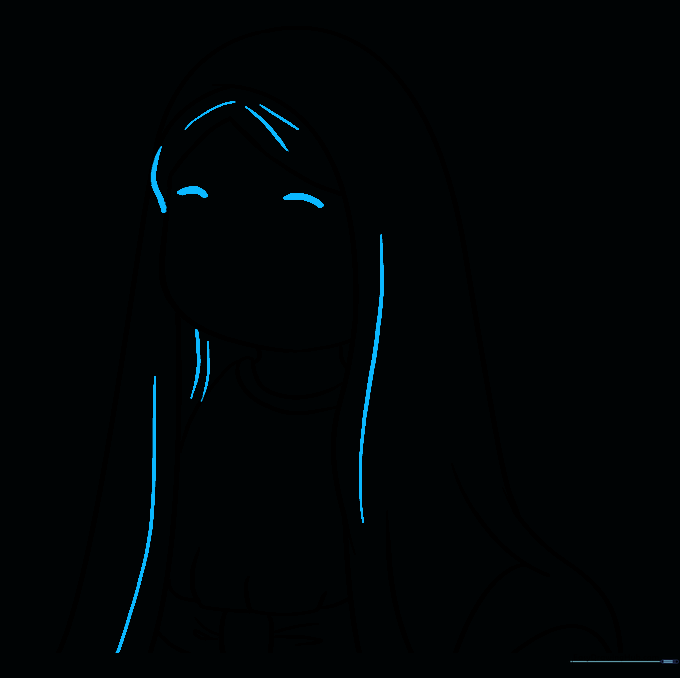
Complete the hair with a short line meeting the scarf, then add texture with various curved lines. Draw two thick, curved lines for the eyebrows. Tip: Eyebrows define the expression, so keep them gentle and arched.
Step 8: Drawing the Eyes

For the eyes, draw three nested circles. Shade the smallest center circle to create the pupil. Tip: If you want the eyes to look bright, leave a tiny white dot unshaded in the pupil to represent a light reflection.
Step 9: Final Facial Details

Use small 'U' shaped lines to define the nose and mouth. Keep these lines very subtle to maintain a soft, peaceful expression. Tip: Less is more when drawing a nose; a simple curve is often enough.
Step 10: Adding Color

Bring your drawing to life with color! Use soft blues for the headscarf and neutral tones for the garment. Tip: Use colored pencils and layer your colors lightly to create a smooth, blended look.
More Tutorials


