How to Draw the Titanic: Easy 10-Step Guide for Kids
Bring history to life with this fun, step-by-step Titanic drawing guide, perfect for young artists ages 6 and up. All you need is a pencil, an eraser, and some paper to recreate this iconic ocean liner. Follow along to build your confidence and master basic geometric shapes while sketching a piece of maritime history.
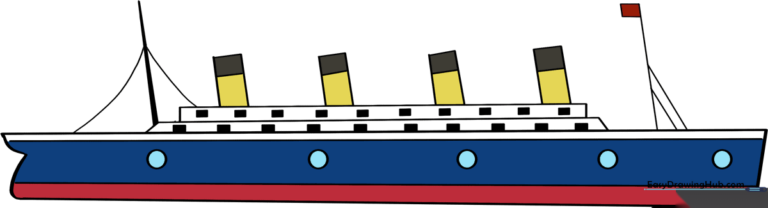
🎯 Final Result
Step-by-Step Instructions
Step 1: Sketching the Hull

Draw an irregular trapezoid using four straight lines to form the ship's hull. Teacher's Tip: Keep your pencil pressure light so you can easily adjust the angles if the shape looks a bit wobbly.
Step 2: Shaping the Stern

Erase the short back line of your trapezoid and replace it with two smooth, curved lines to create the rounded stern. Teacher's Tip: Use a sweeping motion with your wrist to get a natural, fluid curve.
Step 3: Adding Portholes

Draw two horizontal lines across the hull, then add small circles between them for the portholes. Teacher's Tip: Space your circles evenly to make the ship look organized and professional.
Step 4: Building the First Deck

Draw a narrow trapezoid on top of the hull to form the first upper deck level. Teacher's Tip: Use a ruler if you struggle with straight lines, but try freehand first to build your muscle memory!
Step 5: Adding the Second Deck
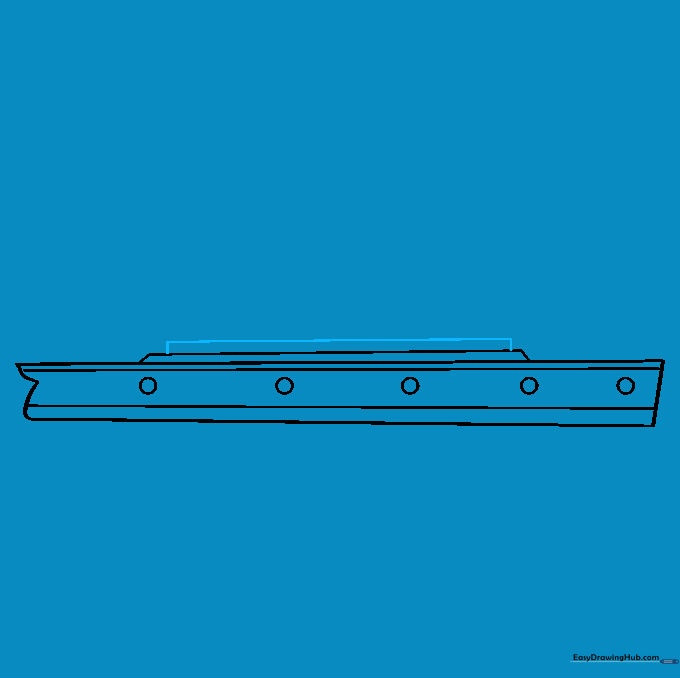
Stack a smaller, narrow rectangle on top of the first deck. Teacher's Tip: Keep this layer slightly shorter than the one below it to give the ship a sense of perspective.
Step 6: Drawing the Smokestacks

Add three slanted rectangles on top of the decks, each with a horizontal line near the top. Teacher's Tip: Slant them slightly toward the back of the ship to show the Titanic is 'moving' forward.
Step 7: Adding Masts and Flags
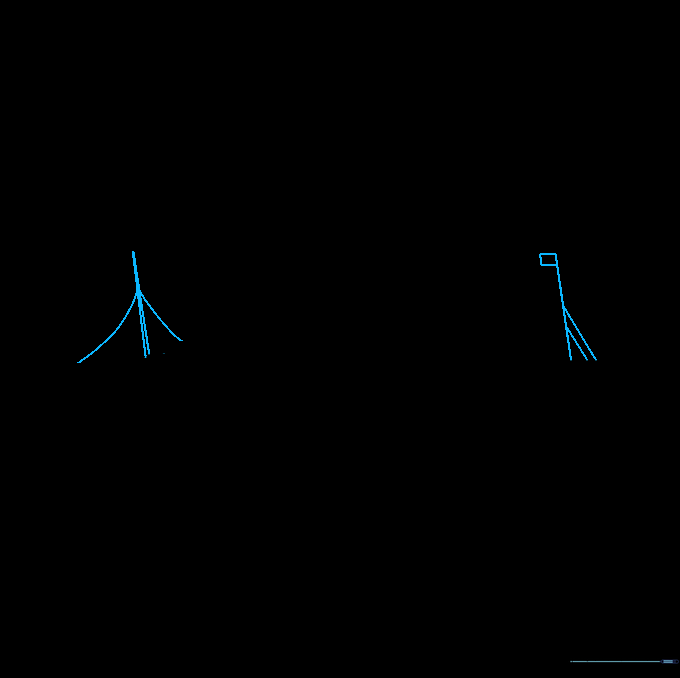
Draw two diagonal lines for masts, connecting them to the deck with small curved lines. Add a small rectangle at the top of the front mast for the flag. Teacher's Tip: Keep these lines thin and delicate to distinguish them from the heavy hull.
Step 8: Detailing the Upper Deck

Add a row of small circles along the uppermost deck to represent the windows. Teacher's Tip: Use a sharp pencil point to keep these tiny circles neat and uniform.
Step 9: Finalizing the Details

Add a second row of circles to the middle deck. Teacher's Tip: Check your drawing against the reference image to ensure all parts are balanced before you start coloring.
Step 10: Bringing Your Titanic to Life with Color
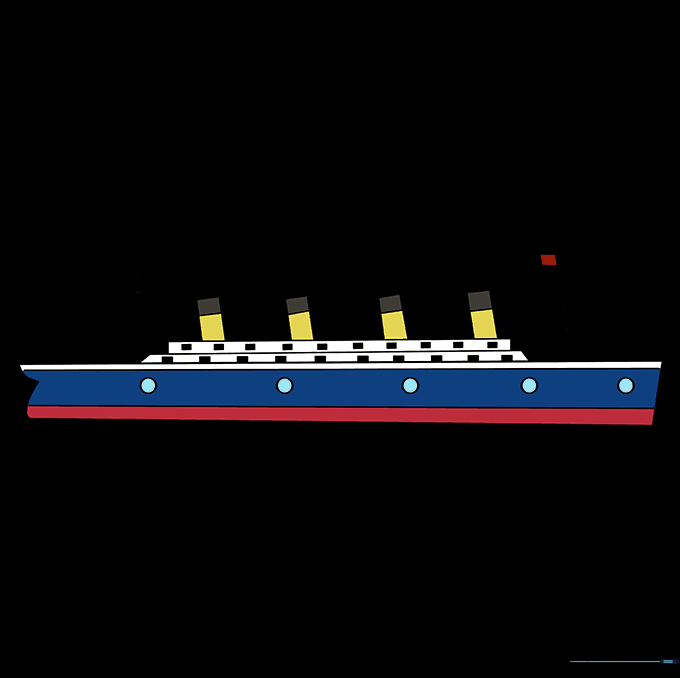
Time to color! Use black and red for the hull, white for the upper decks, and black and yellow for the smokestacks. Teacher's Tip: Use light, even strokes with your colored pencils to avoid streaks.
More Tutorials


