How to Draw a Squad Selfie: Easy Step-by-Step Guide
Capture the fun of friendship by drawing your own 'squad' taking a group selfie! This tutorial is perfect for ages 7+ and requires only a pencil, eraser, and paper. You will learn how to layer characters to create a sense of depth and interaction in your artwork.
🎯 Final Result

Step-by-Step Instructions
Step 1: Sketching the First Character's Head

Draw a partial circle for the head, leaving the bottom open for the neck. Add two short lines for the neck. Tip: Keep the face features simple—two curved lines for eyes with small shaded circles for pupils give them an instant personality.
Step 2: Adding Shoulders and Arms

Use straight lines to sketch the shoulders and arms. Enclose the hands with overlapping curved lines. Tip: Use a 'mitt' shape for the hands if you're a beginner—it's much easier than drawing individual fingers!
Step 3: Introducing the Second Character

Draw a second head overlapping the first to show they are standing close together. Add a tongue using a 'U' shape. Tip: Drawing one character slightly behind another creates a great sense of depth.
Step 4: Building the Second Body

Outline the second character's hand and sketch their torso and legs. Tip: Use straight lines for the limbs to keep the cartoon style clean and consistent.
Step 5: Adding a Victory Sign

Complete the second character's body and draw their hand making a peace sign. Tip: To draw the peace sign, draw two 'V' shaped fingers using overlapping curved lines.
Step 6: Adding the Third Character

Sketch the third character's head and arm. They are reaching out for a high-five! Tip: Make sure the hands touch or overlap slightly to show interaction between the characters.
Step 7: Completing the Third Character
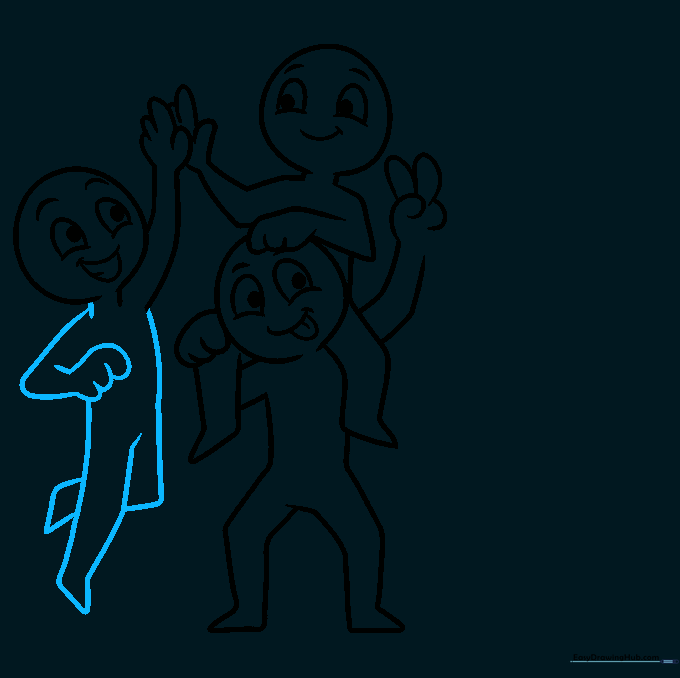
Finish the third character by drawing their neck, arms, and legs. Tip: Keep your lines smooth and confident to give the character a friendly, energetic look.
Step 8: The Fourth Character with Sunglasses

Draw the fourth character's head and add sunglasses using two irregular shapes connected by a line. Tip: Sunglasses are a great way to add 'cool' factor to your characters without needing to draw detailed eyes.
Step 9: Capturing the Selfie
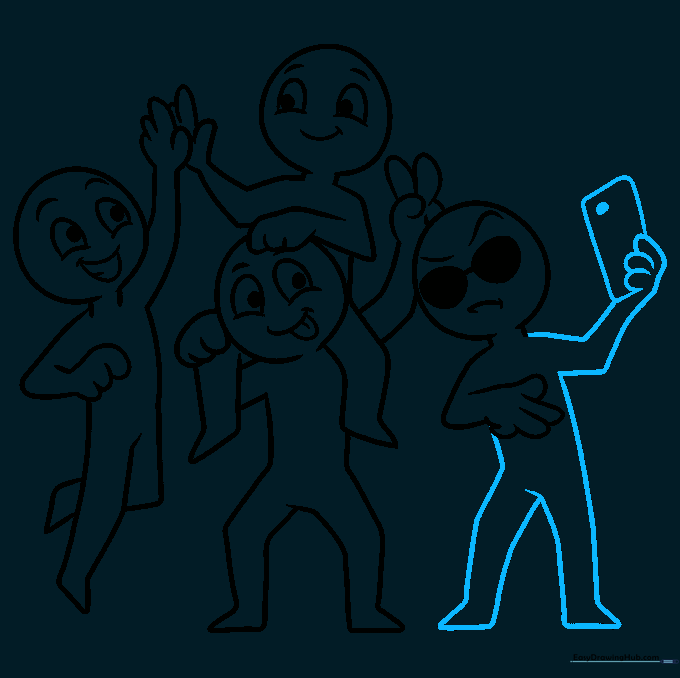
Finish the fourth character and draw a small rectangle in their hand to represent a smartphone. Tip: Add a tiny square in the corner of the rectangle to look like a camera lens!
Step 10: Adding Color

Bring your squad to life with color! Use bright, fun colors for their clothes and hair. Tip: Use a darker shade of your base color to add simple shadows under the chin or arms for a 3D effect.
More Tutorials


