How to Draw the Red Ranger: Easy 10-Step Guide
Ready to morph into action? This tutorial is perfect for young artists and Power Rangers fans ages 6+. You only need a pencil, an eraser, and some paper to bring the Red Ranger to life. Follow these steps to build your character from the helmet down, focusing on clean lines and iconic proportions.
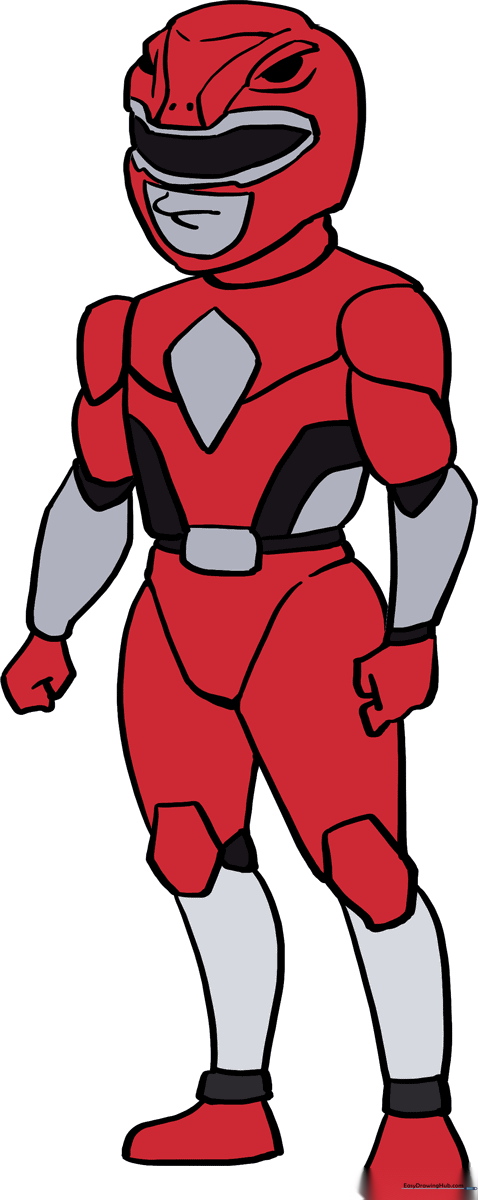
🎯 Final Result
Step-by-Step Instructions
Step 1: Sketching the Helmet Base

Lightly sketch the ranger's head using curved lines. Focus on the pointed chin and the inset eye area. Teacher's Tip: Keep your pencil pressure very light here so you can easily erase the guidelines later.
Step 2: Defining the Neck and Shoulders

Draw a curved line for the neck and a diamond shape below the chin. Connect these to the shoulders. Teacher's Tip: Ensure the diamond is centered; this is the anchor point for the rest of the suit's armor.
Step 3: Sketching the First Arm
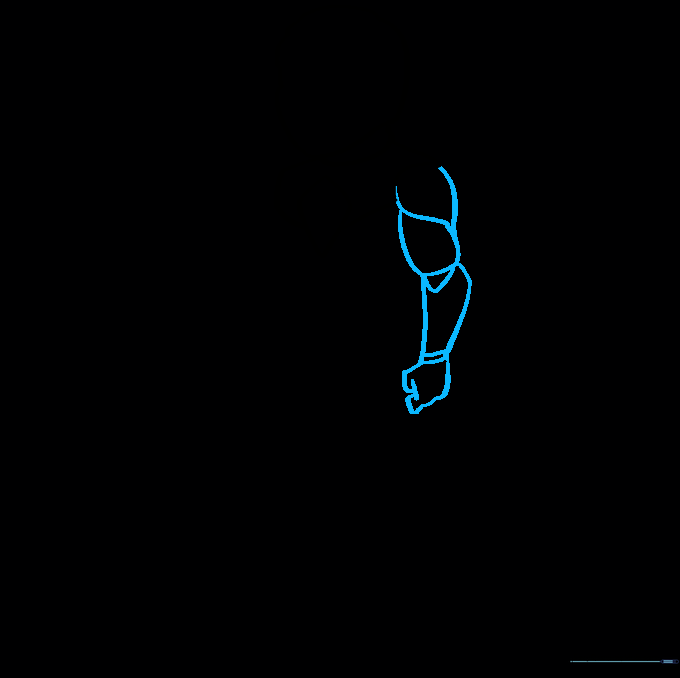
Use teardrop shapes to form the upper arm and a rounded triangle for the elbow. Add two bands at the wrist. Teacher's Tip: Think of the arm as a series of connected tubes to make the movement look more natural.
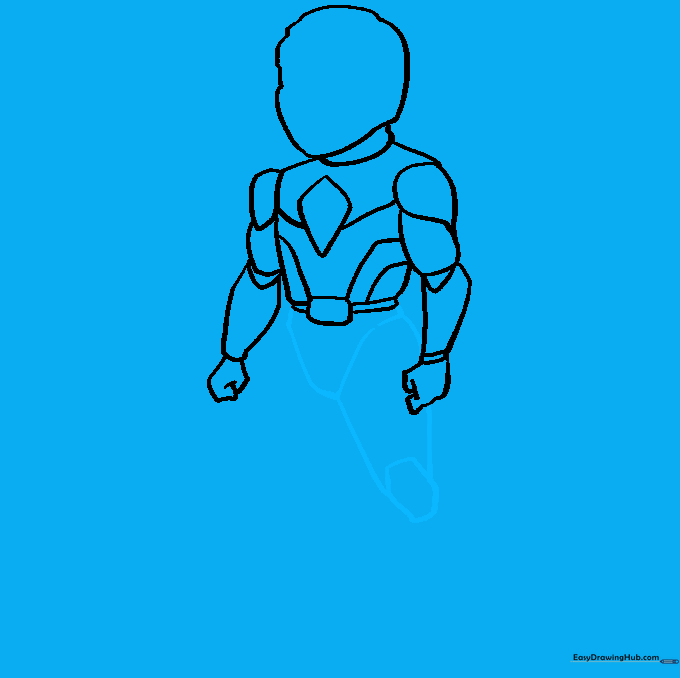
Step 4: Outlining the Torso and Belt

Draw a rounded rectangle for the torso and add the belt using horizontal lines. Teacher's Tip: Keep the belt lines parallel to ensure the suit looks symmetrical and professional.
Step 5: Adding the Second Arm
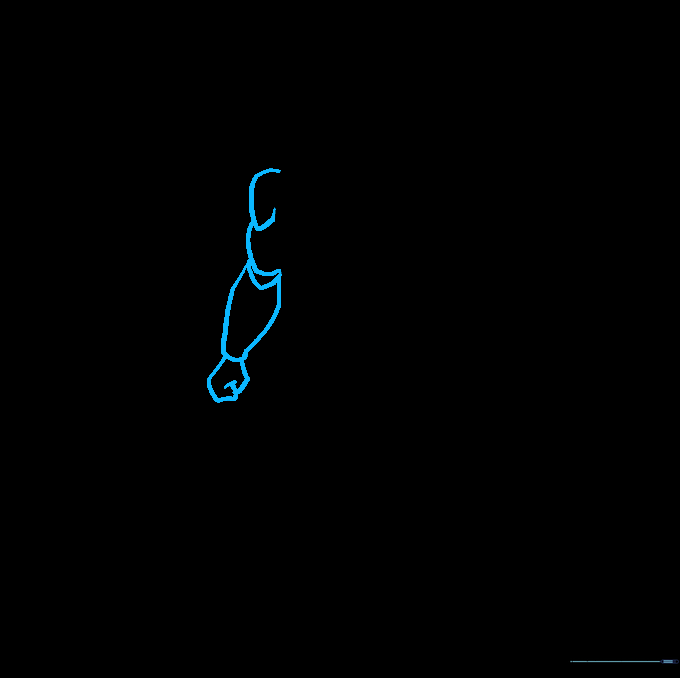
Mirror the shapes from the first arm to create the second one. Teacher's Tip: If you're struggling with balance, hold your drawing up to a mirror to see if one arm looks significantly larger than the other.
Step 6: Starting the Legs
Draw an inverted triangle below the belt, then add the thigh and a hexagon for the knee. Teacher's Tip: The hexagon knee pad is a key detail—make sure it's distinct from the rest of the leg.
Step 7: Drawing the First Leg
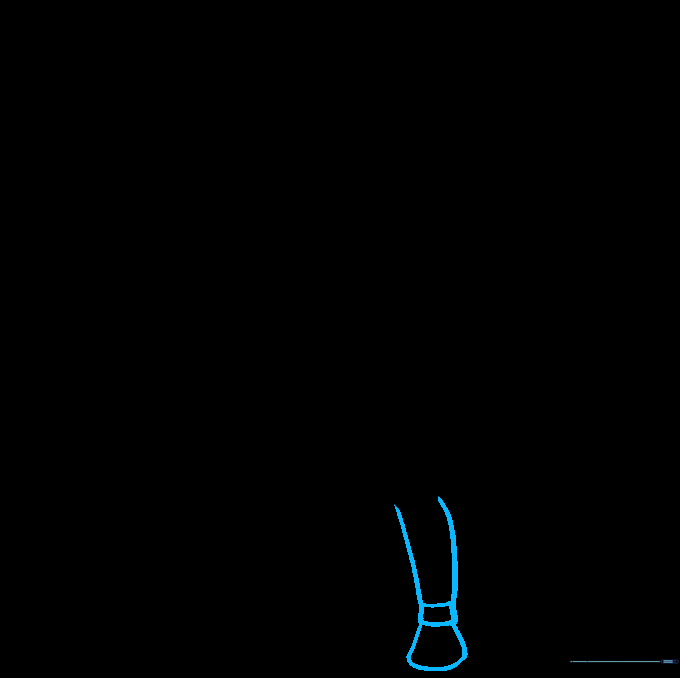
Enclose the lower leg and foot with a long, curved line. Add two bands at the ankle. Teacher's Tip: Keep the foot shape slightly rounded to match the Ranger's boot style.
Step 8: Completing the Legs
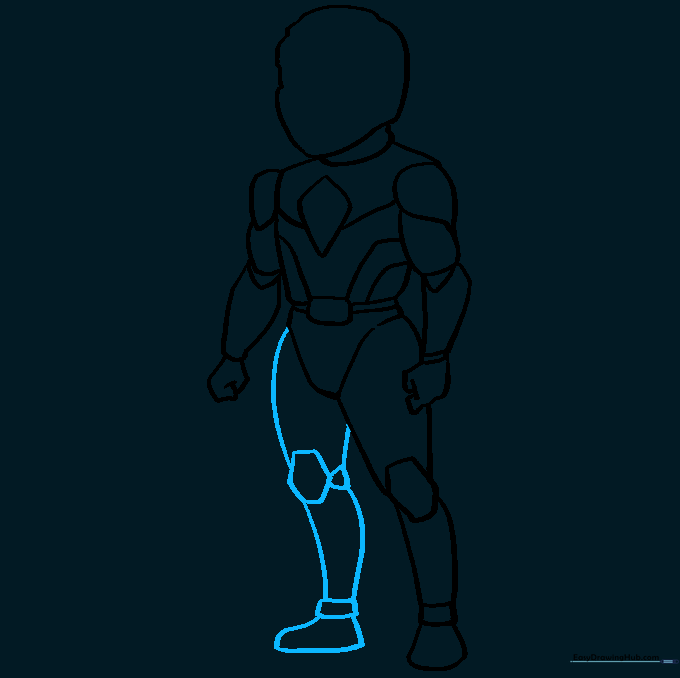
Repeat the process for the second leg, adding the knee and ankle details. Teacher's Tip: Ensure the feet are level so the character looks like they are standing firmly on the ground.
Step 9: Detailing the Helmet

Draw the visor, the dinosaur face emblem, and the mouth area. Teacher's Tip: Use a fine-liner pen for these small details to make them pop against the rest of the suit.
Step 10: Bringing it to Life with Color
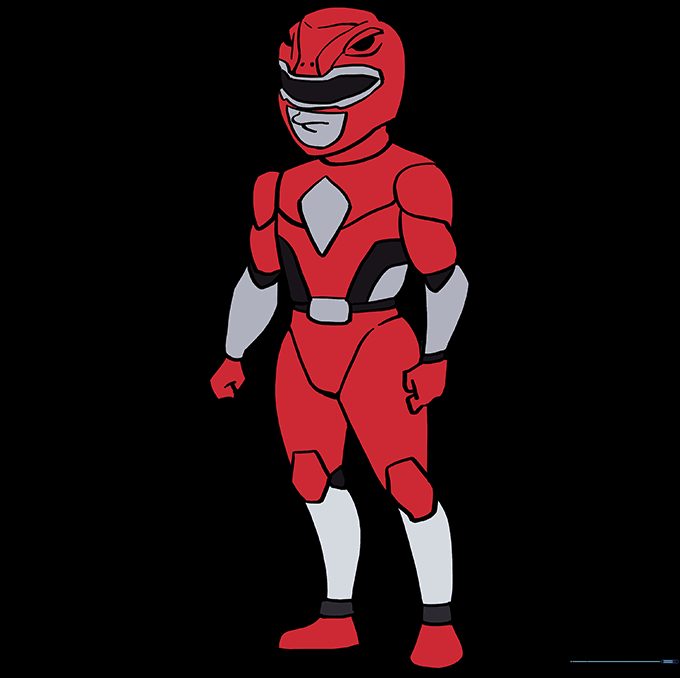
Time to color! Use bright red for the suit and white for the accents. Teacher's Tip: You can customize your drawing by using different colors to create your own unique Power Ranger team!
More Tutorials


