How to Draw the Predator: Easy Step-by-Step Guide
Ready to bring the ultimate sci-fi hunter to life? This tutorial is designed for intermediate artists looking to master character proportions and armor details. All you need is a pencil, an eraser, and a piece of paper to start building your own Predator.
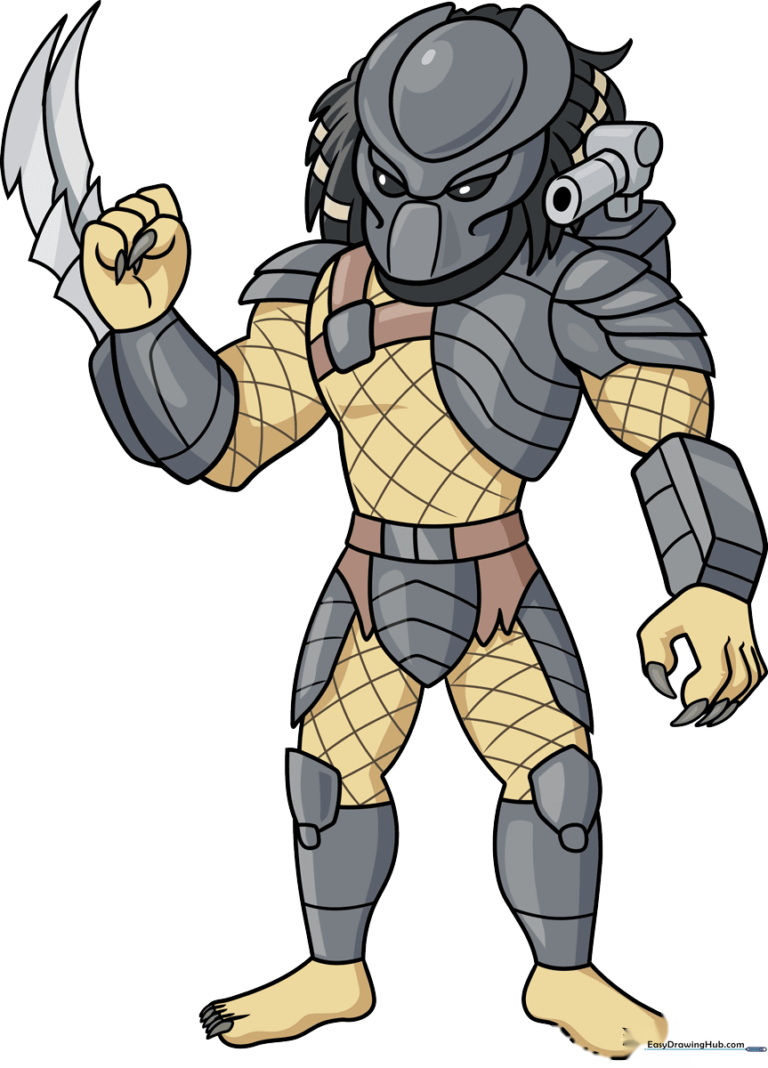
🎯 Final Result
Step-by-Step Instructions
Step 1: Establishing the Head Shape
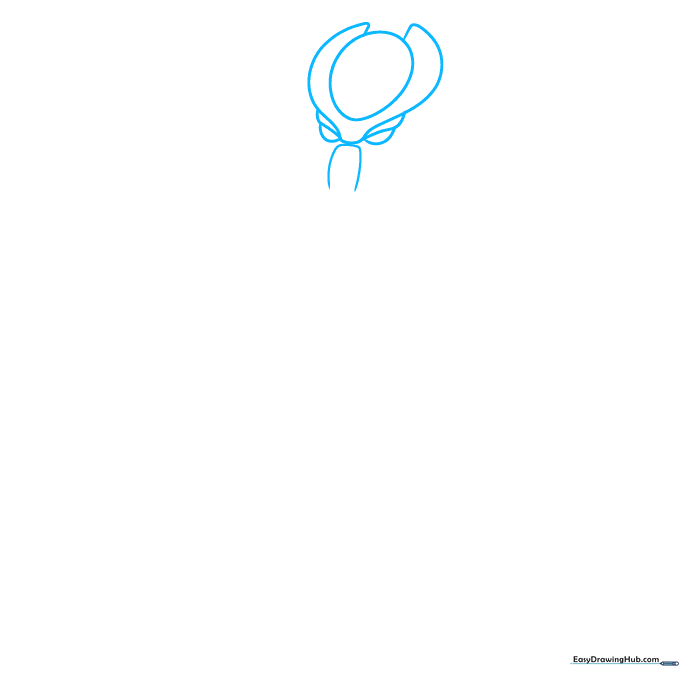
Sketch a light oval near the top of your page for the head. Add a semi-circle around it with a small gap at the top and a bump on the bottom. Tip: Keep these lines faint—they are just your guide for the mask structure.
Step 2: Mapping the Torso and Shoulders
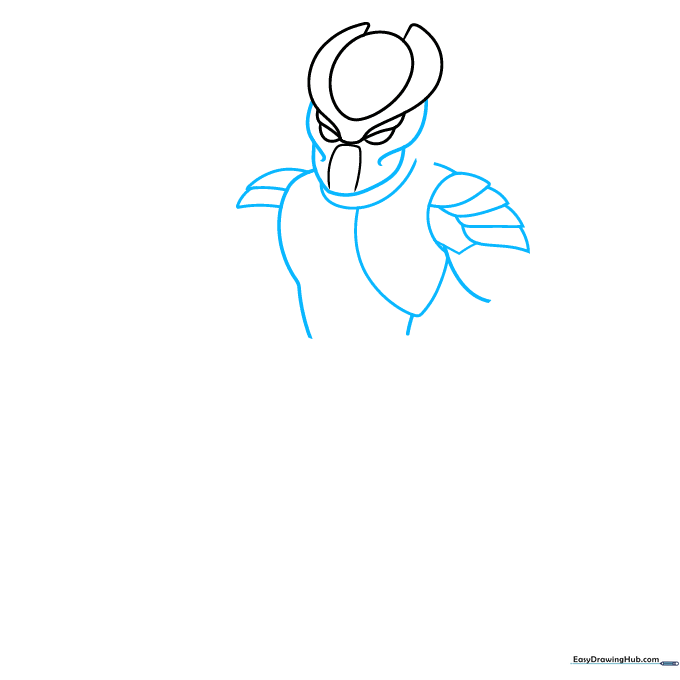
Draw curved lines on the sides of the face and a horizontal curve underneath. Sketch a large teardrop shape to the right for the shoulder. Tip: Use loose, flowing strokes here to help define the character's powerful posture.
Step 3: Sketching the Arm and Claws
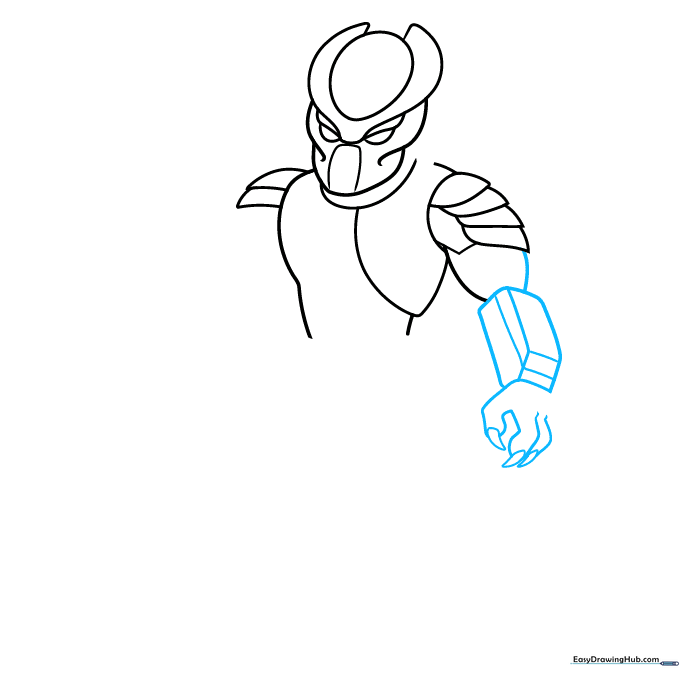
Draw a 3D rectangle for the arm, similar to a loaf of bread. Connect it to the shoulder with a curve, then use small 'sausage' shapes for the fingers. Tip: Add sharp, triangular points to the ends of the fingers to create the signature Predator claws.
Step 4: Refining the Armature
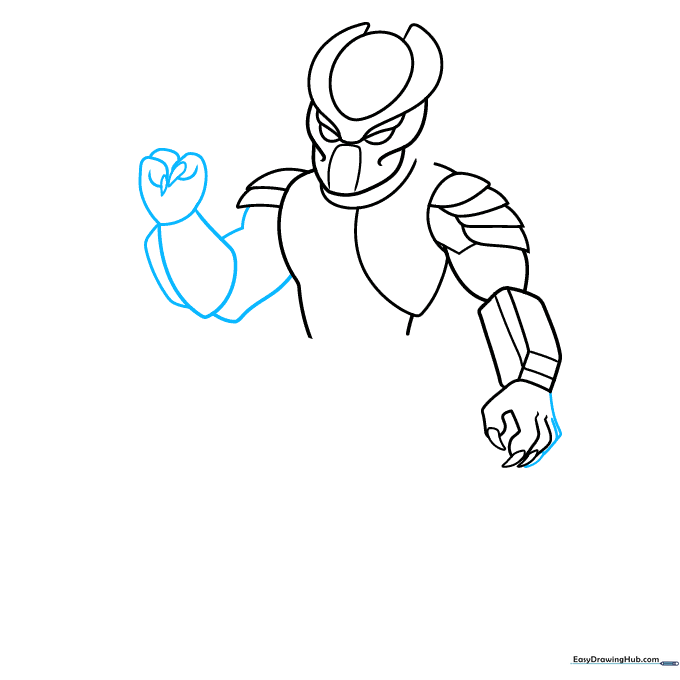
Add two more narrow fingers to the hand. On the left side, sketch a rounded rectangle to start the second arm. Tip: Keep your hand shapes rounded to balance out the sharp, aggressive look of the armor.
Step 5: Adding Tech Details
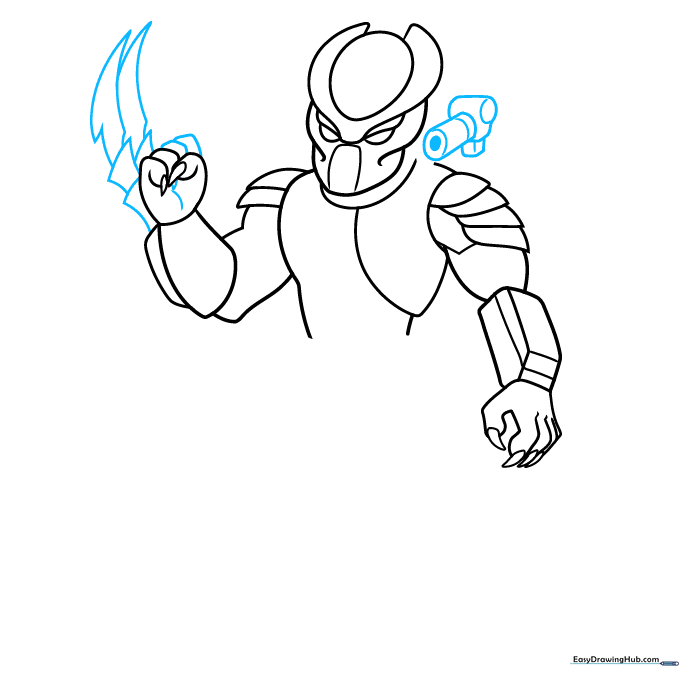
Draw a cylinder behind the head for the shoulder cannon. Add smaller boxes underneath for the mounting gear. Tip: Use a ruler if you want the tech pieces to look extra mechanical and precise.
Step 6: Hair and Belt Details
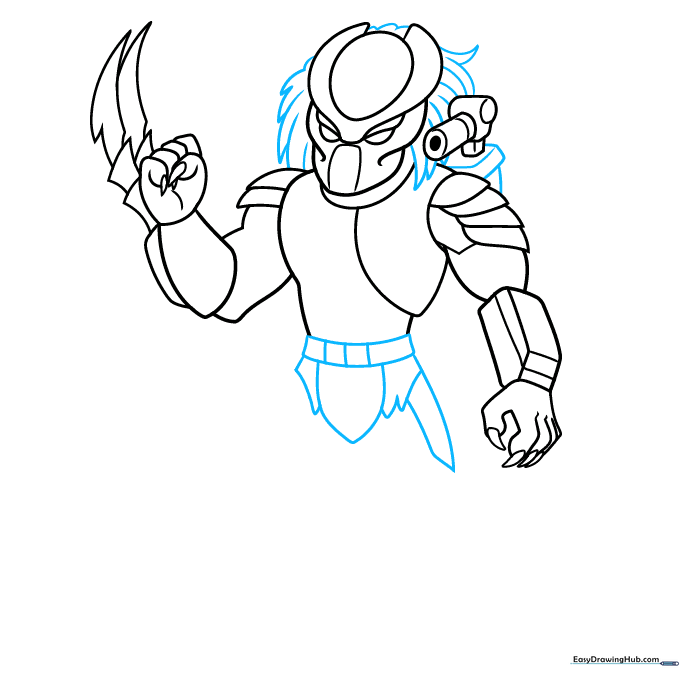
Outline the iconic dreadlocks with loose, sketchy lines. Add a belt around the waist using wide curves. Tip: Vary the length of the dreadlocks to make the character look more dynamic and natural.
Step 7: Constructing the Legs
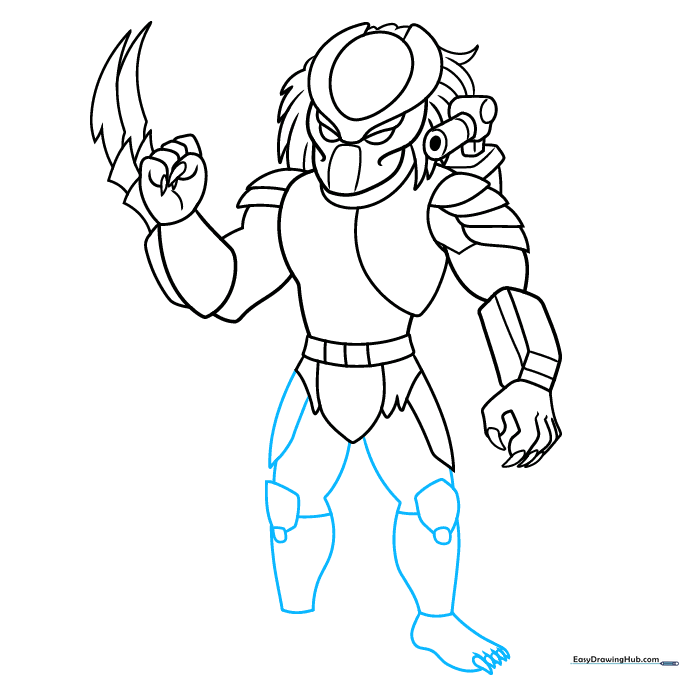
Draw vertical lines and large curves for the legs, connecting them with horizontal lines to form the kneepads. Tip: Make the kneepads slightly rounded to give the armor a sturdy, protective appearance.
Step 8: Finalizing the Feet
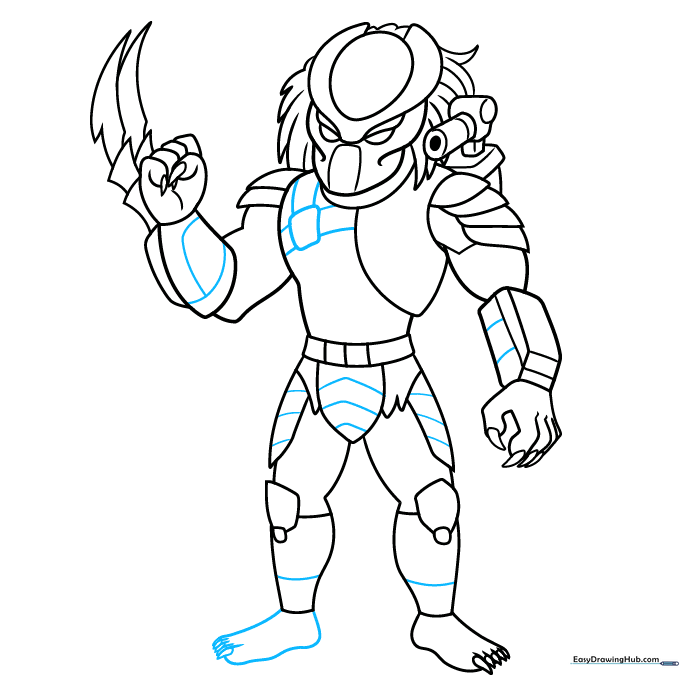
Draw the feet using wide curves and add teardrop shapes for the claws. Tip: Add small dashes between the claws to suggest the texture of the armor and skin.
Step 9: Inking Your Drawing
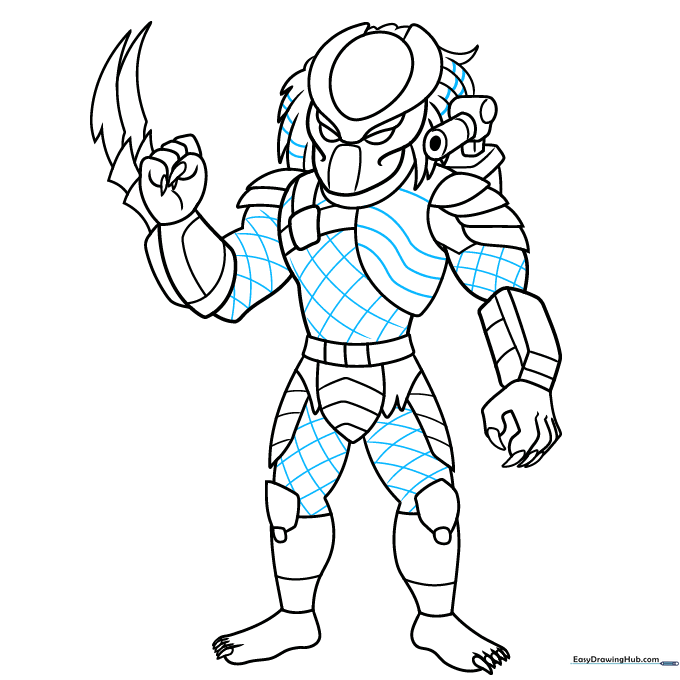
Add a criss-cross pattern to the body for the net-like suit. Use a black pen to outline your final drawing. Tip: Press firmly with your pen to make the character pop, but keep the net lines thinner than the main body outline.
Step 10: Adding Color
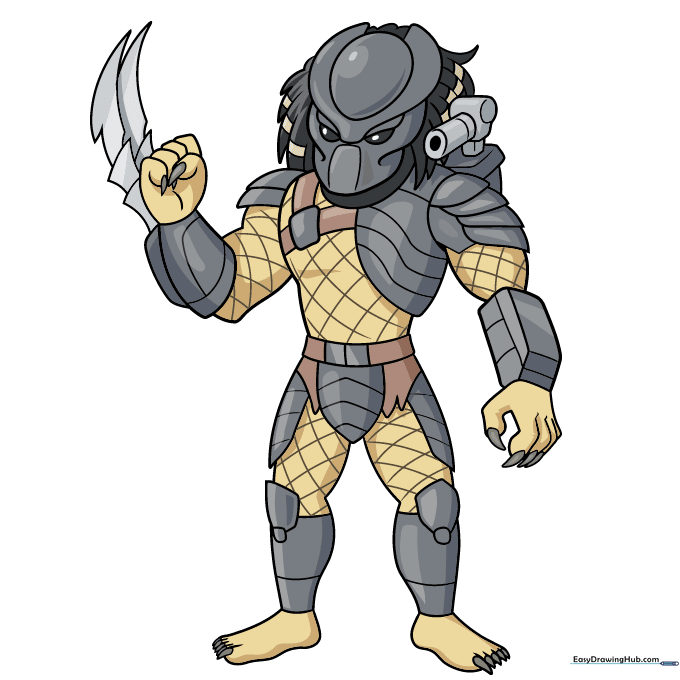
Color the body tan, the armor in shades of gray and brown, and the eyes in dark gray. Tip: Use a lighter gray for the gun and claws to create a metallic sheen.
More Tutorials


