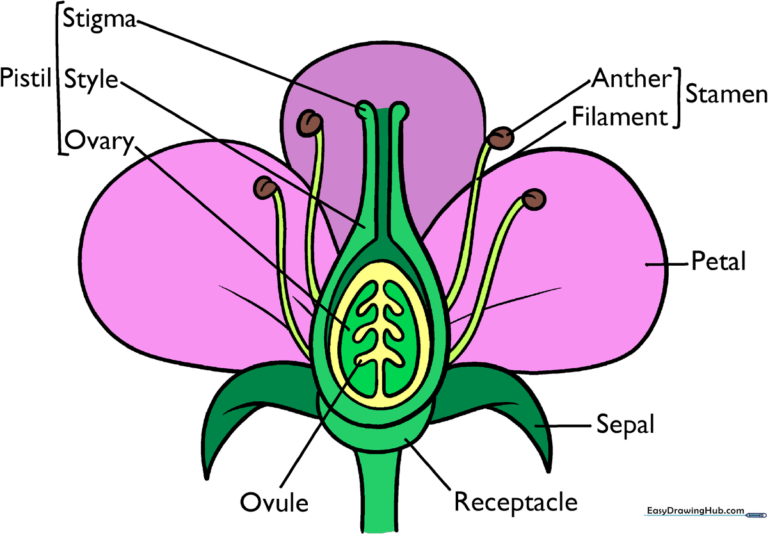
How to Draw Flower Parts: Easy Science Diagram Guide
Bring science to life with this simple, step-by-step guide to drawing a flower’s anatomy. Designed for students and young artists, this activity helps you visualize the pistil, stamen, and petals while building fine motor skills. All you need is a pencil, an eraser, and your favorite coloring supplies to create a perfect classroom-ready diagram.
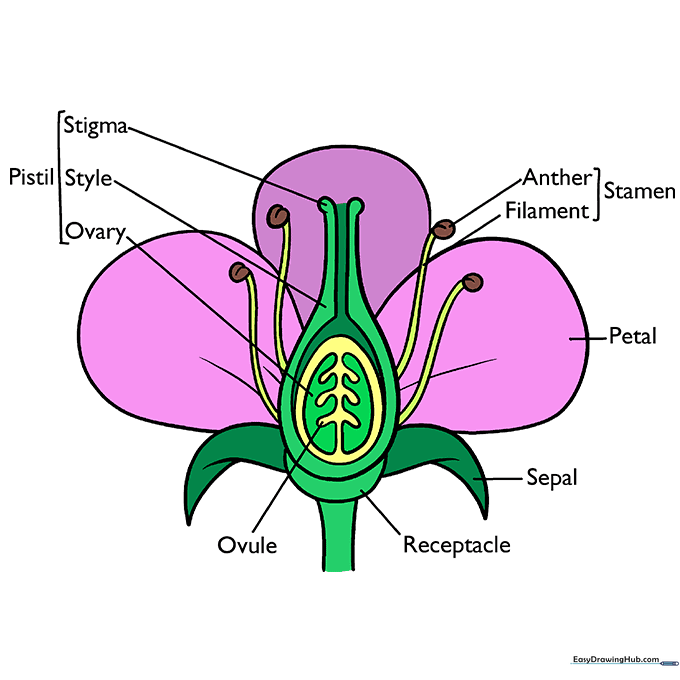
🎯 Final Result
Step-by-Step Instructions
Step 1: Sketching the Ovule

Start by drawing two curved lines that double back on themselves, creating a pine-tree-like pattern in the center. Connect them to form an incomplete oval. Teacher's Tip: Keep your pencil pressure light here; this is the very center of your flower and you'll want to keep it clean.
Step 2: Defining the Ovary

Enclose an egg shape around your ovule. Extend two curved lines from the sides to create the base of the ovary. Tip: Think of this as drawing a small, rounded seed pod at the base of the flower.
Step 3: Forming the Pistil
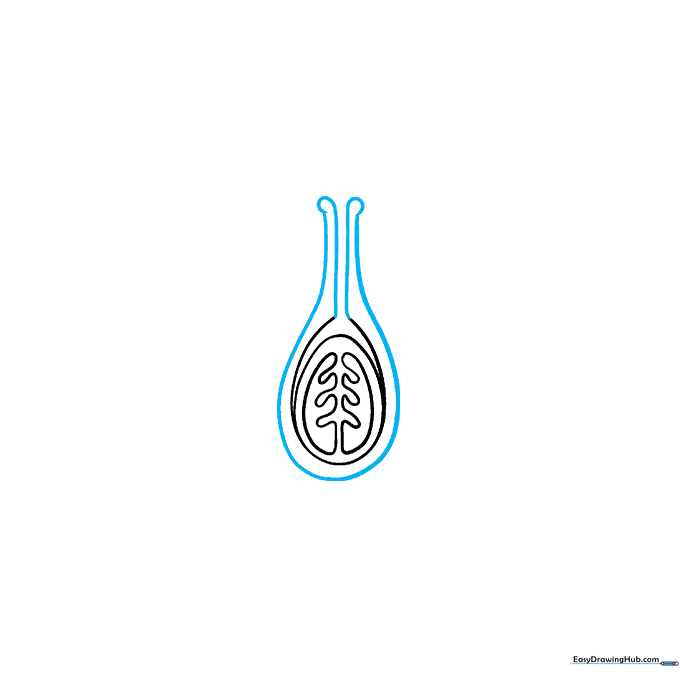
Draw a long, incomplete teardrop shape extending upward from the ovary. Connect the top with vertical lines to complete the style and stigma. Tip: Keep the lines smooth to represent the tube-like structure of the style.
Step 4: Adding the Stem
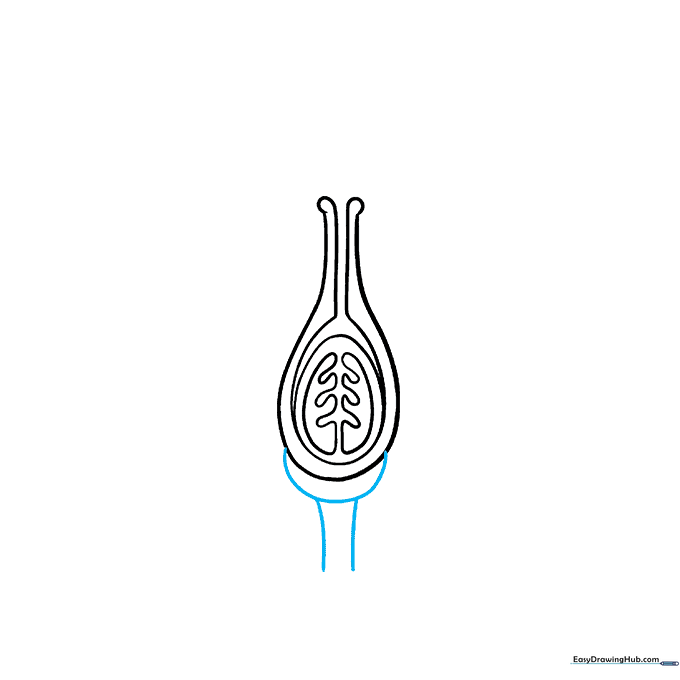
Draw a rounded shape beneath the ovary, then extend two parallel curved lines downward to form the stem. Tip: Make the stem slightly wider at the top where it connects to the flower base.
Step 5: Drawing the Sepals
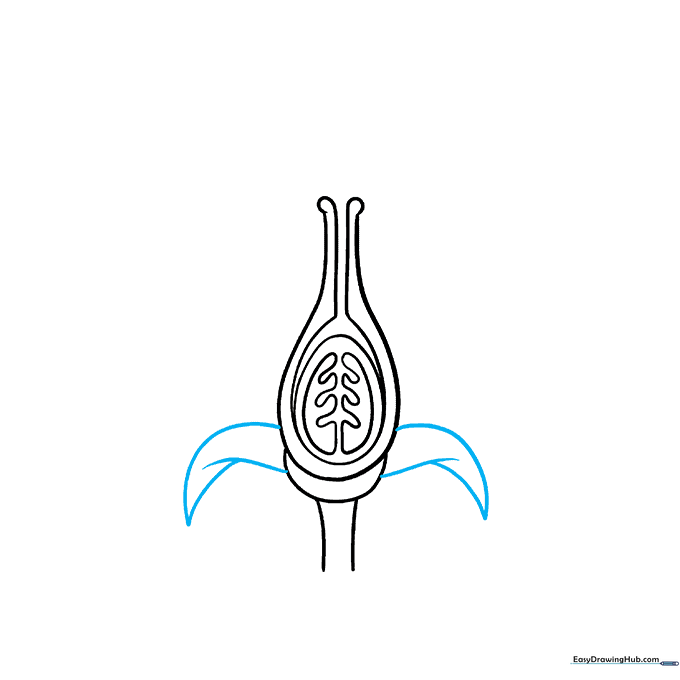
Extend 'Y' shaped lines from the top of the stem to create the leaf-like sepals. Tip: Sepals are usually smaller than petals, so keep them compact at the base of the flower head.
Step 6: Adding Stamens and Anthers
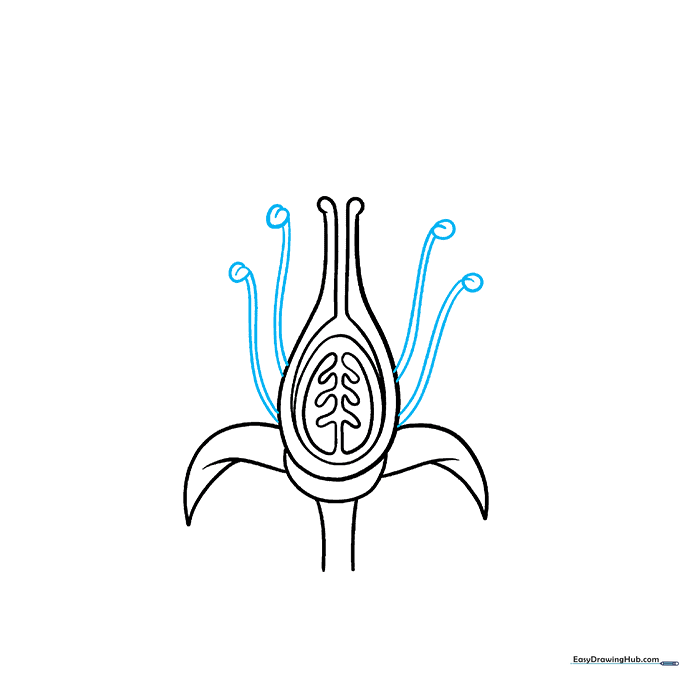
Draw four pairs of lines from the center for filaments, topped with heart-shaped anthers. Tip: These are the male parts of the flower, so try to space them evenly around the central pistil.
Step 7: Sketching the Petals
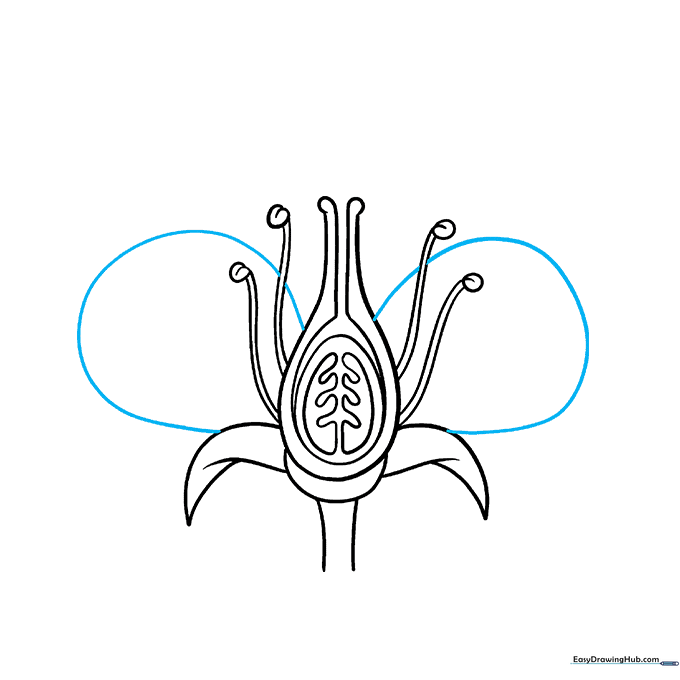
Use long, flowing curved lines to draw two large rounded petals behind the reproductive parts. Tip: Overlap your lines slightly to give the petals a natural, organic look.
Step 8: Finalizing Petal Details
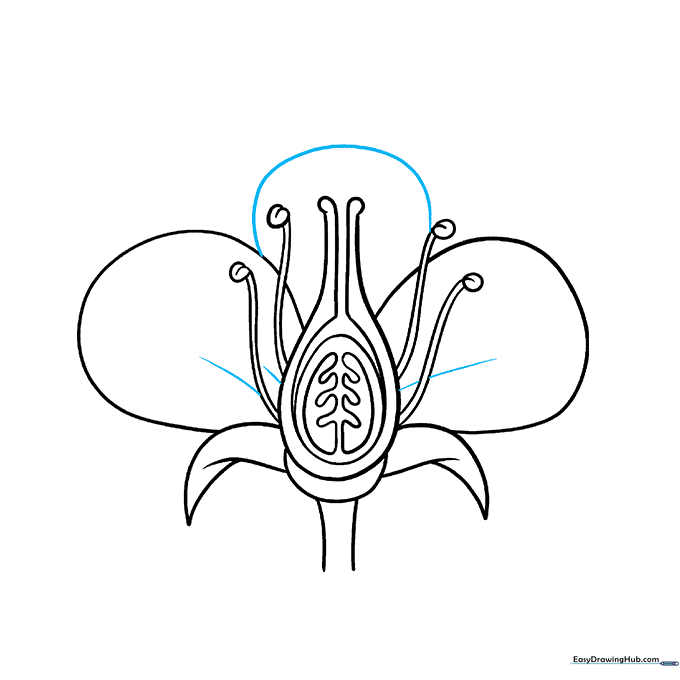
Add a third petal between the first two and add light contour lines to show the curve of the petals. Tip: These contour lines add depth and make your flower look three-dimensional.
Step 9: Labeling the Anatomy
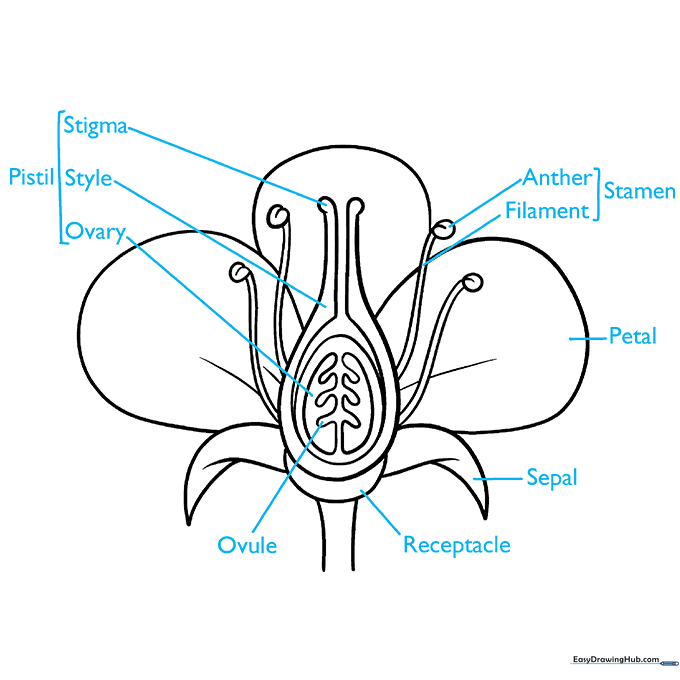
Use a ruler to draw straight leader lines from each part. Label them: Ovule, Ovary, Style, Stigma, Anther, Filament, Petal, Sepal, and Receptacle. Tip: Group the Stigma, Style, and Ovary as the 'Pistil' and the Anther and Filament as the 'Stamen' for a complete science diagram.
Step 10: Adding Color
Bring your diagram to life! Use bright colors for the petals to attract pollinators, and green for the stem and sepals. Tip: Use a light yellow for the anthers to make them stand out against the petals.
More Tutorials


