How to Draw the Nervous System: Easy Science Art Lesson
Bring biology to life with this hands-on drawing activity designed for students and young learners. You will need a pencil, an eraser, and a piece of paper to map out the central and peripheral nervous systems. By the end of this lesson, you will have a clear, labeled diagram that makes complex anatomy easy to understand.
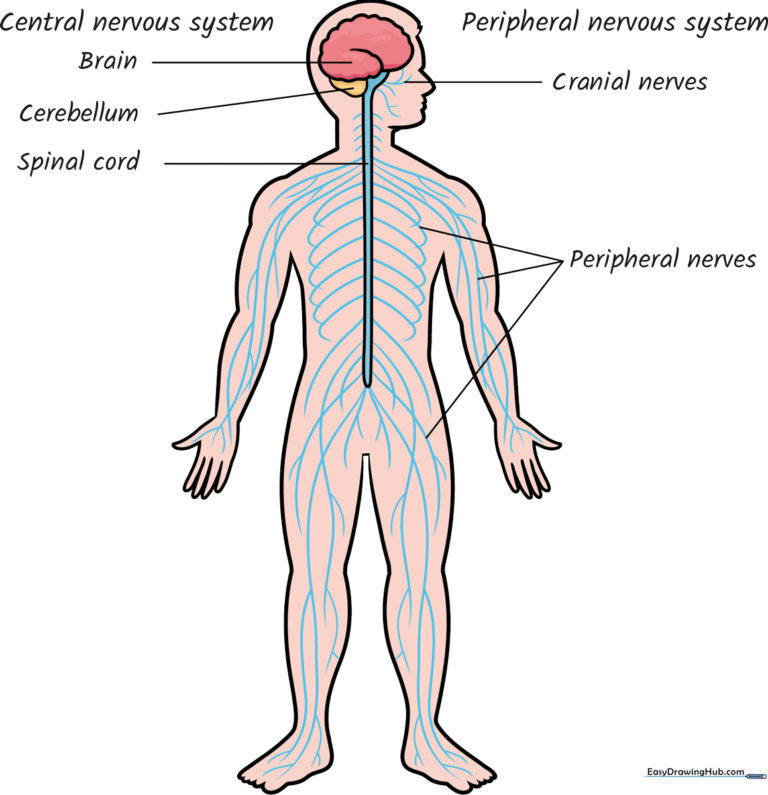
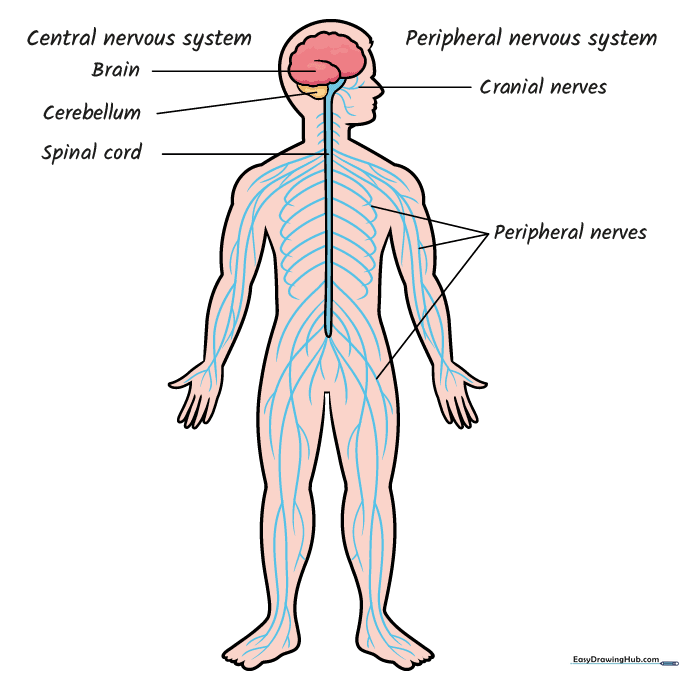
🎯 Final Result
Step-by-Step Instructions
Step 1: Sketching the Profile

Draw a light outline of the head in profile. Use gentle, curved lines to define the chin, nose, and forehead. Teacher's Tip: Keep your pencil strokes very light so you can easily adjust the shape if the proportions feel off.
Step 2: Mapping Shoulders and Arms

Use long, sweeping curves to sketch the shoulders and arms. Add small, rounded shapes at the ends to represent the hands. Teacher's Tip: Think of these as simple guidelines; they don't need to be perfect yet, just focus on the flow of the limbs.
Step 3: Defining the Torso and Legs
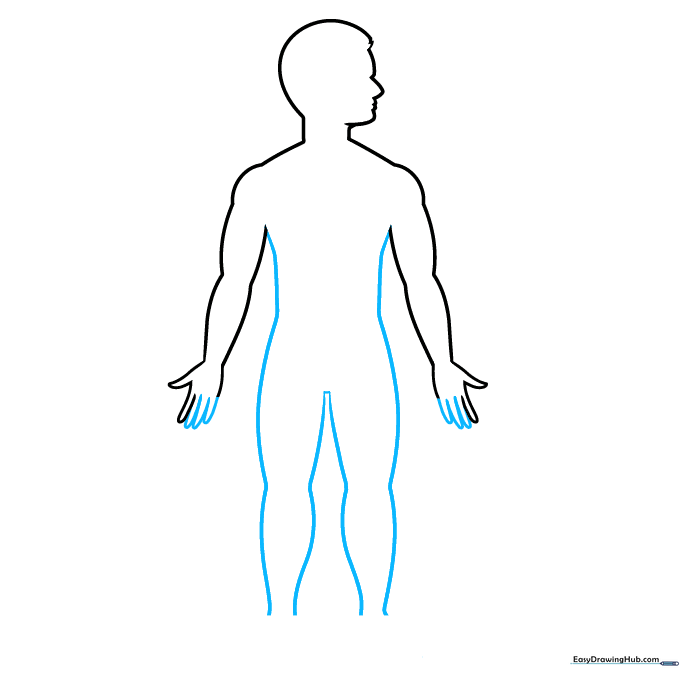
Complete the figure by sketching the torso and legs with long, fluid lines. Ensure the hands are fully enclosed. Teacher's Tip: Encourage students to look at their own arms and legs to see how the joints create natural curves.
Step 4: Drawing the Brain
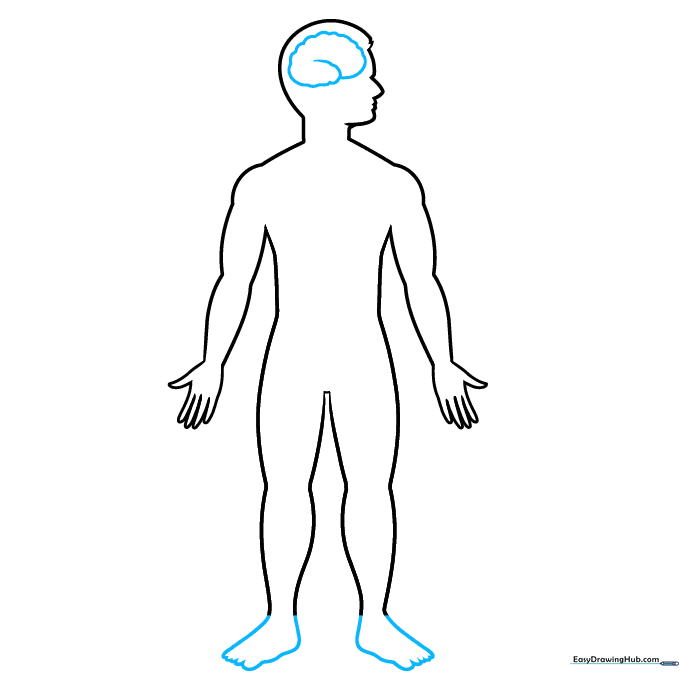
Add the feet with a scalloped edge for the toes. Inside the head, draw the brain using a wavy, scalloped line that overlaps itself. Teacher's Tip: The brain isn't a smooth circle; use short, bumpy strokes to give it that realistic, textured look.
Step 5: The Central Nervous System
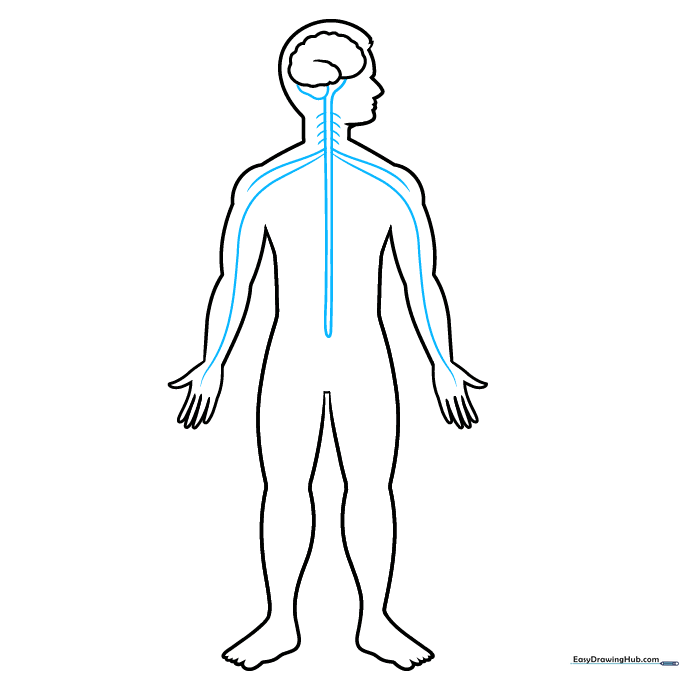
Enclose the occipital lobe at the base of the brain. Extend a line down the center of the torso to represent the spinal cord, then branch out into the neck and arms. Teacher's Tip: This is the 'highway' of the body—keep these lines bold and clear.
Step 6: Adding Rib-like Nerves
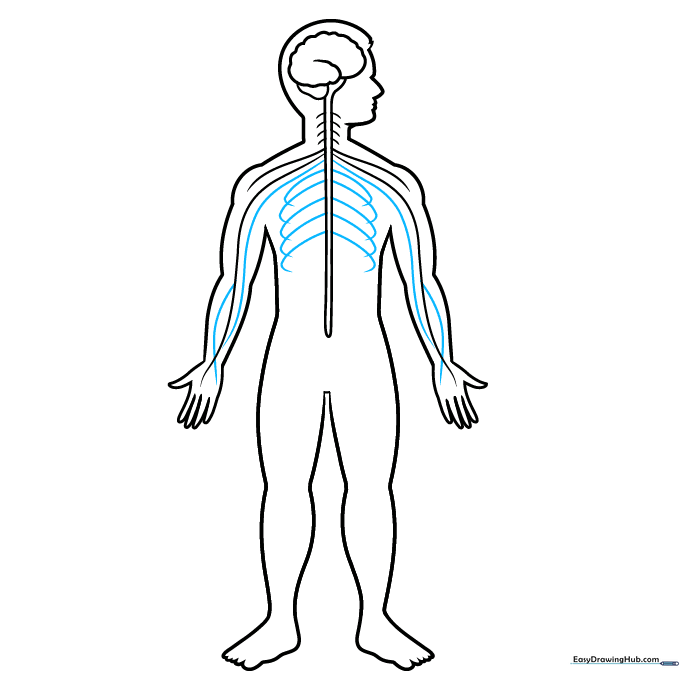
Continue adding lines down the arms, showing how they branch out. Add curved, rib-like lines extending from the spinal cord into the torso. Teacher's Tip: Don't worry about perfect symmetry; nerves in the body are complex and organic.
Step 7: Extending to the Legs
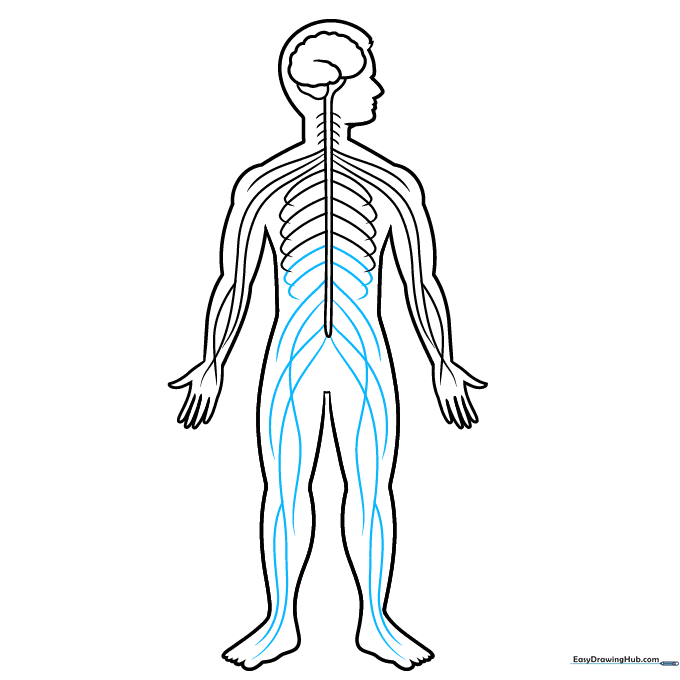
Draw long, curved lines from the spinal cord down into the legs and feet. Let them cross over each other naturally. Teacher's Tip: Use a slightly darker pencil pressure here to distinguish the nerves from the body outline.
Step 8: Adding Fine Detail
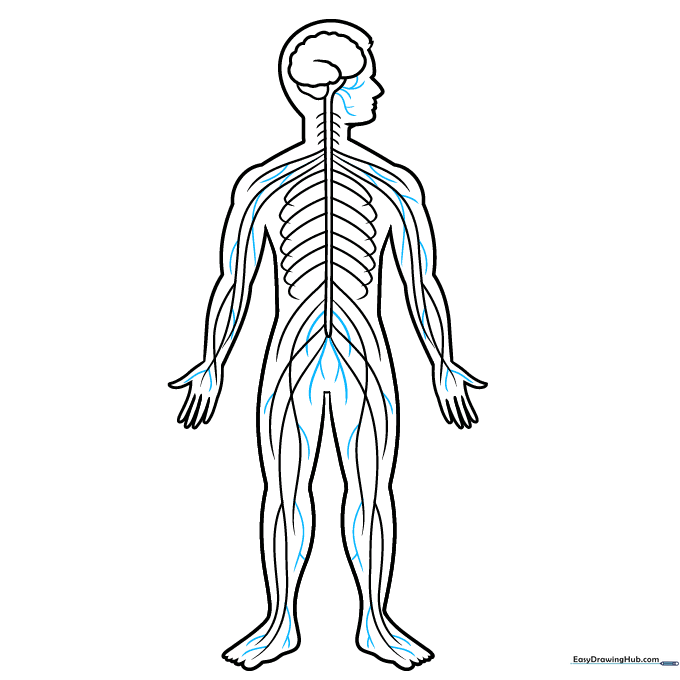
Add smaller 'Y' shaped branches throughout the face, arms, and legs to represent the peripheral nerves. Teacher's Tip: These small details show how the nervous system reaches every part of our body!
Step 9: Labeling Your Diagram
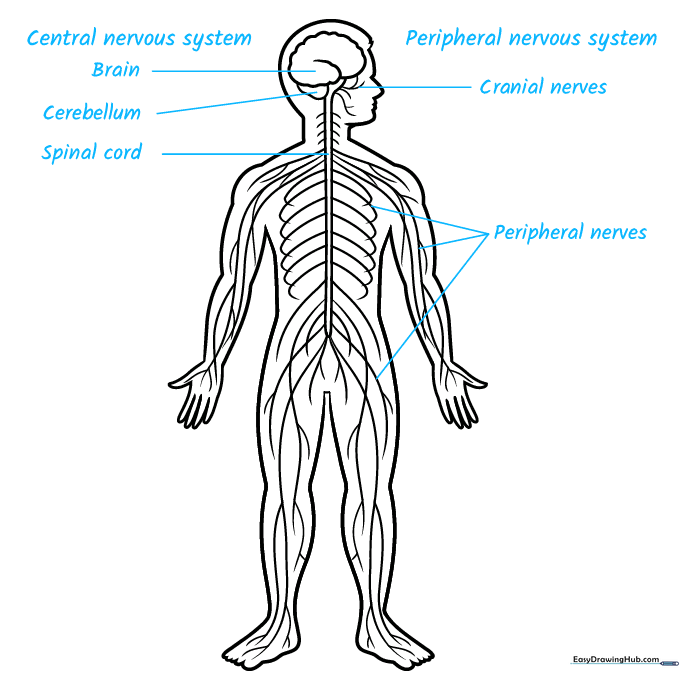
Draw straight lines from the parts to the side of your paper and add labels: Spinal Cord, Cerebellum, Brain, Cranial Nerves, and Peripheral Nerves. Teacher's Tip: Use a ruler for your label lines to keep the diagram looking professional and clean.
Step 10: Adding Color
Bring your drawing to life with color! Use distinct colors for the Central Nervous System versus the Peripheral Nervous System to help you memorize the parts. Teacher's Tip: Colored pencils work best for these fine, intricate lines.
More Tutorials


