How to Draw the Monopoly Man: Easy 10-Step Guide
Bring Rich Uncle Pennybags to life with this fun, screen-free drawing activity perfect for ages 6 and up. All you need is a pencil, an eraser, and a piece of paper to master this iconic board game character. Follow our teacher-tested steps to build confidence and improve your character-sketching skills.
🎯 Final Result
Step-by-Step Instructions
Step 1: Sketching the Face and Mustache

Start by drawing two small circles for the eyes with curved arches for eyebrows. Add a 'C' shape for the nose, then extend lines outward to create his iconic bushy mustache using a wide 'W' shape. Teacher's Tip: Keep your pencil pressure light here so you can easily adjust the mustache shape if needed.
Step 2: Defining the Head and Arms

Draw a large, rounded shape for the head, leaving a gap for the ear. Add a 'C' shape for the ear and small lines for hair. Extend two curved lines from the head to form the base of his outstretched arms. Teacher's Tip: Use smooth, continuous motions to make the head look more natural.
Step 3: Drawing the First Sleeve and Hand

Enclose the end of one arm with a narrow curved rectangle to create the shirt cuff. Use small, overlapping curved lines to sketch the fingers. Teacher's Tip: Hands are tricky! Focus on the 'mitten' shape first before adding individual finger lines.
Step 4: Adding the Second Cuff and Cane
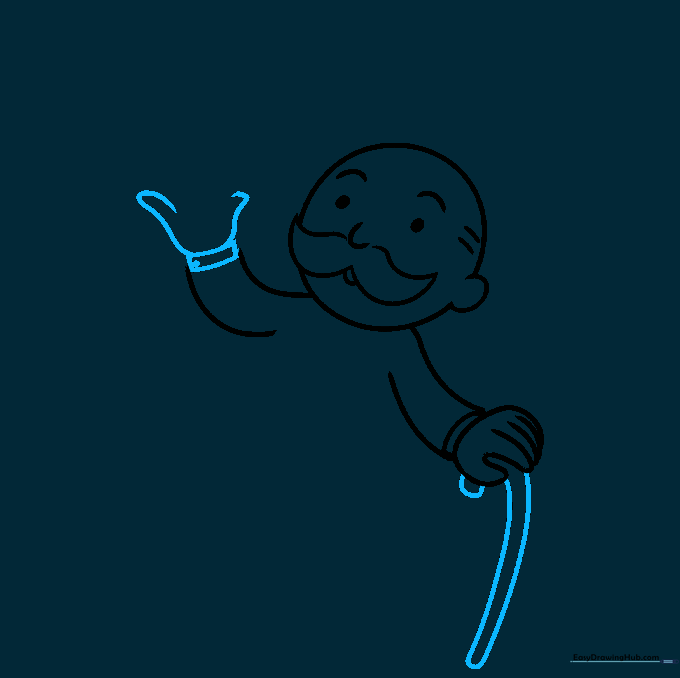
Draw the second cuff with a tiny circle for a cufflink. Extend lines to form the other hand, then draw a 'J' shaped line extending downward to create his classic cane. Teacher's Tip: Make sure the cane line is parallel to give it a solid, sturdy look.
Step 5: Sketching the Top Hat Brim
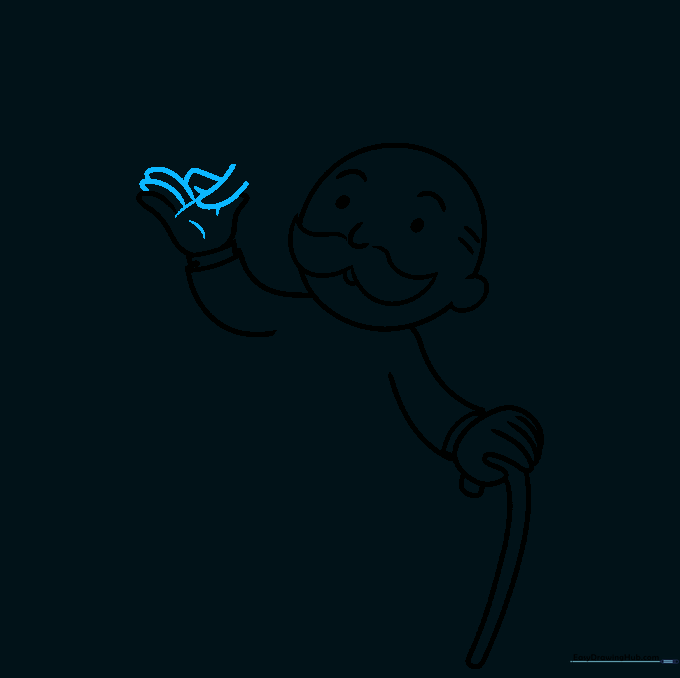
Draw a slanted 'U' shape near the hand to serve as the base of the top hat. Add curved lines to complete the fingers holding the hat. Teacher's Tip: This creates the illusion that he is holding his hat in his hand.
Step 6: Completing the Top Hat
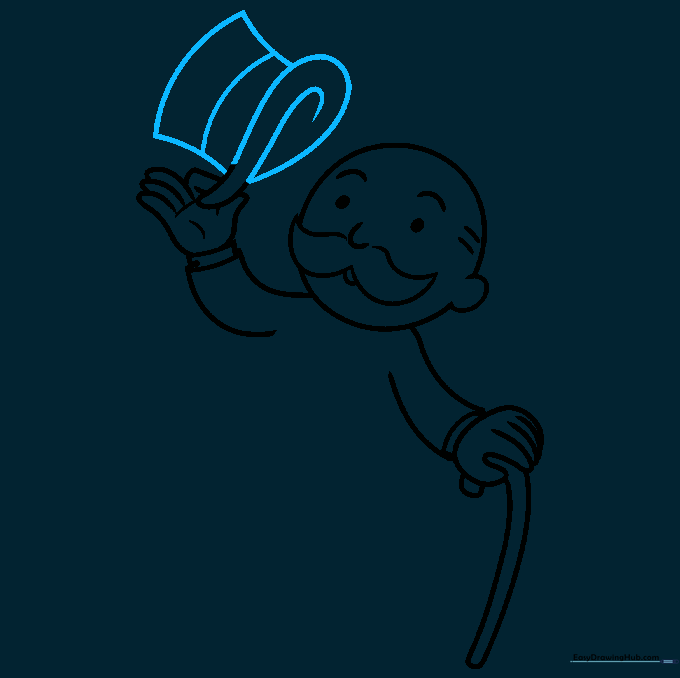
Build the top hat upward from the brim using curved lines. Add a rectangular band across the hat to give it that signature formal look. Teacher's Tip: Keep the sides of the hat straight to contrast with the curved brim.
Step 7: Drawing the Suit Jacket
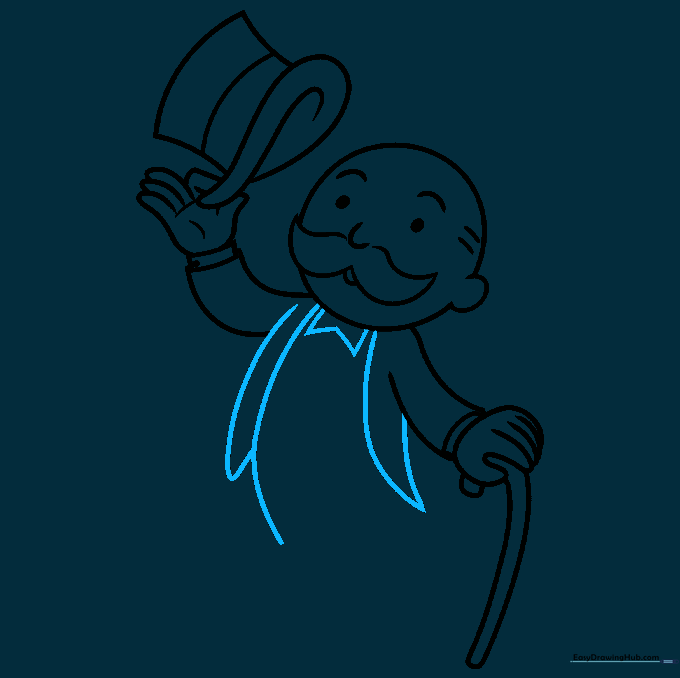
Draw a 'V' shape under the chin for the collar, then extend long, curved lines downward to outline the sides of his suit jacket. Teacher's Tip: Ensure the jacket lines are symmetrical to keep him looking dapper.
Step 8: Adding the Shirt and Pants
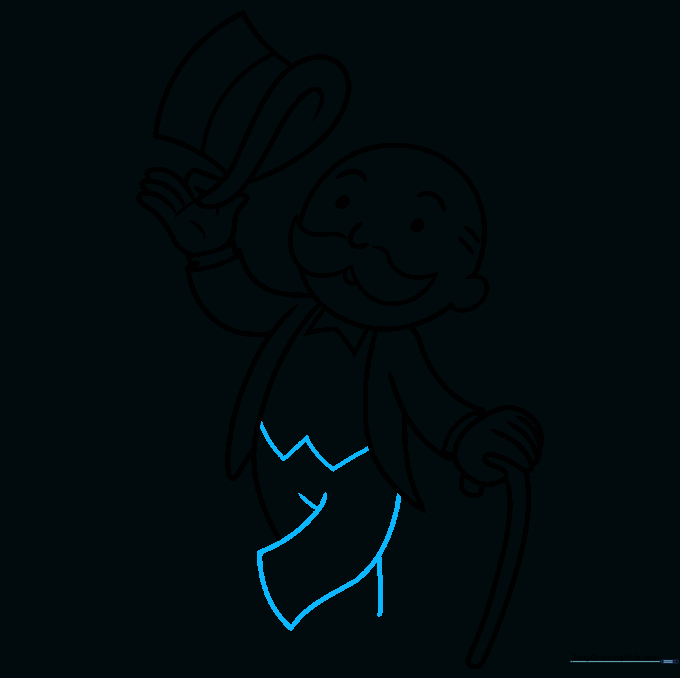
Add a 'W' shape for the shirt tail and sketch the pants using curved lines and a 'Y' shape for the inseam. Teacher's Tip: Use a slightly darker pencil stroke for the pants to distinguish them from the jacket.
Step 9: Final Details and Shoes
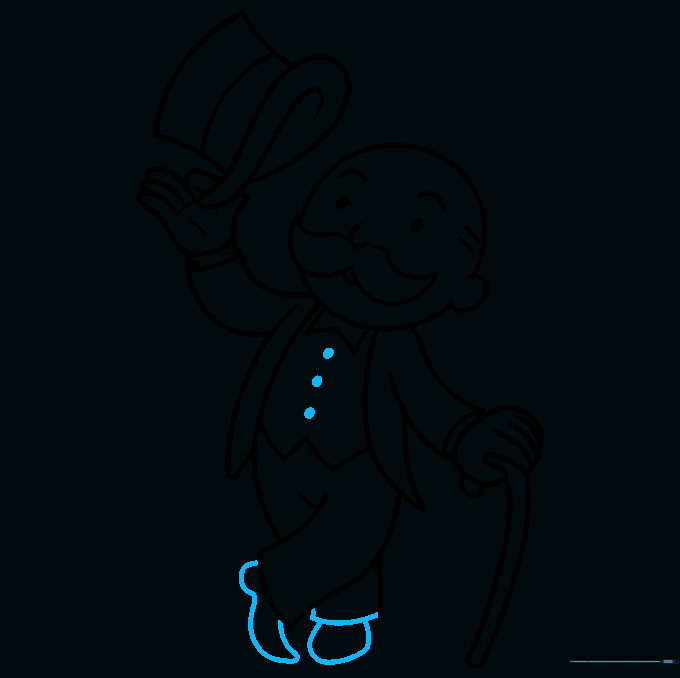
Add three small circles down the center of the shirt for buttons. Finish the pant legs and draw the shoes with irregular, rounded shapes. Teacher's Tip: Don't worry about making the shoes perfect; they should look like classic dress shoes.
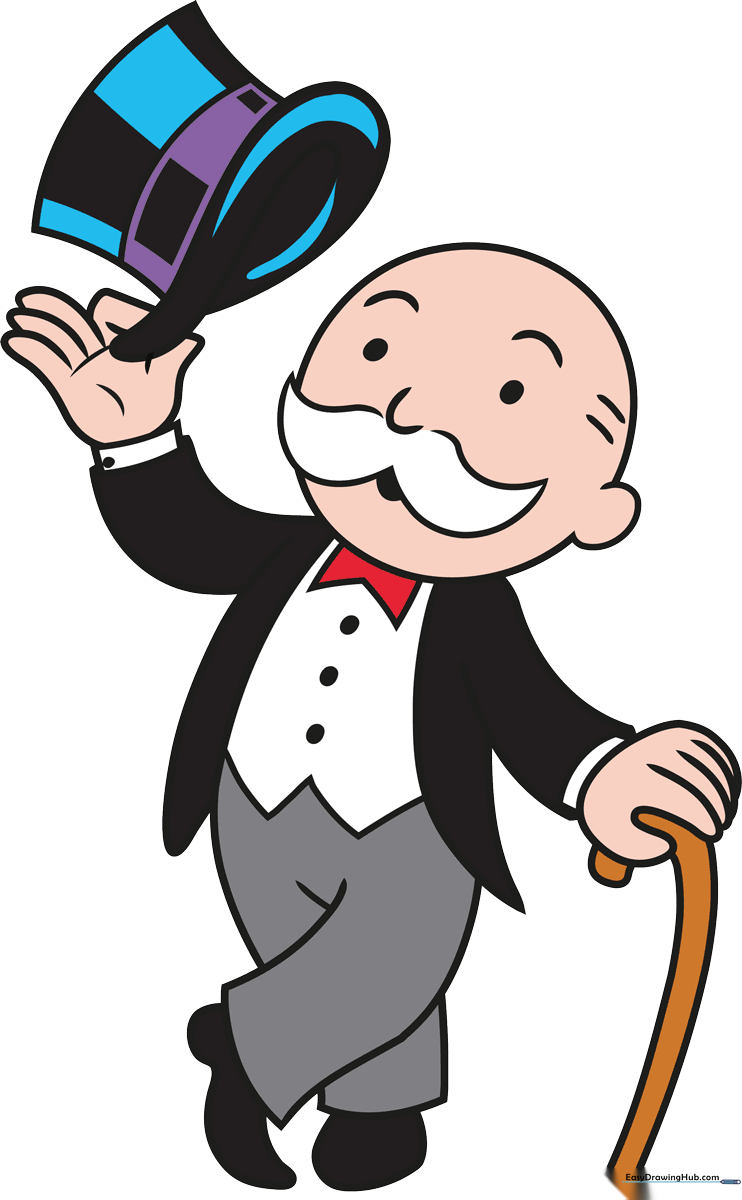
Step 10: Bringing Him to Life with Color

Time to color! Use black for the suit and hat. To make the hat look shiny, try adding a touch of blue to the edges for a highlight effect. Teacher's Tip: Use light, even strokes with your colored pencils for a professional finish.
More Tutorials


