How to Draw the Great Wall of China: Easy 9-Step Guide
Bring history to life with this fun, screen-free drawing activity! Designed for young artists ages 6 and up, this guide uses basic geometric shapes to build the iconic Great Wall. Grab your pencil, eraser, and paper, and let's explore this architectural wonder together.
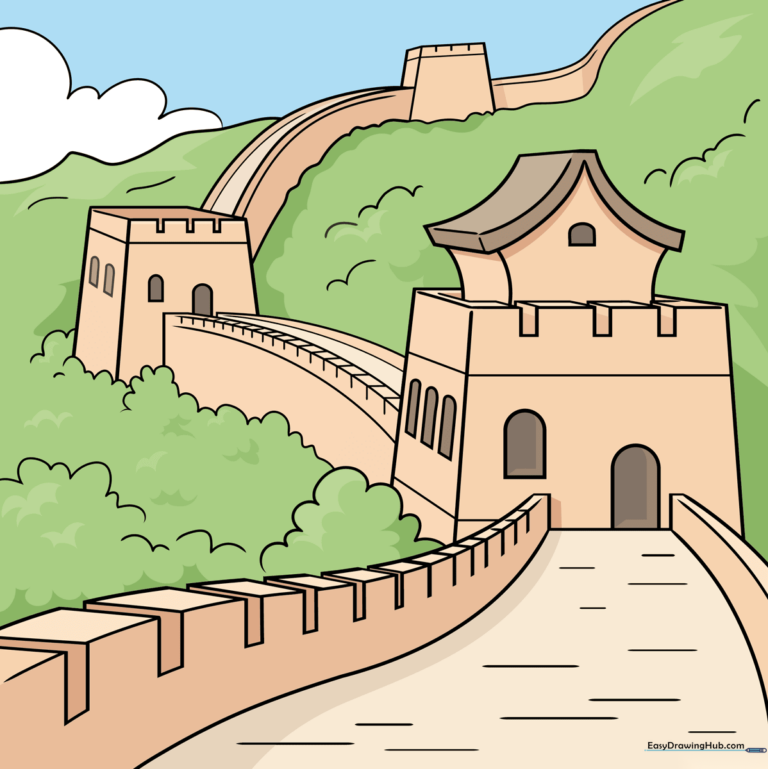
🎯 Final Result
Step-by-Step Instructions
Step 1: Sketching the Main Tower
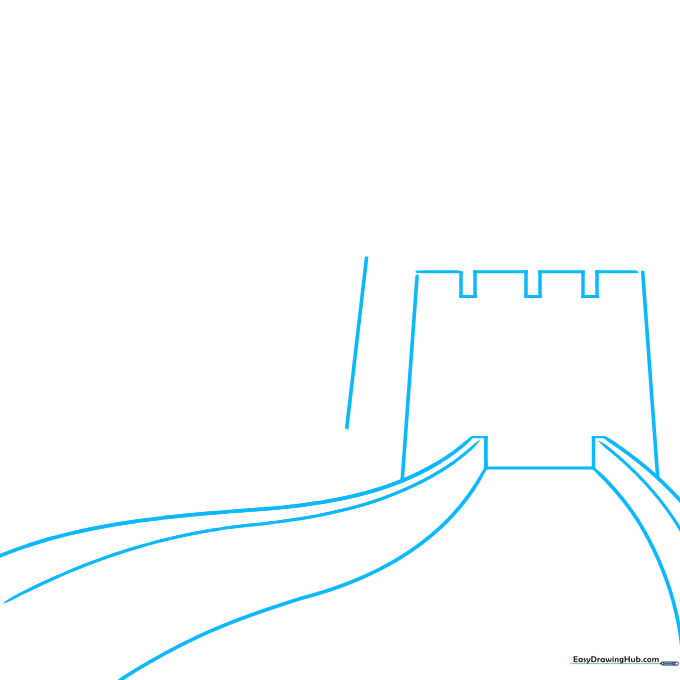
Start by drawing a rectangular base for the tower, adding smaller rectangles on top to create the classic castle look. Teacher's Tip: Use a ruler if you want perfectly straight edges, or keep it freehand for a more organic, artistic feel.
Step 2: Adding the Roof and Foliage
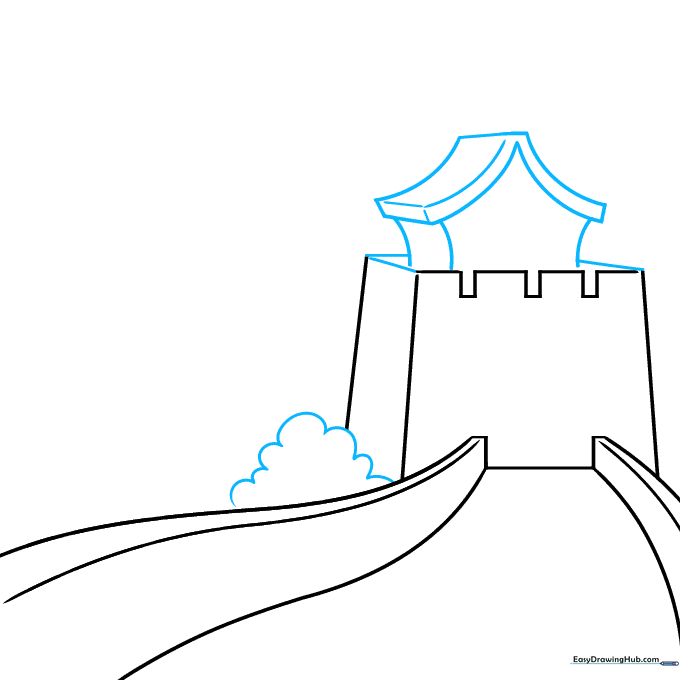
Draw a 3D-style roof on top of your tower using simple curved lines. At the base, add a few wavy, connected lines to represent a small bush. Tip: Keep your bush lines loose and rounded to contrast with the sharp, straight lines of the wall.
Step 3: Defining the 3D Structure
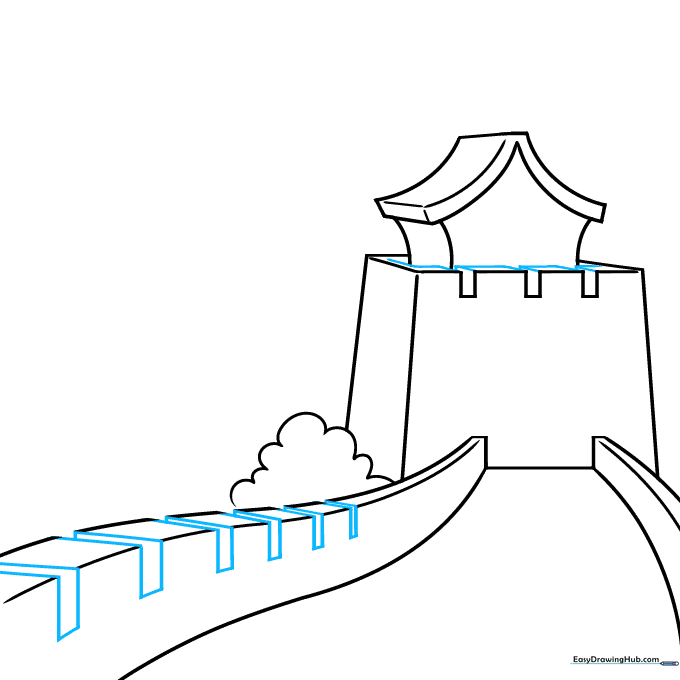
Turn the top rectangles into 3D cubes by adding small diagonal lines. This adds depth to your drawing. Tip: If you make a mistake, don't worry—just use your eraser to clean up the overlapping lines.
Step 4: Adding Architectural Details
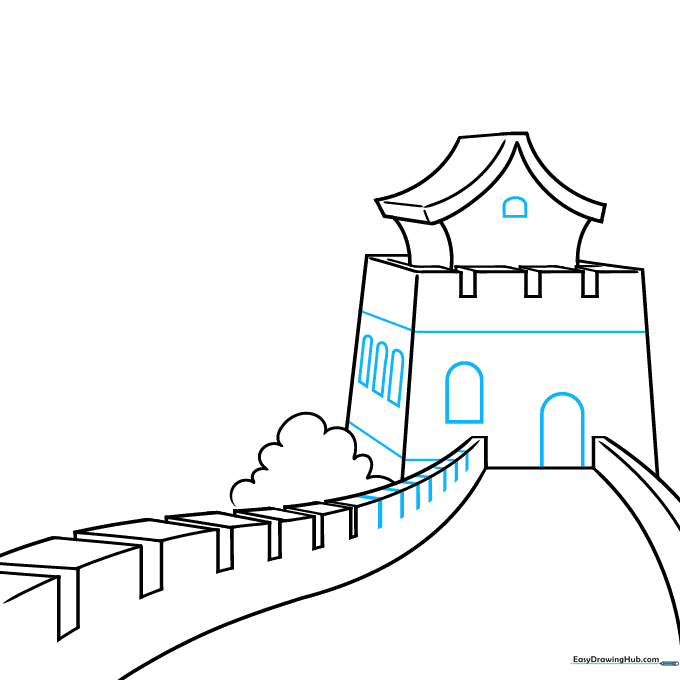
Add 'L' shaped shading to the wall sections and draw archways for doors and windows. Tip: Keep your arches consistent in size to make the tower look balanced and professional.
Step 5: Extending the Wall
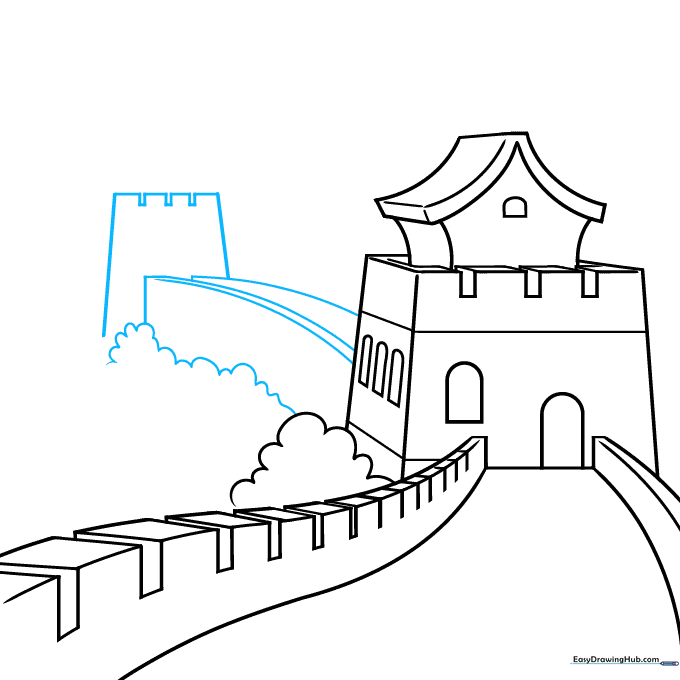
Draw a second tower in the distance using a trapezoid shape. Connect it to the first tower with curved lines to show the wall winding along the hills. Tip: The further away the tower is, the smaller it should look!
Step 6: Adding Texture
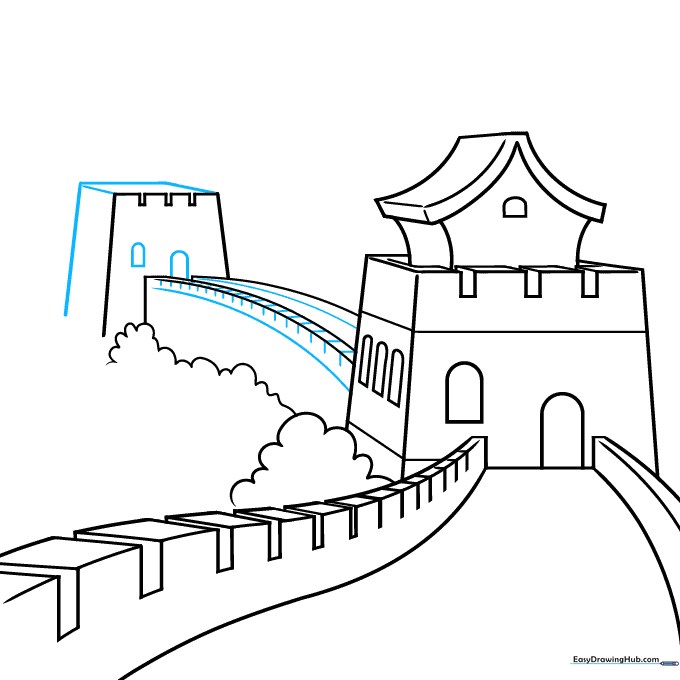
Give your second tower 3D depth and add small, short lines along the top of the wall to represent stone textures. Tip: Use varying lengths for your texture lines to make the wall look weathered and realistic.
Step 7: Creating the Landscape
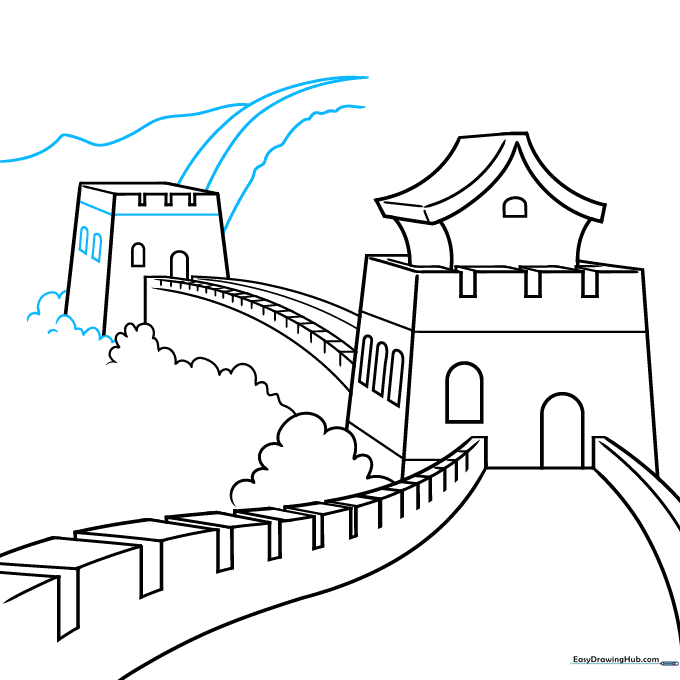
Extend the wall further into the distance using converging lines. Add a large, smooth curve behind the wall to represent a mountain. Tip: Keep the mountain line light so it doesn't distract from the wall itself.
Step 8: Finalizing the Wall Path
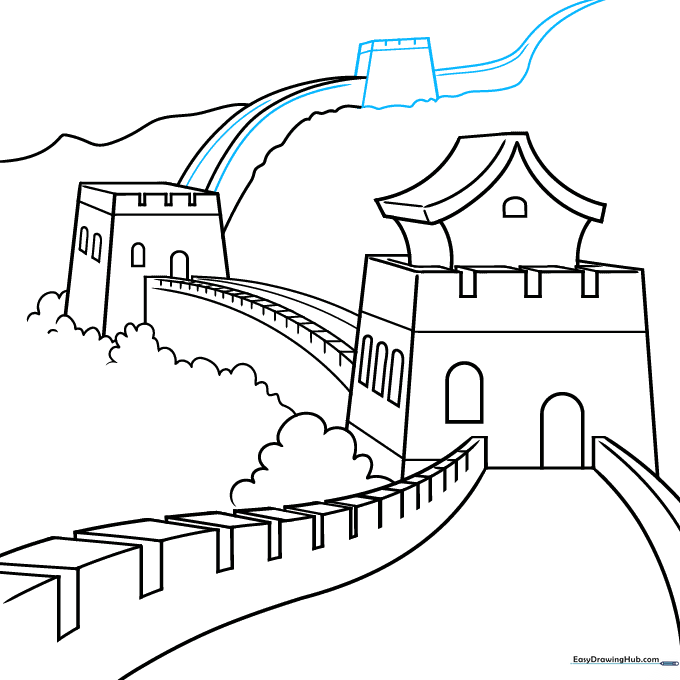
Add one more distant tower and continue the wall's path. Use long, sweeping curves to show how the wall climbs the hills. Tip: Think of the wall like a ribbon draped over the landscape.
Step 9: Adding Final Touches
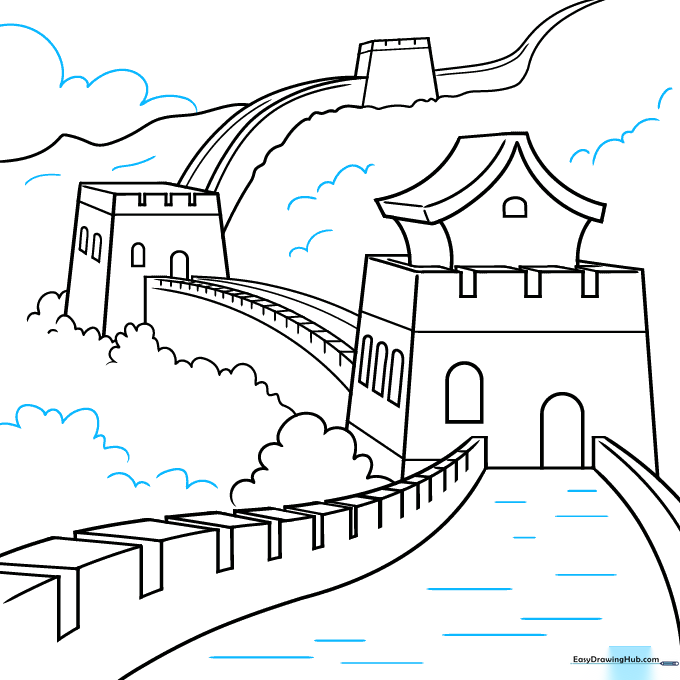
Add texture to the ground and a fluffy cloud in the sky to complete your scene. Tip: Use small dots or dashes on the ground to create a rocky, natural look.
Step 10: Bring It to Life with Color
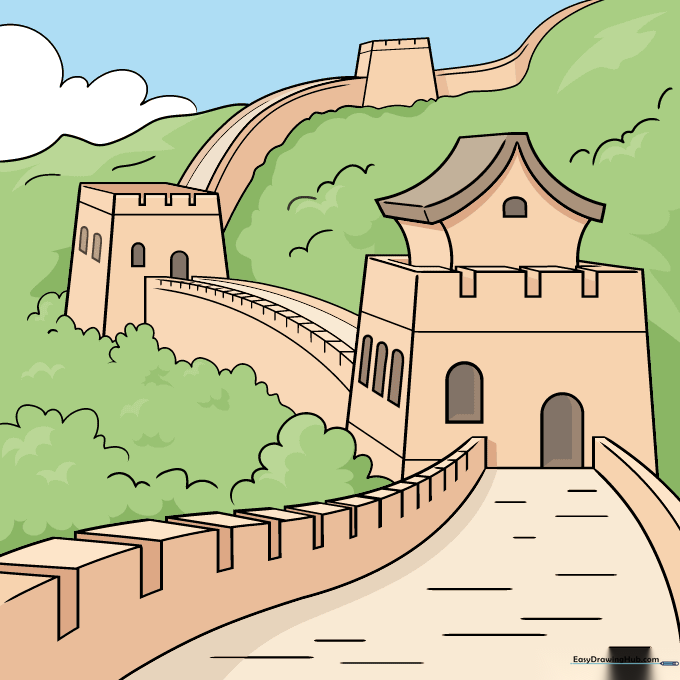
Time to color! Use earthy tones like grey and brown for the stones, and vibrant greens for the mountains. Tip: Use a lighter shade of grey for the tops of the walls to show where the sun hits them.
More Tutorials


