How to Draw the Fairy Godmother: Easy 10-Step Guide
Bring a touch of magic to your sketchbook with this Fairy Godmother drawing guide, designed for young artists and beginners. You will need a pencil, an eraser, and your favorite coloring markers or pencils. Follow these steps to master character proportions and create your own enchanted illustration.
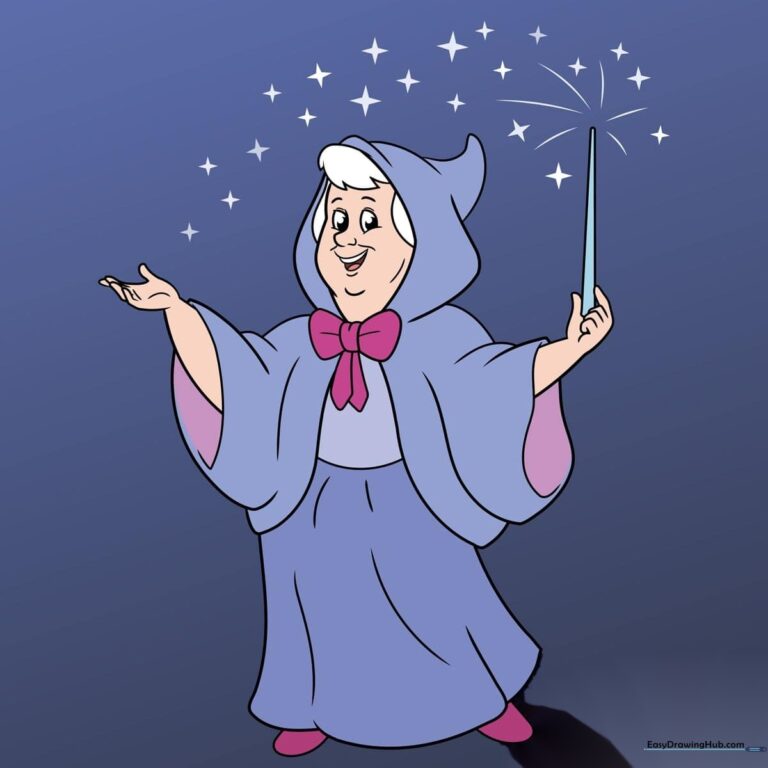
🎯 Final Result
Step-by-Step Instructions
Step 1: Sketching the Face

Start by drawing a soft, rounded shape for the face. Add two small circles for the eyes and a gentle curve for the smile. Teacher's Tip: Keep the face shape light and airy—don't press too hard with your pencil!
Step 2: Adding Facial Features and Hair
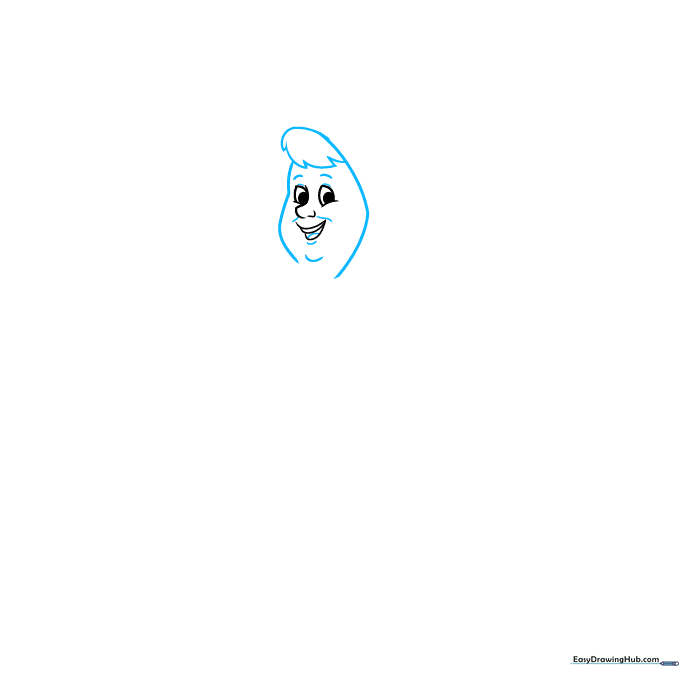
Add the eyebrows, eyelids, and chin details. Use jagged, short strokes to create the texture of her hair around the hood. Teacher's Tip: Use short, quick strokes for the hair to make it look soft rather than stiff.
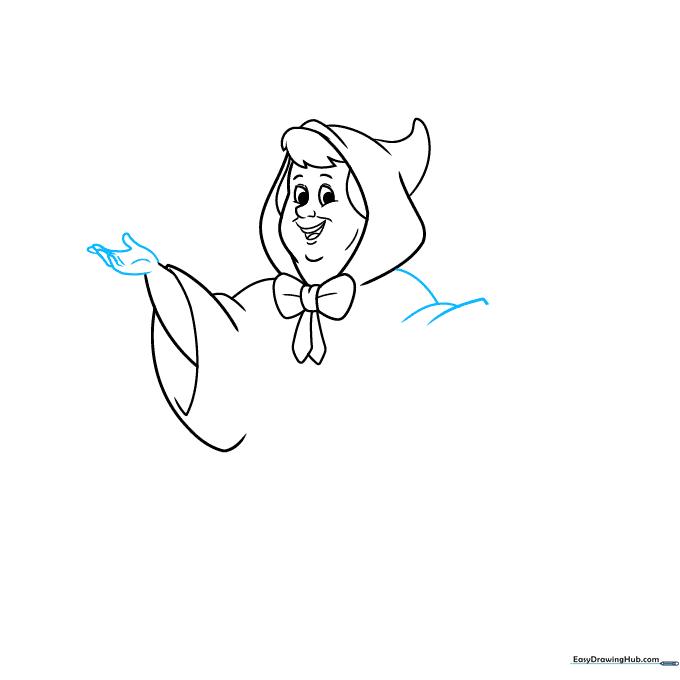
Step 3: Drawing the Hood and Neck
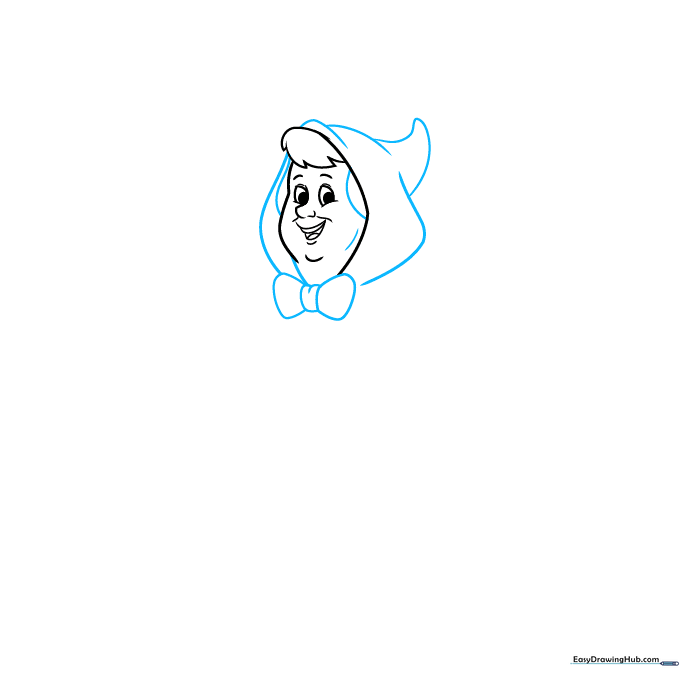
Use overlapping curved lines to complete the hood and the collar area. Add a small bow at the base of the neck. Teacher's Tip: Ensure the bow looks slightly rounded to give it a 3D appearance.
Step 4: Sketching the Sleeves
Add texture to the bow and draw the flowing lines of the sleeves. Teacher's Tip: Use long, sweeping curves to represent the fabric of the cloak, which helps show movement.
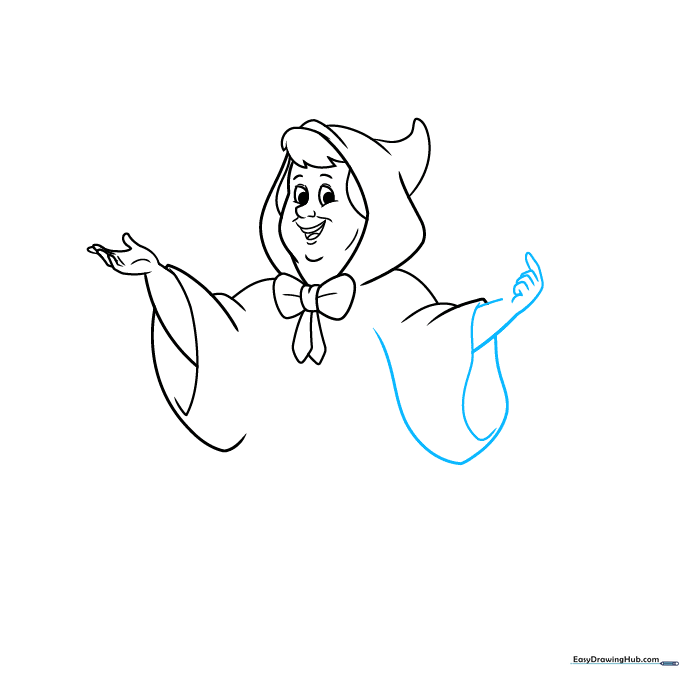
Step 5: Drawing the Hands
Carefully draw the hand with fingers curled upward. Teacher's Tip: Hands can be tricky! Focus on the overall shape of the palm first before adding the individual fingers.
Step 6: Completing the Arms
Connect the sleeves to the rest of the body using long, smooth curves. Teacher's Tip: Make sure the lines flow naturally from the shoulder to the wrist to create a realistic drape.
Step 7: The Magic Wand
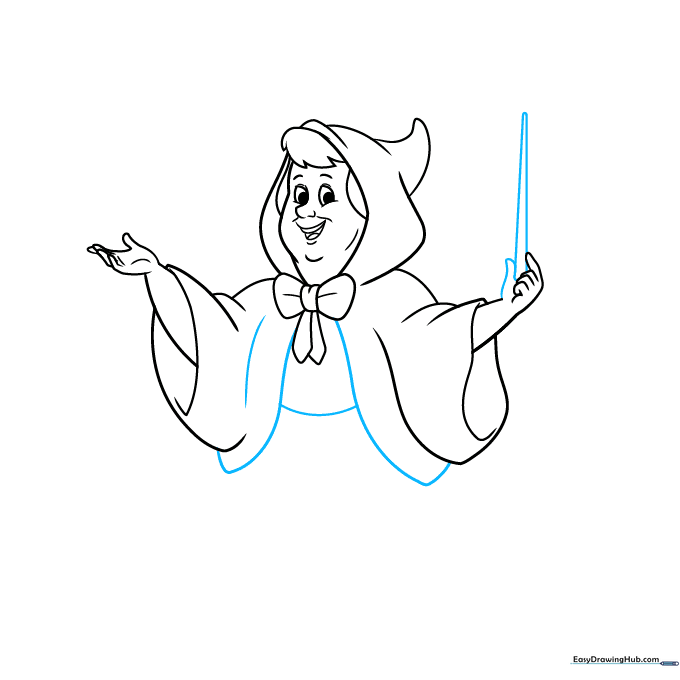
Draw the magic wand extending from her hand, finishing with a point. Add the thumb and continue the cloak lines. Teacher's Tip: Use a ruler if you want the wand to be perfectly straight, or keep it hand-drawn for a whimsical feel.
Step 8: Skirt and Magic Sparkles
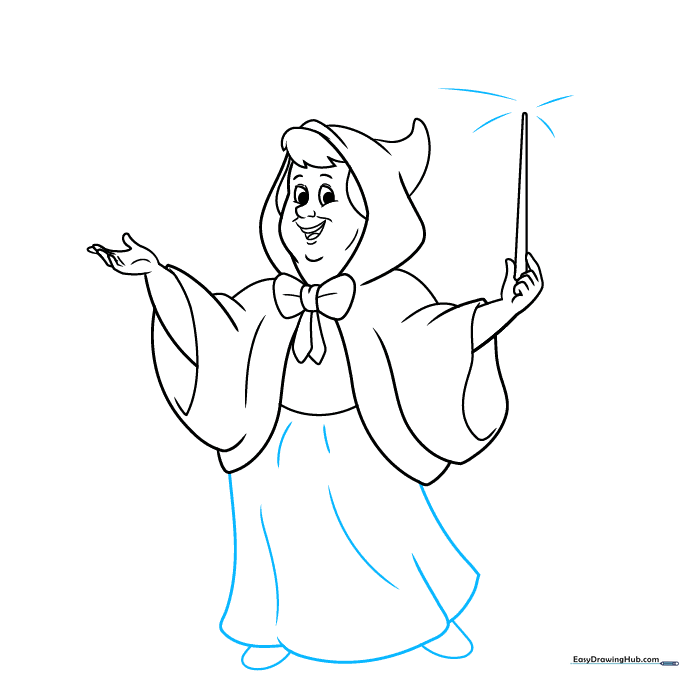
Sketch the skirt and shoes. Add a starburst pattern at the tip of the wand. Teacher's Tip: Draw the starburst lines with varying lengths to make the magic look like it is radiating outward.
Step 9: Final Magical Details
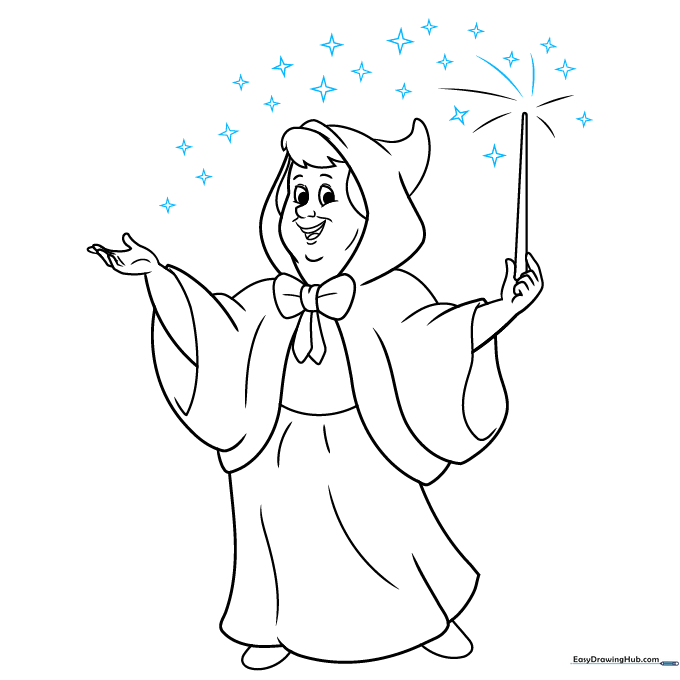
Draw small four-pointed stars around the wand and head to complete the magical effect. Teacher's Tip: Place the stars at different angles to create a sense of movement and sparkle.
Step 10: Adding Color
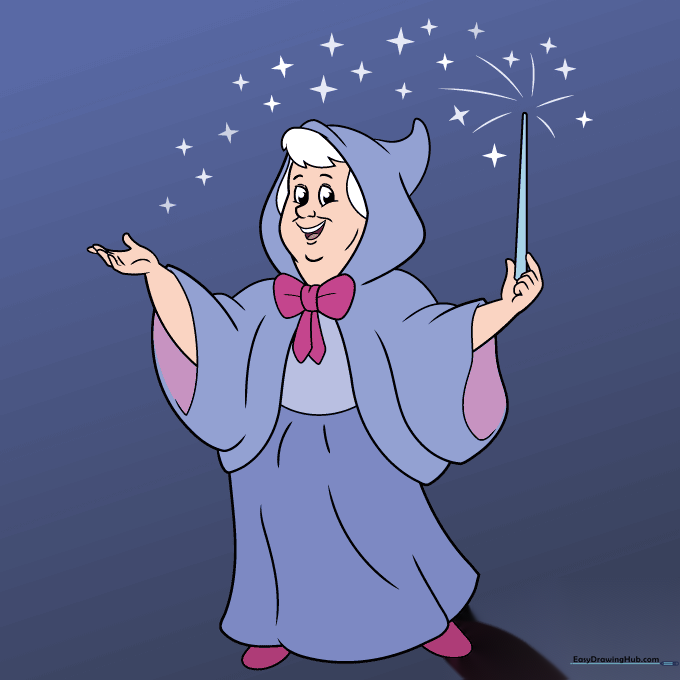
Time to bring your drawing to life! Use soft blues for the cloak, pink for the bow, and white for the hair. Teacher's Tip: Use a light touch with your colored pencils to blend the blue shades for a more professional, magical look.
More Tutorials


