How to Draw Teeth and Lips: Easy 10-Step Guide
Ready to bring your character portraits to life? This tutorial is perfect for artists ages 7+ looking to master facial features. All you need is a pencil, an eraser, and a piece of paper to start practicing these essential proportions.
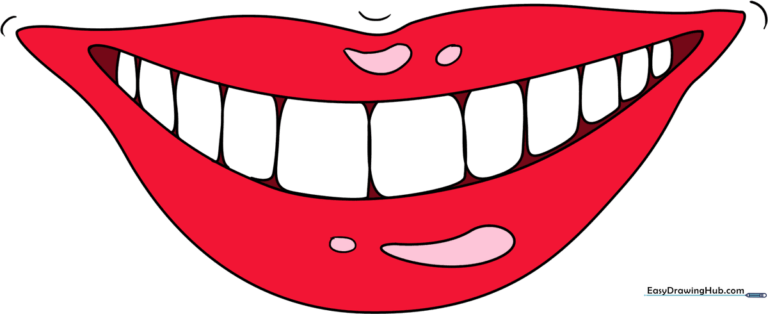
🎯 Final Result
Step-by-Step Instructions
Step 1: Sketching the Cupid's Bow

Draw a gentle, curved line for the top of the upper lip with a slight dip in the center. Teacher's Tip: This dip is called the 'Cupid's bow'—try to keep it symmetrical for a balanced look.
Step 2: Defining the Mouth Shape

Use a wide 'U' shaped line to connect the ends of your first line. Teacher's Tip: Keep this line light; it acts as the boundary for the entire mouth area.
Step 3: Outlining the Upper Lip

Draw a curved line just below the top edge to define the bottom of the upper lip. Teacher's Tip: This creates the volume that makes the lip look 3D rather than flat.
Step 4: Completing the Lower Lip

Connect the corners of the mouth with a wide, gentle curve to form the bottom lip. Teacher's Tip: Ensure the bottom lip looks slightly fuller than the top for a natural appearance.
Step 5: Starting the Teeth
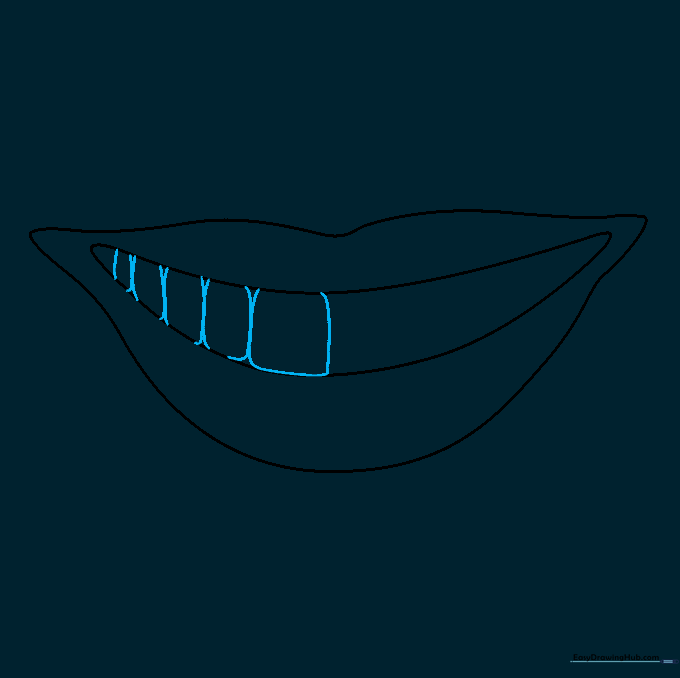
Draw two slightly curved lines between the lips to begin the teeth. Teacher's Tip: Think of these as small, rounded rectangles tucked inside the mouth.
Step 6: Filling the Smile
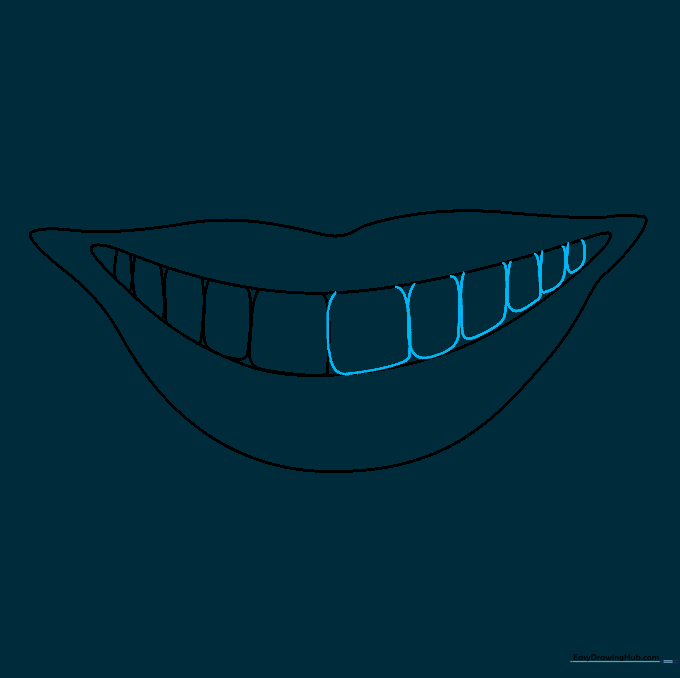
Continue adding teeth across the mouth, making them smaller toward the corners. Teacher's Tip: Varying the size creates a realistic perspective of the mouth curving back.
Step 7: Adding Lip Highlights

Draw small ovals on the top lip to represent light reflection. Teacher's Tip: Leaving these white when you color will make the lips look glossy and realistic.
Step 8: Glossy Lower Lip
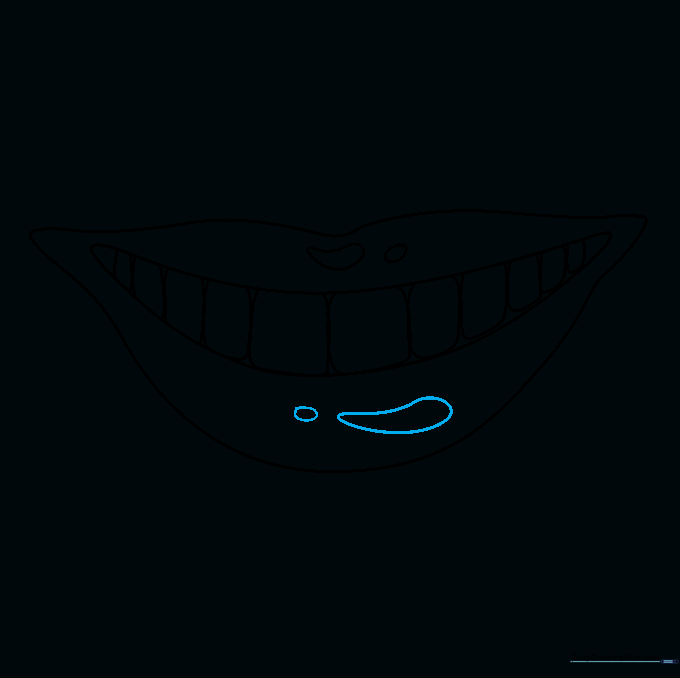
Repeat the highlight process on the bottom lip with a larger oval. Teacher's Tip: Keep the shapes irregular to mimic natural light hitting a curved surface.
Step 9: Final Contours

Add small lines at the corners of the mouth and above the Cupid's bow. Teacher's Tip: These subtle lines suggest the skin's natural folds and facial structure.
Step 10: Adding Color

Bring your drawing to life with color! Use pinks or reds for the lips and keep the teeth a clean, off-white. Teacher's Tip: Use a darker shade at the corners of the mouth to add depth.
More Tutorials


