How to Draw Taylor Swift: Easy 9-Step Guide for Fans
Bring your favorite pop star to life with this fun, easy-to-follow drawing guide! Designed for ages 7+, this project requires only a pencil, paper, and an eraser. Follow these steps to build confidence in your portrait skills while capturing Taylor’s iconic stage style.
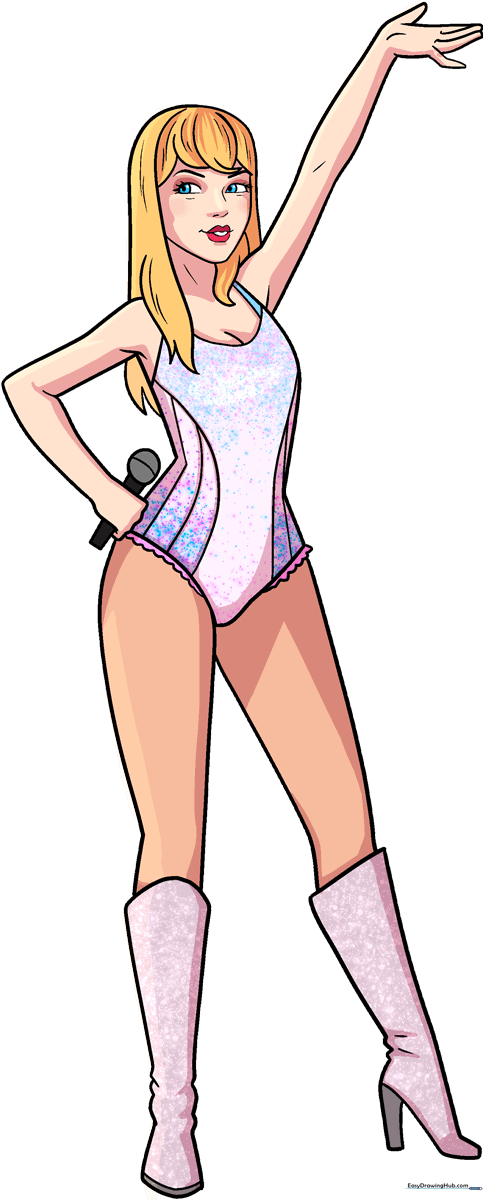
🎯 Final Result
Step-by-Step Instructions
Step 1: Sketching the Face Shape
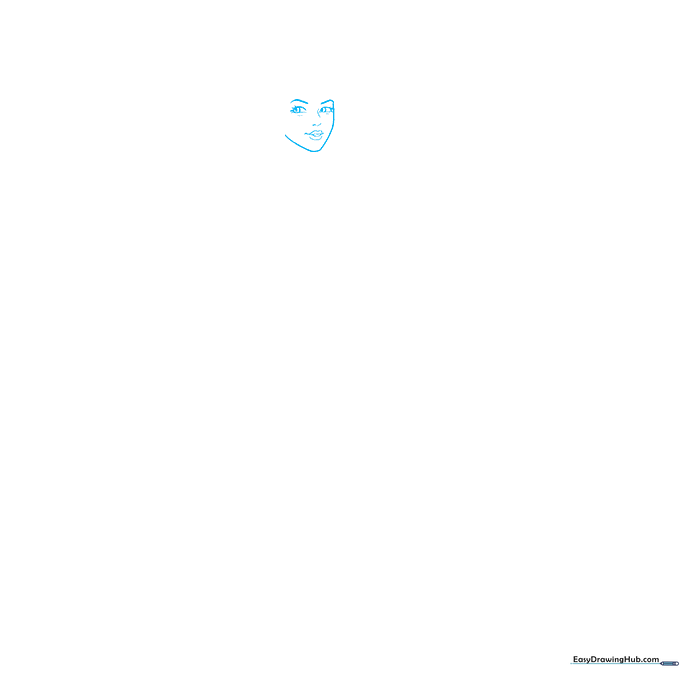
Draw a soft, rounded shape for the face. Add light guidelines for the eyes, nose, and lips. Tip: Keep your pencil pressure light here so you can easily erase the guidelines later.
Step 2: Defining the Hairline
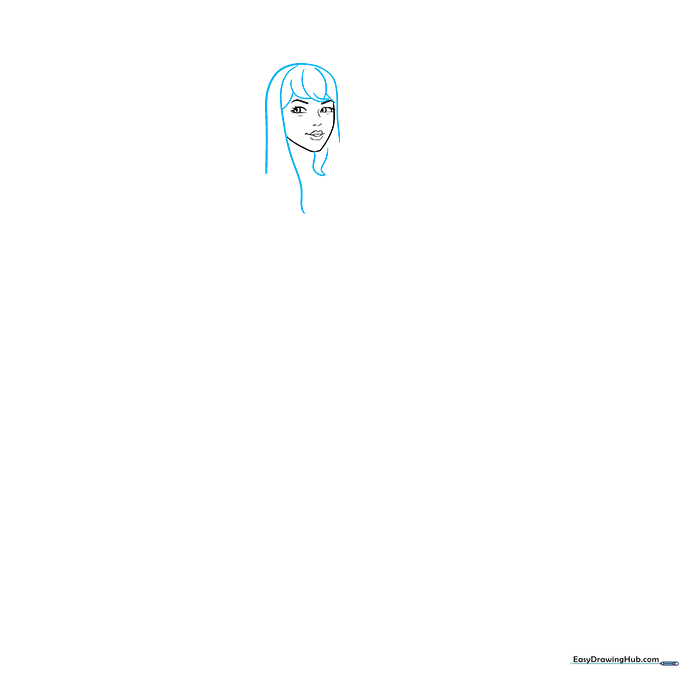
Use long, flowing curved lines to frame the face with hair. Tip: Think of the hair as large shapes rather than individual strands to keep the drawing looking clean.
Step 3: Adding Hair Texture and Shoulders

Add smaller curved lines to the hair to create volume and movement. Extend two lines downward to form the neck and shoulders. Tip: Let your pencil flick off the paper at the ends of the hair lines for a natural look.
Step 4: Drawing the Arms
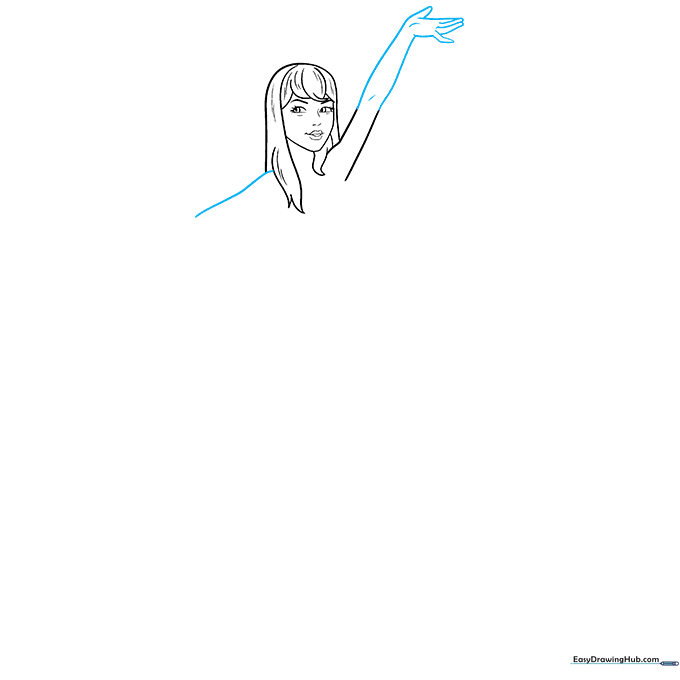
Sketch the arms extending outward. Use overlapping lines to show the bend at the elbow. Tip: Keep the arms slightly curved to make the pose look relaxed and natural.
Step 5: Sketching the Microphone
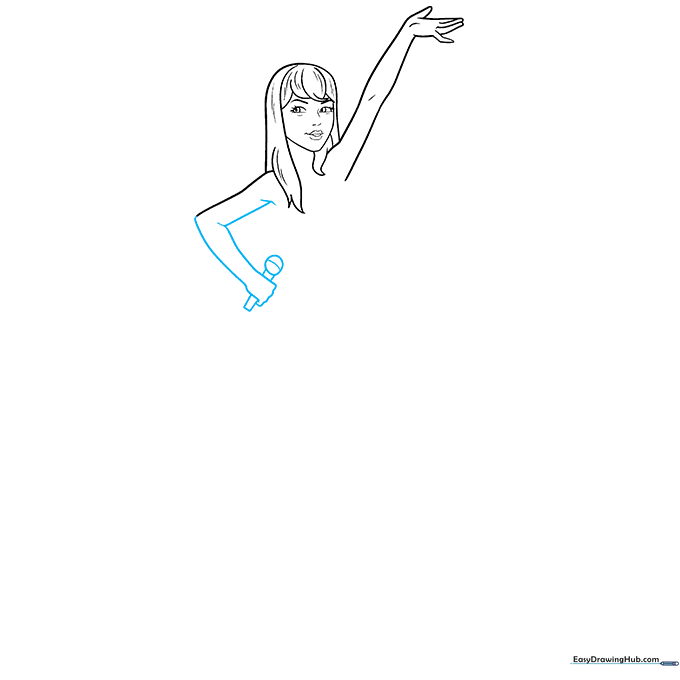
Draw a small circle for the microphone head and a rectangle for the handle. Tip: Use a ruler or the edge of a book if you find it tricky to keep the microphone handle straight.
Step 6: Outlining the Torso
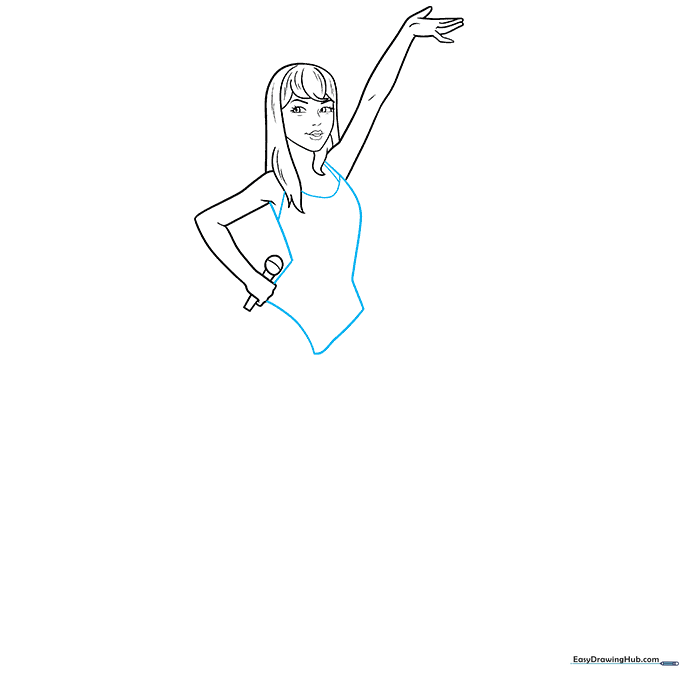
Draw the sides of the torso and the leotard lines. Tip: Think of this as drawing a simple 'V' shape for the neck and curved lines for the sides of the body.
Step 7: Adding Costume Details
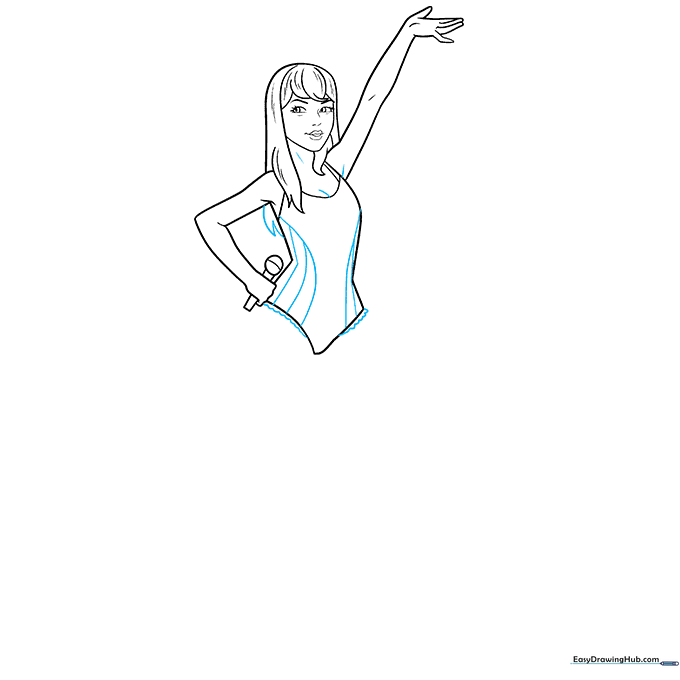
Add decorative lines across the leotard and wavy lines for lace trim. Tip: Use short, quick strokes to create the look of lace texture.
Step 8: Drawing the Legs and Boots
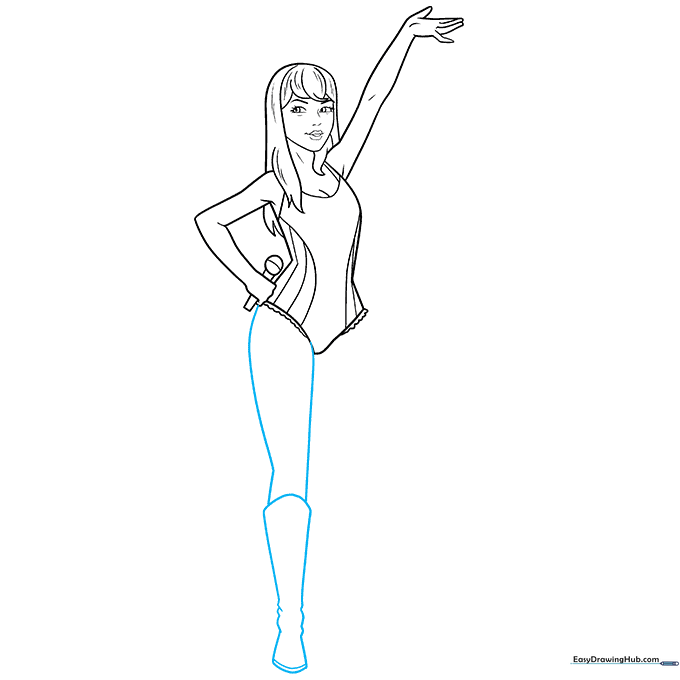
Sketch the legs and the shape of the boots. Add a squiggly pattern near the ankle for detail. Tip: Ensure the legs are symmetrical to keep the drawing balanced.
Step 9: Finalizing the Outline
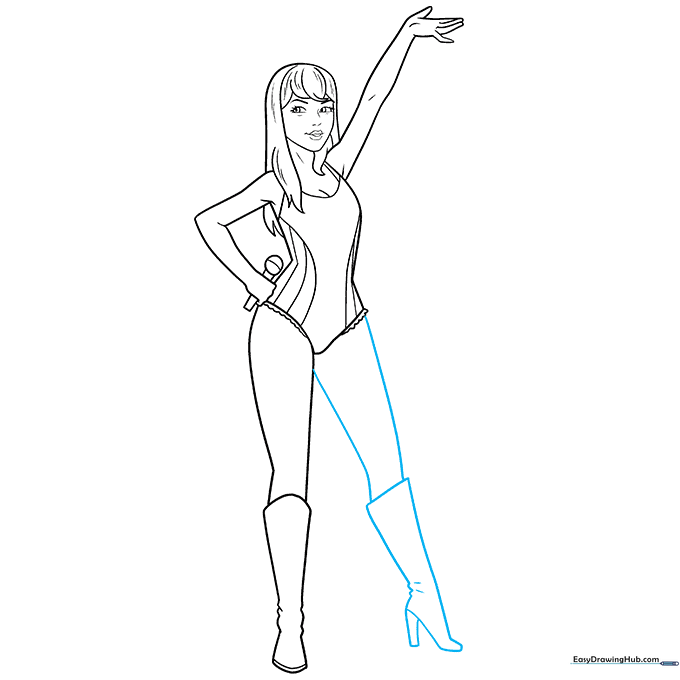
Complete the second boot and add the heel. Erase any extra guidelines. Tip: Use a fine-liner pen to go over your pencil lines for a professional, finished look.
Step 10: Adding Color
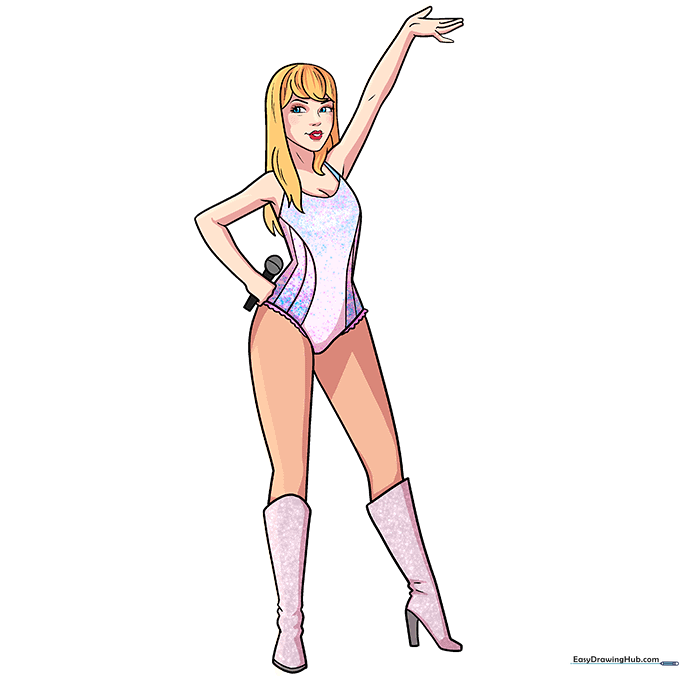
Bring your drawing to life! Use bright pinks for the outfit and blonde tones for the hair. Tip: Use a light touch with your markers to create a 'sparkly' effect by leaving small white gaps.
More Tutorials


