How to Draw Supergirl: Easy 9-Step Superhero Guide
Ready to bring the Girl of Steel to life? This tutorial is perfect for young artists ages 7+ who want to practice character proportions and dynamic movement. Grab your pencil, eraser, and paper to start sketching your own heroic masterpiece.
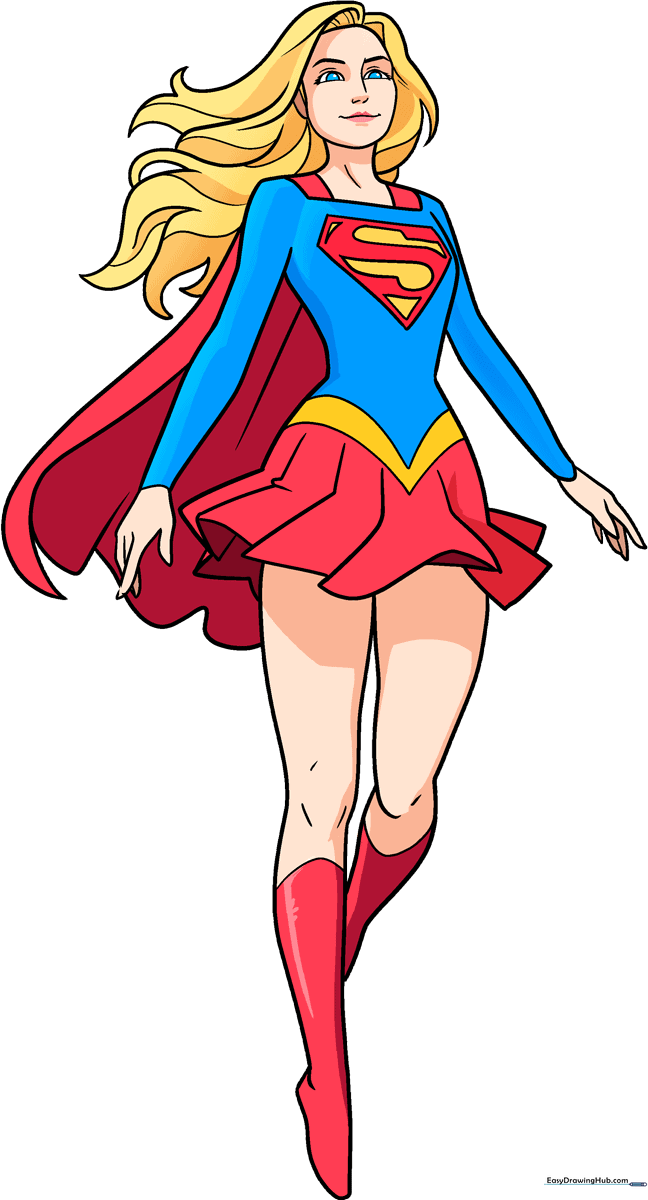
🎯 Final Result
Step-by-Step Instructions
Step 1: Sketching the Face

Lightly sketch the oval for the face and add guidelines for the eyes, nose, and mouth. Teacher's Tip: Keep your pencil pressure soft here; these lines are just a map for your final drawing.
Step 2: Adding the Hair and Neck

Draw the hair flowing in the wind using long, sweeping curved lines. Add the neck and shoulders below the head. Teacher's Tip: Use sharp points at the ends of the hair strands to make them look like they are moving in the breeze.
Step 3: Defining the Hair

Continue adding volume to the hair with overlapping curves. Teacher's Tip: Vary the length of your lines to create a natural, layered look for her hair.
Step 4: Sketching the Torso
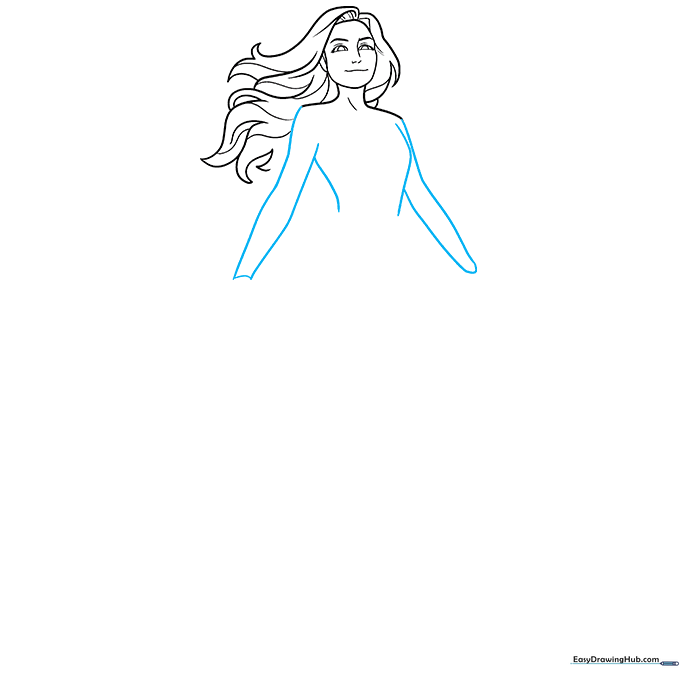
Extend the shoulder lines down to form the arms and torso. Teacher's Tip: Keep the torso lines slightly curved to give her a dynamic, heroic posture.
Step 5: Adding the Logo
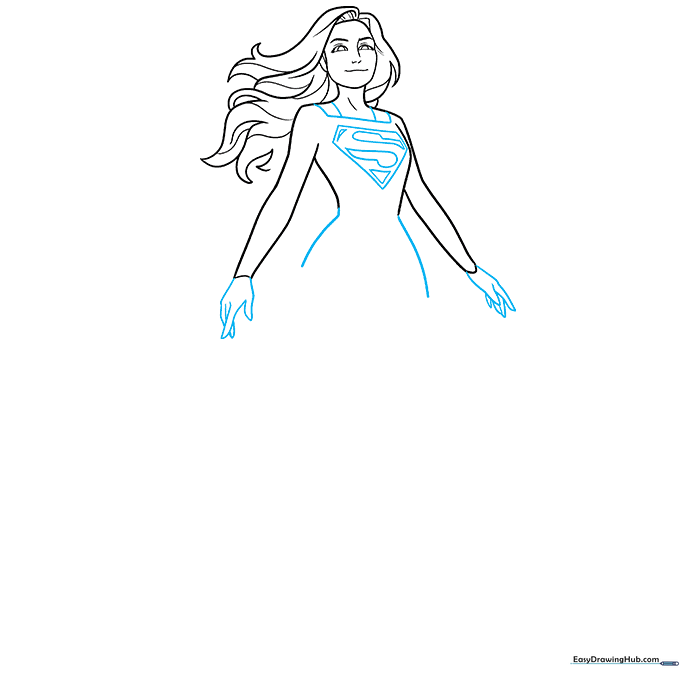
Draw the hands and the iconic 'S' shield on her chest. Teacher's Tip: Draw a pentagon first, then fit the 'S' inside it to ensure the logo is centered.
Step 6: Drawing the Skirt
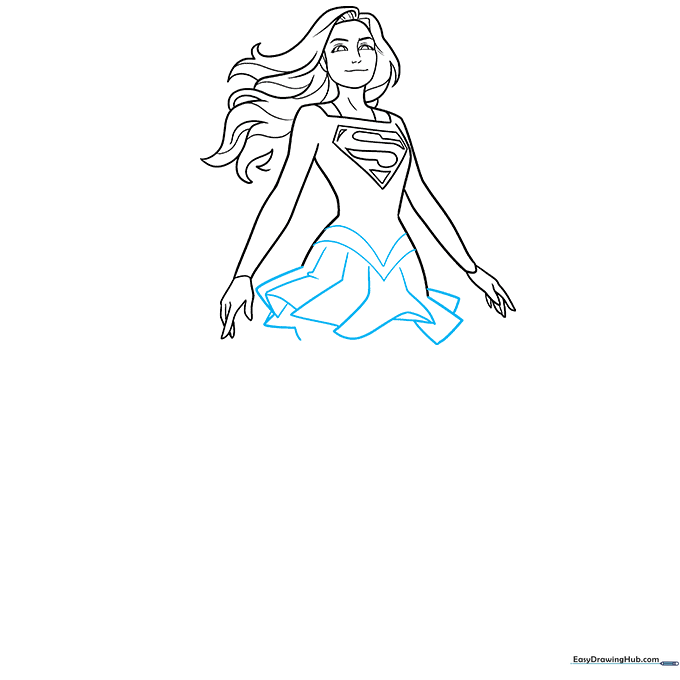
Create a 'V' shape at the waist and add pleats to the skirt. Teacher's Tip: Use short, vertical lines for the pleats to make the fabric look like it has movement.
Step 7: Drawing the Legs

Sketch the legs and feet, ensuring the lines overlap at the ankles. Teacher's Tip: If the legs look too stiff, try curving the lines slightly to show a walking or standing pose.
Step 8: Adding Boot Details
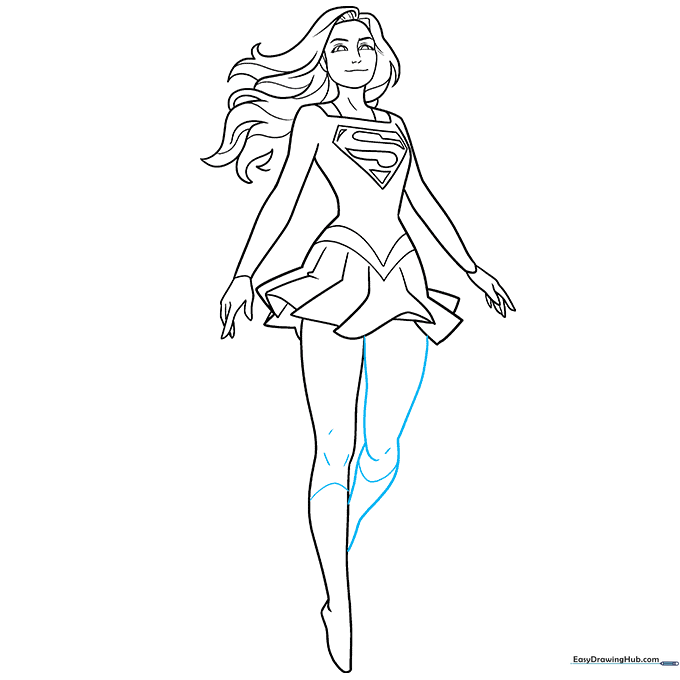
Finish the legs by adding the boot tops and knee contours. Teacher's Tip: A simple horizontal line across the leg creates the illusion of a boot cuff.
Step 9: The Cape
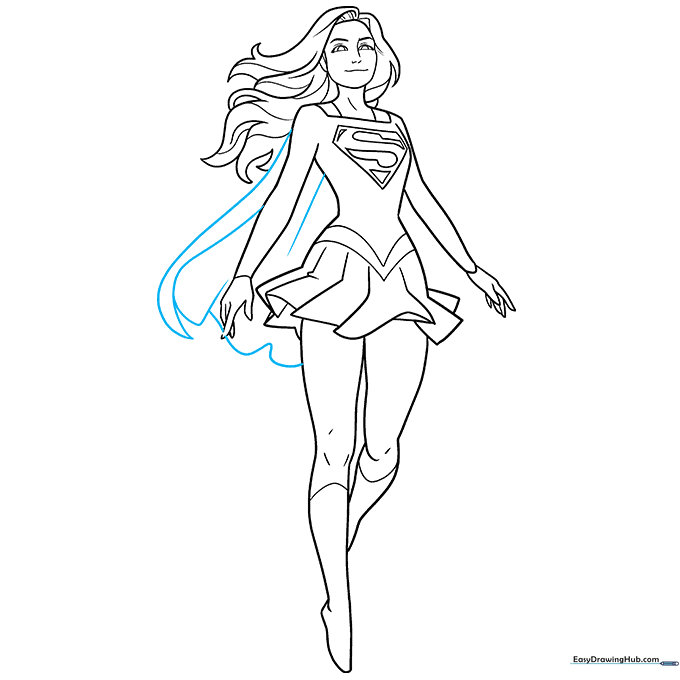
Finally, draw the cape flowing behind her. Teacher's Tip: Use long, sweeping lines to make the cape look like it's catching the wind.
Step 10: Color Your Hero
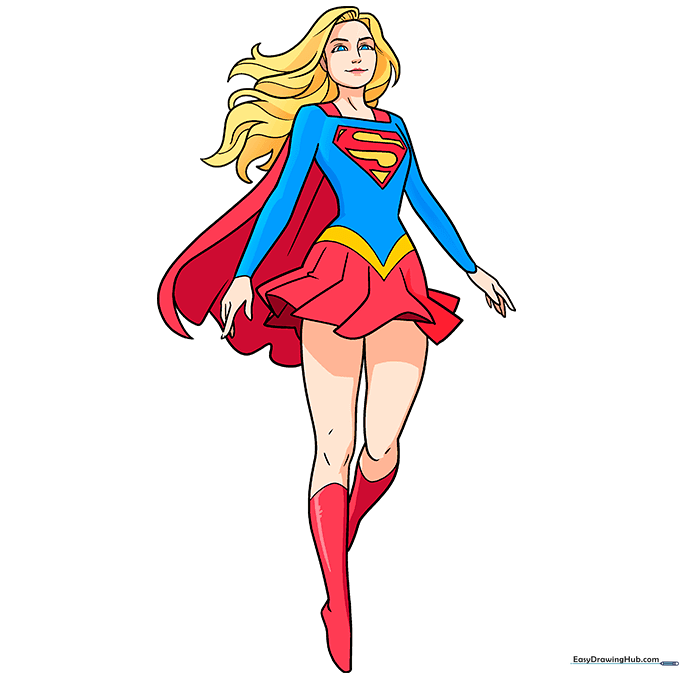
Bring your drawing to life! Use bright blue for the suit, vibrant red for the cape and boots, and yellow for the logo. Teacher's Tip: Use a darker shade of red in the folds of the cape to add depth.
More Tutorials


