How to Draw Spider-Man: Easy 10-Step Guide for Kids
Ready to bring your favorite web-slinger to life? This tutorial is designed for young artists ages 7+ to master Spider-Man’s iconic pose using basic geometric shapes. You will need a pencil, an eraser, and a black marker to complete this heroic character study.
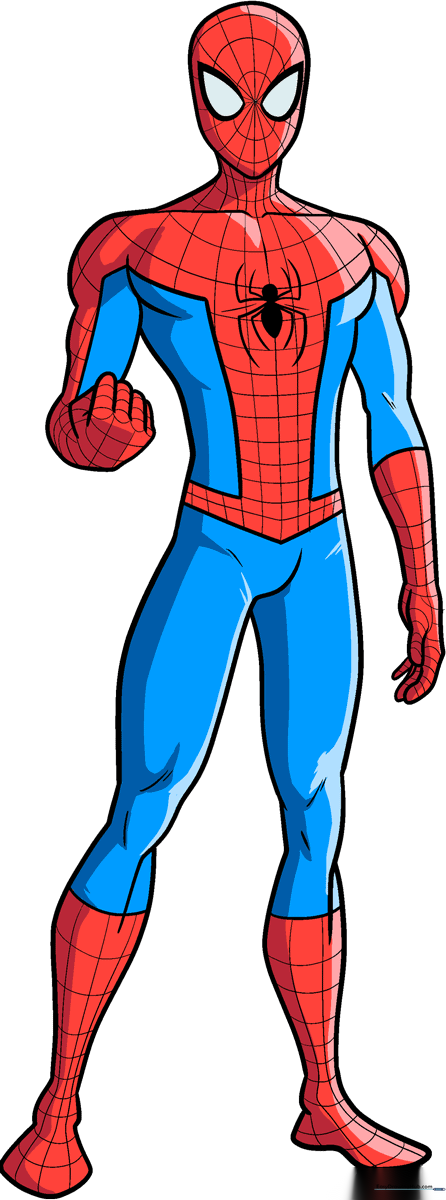
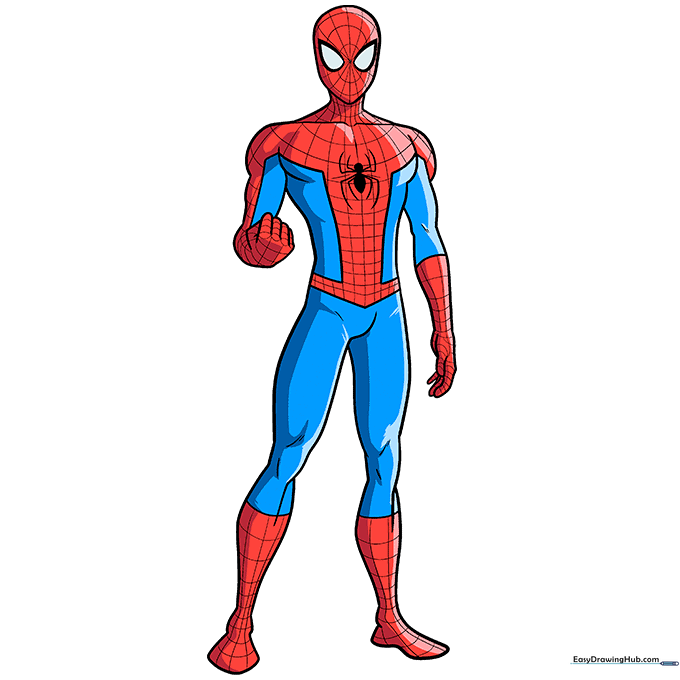
🎯 Final Result
Step-by-Step Instructions
Step 1: Sketching the Head and Eyes
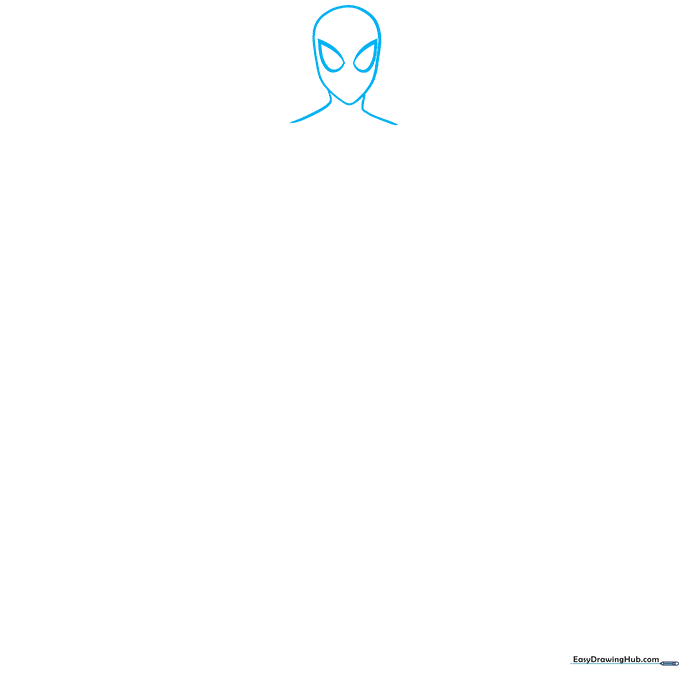
Start by sketching a rounded shape for the head. Add two large, teardrop-shaped outlines for the eyes. Teacher's Tip: Keep your pencil lines very light so you can easily erase the construction lines later.
Step 2: Defining the Shoulders and Torso
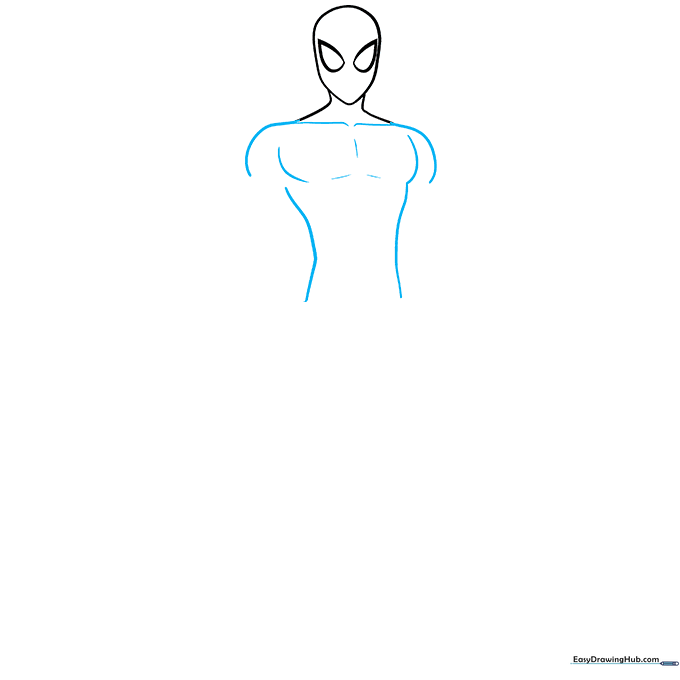
Draw the neck and broad shoulders using smooth, curved lines. Connect these to a tapered torso shape. Teacher's Tip: Think of the torso as an inverted triangle to give him that classic superhero strength.
Step 3: Sketching the First Arm
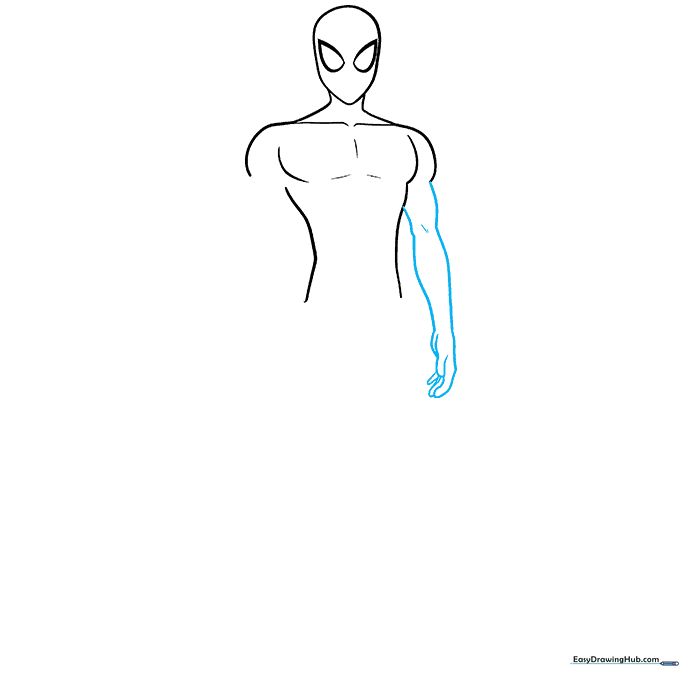
Extend the arm outward using two parallel curved lines. Add the hand with fingers curled. Teacher's Tip: Use short, overlapping lines at the elbow to show the joint bending naturally.
Step 4: Drawing the Second Arm

Draw the second arm bent at the elbow with a closed fist. Teacher's Tip: Make sure the fist is slightly smaller than the head to keep the proportions looking realistic.
Step 5: Shaping the First Leg

Sketch the muscular leg using long, sweeping curves. Ensure the knee is slightly bent. Teacher's Tip: Use a 'C' shape for the calf muscle to give the leg a sense of movement.
Step 6: Adding the Second Leg
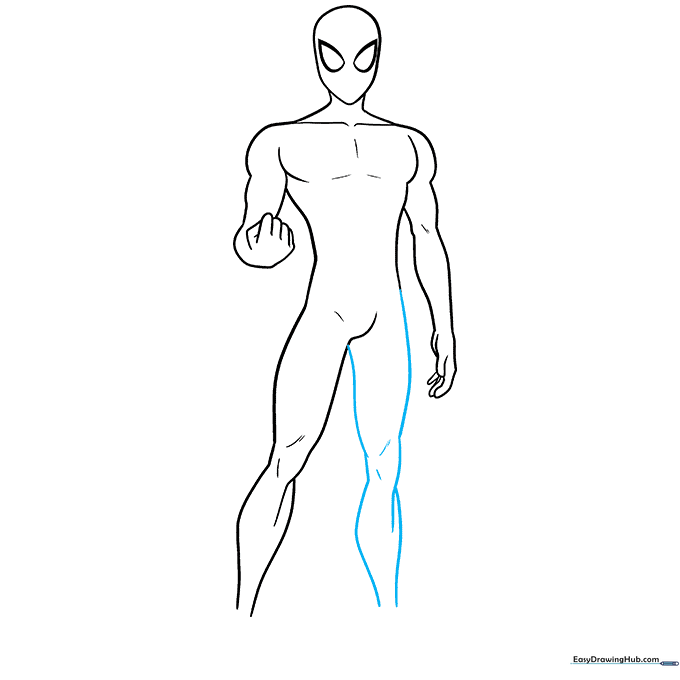
Mirror the leg shape for the second side. Keep the lines fluid to match the first leg. Teacher's Tip: Check that both legs are roughly the same length so your hero doesn't look lopsided!
Step 7: Detailing the Suit
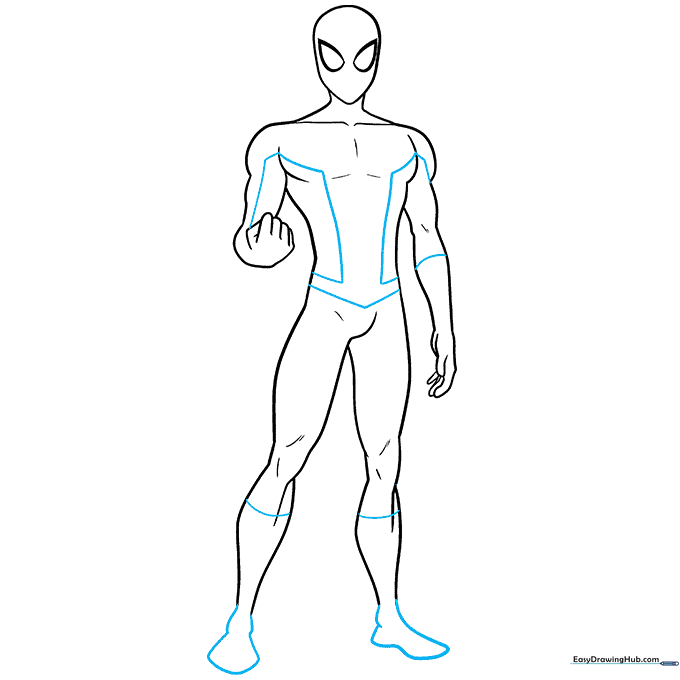
Add rectangular blocks on the torso and arms to define the suit's sections. Draw a 'V' at the waist and define the boot lines. Teacher's Tip: Use a ruler if you struggle with straight lines, but freehand is better for a cartoon look.
Step 8: The Spider Emblem
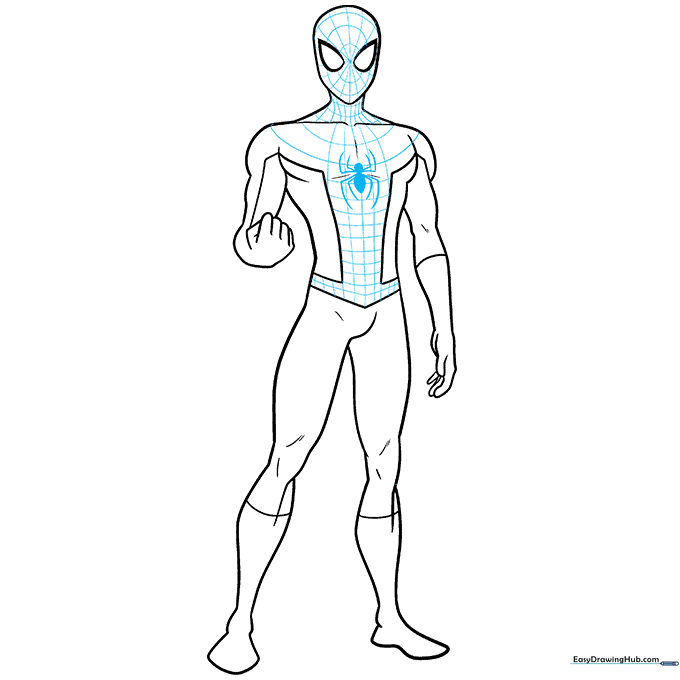
Draw the spider logo on the chest: a small circle for the head and a teardrop for the body. Add eight thin legs. Teacher's Tip: Keep the spider small so it doesn't crowd the chest area.
Step 9: Adding the Web Pattern
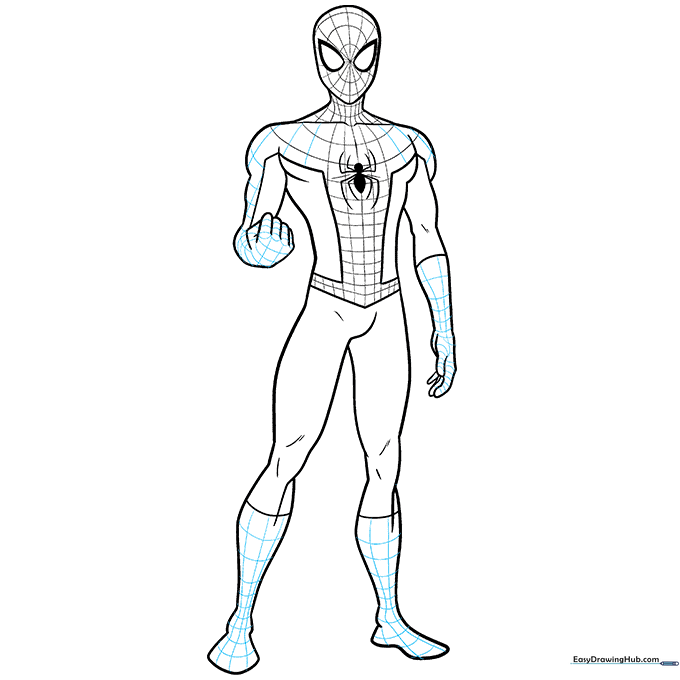
Carefully draw a grid of curved lines across the mask and torso to create the web effect. Teacher's Tip: Start from the center of the face and work outward to keep the pattern symmetrical.
Step 10: Final Coloring
Time to color! Use bright red for the webbed sections and deep blue for the rest of the suit. Teacher's Tip: Use a fine-tip black marker to outline your work before coloring to make the lines pop.
More Tutorials


