How to Draw Sobble: Easy 10-Step Pokémon Tutorial
Bring the water-type Pokémon Sobble to life with this beginner-friendly drawing guide. Designed for ages 5 and up, this activity requires only a pencil, eraser, and paper to master Sobble’s iconic, shy expression. Follow these steps to build confidence in your character sketching skills.
🎯 Final Result

Step-by-Step Instructions
Step 1: Sketching the Head Shape

Draw a long, curved line to form the head. It should look like an upside-down teardrop that is open at the bottom. Teacher's Tip: Keep your pencil pressure light so you can easily adjust the shape later if it looks a bit lopsided.
Step 2: Drawing the Expressive Eyes

Draw two large ovals for the eyes. Inside each, add smaller ovals for the pupils and a tiny circle for the highlight. Teacher's Tip: Adding that tiny white highlight is the secret to making Sobble look 'alive' and cute!
Step 3: Adding Cheeks and Mouth

Sketch two partial ovals under the eyes for cheeks, and a large oval for the mouth. Add a curved line inside for the tongue and two dots for nostrils. Teacher's Tip: Keep the mouth shape soft and rounded to match Sobble's gentle personality.
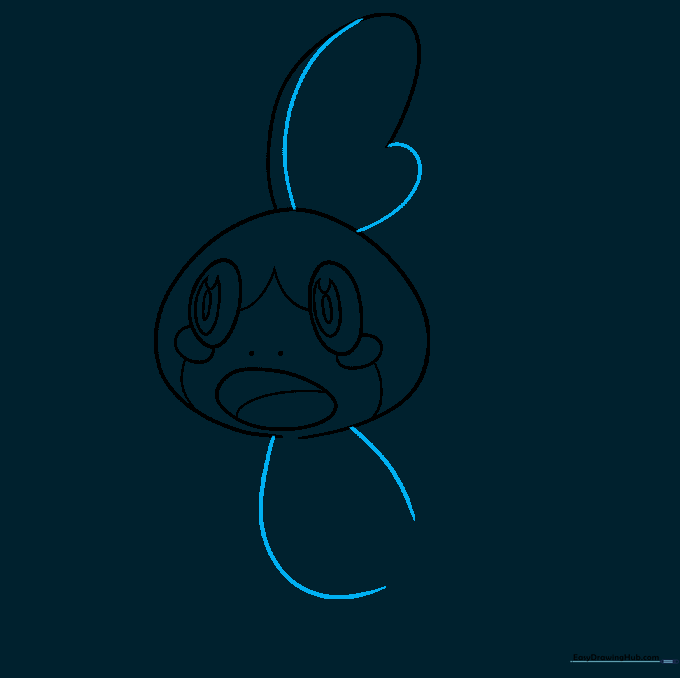
Step 4: The Teardrop Mark and Fin

Draw a teardrop shape between the eyes, then extend a long, graceful curved line from the top of the head to start the fin. Teacher's Tip: Use a fluid motion with your wrist to get that smooth, curved line for the fin.
Step 5: Completing the Fin and Body
Close the fin shape with a curved line and contour the front. Then, draw two curved lines extending down from the head to form the body. Teacher's Tip: Make the body lines slightly wider at the bottom to give Sobble a sturdy stance.
Step 6: Adding the Belly and Arm

Draw a round shape on the chest and belly. Extend two curved lines for the arm, ending in two 'U' shaped digits for the hand. Teacher's Tip: If the arm looks too stiff, try curving it slightly to make it look more natural.
Step 7: Drawing the Tail and Leg

Enclose a half-circle for the tail. Add two curved lines for the leg and a peanut-shaped foot. Teacher's Tip: The 'peanut' shape is a great trick for drawing cartoon feet—it keeps them simple and balanced.
Step 8: Detailing the Tail

Add a spiral-shaped line inside the tail to give it texture. Teacher's Tip: Start the spiral from the center and work your way out to keep the spacing even.
Step 9: Finishing the Limbs
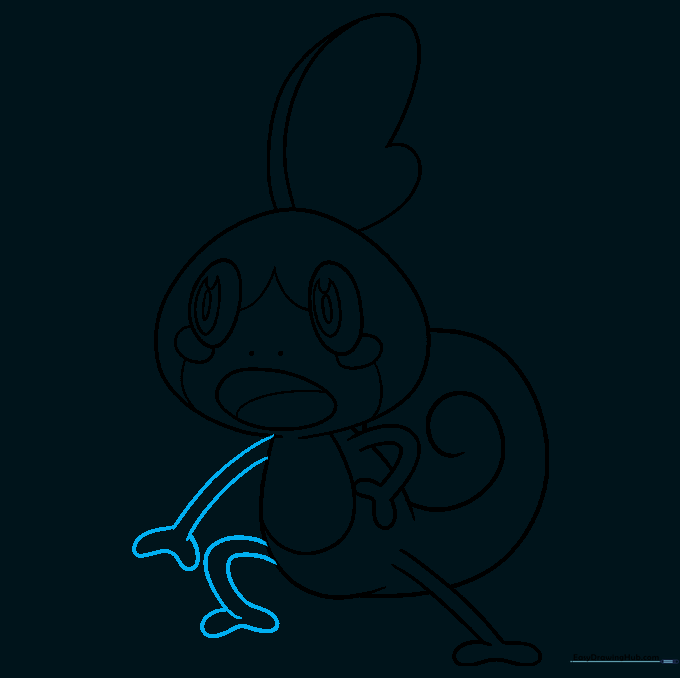
Draw the remaining arm and leg using the same curved line technique as before. Teacher's Tip: Check that the limbs look proportional to the body size before finalizing your lines.
Step 10: Adding Color

Bring your drawing to life! Use light blue for the body, darker blue for the markings, and a bright yellow for the fin. Teacher's Tip: Use light, circular strokes when coloring to get a smooth, even look without streaks.
More Tutorials


