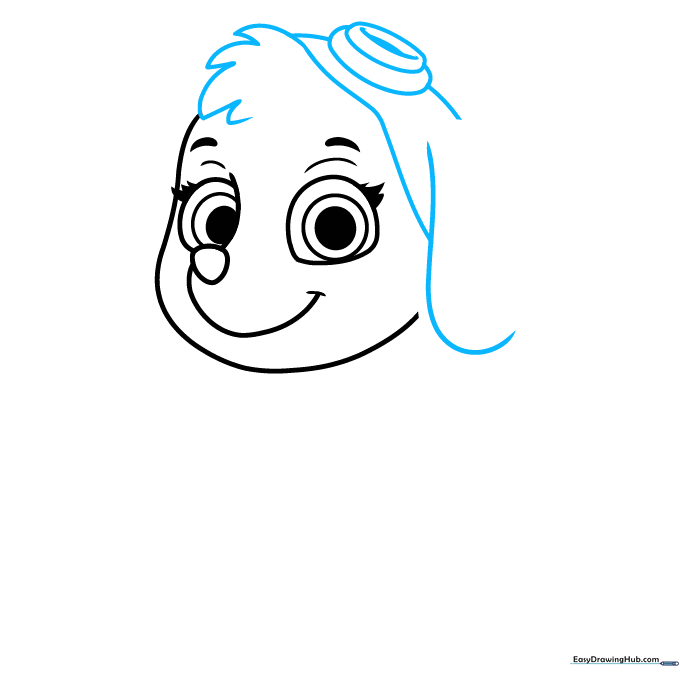
How to Draw Skye from Paw Patrol: Easy 10-Step Guide
Ready to take to the skies? This tutorial is perfect for young PAW Patrol fans ages 5 and up. You will only need a pencil, an eraser, and some paper to bring Skye to life. Follow these simple steps to master her signature goggles and aviator look while building your confidence as an artist.
🎯 Final Result
Step-by-Step Instructions
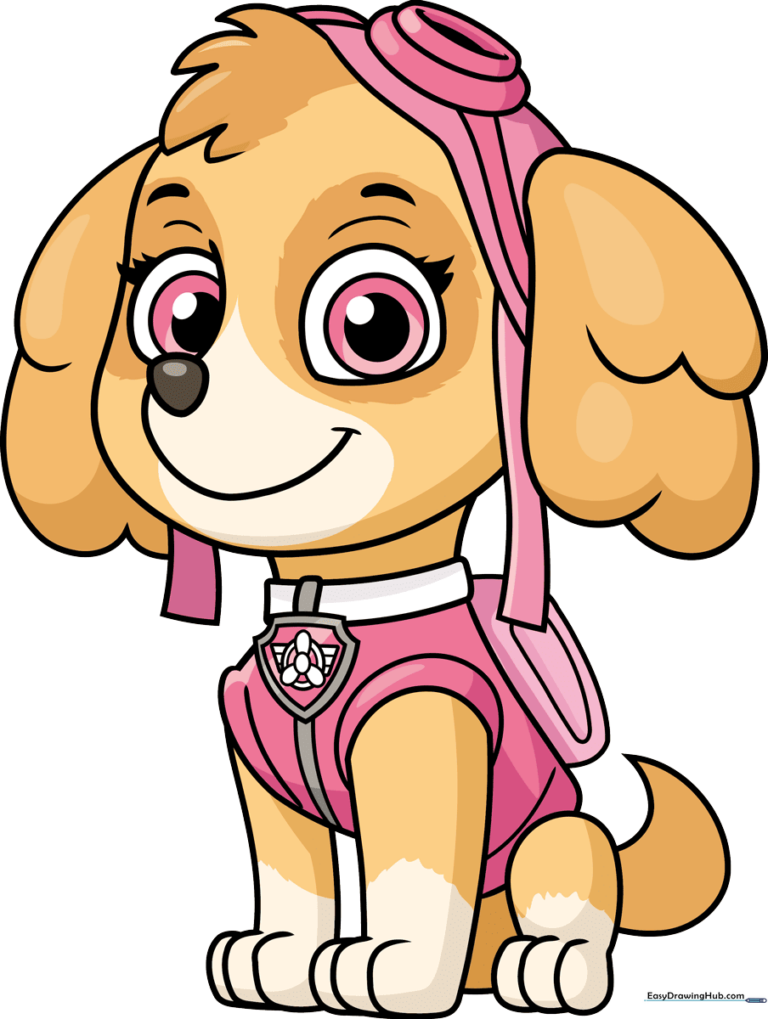
Step 1: Sketching the Nose and Eyes
Start by drawing a small, rounded triangle for Skye's nose. From there, draw two curved lines to define her snout. Add three circles of decreasing size for the eye, shading the smallest one to create her pupil. Tip: Keep the eye circles centered to give her that friendly, alert look.
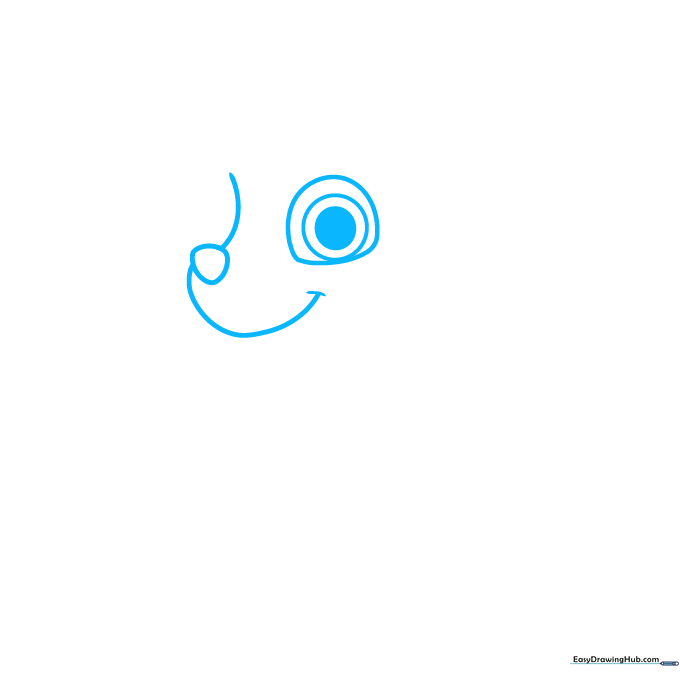
Step 2: Defining the Face
Outline the side of her face with a long, smooth curve. Add the second eye using the same three-circle method as before. Use bold, curved lines to draw her eyebrows and eyelashes, which give Skye her expressive, happy personality. Tip: Draw the lashes with a quick flick of the wrist for a natural look.
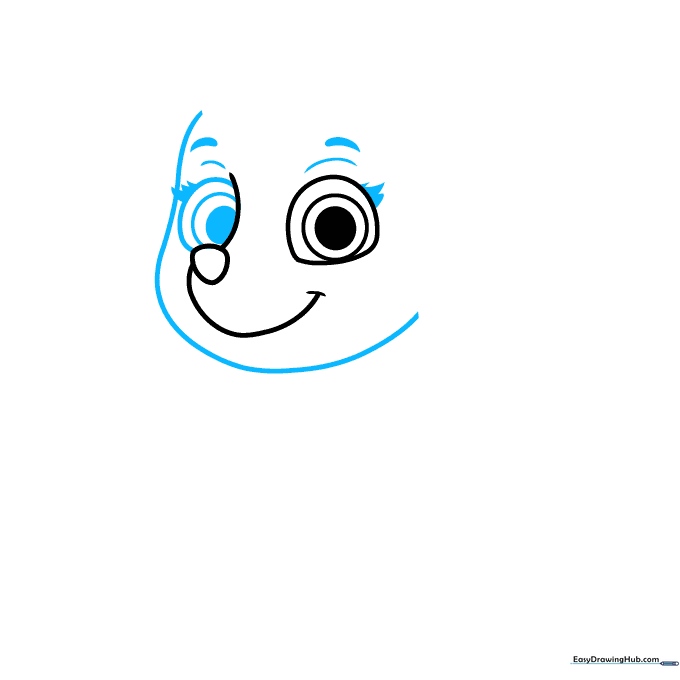
Step 3: Adding Goggles and Fur
Draw a tuft of fur on top of her head using zigzagging curved lines. Next, sketch the goggle eyepiece by drawing two overlapping ovals. Tip: Make sure the goggle lens looks thick by drawing a smaller oval inside the first one.
Step 4: Completing the Goggles
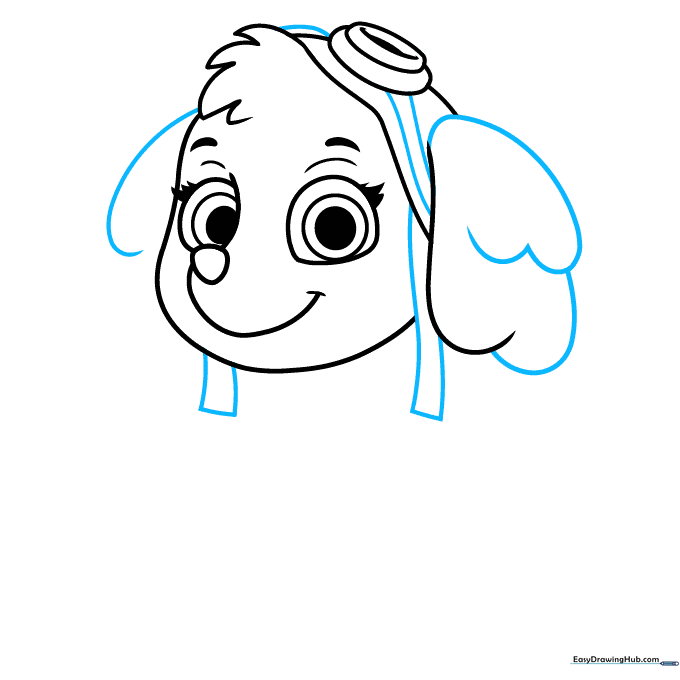
Finish the first ear and start the second one using overlapping curves. Connect the goggles with straps across her head and draw the second circular lens. Tip: Keep the straps parallel to make them look like they are wrapping around her head.
Step 5: Neck and Vest
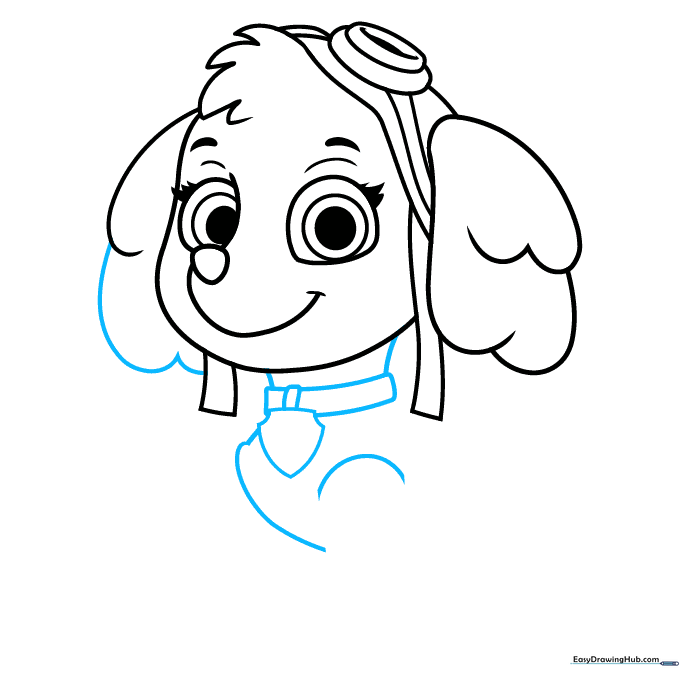
Draw two short lines for the neck, followed by a three-part collar. Add the shield-shaped pup tag in the center. Start sketching the vest sleeves. Tip: The pup tag is the center of her uniform, so take your time to make it symmetrical.
Step 6: Drawing the Legs
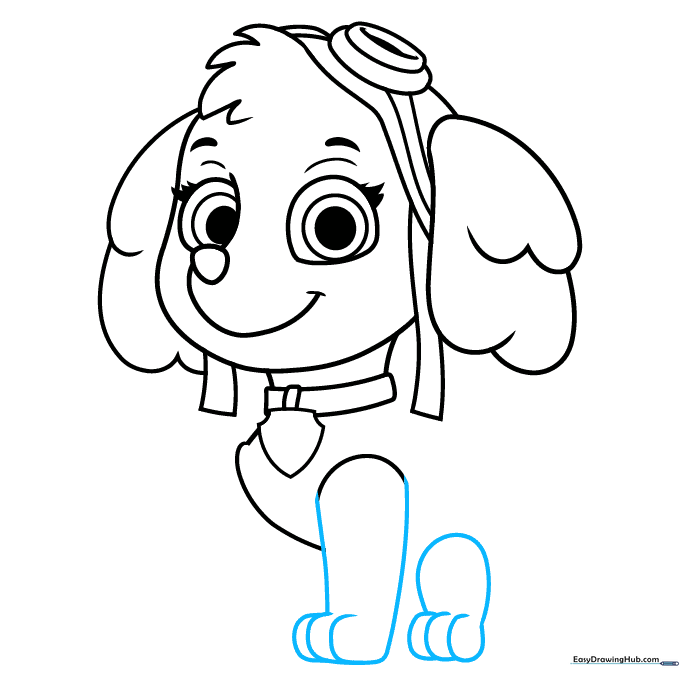
Use overlapping curved lines to outline the front and back legs. Keep the lines soft to show the rounded shape of a puppy's paws. Tip: Think of the legs as soft cylinders.
Step 7: Finishing the Vest
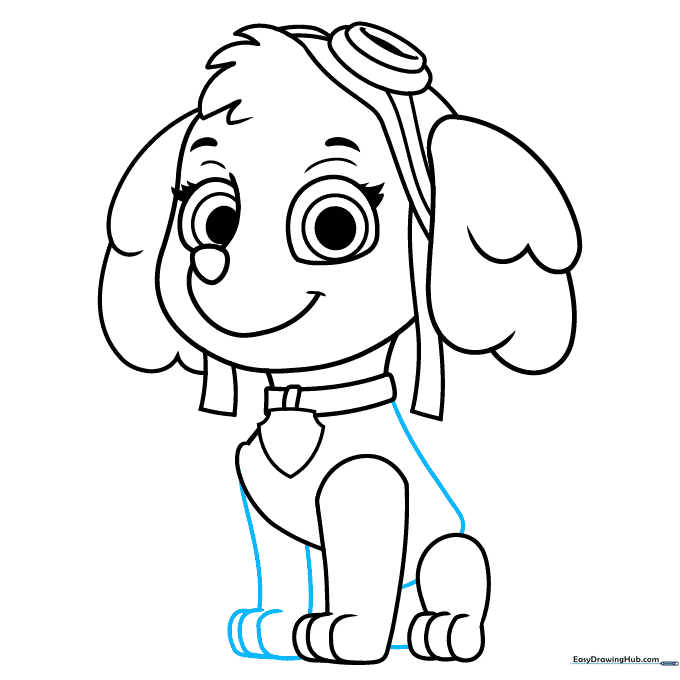
Complete the remaining leg and refine the vest outline with smooth, continuous curves. Tip: Ensure the vest looks like it fits snugly around her body.
Step 8: Tail and Pup Pack
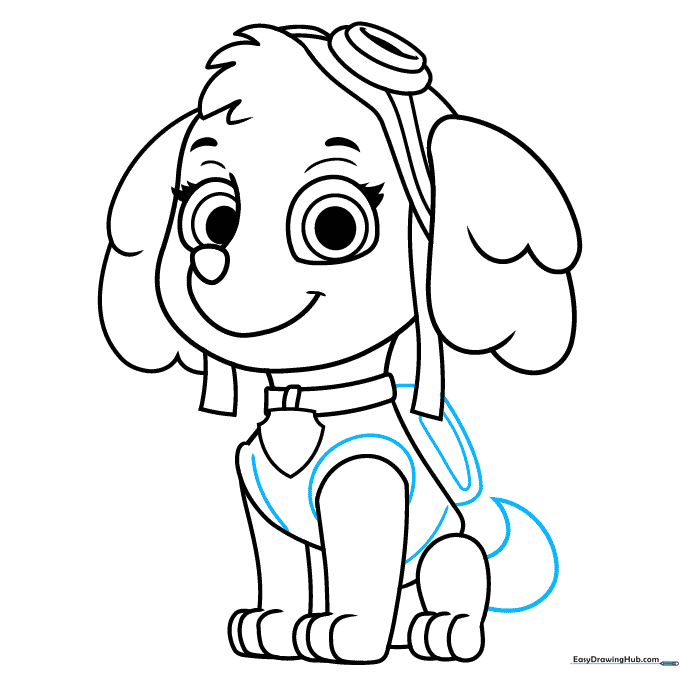
Draw a tail by connecting two curved lines to a point. Add the Pup Pack on her back using a rounded shape. Tip: The Pup Pack is a key part of her gear, so make it look sturdy and attached to her vest.
Step 9: Final Details
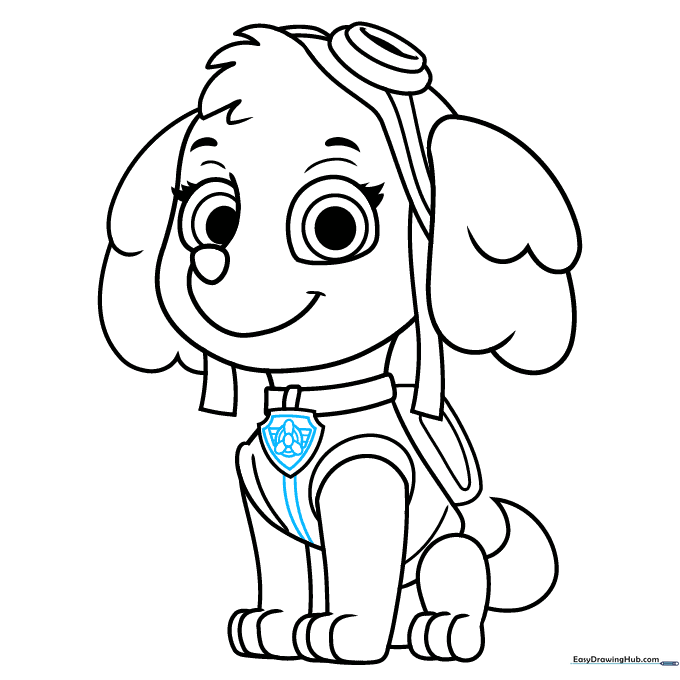
Add the final details to the pup tag, such as the propeller logo, using small circles and rectangles. Tip: Use a sharp pencil for these small details to keep them clean.
Step 10: Color Your Masterpiece

Time to bring Skye to life! Use light brown for her fur, cream for her snout and paws, and vibrant pink for her vest and goggles. Tip: Use light pressure with your colored pencils to blend the colors smoothly.
More Tutorials


