How to Draw Scooby-Doo: Easy 10-Step Cartoon Guide
Ready to solve some mysteries? This tutorial is perfect for young artists ages 7+ who want to capture everyone’s favorite Great Dane. You’ll just need a pencil, an eraser, and some paper to bring this iconic cartoon character to life. Follow along to master his lanky proportions and expressive face.
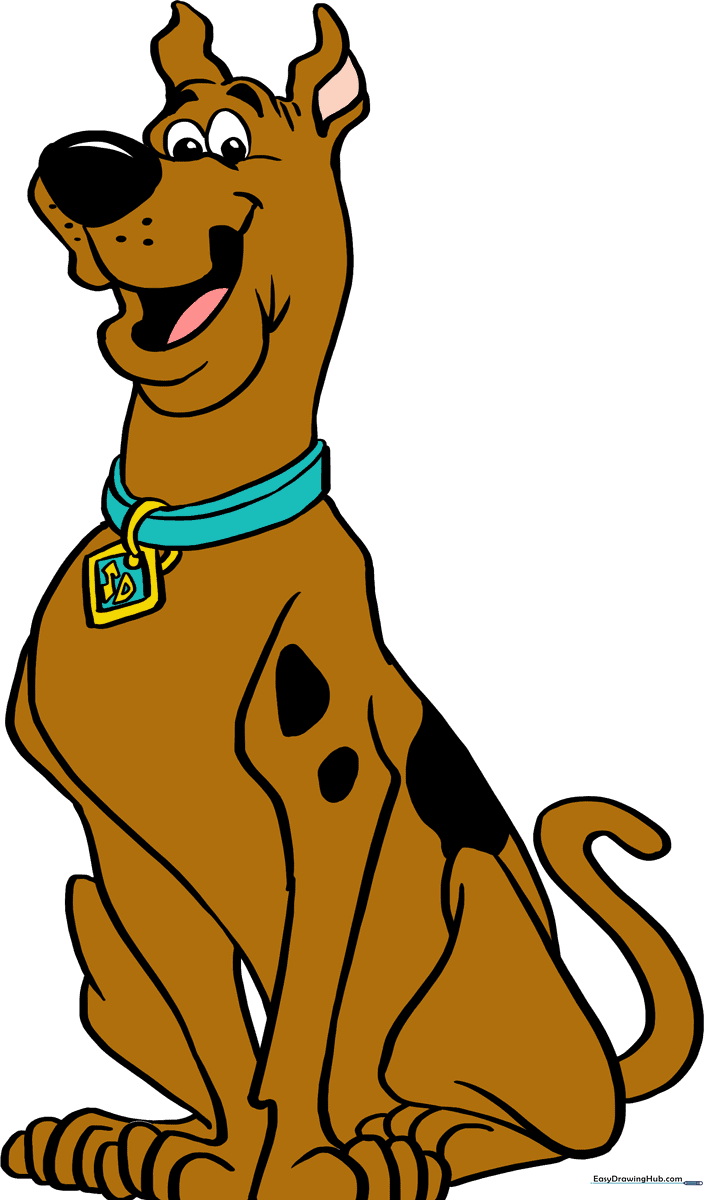
🎯 Final Result
Step-by-Step Instructions
Step 1: Sketching the Snout and Eyes

Start by drawing Scooby's snout. Sketch a curved, inverted triangle for the nose, then add curved lines for his upper lip. Place two ovals above the snout for his eyes. Teacher's Tip: Draw the pupils as small circles within circles; shading them in now gives him that classic, curious Scooby expression.
Step 2: Defining the Head and Ears

Use curved lines to define his open mouth, tongue, and lower jaw. Add three small lines at the jaw corner to show skin folds. Outline the forehead, floppy ears, and neck. Teacher's Tip: Keep the ear shapes rounded to capture his friendly, goofy personality.
Step 3: Adding the Iconic Collar

Complete the neck with a curved line and add his signature collar. Draw a diamond shape for his name tag and write 'SD' inside. Teacher's Tip: Make the collar slightly wider than the neck to give it a cartoonish, loose fit.
Step 4: Sketching the Back and Hip
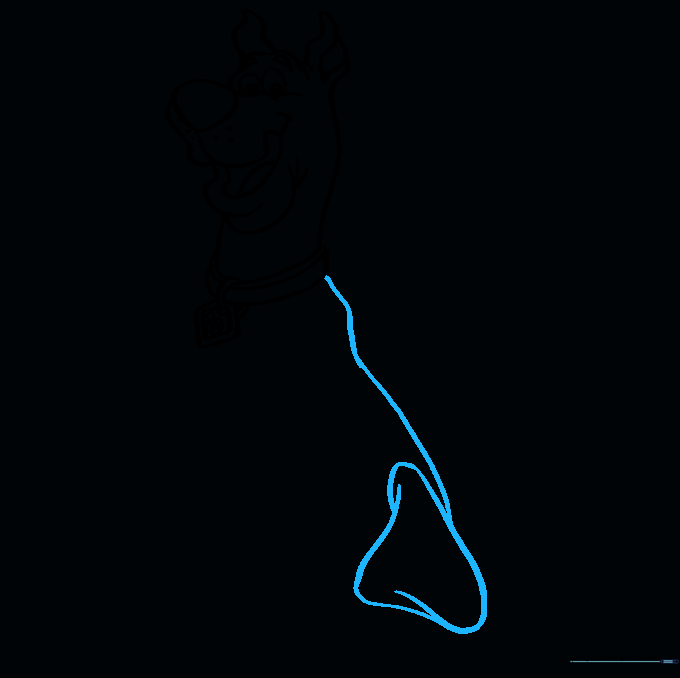
Use a long, sweeping curved line to outline Scooby's back. At the base, sketch the hip and upper leg using overlapping curves to create an irregular triangle shape. Teacher's Tip: Scooby is lanky, so don't be afraid to make these lines long and graceful.
Step 5: Drawing the Tail

Extend an 'S' shaped line from the hip and double it back to form his thin, expressive tail. Teacher's Tip: A slight curve at the end of the tail adds movement to your drawing.
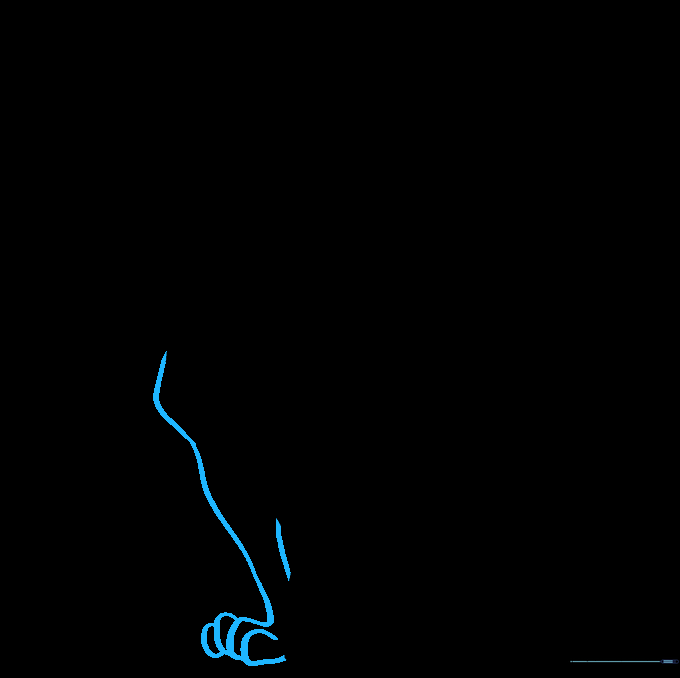
Step 6: Adding the Front Legs
Draw the forelegs with long, curved lines, focusing on the sharp angles at the shoulders and ankles. Use 'C' shapes for the toes. Teacher's Tip: Ensure the legs look slightly knobby to match his cartoon anatomy.
Step 7: Connecting the Chest and Stomach
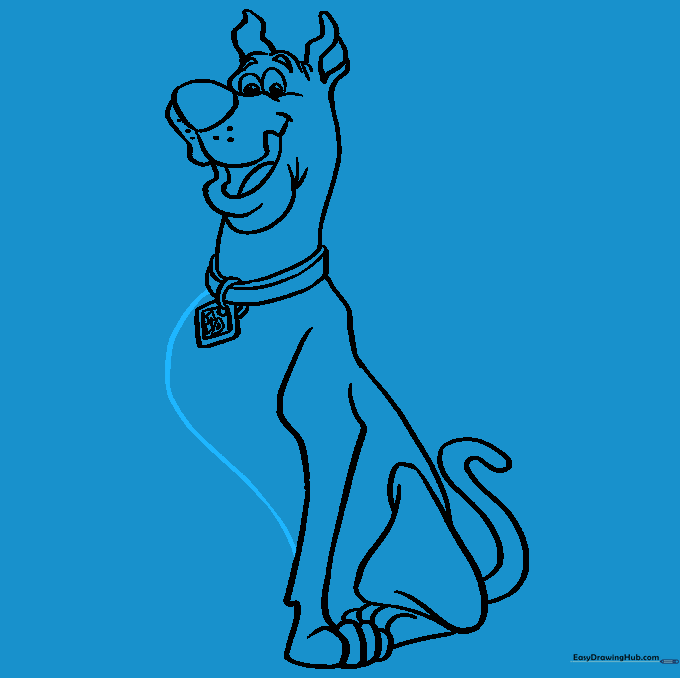
Connect the collar to the foreleg with a long, smooth curve to form his chest and belly. Teacher's Tip: This line should be a continuous, flowing curve to show his lean frame.
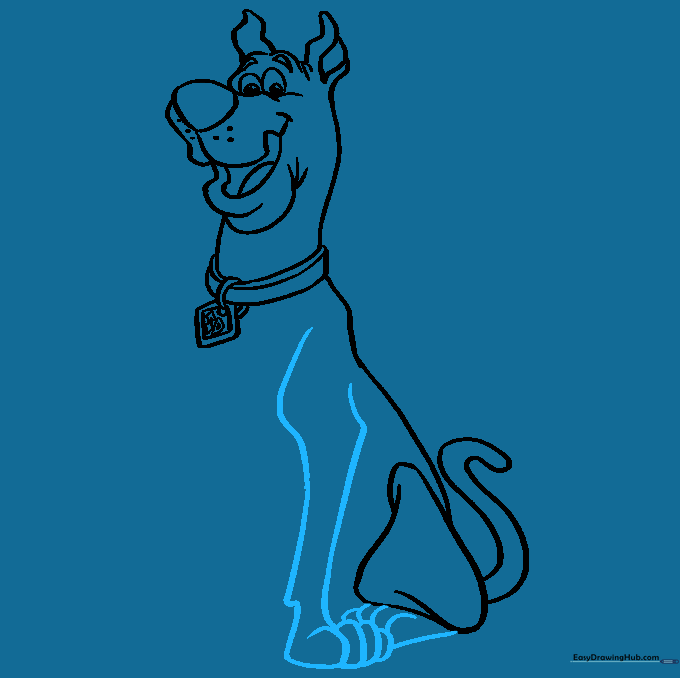
Step 8: Refining the Foreleg
Add detail to the second foreleg using curved lines. Enclose the foot with 'C' shapes for the toes. Teacher's Tip: Make sure the paws align with the first leg to keep the perspective consistent.
Step 9: Finalizing the Rear Leg and Spots
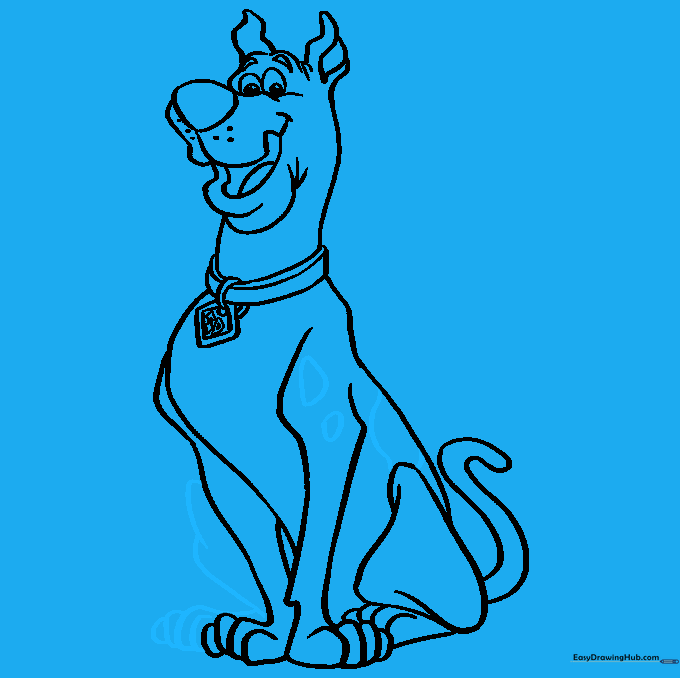
Draw the rear leg and paw using curved lines. Add a few irregular spots on his back and shoulder. Teacher's Tip: Vary the size of the spots to make them look more natural.
Step 10: Adding Color
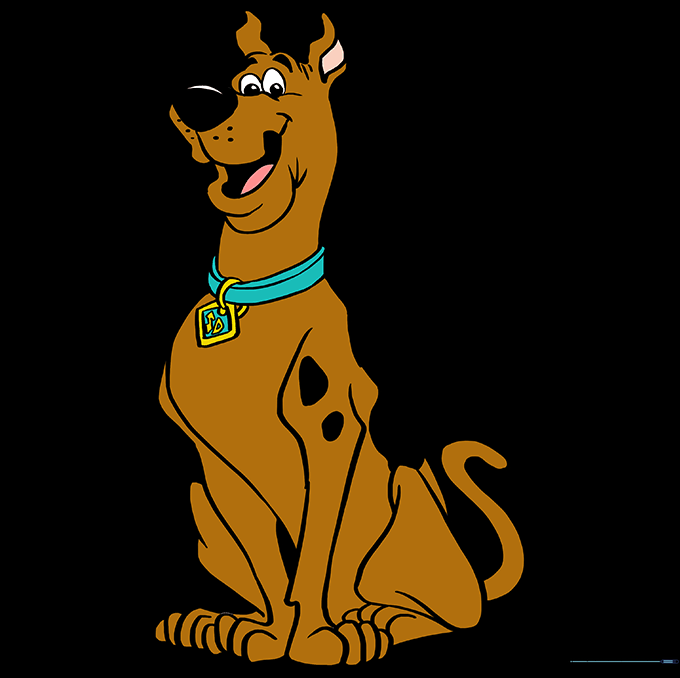
Bring your Scooby-Doo to life with color! Use a warm brown for his fur, black for his spots, and a vibrant cyan blue for his collar. Teacher's Tip: Use light, circular motions with your colored pencils to get an even, smooth coat.
More Tutorials


