How to Draw Sans from Undertale: Easy 10-Step Guide
Bring the iconic skeleton from Undertale to life with this beginner-friendly drawing guide. Designed for artists ages 6 and up, this activity requires only a pencil, paper, and an eraser. Follow these steps to master Sans's signature grin and relaxed posture while building your character-design skills.
🎯 Final Result

Step-by-Step Instructions
Step 1: Sketching the Skull Shape

Start by drawing the skull. Use two overlapping curved lines to create a slightly pinched, rounded shape. Teacher's Tip: Keep your pencil pressure light so you can easily erase the overlapping lines later to refine the jawline.
Step 2: Adding the Eye Sockets

Draw two irregular, rounded shapes for the eye sockets. Add a small, shaded circle inside each to represent his pupils. Teacher's Tip: Make the eyes slightly asymmetrical to give him that classic, mischievous Sans expression.
Step 3: Defining the Nose and Grin

Add a small, shaded triangle for the nose. For the mouth, draw two long, wide-curved lines connected at the ends, then add vertical lines to create the teeth. Teacher's Tip: Ensure the teeth are evenly spaced to keep his smile looking clean and intentional.
Step 4: Sketching the Hoodie and Neck

Use curved lines to outline the neck area and the opening of his signature hoodie. Teacher's Tip: Focus on the folds of the fabric near the neck to give the drawing a sense of depth and realism.
Step 5: Drawing the Arms and Jacket
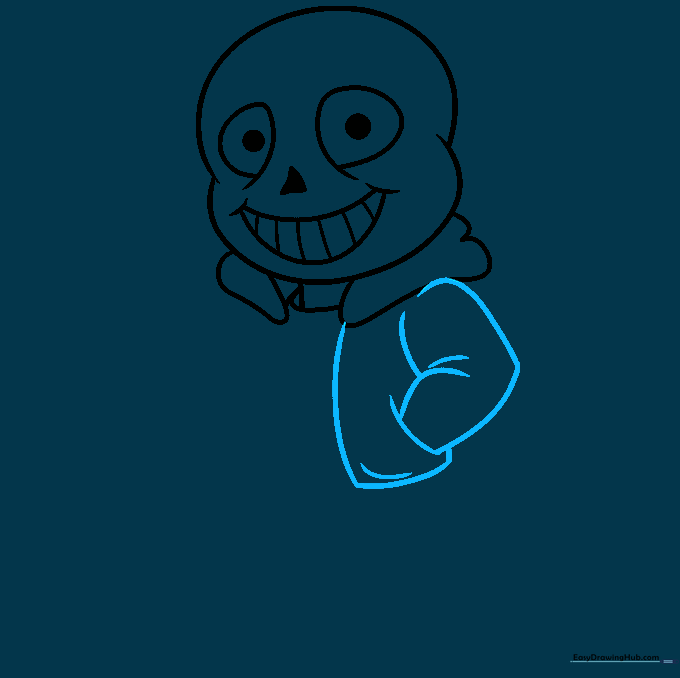
Draw the arms tucked into the jacket pockets using simple curved lines. Outline the rectangular shape of the jacket body. Teacher's Tip: Keep the lines for the arms slightly rounded to show he is relaxed with his hands in his pockets.
Step 6: Refining the Jacket Details
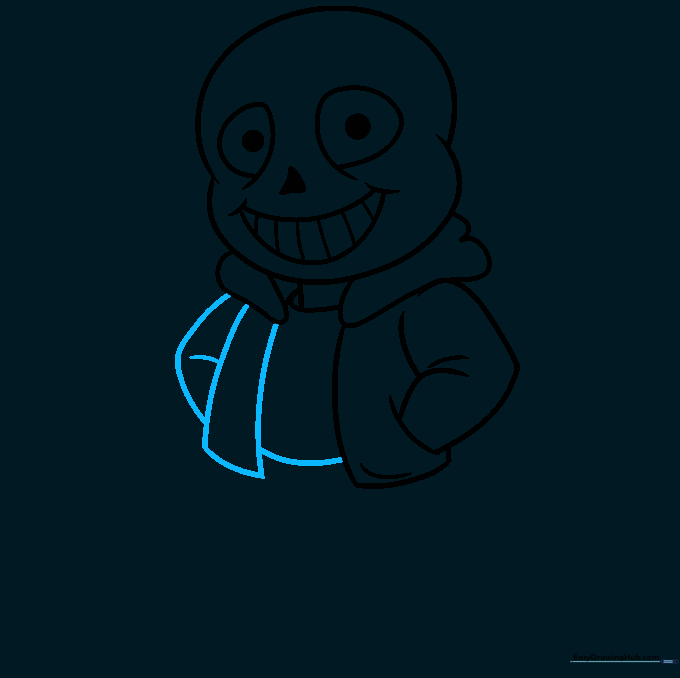
Add final details to the jacket, including the hem and elbow bends. Teacher's Tip: Use a slightly darker line for the jacket edges to make the character pop against the background.
Step 7: Sketching the Pants
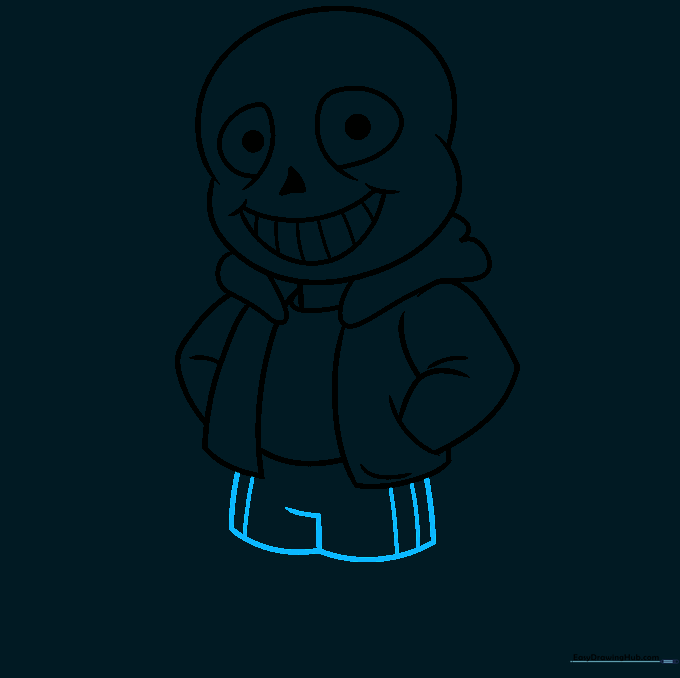
Draw the pants using simple curved lines and add vertical bands to indicate the stripes. Teacher's Tip: Keep the pant legs loose and baggy to match the character's casual style.
Step 8: Adding the First Slipper
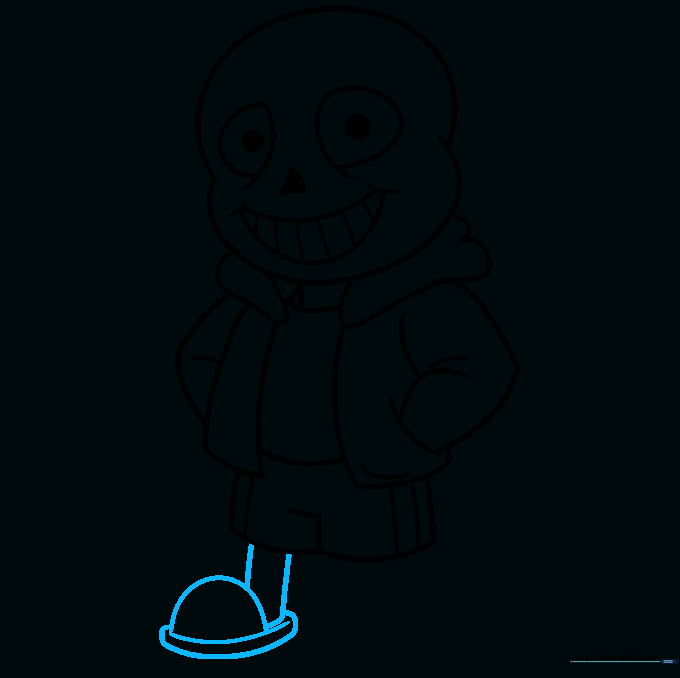
Extend the leg lines downward and draw the slipper shape at the bottom. Teacher's Tip: Slippers are rounded and soft, so avoid sharp corners when drawing the toe area.
Step 9: Completing the Second Slipper
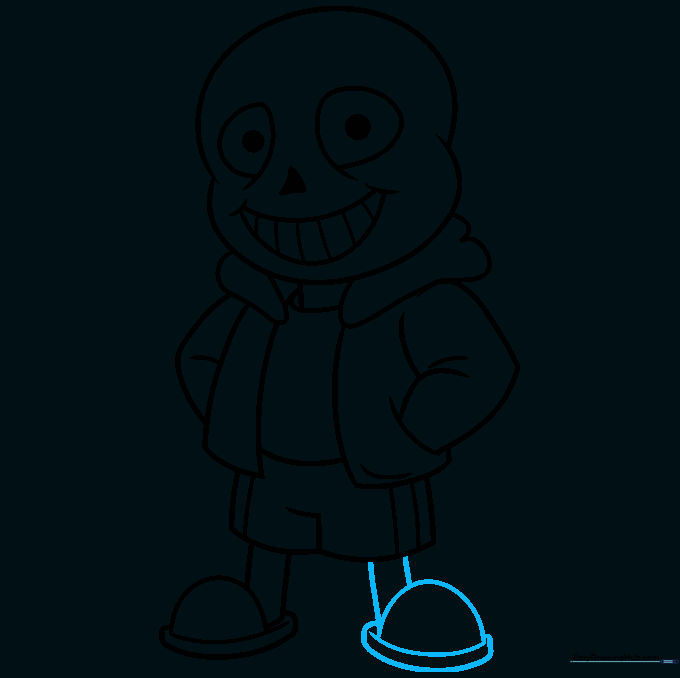
Mirror the first slipper on the other leg to complete the lower body. Teacher's Tip: Check that both slippers are at the same height so your character looks balanced.
Step 10: Adding Color

Bring your drawing to life with color! Use blue for the jacket, white for the skull, and black for the pants stripes. Teacher's Tip: Use light, even strokes with your colored pencils to keep the colors smooth and vibrant.
More Tutorials


