How to Draw a Salad: Easy 10-Step Guide for Kids
Ready to create a masterpiece that looks good enough to eat? This tutorial is perfect for young artists ages 5 and up. All you need is a pencil, an eraser, and some colored pencils to bring this healthy, vibrant salad bowl to life.
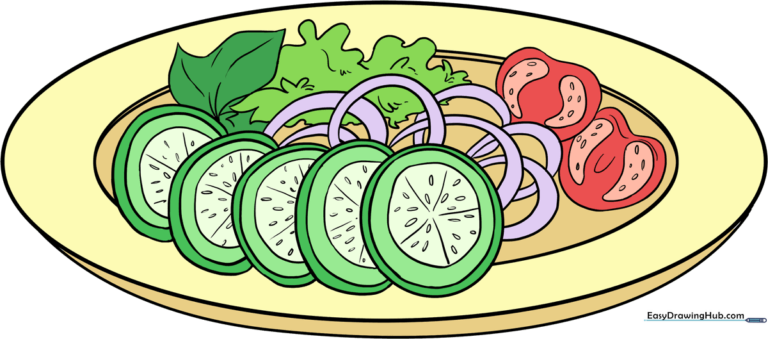
🎯 Final Result
Step-by-Step Instructions
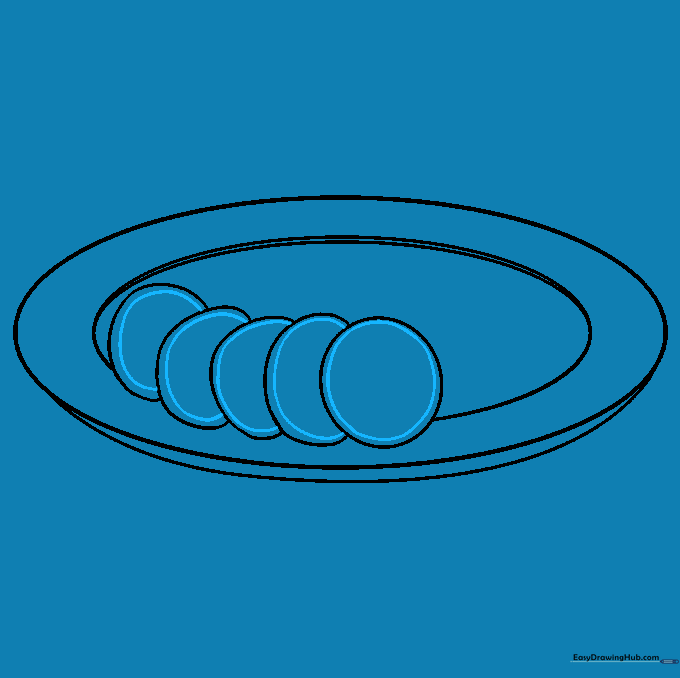
Step 1: Sketching the Plate Base

Draw a wide, horizontal oval in the center of your paper. This is the rim of your salad bowl. Teacher's Tip: Keep your hand loose and draw this in one fluid motion to get a nice, smooth curve.
Step 2: Adding Depth to the Bowl

Draw a smaller oval inside the first one to create the rim's thickness. Add a curved line underneath to form the bottom of the bowl. Tip: Imagine the bowl is sitting on a table; the curved line at the bottom gives it a 3D weight.
Step 3: Placing the Cucumber Slices

Sketch a circle near the front, then add overlapping partial circles behind it. These are your cucumber slices. Tip: Don't worry about them being perfect circles; vegetables in nature are often slightly irregular!
Step 4: Cleaning Up Your Sketch

Carefully erase the lines where the cucumbers overlap the bowl or each other. Tip: Use a kneaded eraser if you have one—it’s great for lifting graphite without smudging your paper.
Step 5: Detailing the Cucumber Peels
Draw a smaller circle inside each cucumber slice, then add a parallel line along the outer edge. This creates the 'peel' look. Tip: Keep your pencil pressure light here to maintain a delicate, realistic texture.
Step 6: Adding Cucumber Seeds

Add a small circle in the center of each slice, then draw 'spokes' radiating outward. Place tiny ovals between the spokes for seeds. Tip: This is a great exercise for fine motor control—take your time with these small shapes!
Step 7: Sketching Onion Slices
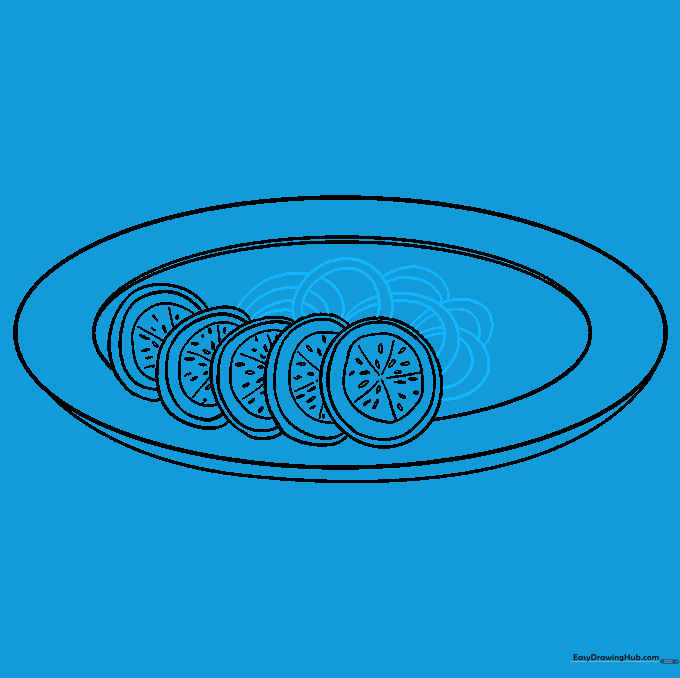
Draw partial circles overlapping the cucumbers to represent onion slices. Tip: Vary the sizes of these arcs to make your salad look more natural and less uniform.
Step 8: Adding Lettuce Leaves
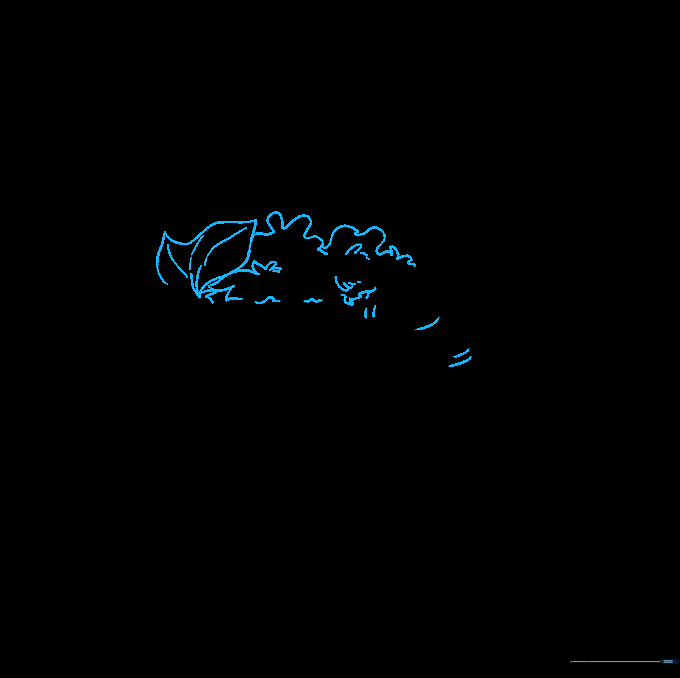
Use wavy, pointed lines to draw lettuce leaves tucked between the veggies. Add small 'U' shapes to show the texture of the leaves. Tip: Use quick, flicking motions with your pencil to make the leaves look crisp and fresh.
Step 9: Drawing Tomato Wedges
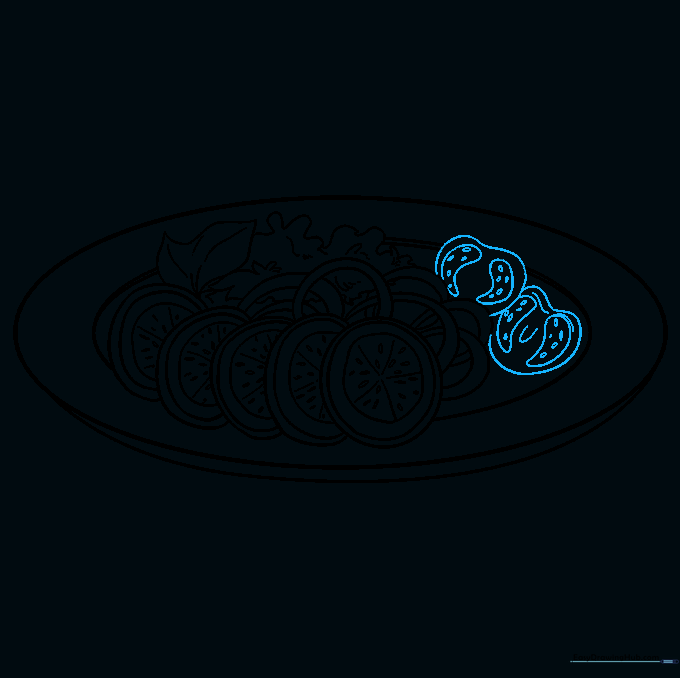
Sketch heart-shaped tomato wedges with teardrop-shaped seed membranes inside. Add small dots for texture. Tip: Tomatoes are soft, so use slightly rounded, irregular shapes to show they are sitting comfortably in the bowl.
Step 10: Bringing Your Salad to Life with Color
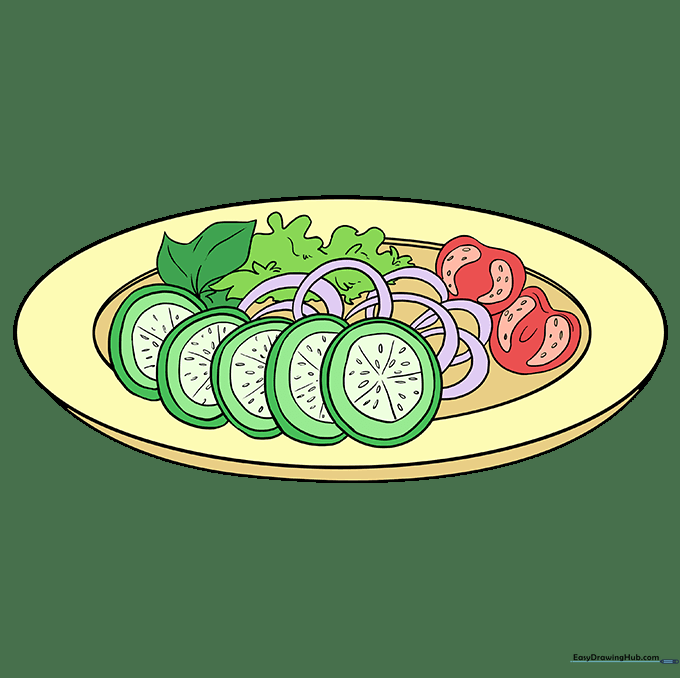
Time to color! Use bright reds for tomatoes, deep purples for onions, and crisp greens for the lettuce and cucumbers. Tip: Use light and dark shades of green to create shadows, making your salad look even more delicious.
More Tutorials


