How to Draw Rudolph: Easy 10-Step Guide for Kids
Bring the magic of the holidays to your sketchbook with this friendly Rudolph tutorial, perfect for artists ages 5 and up. You will only need a pencil, an eraser, and your favorite markers or crayons to complete this festive character. Follow along to build confidence in your drawing skills while creating a classic Christmas icon.
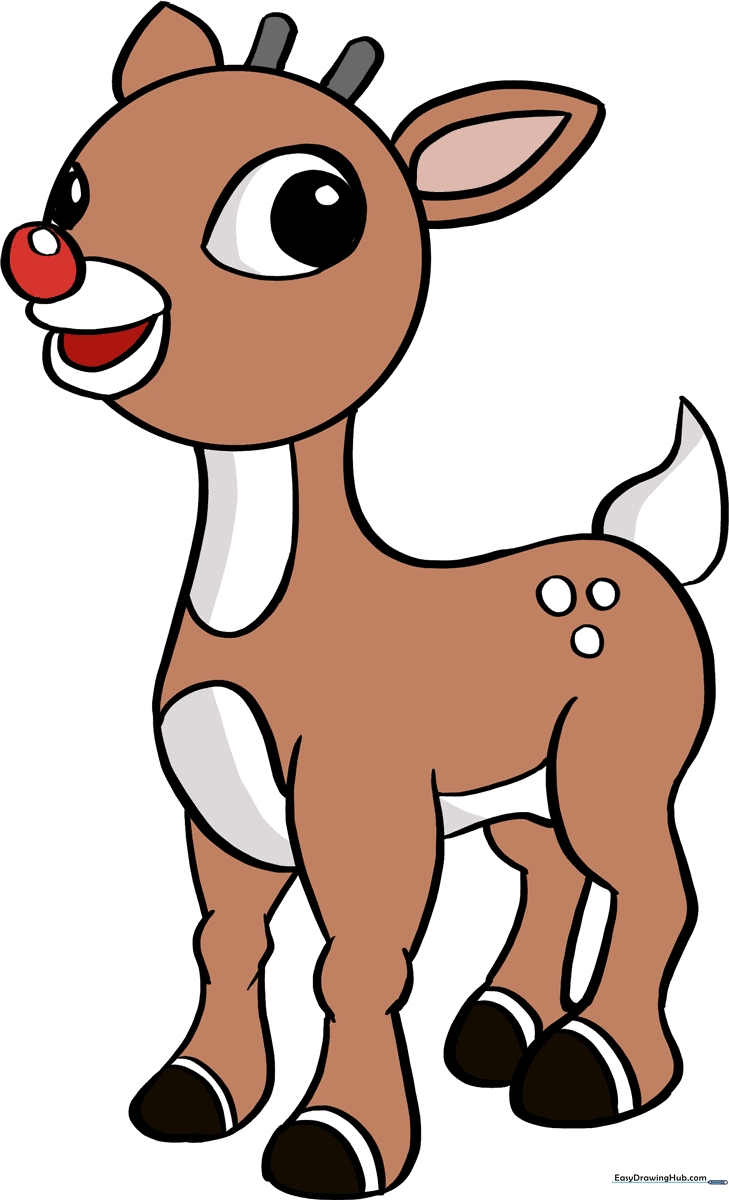
🎯 Final Result
Step-by-Step Instructions
Step 1: Sketching the Head

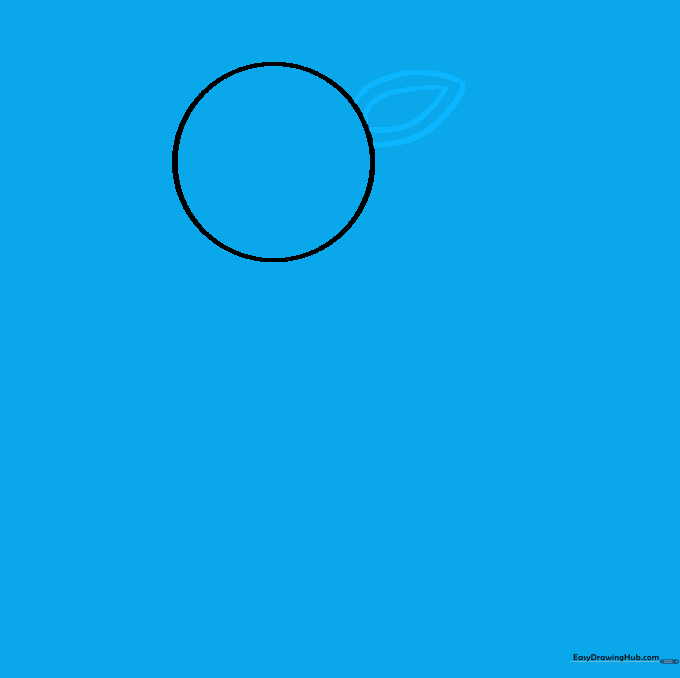
Draw a light circle to form the base of Rudolph's head. Teacher's Tip: Keep your pencil strokes very soft so you can easily erase any overlapping lines later.
Step 2: Drawing the Ear
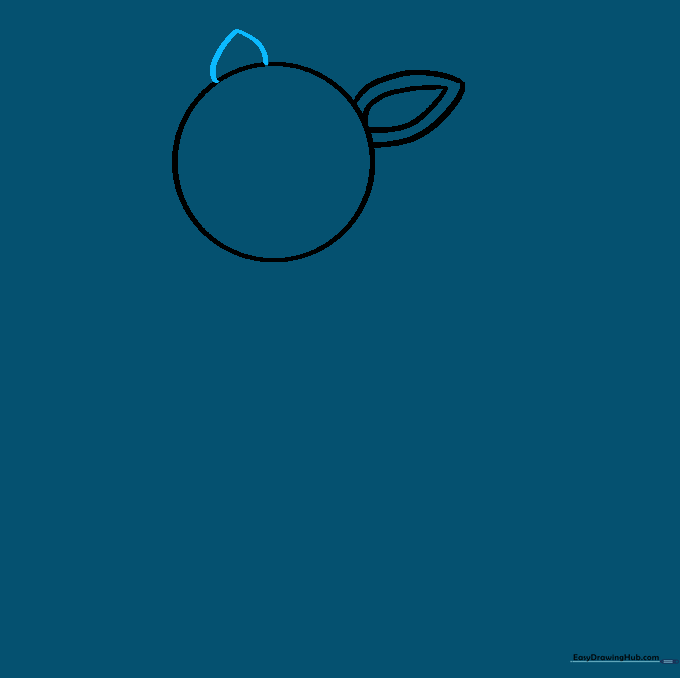
Add two teardrop shapes on the side of the head, one inside the other, to create the ear. Teacher's Tip: Make the inner shape slightly smaller to give the ear a realistic depth.
Step 3: Defining the Ear Shape
Draw a smaller, partial teardrop shape to finish the outer edge of the ear. Teacher's Tip: This adds a nice curve that makes the ear look perky and alert.
Step 4: The Famous Red Nose
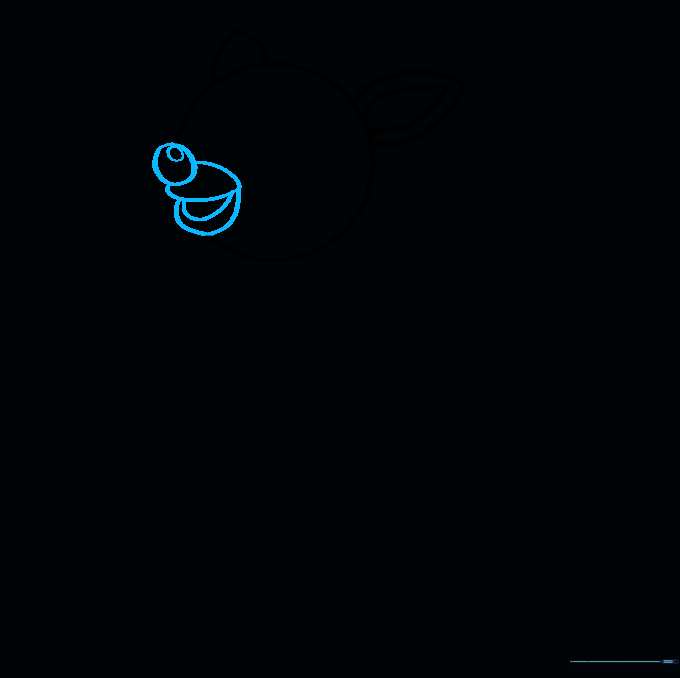
Draw an oval with a smaller oval inside for the nose, then add the snout and mouth below. Teacher's Tip: Keep the mouth small and curved to give Rudolph a sweet, happy expression.
Step 5: Outlining the Neck
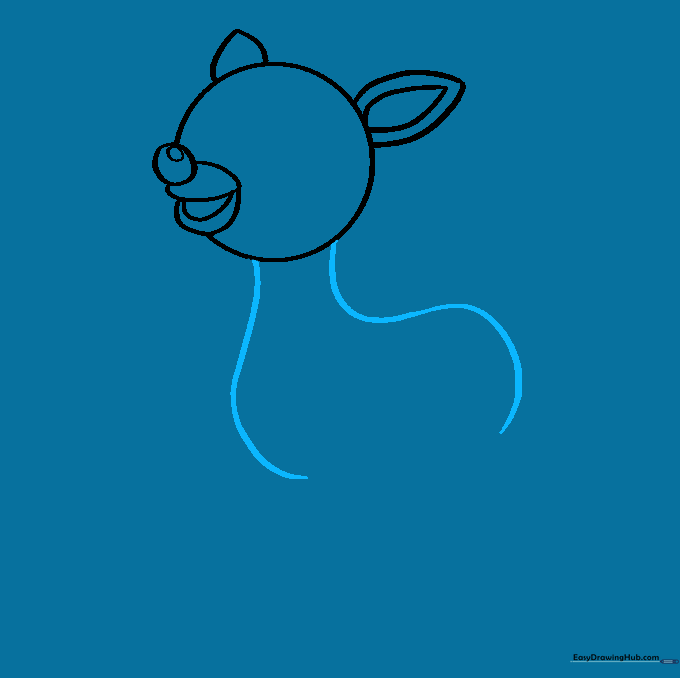
Use smooth, curved lines to extend the neck down from the head. Teacher's Tip: Imagine the neck is a soft tube; keep the lines fluid rather than jagged.
Step 6: Drawing the Legs
Outline the legs using pairs of curved lines and connect them with a belly line. Teacher's Tip: Keep the legs slightly wider at the top and thinner at the bottom for a cartoonish look.
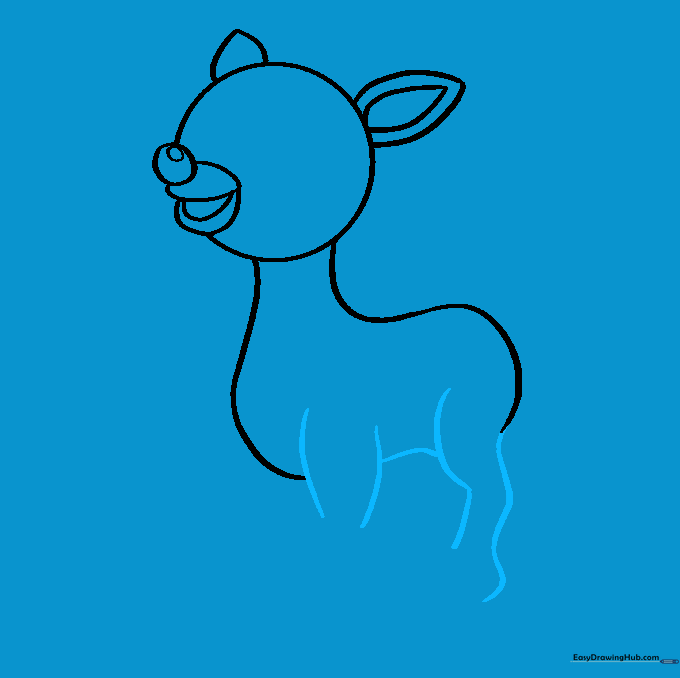
Step 7: Adding the Tail

Draw a simple teardrop shape for the tail. Teacher's Tip: Position it high on the back to make Rudolph look energetic and ready to fly!
Step 8: Refining the Legs and Belly
Enclose the feet and add circular knee joints. Detail the belly with soft curves. Teacher's Tip: Adding those small circles for knees helps the legs look more articulated.
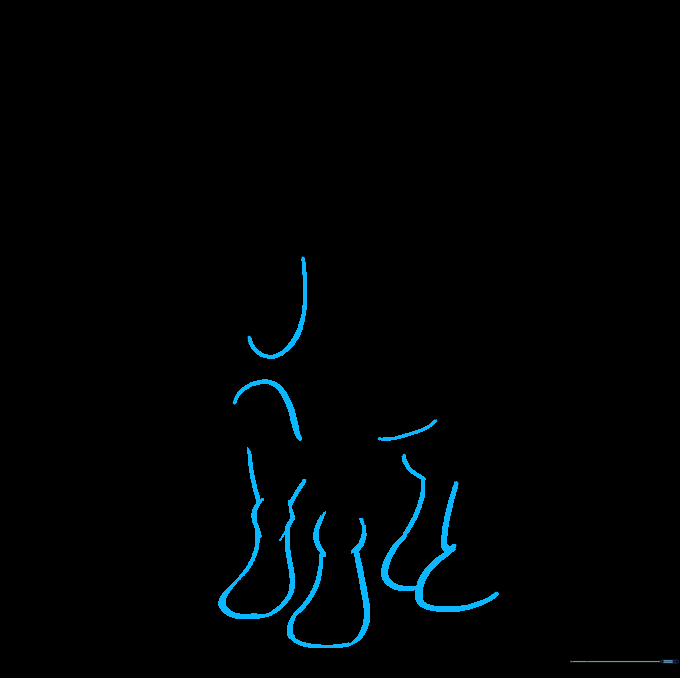
Step 9: Final Details
Add antlers, eyes, and hoof lines. Teacher's Tip: Draw the eyes as circles-within-circles to give Rudolph a bright, friendly gaze.
Step 10: Color Your Masterpiece

Bring Rudolph to life with brown for his fur and, of course, a bright red nose! Teacher's Tip: Use a lighter shade of brown for the belly to create a nice contrast.
More Tutorials


