How to Draw Rosemary: Simple 10-Step Botanical Guide
Bring nature to your sketchbook with this simple rosemary drawing tutorial, designed for artists of all ages. You will only need a pencil, an eraser, and a piece of paper to get started. Follow these steps to master the unique, needle-like leaf structure of this classic herb.
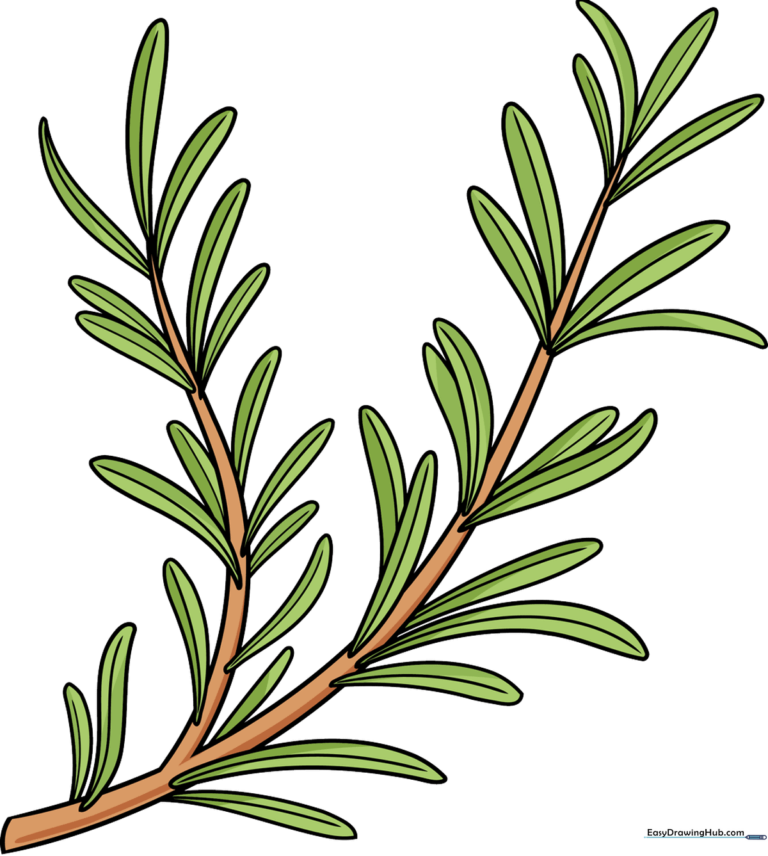
🎯 Final Result
Step-by-Step Instructions
Step 1: Establishing the Stem

Start by sketching a light 'Y' shape to form the woody stem. At the very tip of one branch, draw a small, narrow teardrop shape for the first leaf. Tip: Keep your pencil pressure light; these are just guidelines for your final structure.
Step 2: Adding Leaf Pairs
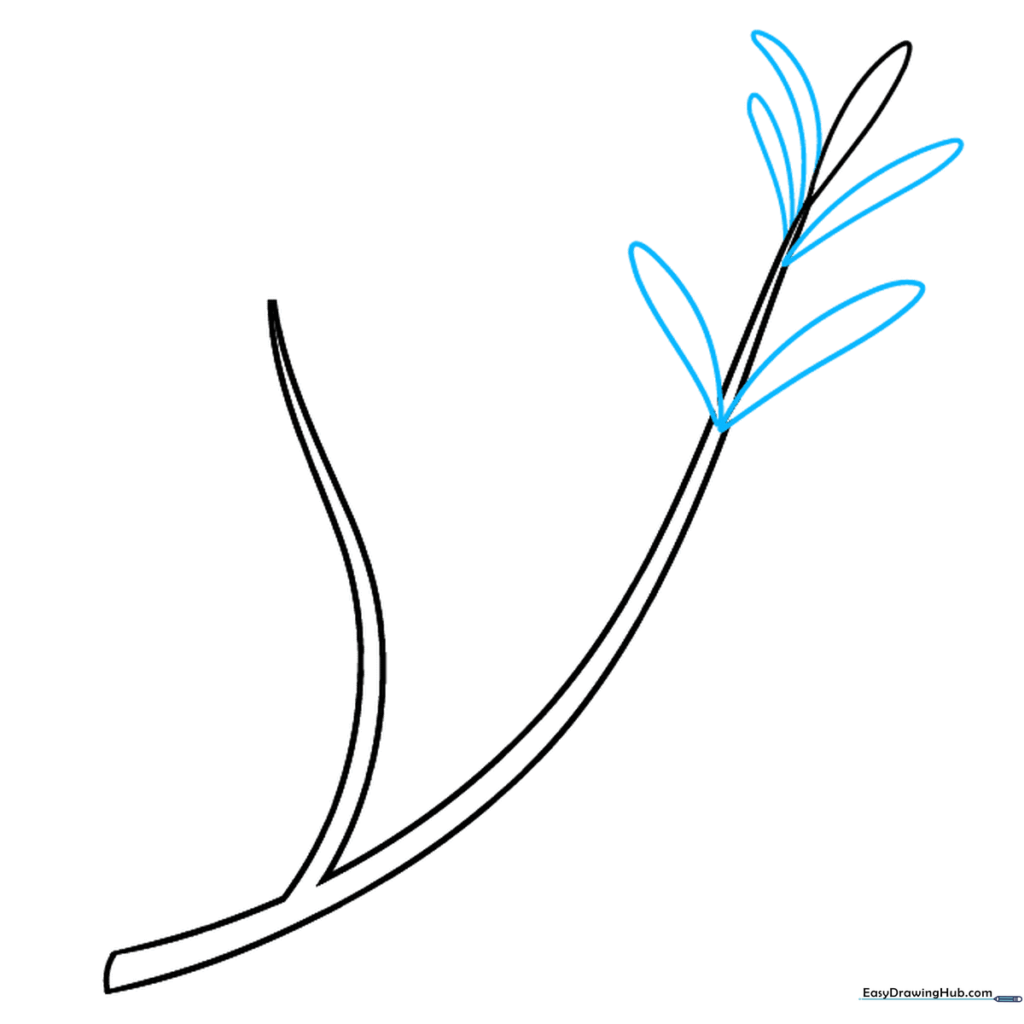
Add more narrow, teardrop-shaped leaves along the stem. Rosemary leaves grow in pairs, so try to place them opposite each other. Tip: Vary the length of the leaves slightly to make the plant look more natural.
Step 3: Building Density
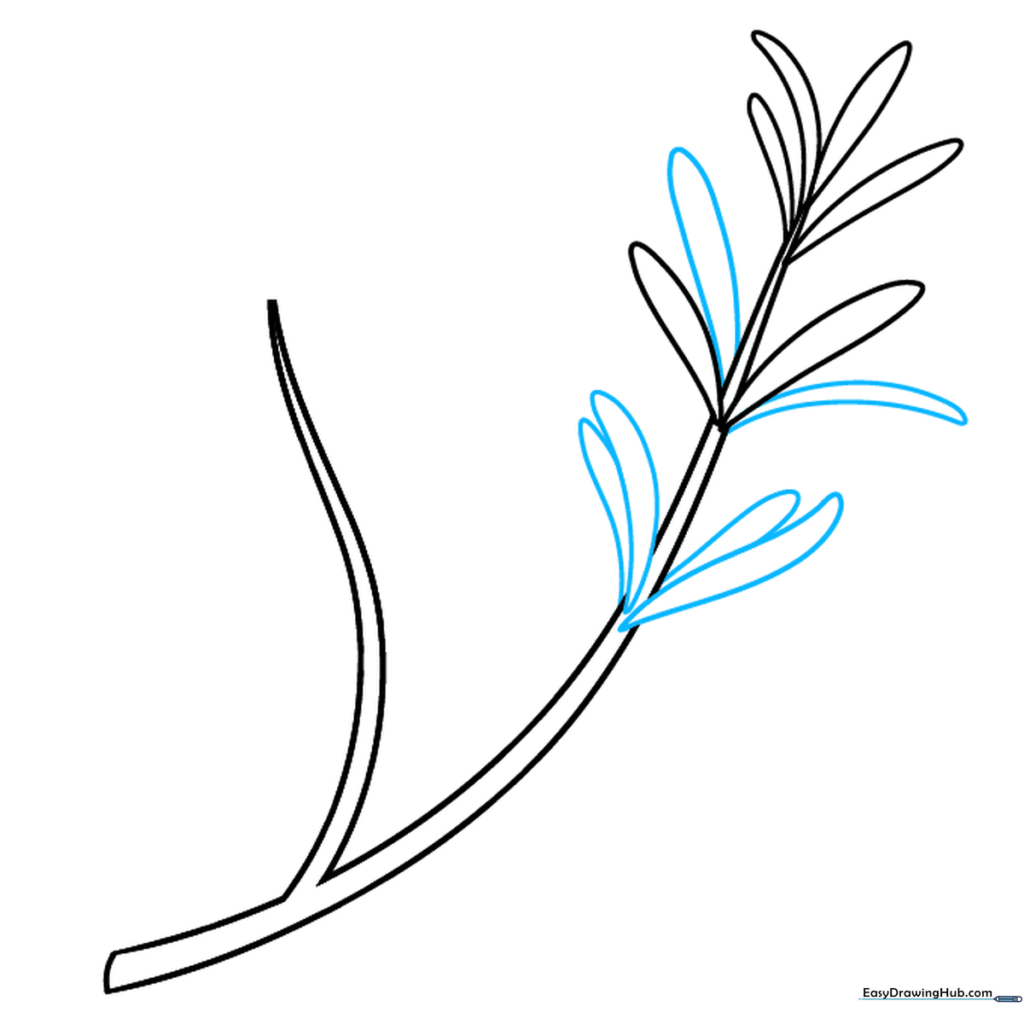
Continue adding leaves until you have clusters of four at each node. Then, move down the stem and add another grouping of four. Tip: Don't worry if they aren't perfect; rosemary leaves are naturally slightly irregular.
Step 4: Expanding the Foliage
Keep adding clusters of leaves down the stem. Ensure the leaves point slightly upward. Tip: If your lines get too crowded, use your eraser to clean up the stem lines between the leaf attachments.
Step 5: Filling the Base
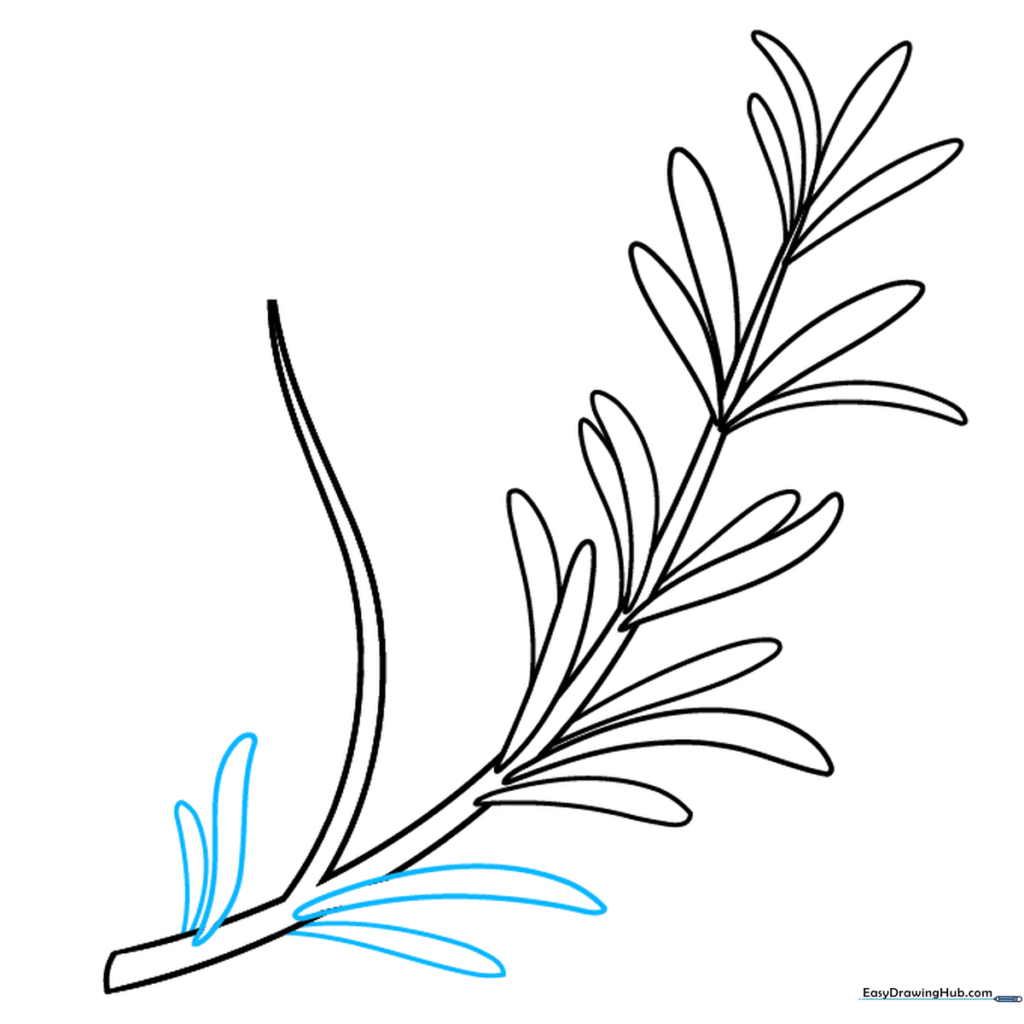
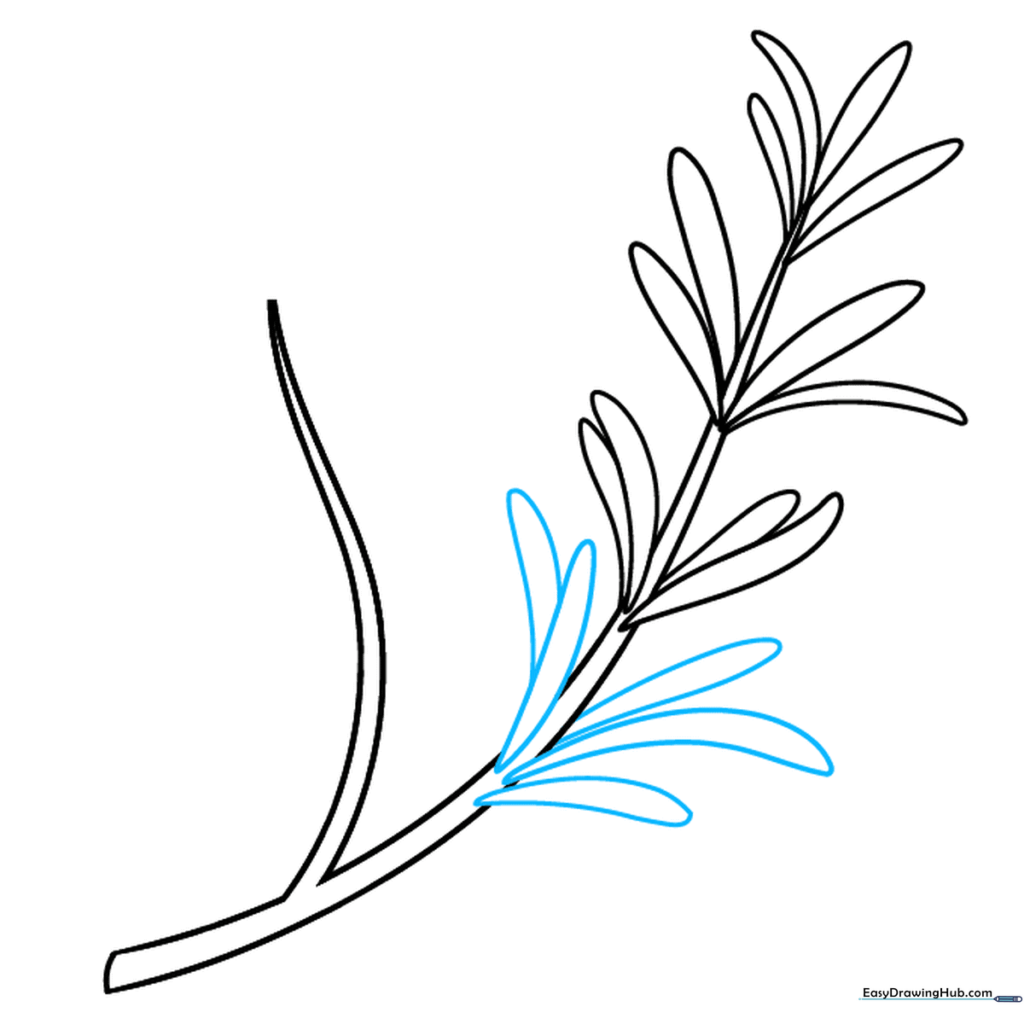
Add two more groupings of leaves near the bottom of your sprig to give it a sturdy base. Tip: Make these bottom leaves slightly larger to create a sense of perspective.
Step 6: Working the Second Branch
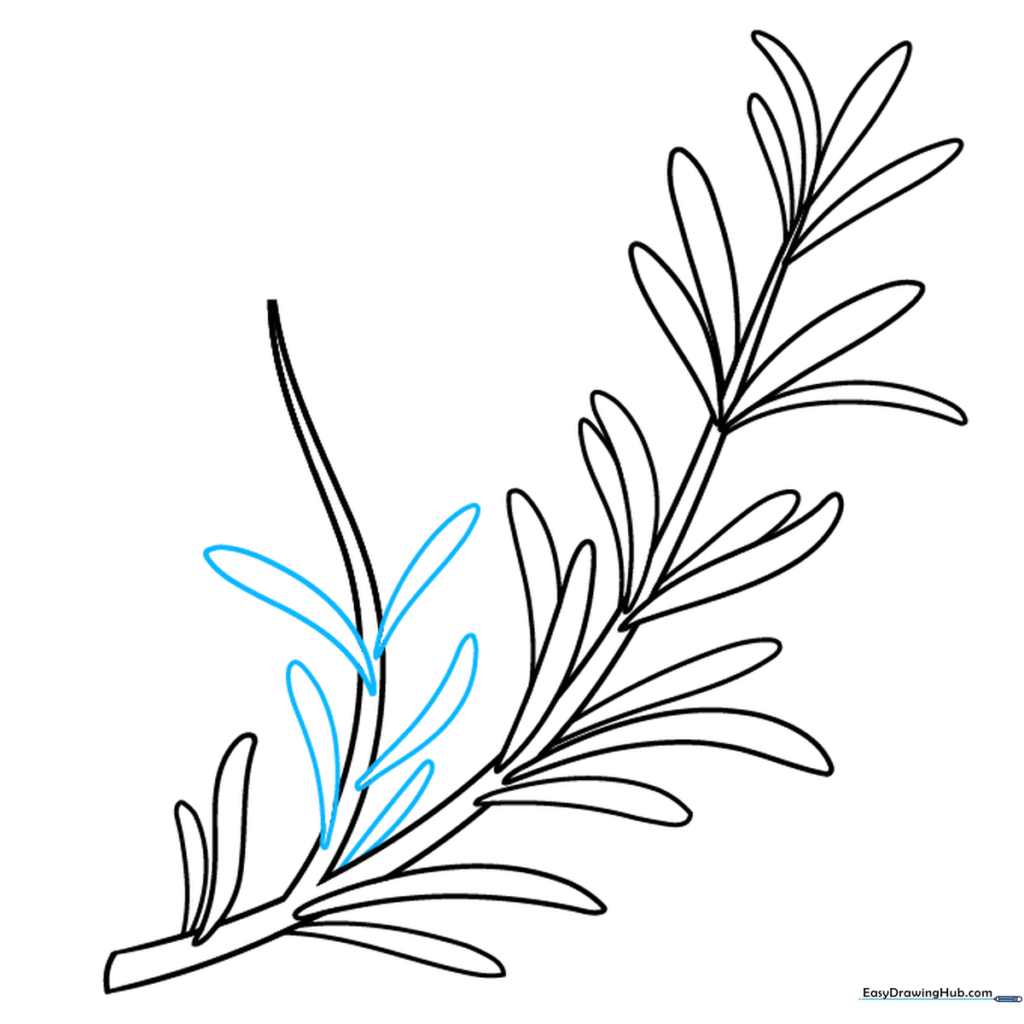
Now, focus on the second branch of your 'Y' stem. Repeat the process of drawing narrow, teardrop-shaped leaves. Tip: Erase any overlapping stem lines so the leaves appear to grow directly from the branch.
Step 7: Filling the Second Branch
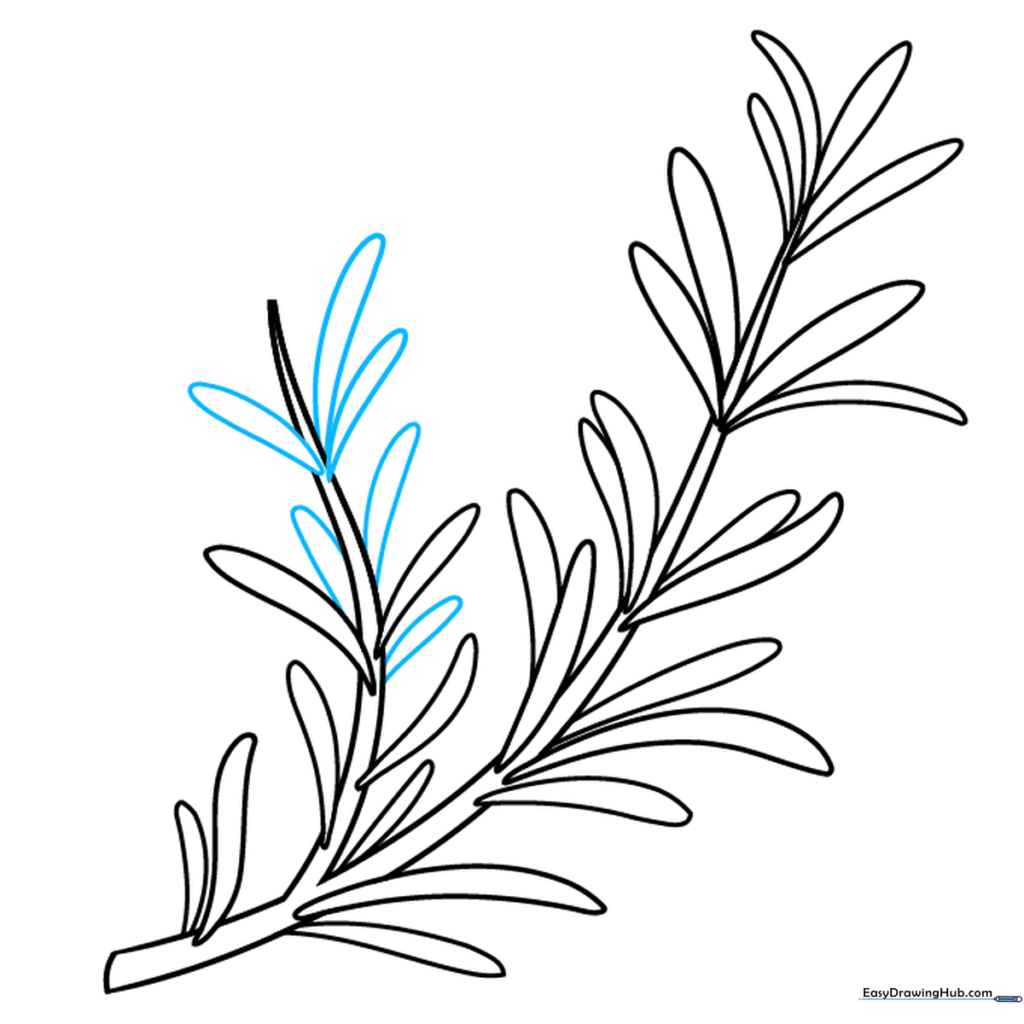
Continue adding leaves along the second branch. Keep the spacing consistent with your first branch to maintain balance. Tip: Rotate your paper if it helps you draw the curves more comfortably.
Step 8: Adding Leaf Texture
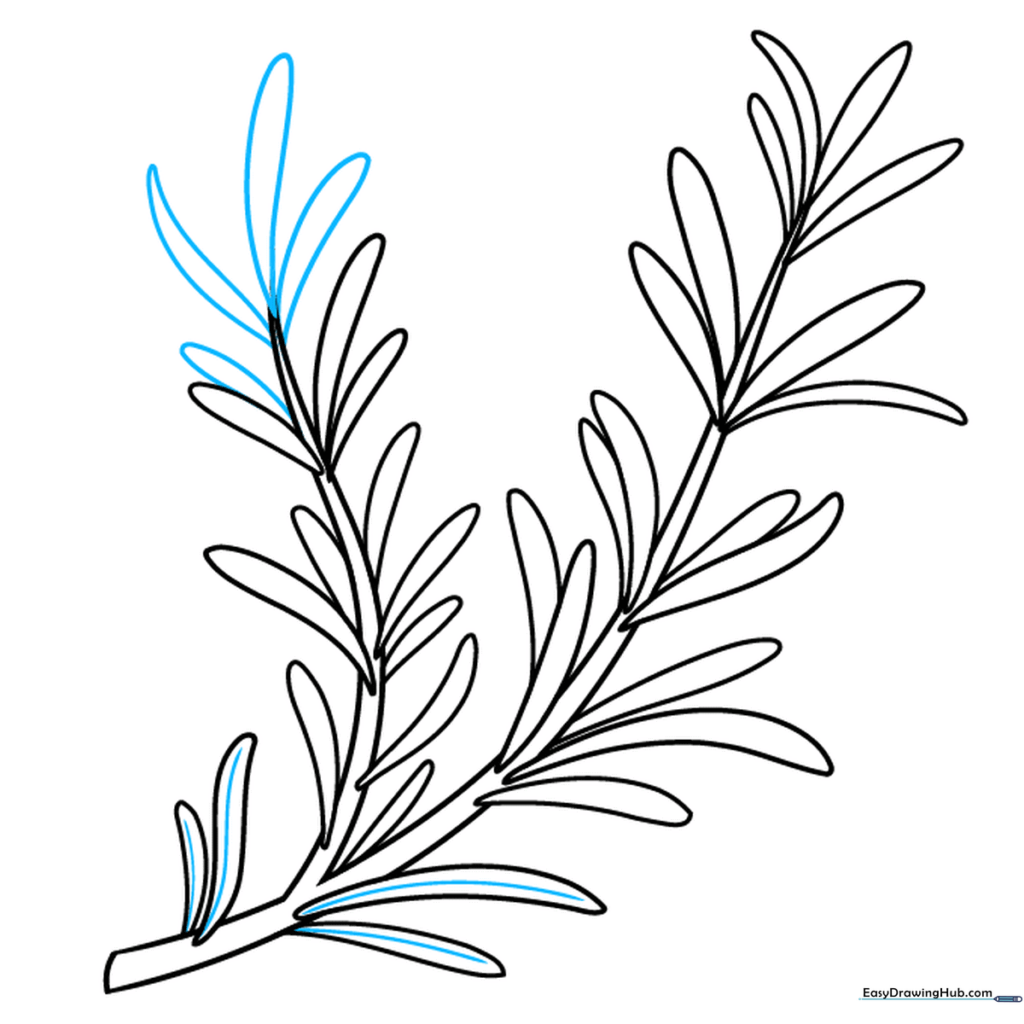
Reach the tip of the second branch and add the final leaves. Now, add a central vein to each leaf using a single curved line. Tip: This small detail adds depth and makes your drawing look much more professional.
Step 9: Finalizing Details
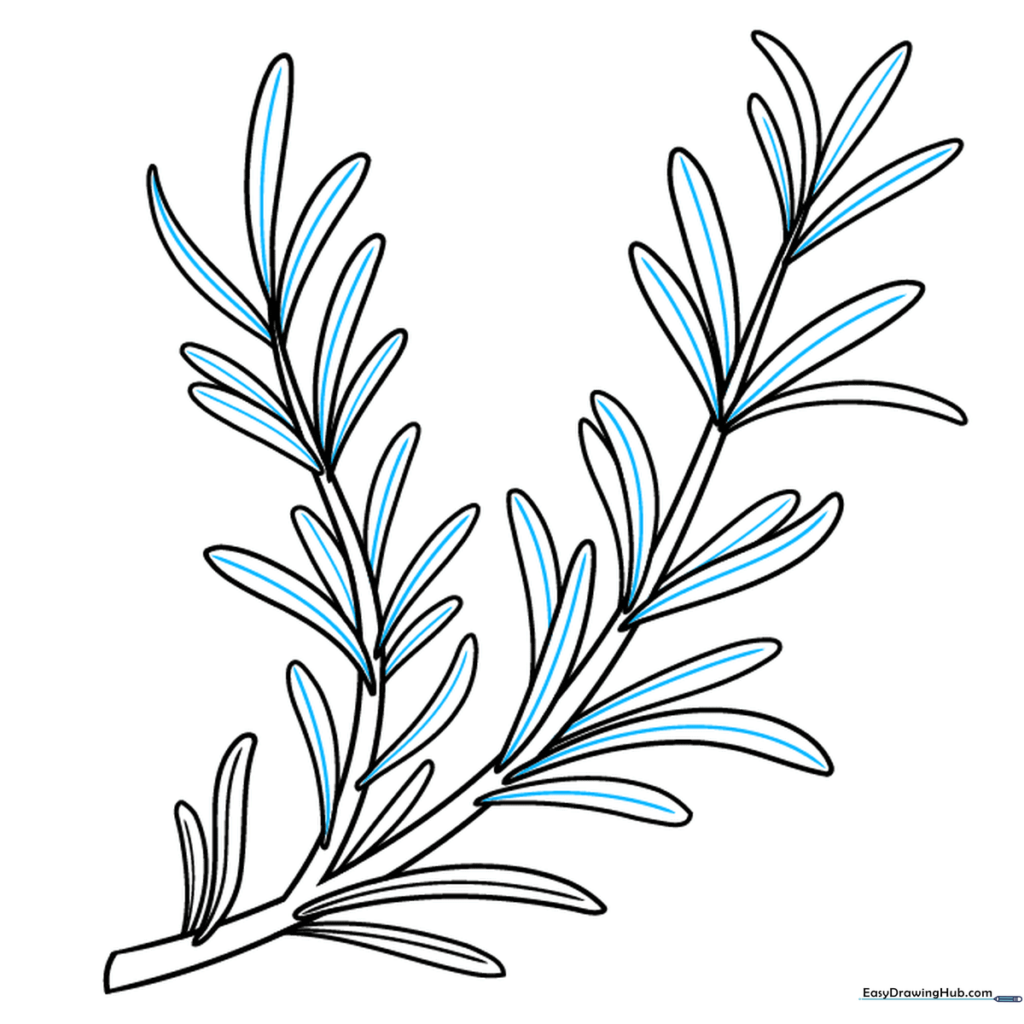
Go back and add the central vein to all the leaves on the first branch. Ensure every leaf has this contouring for a cohesive look. Tip: Take your time; this is where the drawing really comes to life.
Step 10: Adding Color
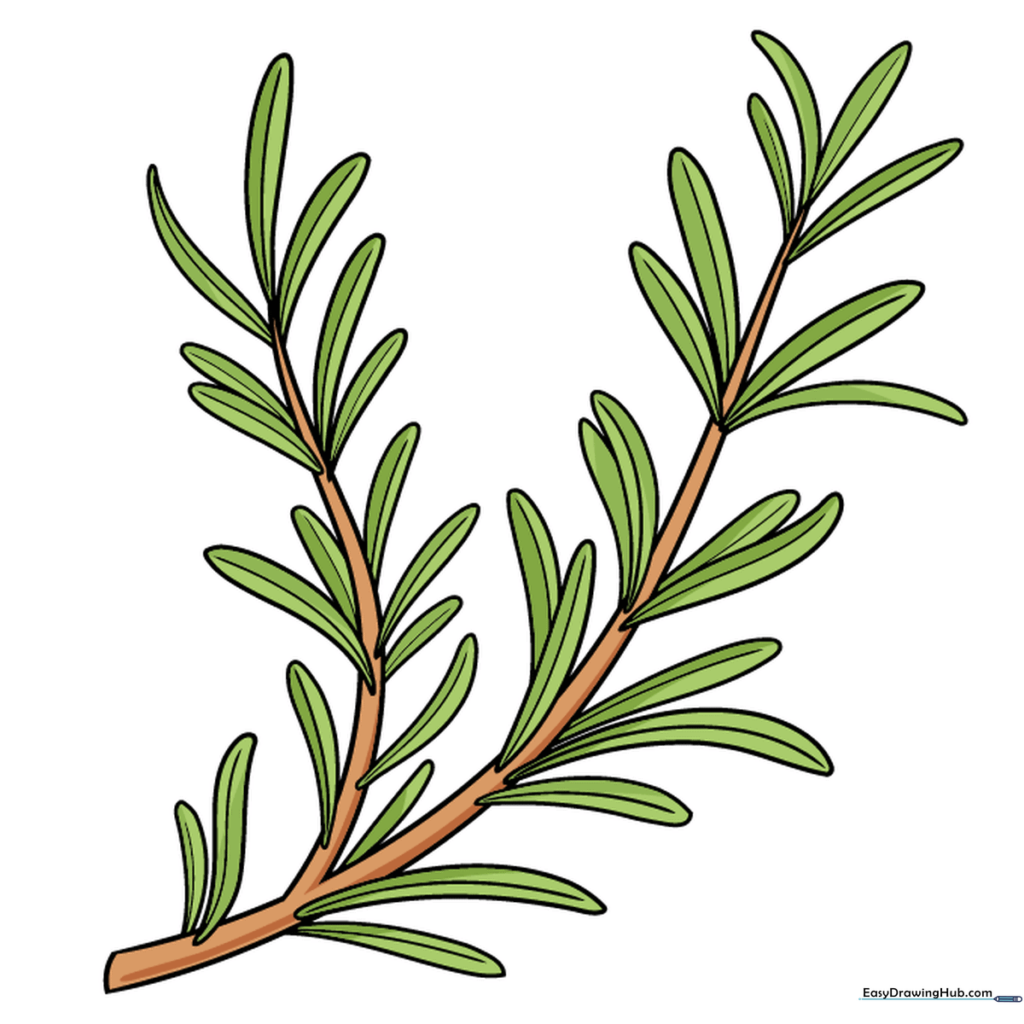
Your outline is complete! Use deep green for the leaves and a woody brown for the stem. Tip: Use a lighter green for the highlights on the leaves to give them a fresh, vibrant appearance.
More Tutorials


