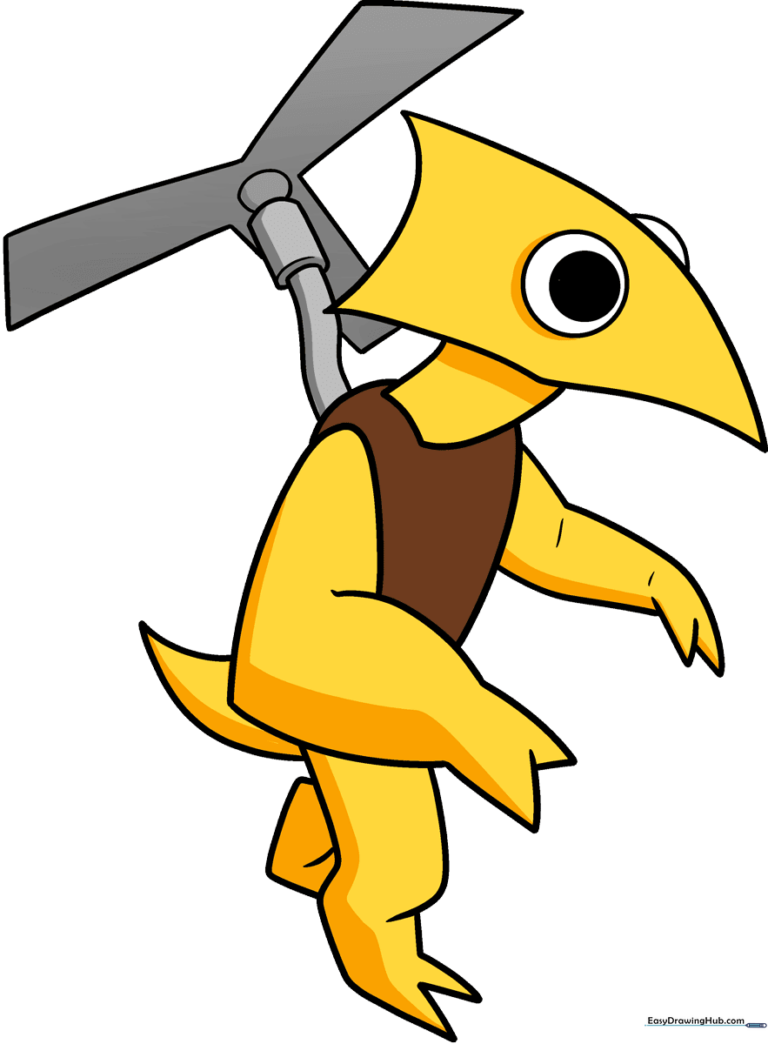
How to Draw Rainbow Friends Yellow: Easy 9-Step Guide
Ready to bring the Pterodactyl-like Yellow from Rainbow Friends to life? This tutorial is perfect for young artists and Roblox fans looking to practice character design. Grab your pencil, eraser, and paper, and let's start sketching this iconic monster together.
🎯 Final Result
Step-by-Step Instructions
Sketching the Head Shape
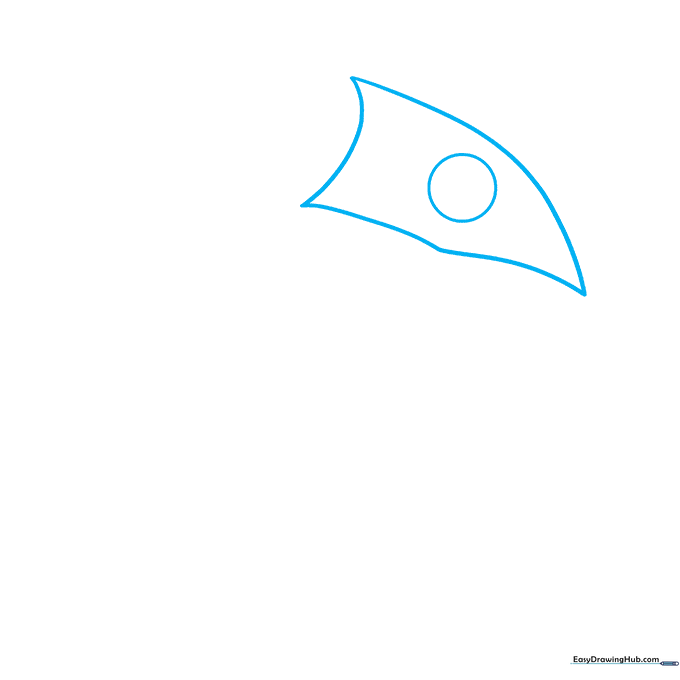
Start by drawing a soft, triangular shape for the head using light, sketchy lines. Add a large circle for the eye. Teacher's Tip: Keep your pencil pressure light so you can easily adjust the shape if it looks a bit lopsided.
Defining the Eye

Draw a smaller circle inside the first for the pupil, then add a curved line to create the second eye's shape. Teacher's Tip: Focus on the spacing between the eyes to give the character that signature wide-eyed look.
Forming the Neck and Torso
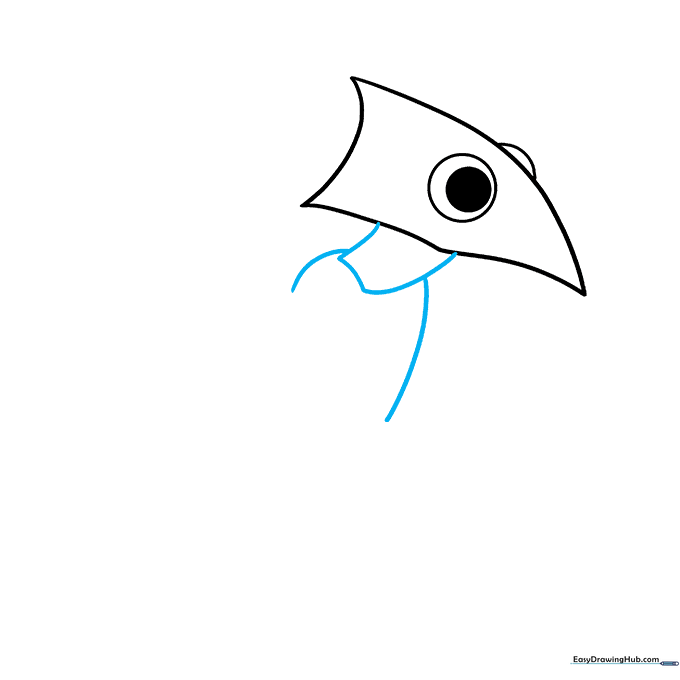
Draw a curved line that loops back on itself to form the neck, then extend lines downward to start the torso. Teacher's Tip: Use smooth, continuous strokes to make the neck look flexible.
Sketching the First Arm
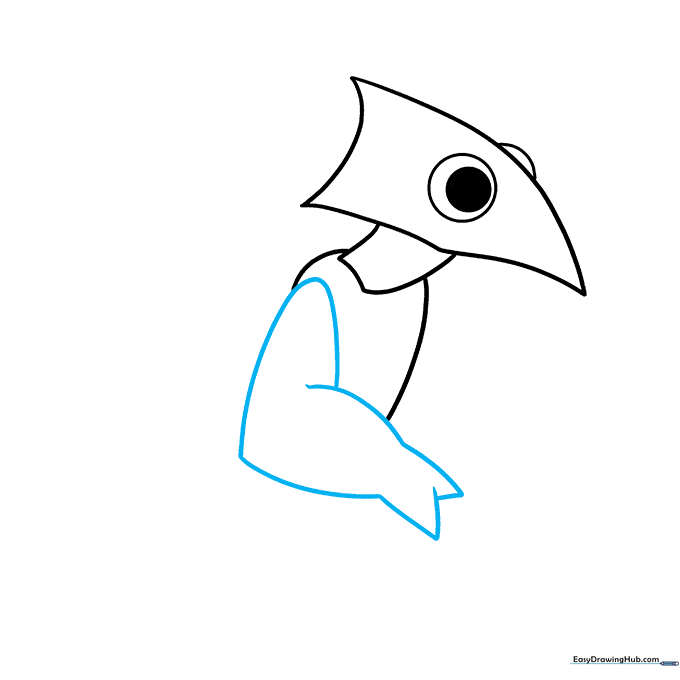
Use overlapping curved lines to create the arm, ending in a 'V' shape for the fingers. Teacher's Tip: Think of the fingers as two simple prongs; keep them sharp to match the character's design.
Adding the Second Arm
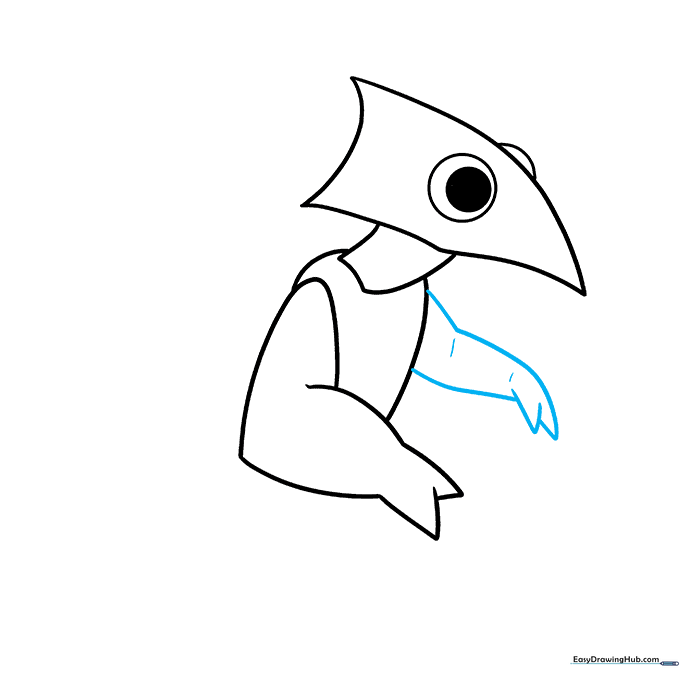
Draw the second arm with 'Y' shaped fingers, adding small lines at the elbow and wrist for contour. Teacher's Tip: Adding these small lines helps define the joints and makes the drawing look more professional.
Drawing the Legs and Feet
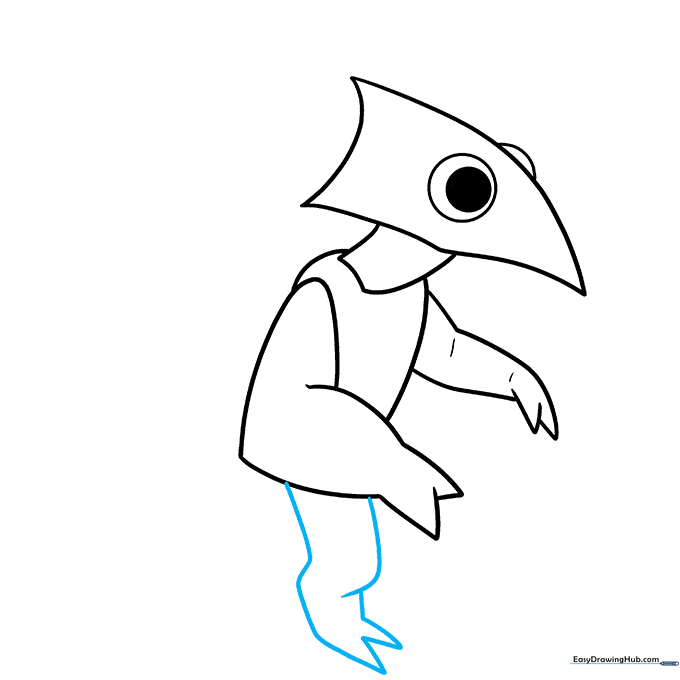
Create the leg and foot using overlapping curves, emphasizing the 'Y' shape at the knee. Teacher's Tip: Make sure the toes come to a point to give the character a slightly menacing, monster-like appearance.
Completing the Lower Body
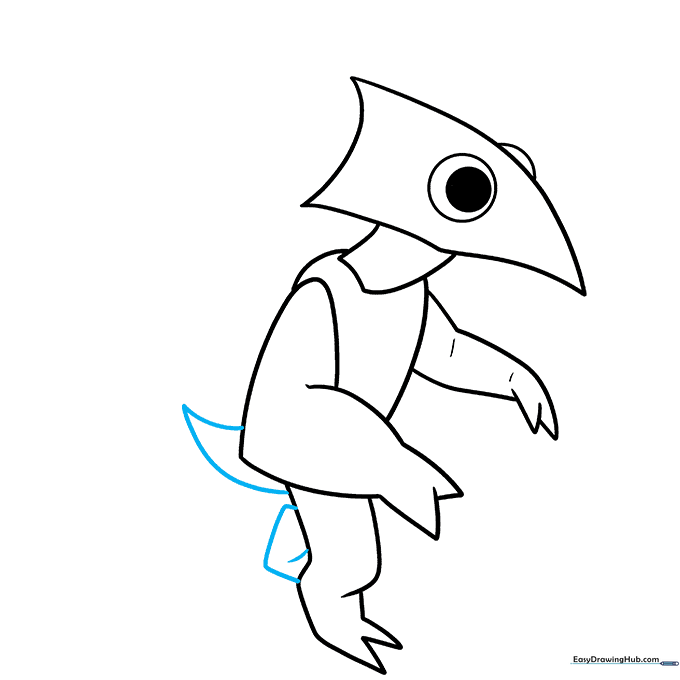
Draw the second leg and add a triangular tail by connecting two curved lines. Teacher's Tip: Ensure the tail looks balanced with the rest of the body to keep the character's proportions correct.
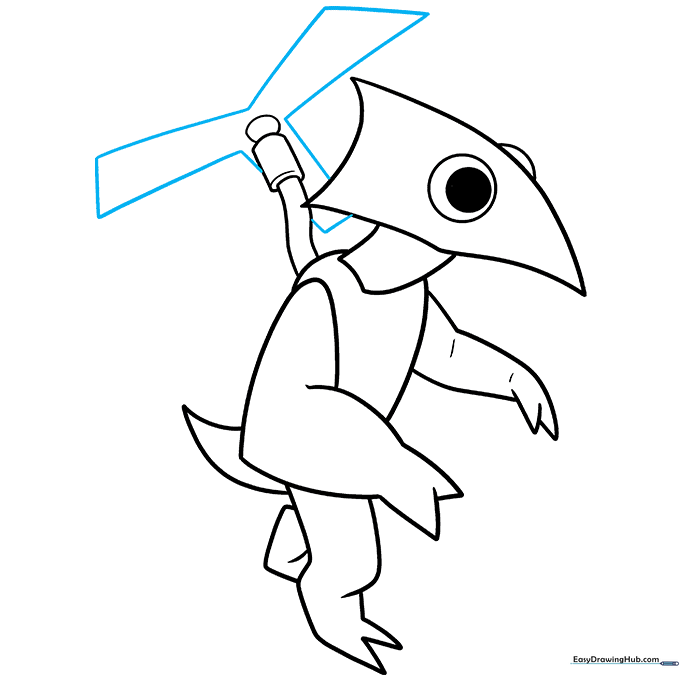
Adding the Helicopter Detail

Draw the helicopter base using two parallel lines connected by a rectangle. Add a 'C' shape for depth and an oval on top. Teacher's Tip: Use a ruler if you find it hard to keep the parallel lines straight!
Finalizing the Blades
Finish the helicopter by drawing the 'Y' shaped blades with straight lines. Teacher's Tip: Keep these lines clean and sharp to make the helicopter look like it's spinning fast.
Adding Color
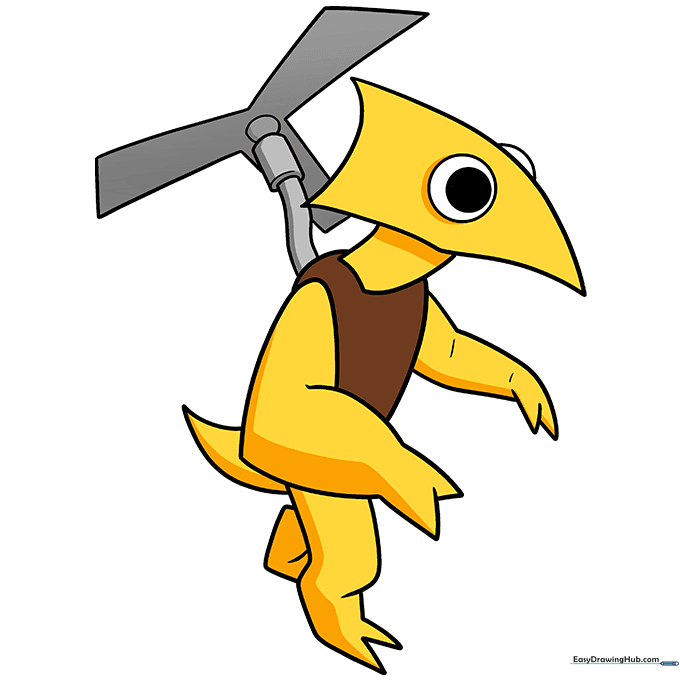
Bring your character to life! Use bright yellow for the body, brown for the torso, and metallic grey for the helicopter. Teacher's Tip: Use light pressure with your crayons to create a smooth, even layer of color.
More Tutorials


