How to Draw Rainbow Friends Blue: Easy 10-Step Guide
Bring Blue from Roblox's Rainbow Friends to life with this fun, screen-free drawing activity. Designed for artists ages 5 and up, this guide requires only a pencil, paper, and an eraser. Follow these simple steps to master Blue's iconic look and build your confidence as a character artist.
🎯 Final Result

Step-by-Step Instructions
Step 1: Sketching the Eyes

Draw two circles for the eyes. Inside the left one, draw a smaller circle with a slice missing and shade it in. For the right eye, draw a bold 'X'. Teacher's Tip: Keep your pencil lines light so you can easily adjust the symmetry if needed.
Step 2: Adding the Mouth
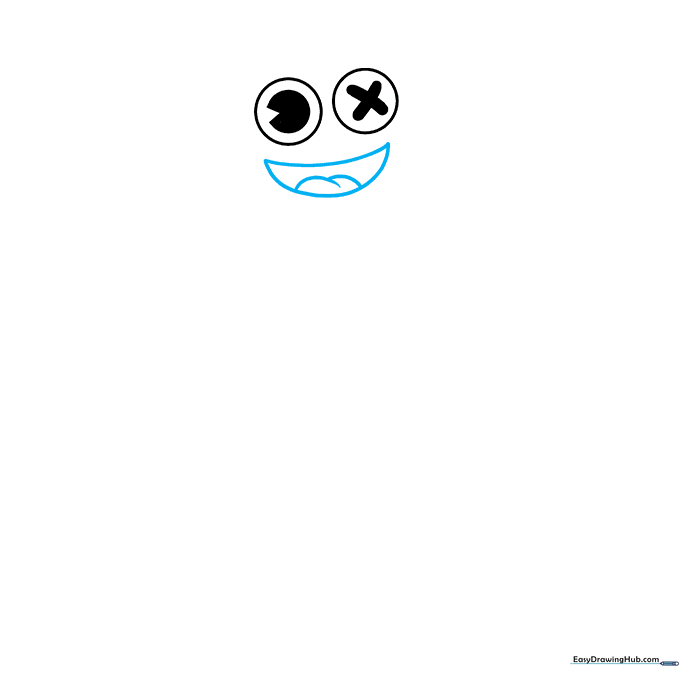
Use two curved lines to create a wide, friendly crescent mouth. Add a small tongue inside using overlapping curves. Teacher's Tip: Make the mouth wide to give Blue that signature goofy expression.
Step 3: Drawing the Crown

Sketch a simple three-dimensional crown sitting at an angle above the left eye. Teacher's Tip: Use straight lines for the points of the crown to contrast with the roundness of the head.
Step 4: Shaping the Head

Draw a large, rounded shape around the eyes and mouth to form the head. Teacher's Tip: Don't worry about it being a perfect circle; a slightly lumpy shape gives the character more personality.
Step 5: Sketching the Arm
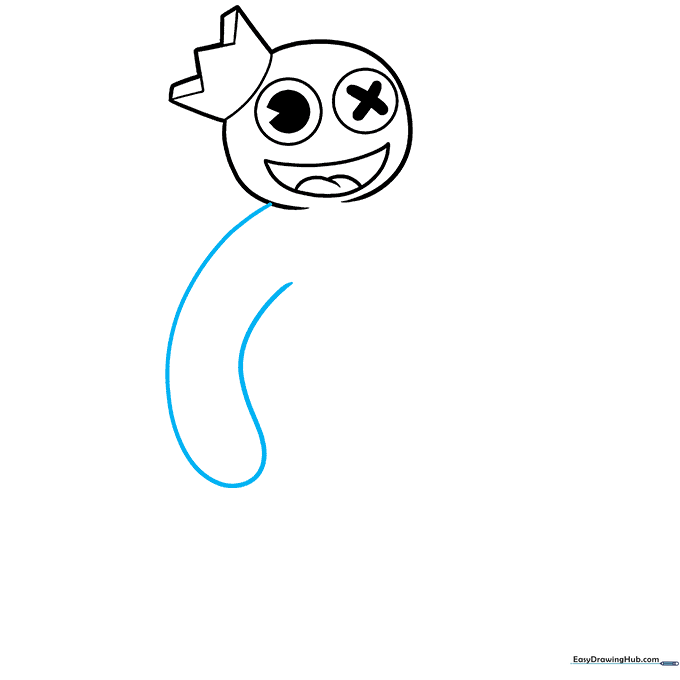
Extend a long, curved line from the side of the head and loop it back to create the arm. Teacher's Tip: Keep the arm thick to match Blue's chunky, cartoonish proportions.
Step 6: Defining the Torso
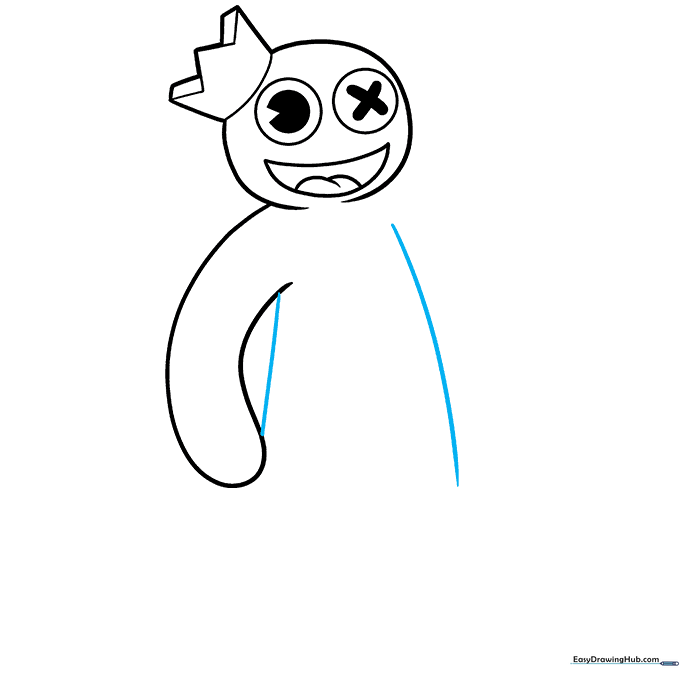
Draw a straight line from the underarm and a longer curved line nearby to form the torso. Teacher's Tip: This creates the main body mass, so keep the lines smooth and confident.
Step 7: Connecting the Body
Use a long and short curved line to arch from the head down to the base of the torso. Teacher's Tip: Think of this as the 'spine' of your drawing to keep the character balanced.
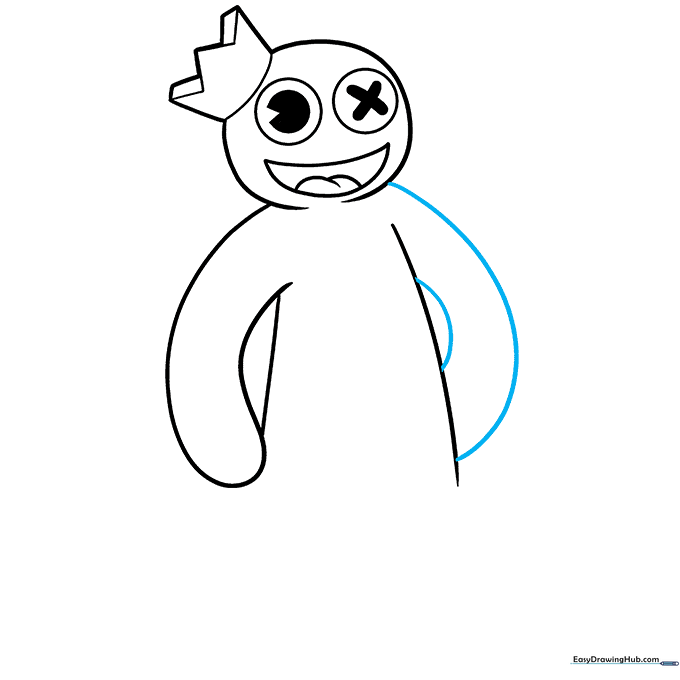
Step 8: Drawing the Leg
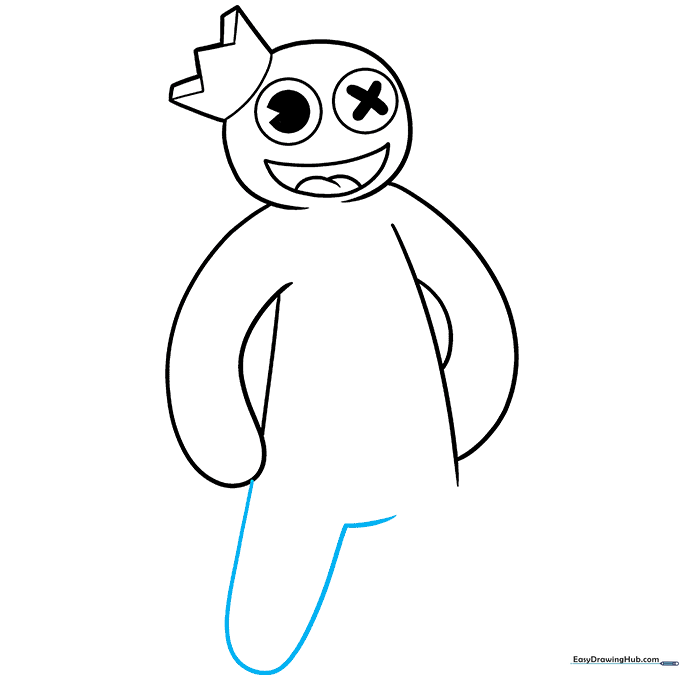
Extend a curved line from the hand area and loop it back to form the leg. Teacher's Tip: Ensure the leg looks sturdy by keeping the curve wide at the bottom.
Step 9: Finalizing the Outline
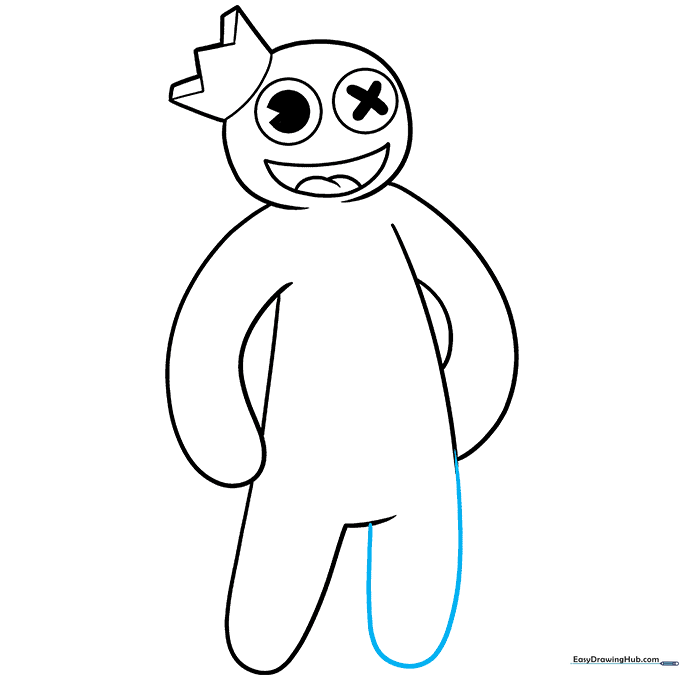
Extend the torso line on the opposite side and loop it back to finish the leg. Teacher's Tip: Double-check that all your lines connect to create a closed shape before you start coloring.
Step 10: Coloring Time
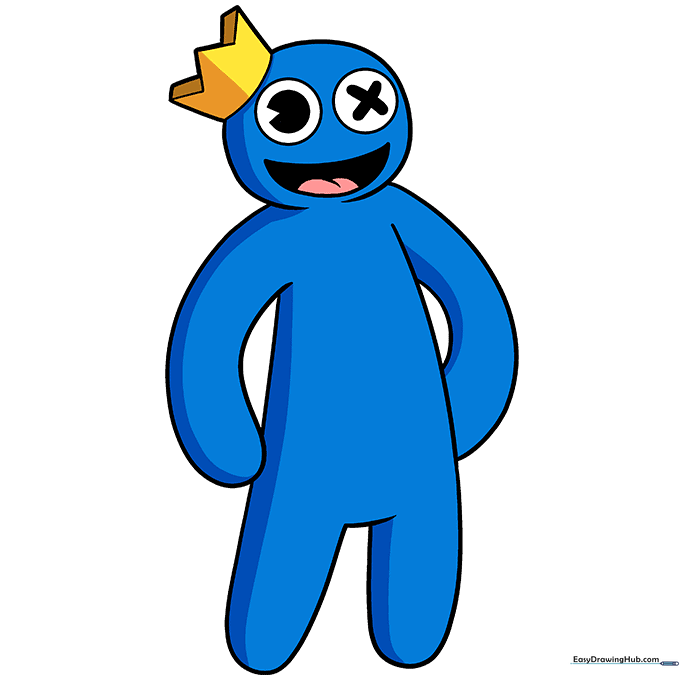
Bring your drawing to life! Color the body a vibrant blue and the crown a bright yellow. Teacher's Tip: Use circular motions with your crayon or marker for an even, smooth finish.
More Tutorials


