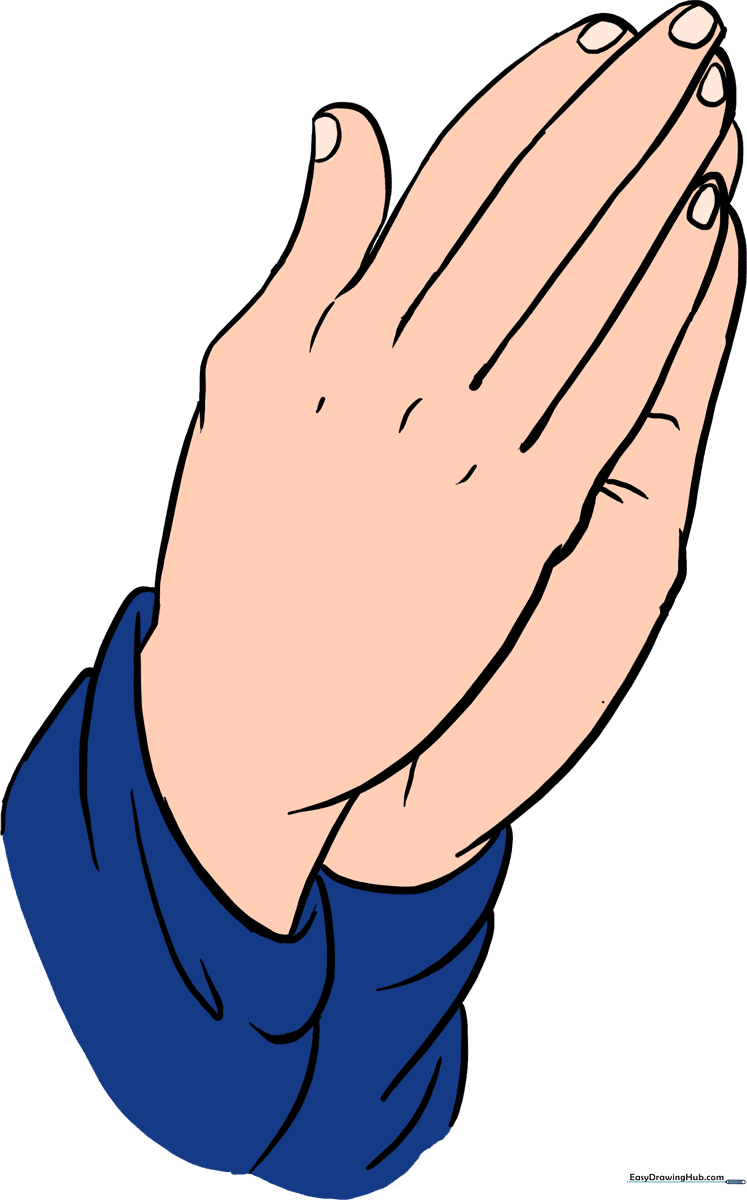
How to Draw Praying Hands: Simple Step-by-Step Guide
Drawing hands is a classic challenge for artists of all ages, but this simple method makes it approachable for beginners. You will need a pencil, an eraser, and a sheet of paper to complete this study. Follow these steps to learn how to capture the gentle gesture of folded hands with confidence.
🎯 Final Result
Step-by-Step Instructions
Step 1: Sketching the Base Shape

Begin by sketching the general outline of the hand. Use three curved lines to form an open, rectangular shape. Teacher's Tip: Keep your pencil pressure light so you can easily adjust the proportions later.
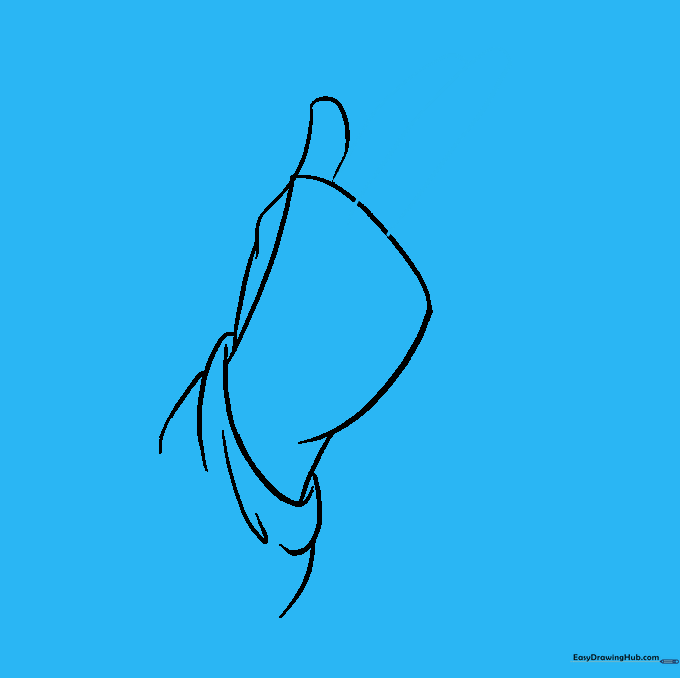
Step 2: Defining the Knuckles and Thumb

Use curved lines to flesh out the top of the hand, focusing on the bulge of the knuckle. Add an upside-down 'U' shape to define the thumb. Teacher's Tip: Think of the thumb as a soft, rounded mound rather than a sharp corner.
Step 3: Drawing the Wrist and Sleeve
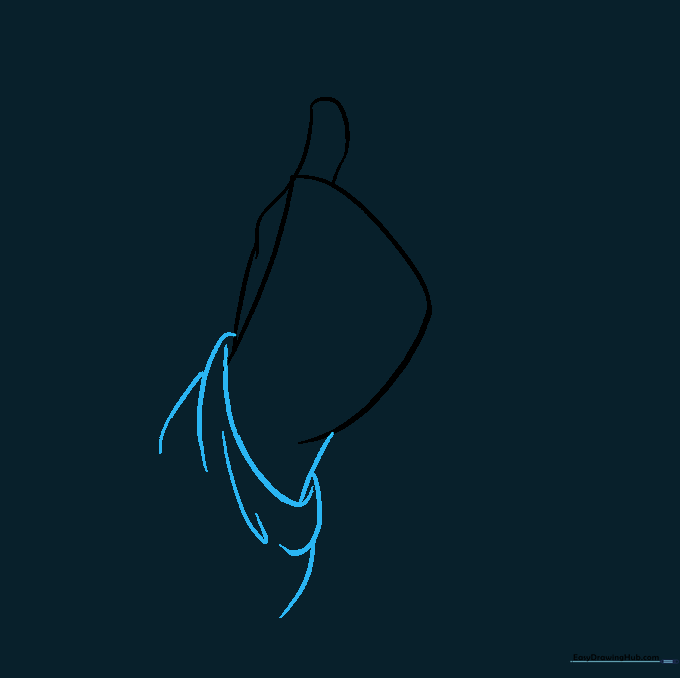
Extend the wrist with a curved line and connect it to the base. Add a few extra curves to suggest the folds of fabric at the sleeve. Teacher's Tip: Folds in fabric are just shadows—keep your lines loose and flowing.
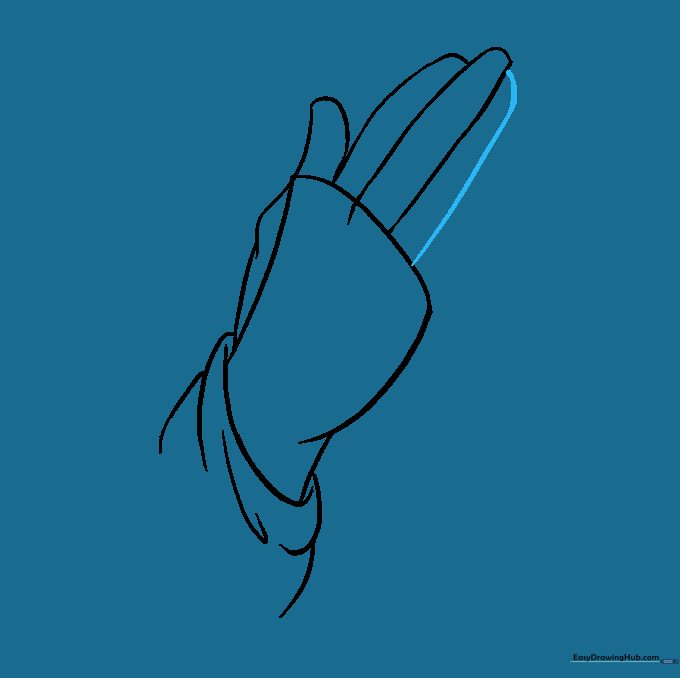
Step 4: Sketching the First Fingers
Draw three long, curved lines extending from the hand. At the tips, curve them back to intersect. Teacher's Tip: Fingers are not perfectly straight; give them a slight, graceful bend.
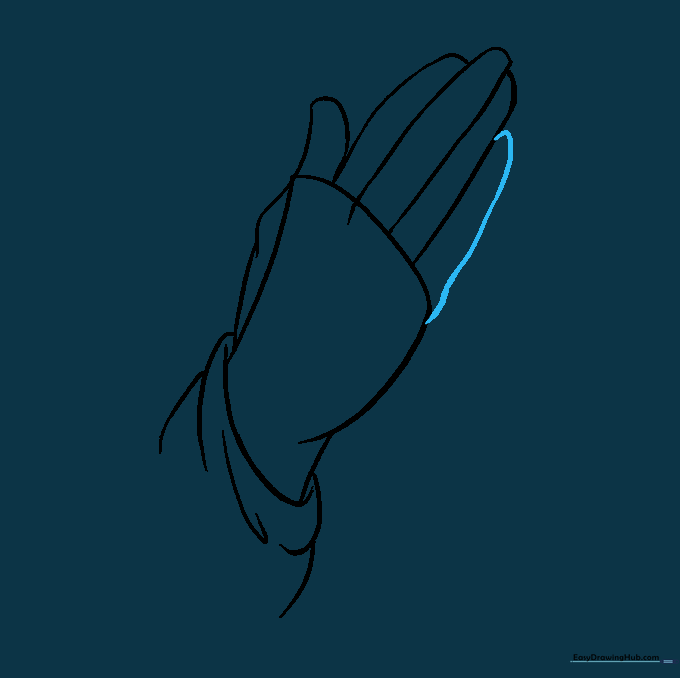
Step 5: Adding the Third Finger
Continue the pattern by drawing another long, curved line to represent the third finger. Teacher's Tip: Check your spacing—make sure there is a tiny gap between the fingers to show depth.
Step 6: Completing the Fingers
Draw one final, slightly shorter curved line to complete the set of fingers. Teacher's Tip: The pinky finger is usually the shortest, so keep this line tucked slightly lower than the others.
Step 7: Cleaning Up the Outline

Carefully erase any overlapping guide lines from the hand to reveal a clean, solid outline. Teacher's Tip: Use a kneaded eraser if you have one; it’s gentler on the paper surface.
Step 8: Sketching the Second Hand
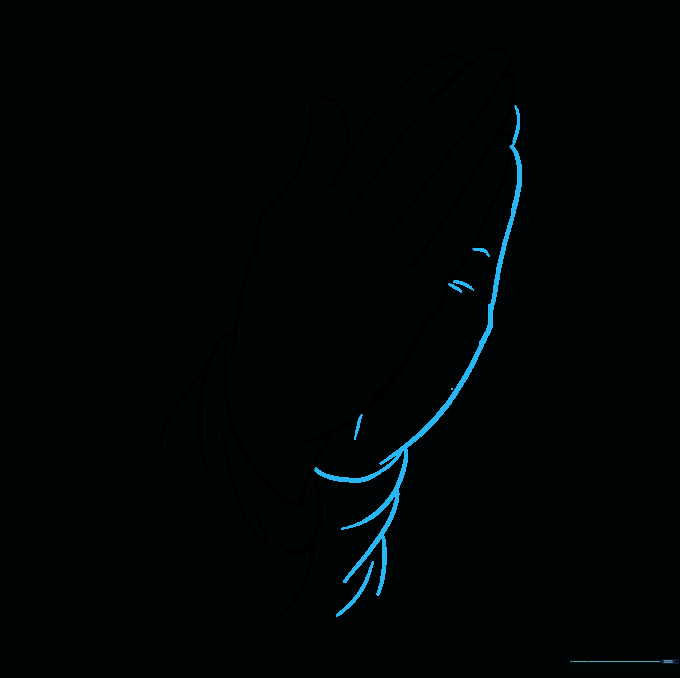
Sketch the second hand behind the first by extending a long, curved line from the wrist. Add small details like knuckles and fabric folds. Teacher's Tip: Don't worry about making it perfect; the second hand is partially hidden, which makes it easier to draw!
Step 9: Adding Final Details

Enclose small, rounded shapes on the fingertips for fingernails and add short, curved lines for the knuckles. Teacher's Tip: Keep fingernails small—too large and they can look like claws!
Step 10: Adding Color
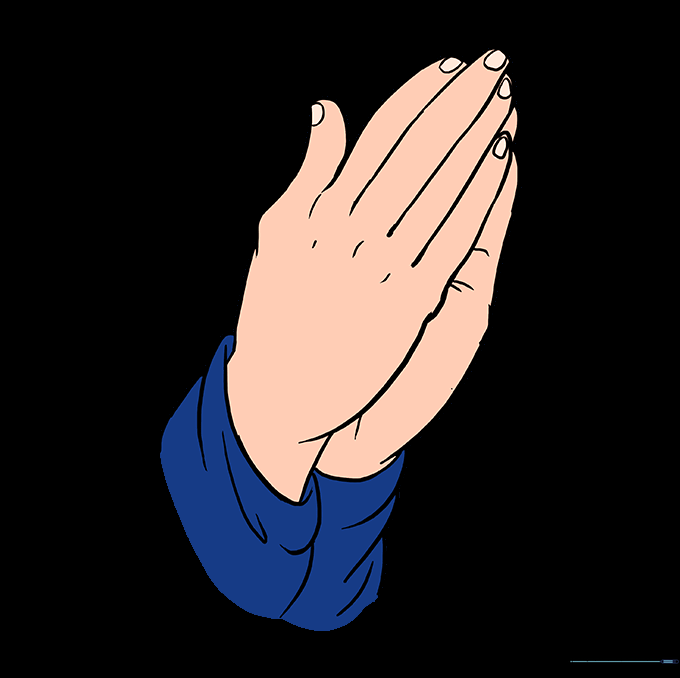
Bring your drawing to life with color! Use soft skin tones and add a bit of shading to the folds of the sleeve. Teacher's Tip: Try using a darker shade of your skin tone color to add depth where the hands meet.
More Tutorials