How to Draw Popeye: Easy Step-by-Step Guide for Kids
Ready to bring the world's most famous sailor to life? This tutorial is perfect for young artists ages 6+ who want to practice drawing expressive faces and muscular shapes. Grab your pencil, an eraser, and a piece of paper to start building your own cartoon hero.
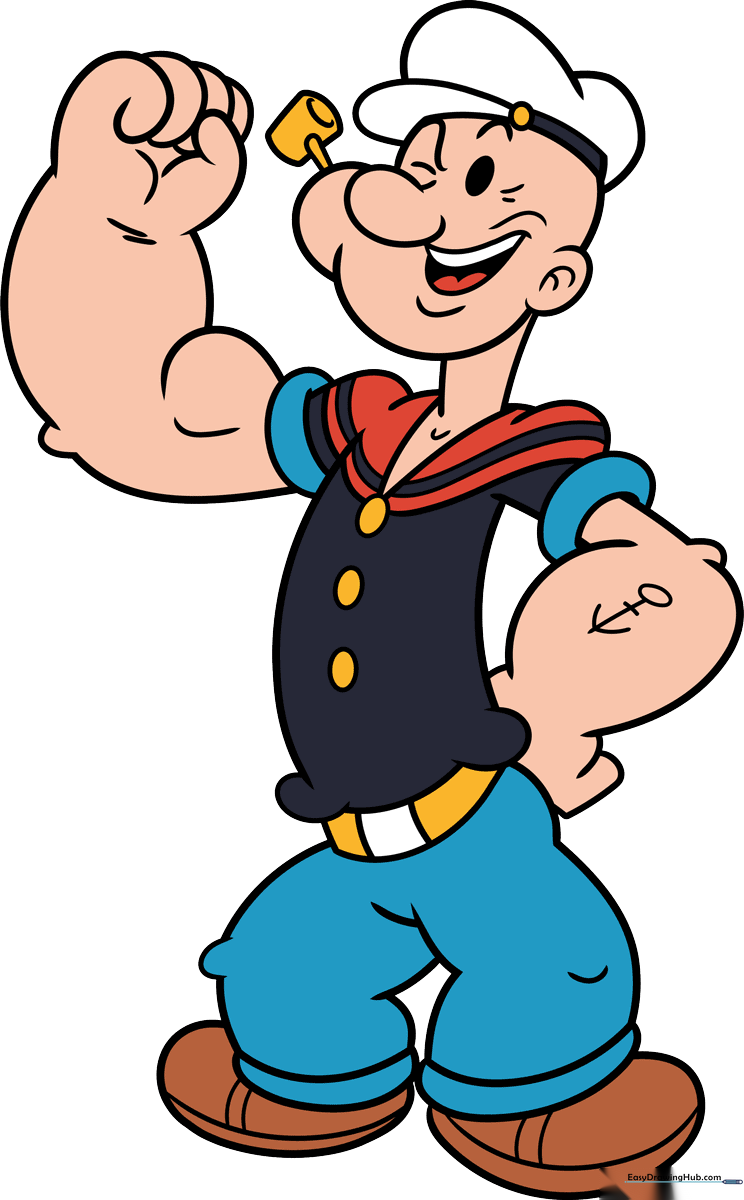
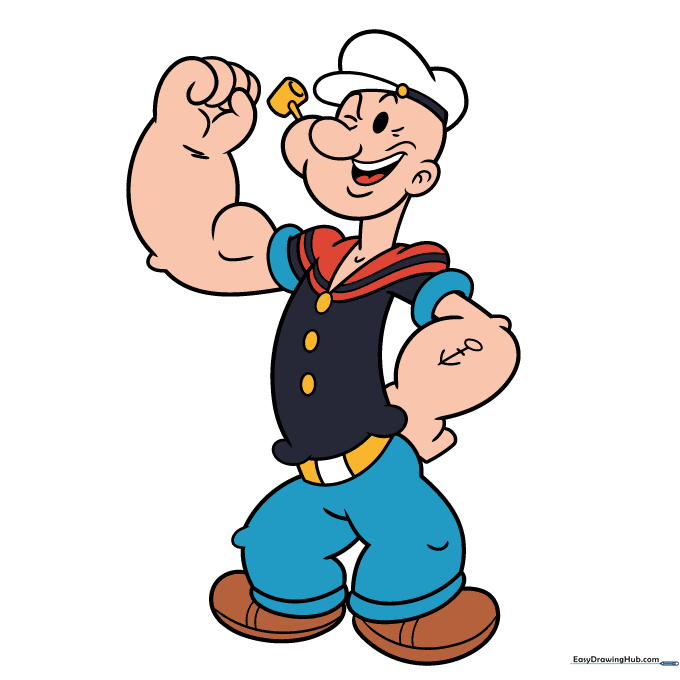
🎯 Final Result
Step-by-Step Instructions
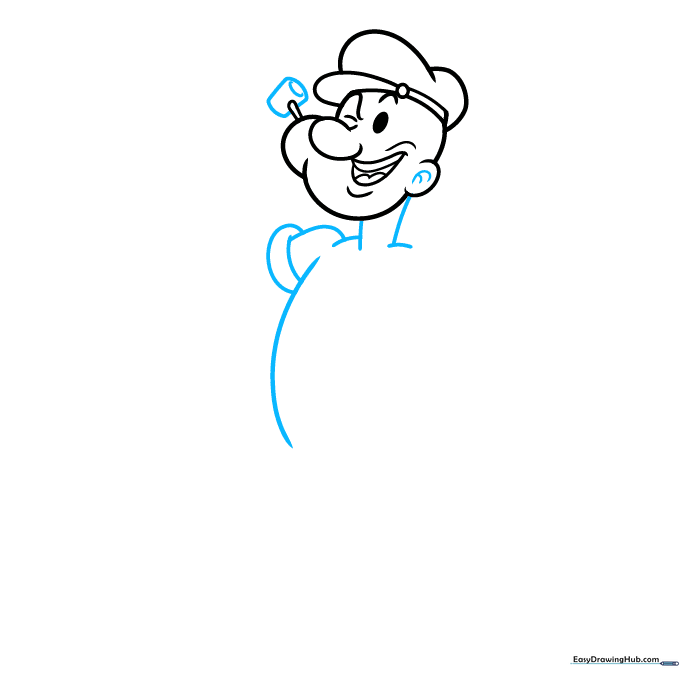
Step 1: Sketching the Face

Start by drawing the face. Use long, curved lines for the mouth and a bulbous shape for the nose. Add a squinting eye and an eyebrow. Teacher's Tip: Keep your pencil lines light so you can easily adjust the expression if it looks a bit too grumpy!
Step 2: Adding the Chin and Mouth

Use overlapping curved lines to define the dimpled chin and ear. Draw the open mouth with a tongue inside. Teacher's Tip: Popeye’s chin is very distinct—make sure those curves are deep to capture his classic look.
Step 3: The Sailor Cap and Pipe

Extend a curved line from the chin for the pipe stem. Sketch the brim and crown of his sailor cap. Teacher's Tip: Draw the cap button as a small circle first to help center the rest of the hat shape.
Step 4: Defining the Pipe and Neck
Draw a rounded rectangle for the pipe bowl. Add contour lines inside the ear and define the neck and shoulders. Teacher's Tip: Use short, quick strokes for the neck muscles to give him that strong, cartoonish appearance.
Step 5: Drawing the Famous Forearms
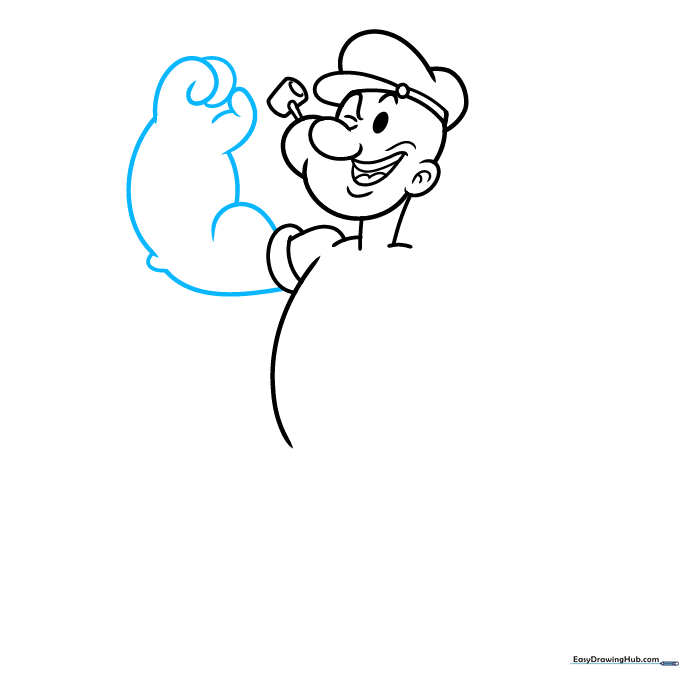
Sketch the massive, muscular arm. Use overlapping curves for the biceps and the knobby elbow. Teacher's Tip: Think of the forearm as a large, rounded shape—don't worry about perfect anatomy, just focus on the 'bulge' of the muscle.
Step 6: Hands and Sailor Collar
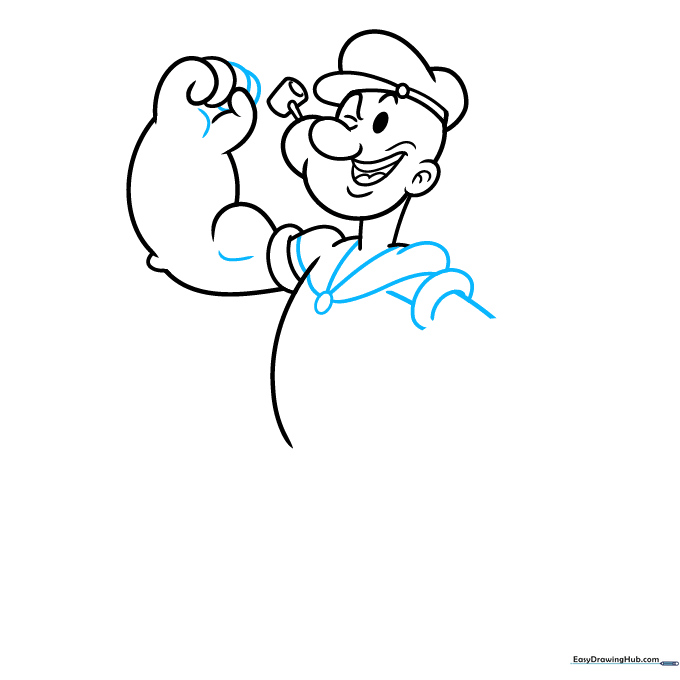
Complete the fingers and palm. Add the iconic sailor collar using curved lines. Teacher's Tip: If the fingers are tricky, draw them as simple rounded sausages first, then refine the knuckles.
Step 7: Torso and Belt
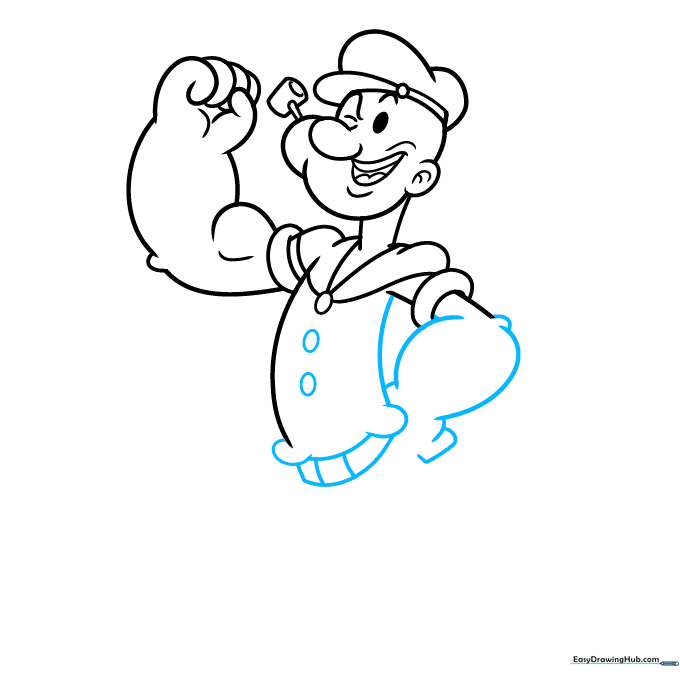
Add the buttons on the chest and draw the tucked-in shirt, belt, and buckle. Teacher's Tip: Keep the belt line horizontal to ground the character's posture.
Step 8: Legs and Pants
Draw the legs using overlapping curves, noting the knobby knees and pant cuffs. Teacher's Tip: Use a slightly wider line for the cuffs to show the fabric folding over.
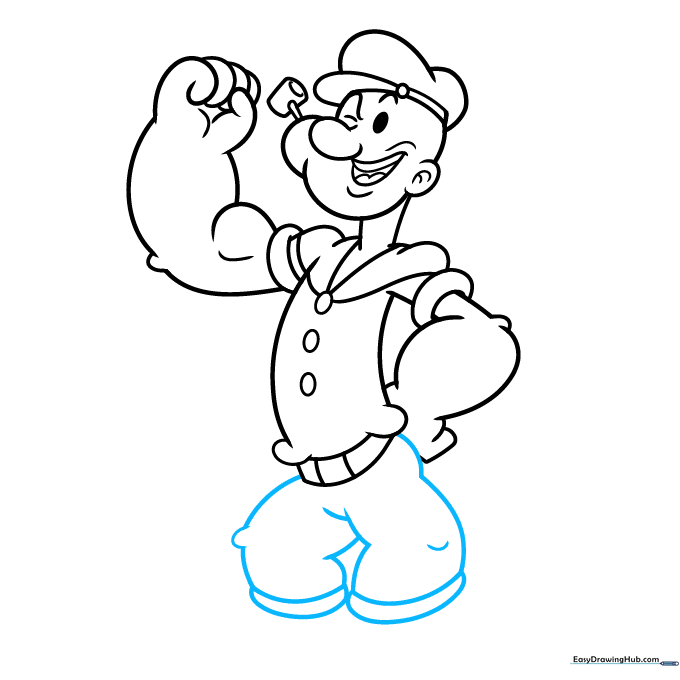
Step 9: Shoes and Anchor Tattoo
Draw the shoes and add the classic anchor tattoo on his forearm. Teacher's Tip: The anchor is just an oval, two lines, and a curve—keep it simple so it doesn't clutter the arm detail.
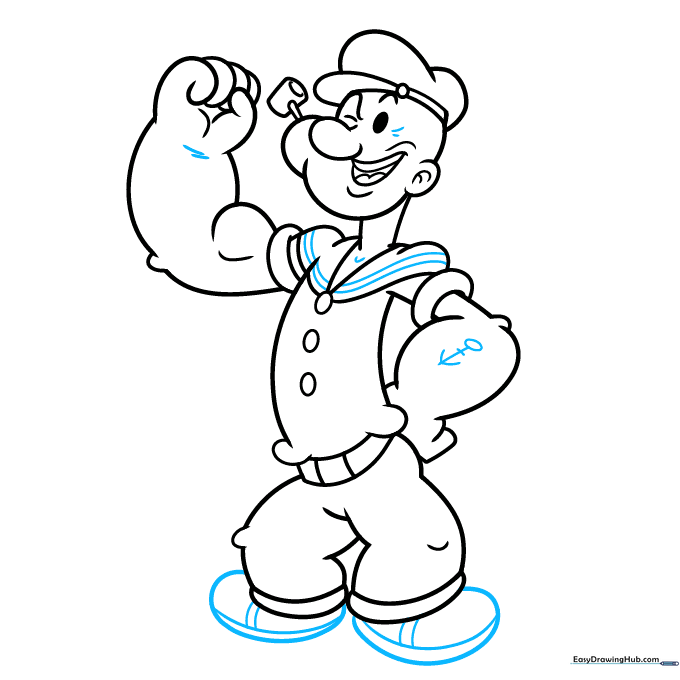
Step 10: Adding Color
Your outline is complete! Use peach for the skin and classic white, red, or black for the sailor suit. Teacher's Tip: Use colored pencils to add a light shadow under the chin to give your drawing more depth.
More Tutorials


