How to Draw Peter Pan: Easy 10-Step Guide for Kids
Bring the magic of Neverland to your sketchbook with this easy-to-follow Peter Pan drawing tutorial. Designed for young artists ages 7+, this project uses basic shapes to build confidence and character proportion skills. All you need is a pencil, an eraser, and a piece of paper to get started.
🎯 Final Result
Step-by-Step Instructions
Step 1: Sketching the Head and Hat Base

Start with a light circle for the head and a curved line for the chin. Add the jagged hair tufts along the forehead, then cap it off with two connected triangles to form the base of his iconic hat. Teacher's Tip: Keep your pencil pressure light here; you'll be erasing the overlapping lines later!
Step 2: Adding the Hat Feather and Ear

Extend two curved lines from the hat to a point, then draw a central line to create the feather. Sketch a small, pointed ear on the side of the head and add tufts of hair near the neck. Teacher's Tip: The feather should look slightly curved to give it a sense of movement.
Step 3: Drawing the Collar and Shoulders

Draw two curved triangles at the base of the neck to form the collar of his tunic. Sketch the shoulders and arms using smooth, flowing lines. Teacher's Tip: Ensure the collar triangles are symmetrical to keep the character looking balanced.
Step 4: Sketching the Arms and Hands

Complete the arms and hands. Use short, jagged lines at the bottom of the sleeves to show the fabric's edge. Teacher's Tip: Hands are tricky! Focus on the overall shape of the fist rather than individual fingers at this stage.
Step 5: Defining the Torso and Knife
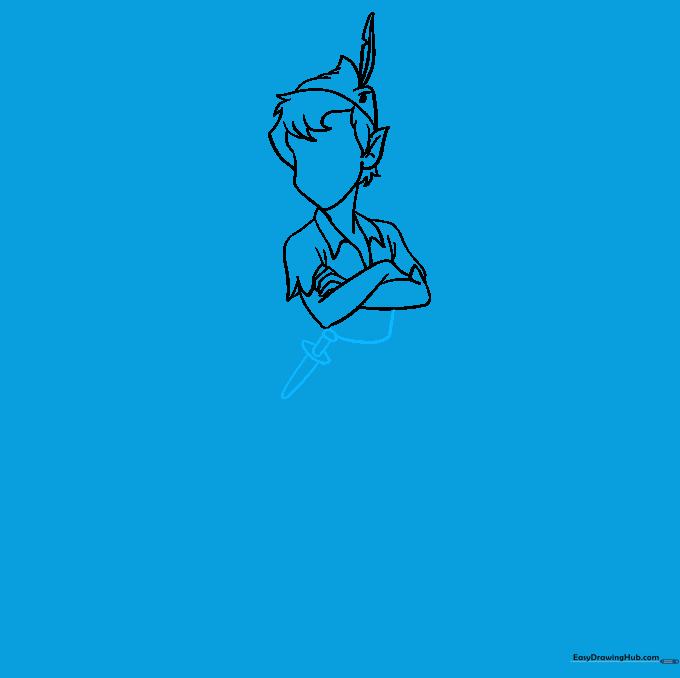
Draw the torso using a curved line. Add the knife at his waist using a simple oval for the handle and a pointed shape for the blade. Teacher's Tip: Keep the knife small so it doesn't distract from the character's pose.
Step 6: Adding the Belt and Tunic Hem
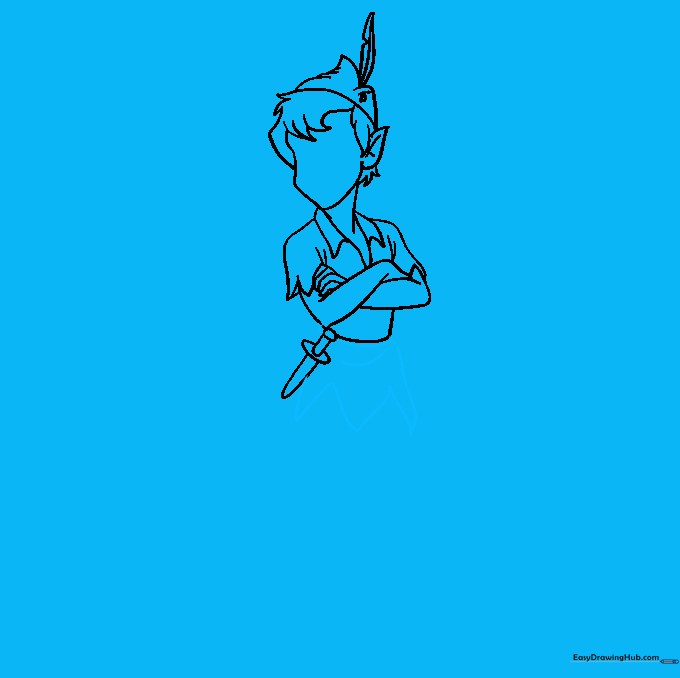
Draw a horizontal line for the belt, then create the jagged 'V' shapes at the bottom of the tunic. Teacher's Tip: Make the 'V' shapes irregular to give the tunic a natural, worn-in look.
Step 7: Drawing the First Leg and Shoe
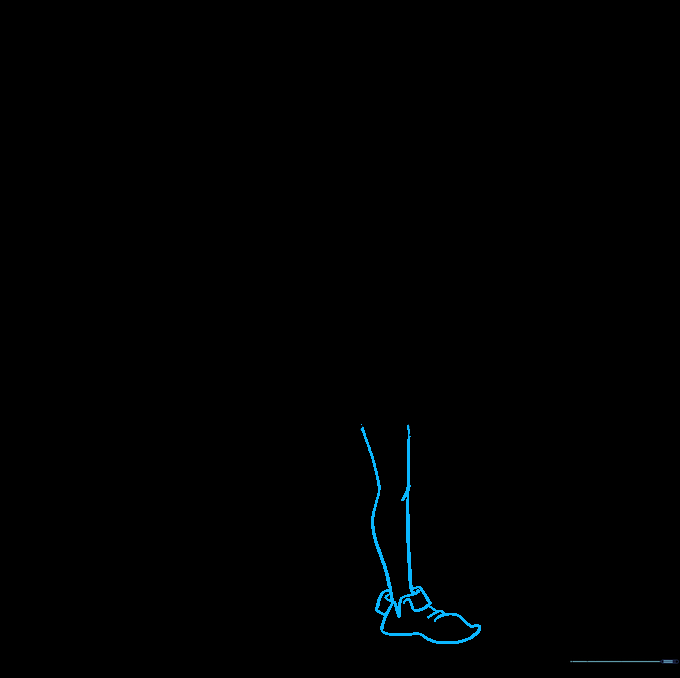
Extend curved lines downward to form the leg, showing a slight bend at the knee. Sketch the pointed shoe with a folded collar. Teacher's Tip: The overlap at the knee helps show that the leg is bent, adding depth to your drawing.
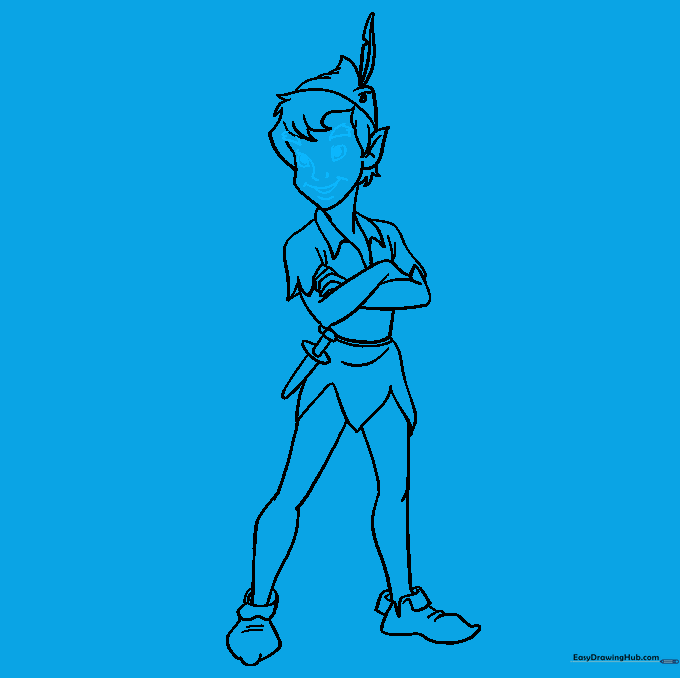
Step 8: Completing the Legs and Shoes
Sketch the second leg and shoe to match the first. Add small lines across the top of the shoes to show the fabric texture. Teacher's Tip: Ensure the shoes are roughly the same size so the character looks proportional.
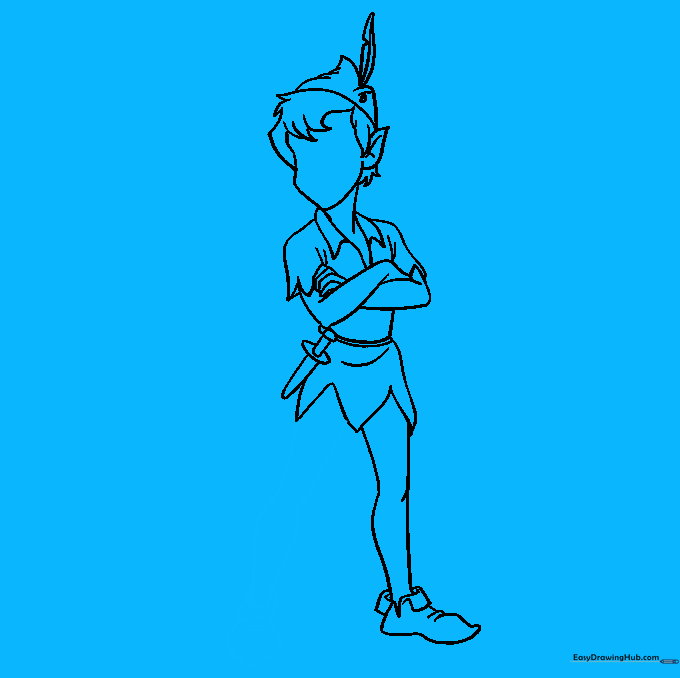
Step 9: Adding Facial Features
Draw almond-shaped eyes with small, dark pupils. Add eyebrows, a simple nose, and a cheerful smile. Teacher's Tip: Use a fine-liner pen to go over these details once you're happy with the pencil sketch.
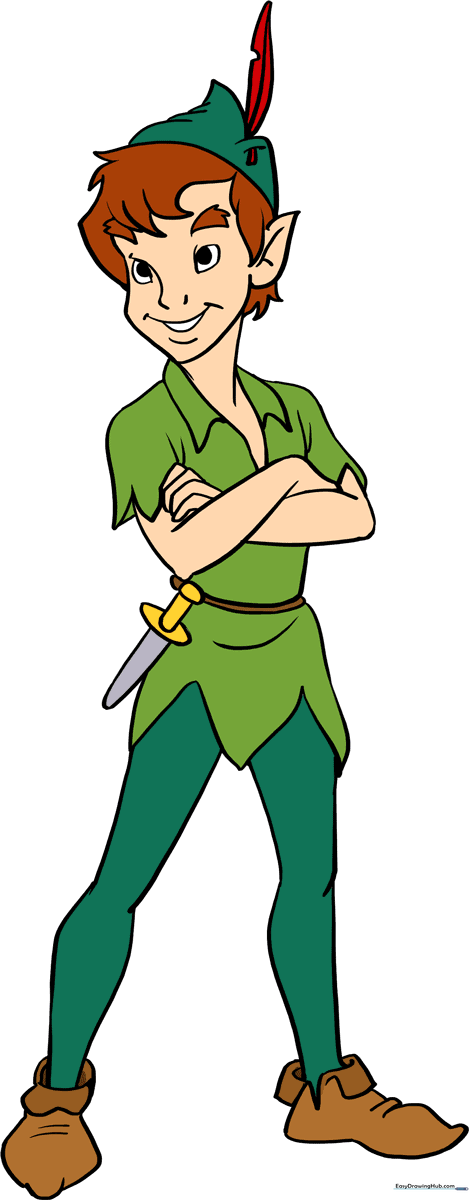
Step 10: Bringing Peter Pan to Life with Color
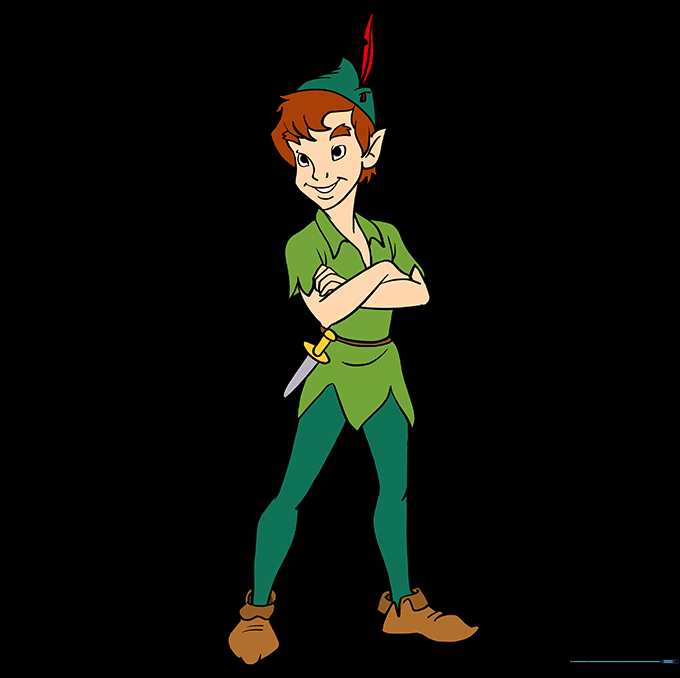
Time to color! Use light green for the tunic, darker green for the hat and pants, and brown for the shoes. Teacher's Tip: Try adding a little shading under the collar to make the drawing pop. You can also draw his friend Tinker Bell nearby to complete the scene!
More Tutorials


