How to Draw Arm and Hand Anatomy: Easy Guide for Kids
Help young artists understand human anatomy with this clear, visual guide to the arm and hand. Designed for ages 7+, this lesson requires only a pencil, paper, and an eraser. By the end, students will be able to identify and illustrate key anatomical parts with confidence.
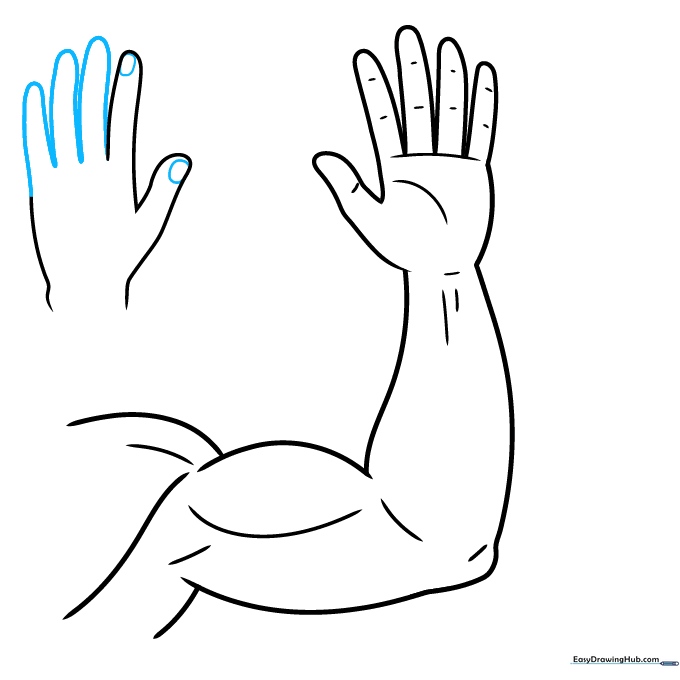
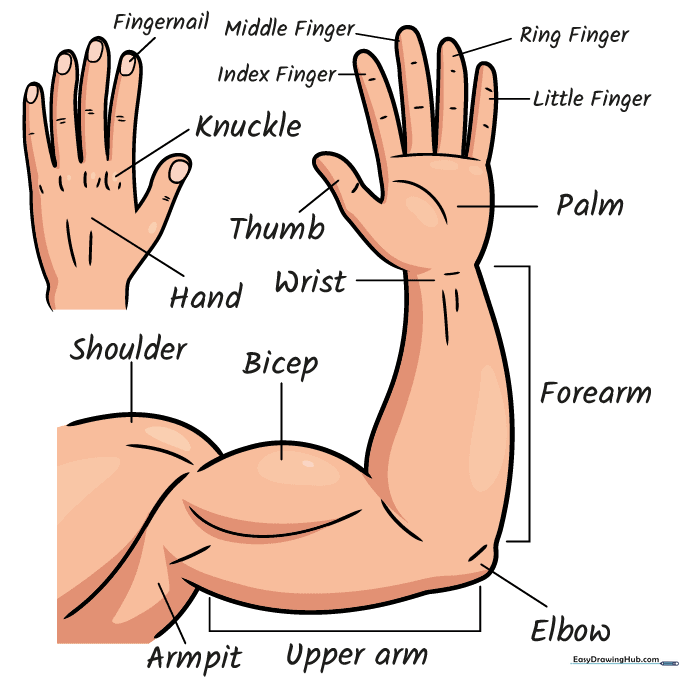
🎯 Final Result
Step-by-Step Instructions
Sketching the Shoulder and Bicep

Start by sketching the shoulder and bicep using soft, overlapping curved lines. Teacher's Tip: Keep your pencil pressure light so you can easily refine the muscle shapes later.
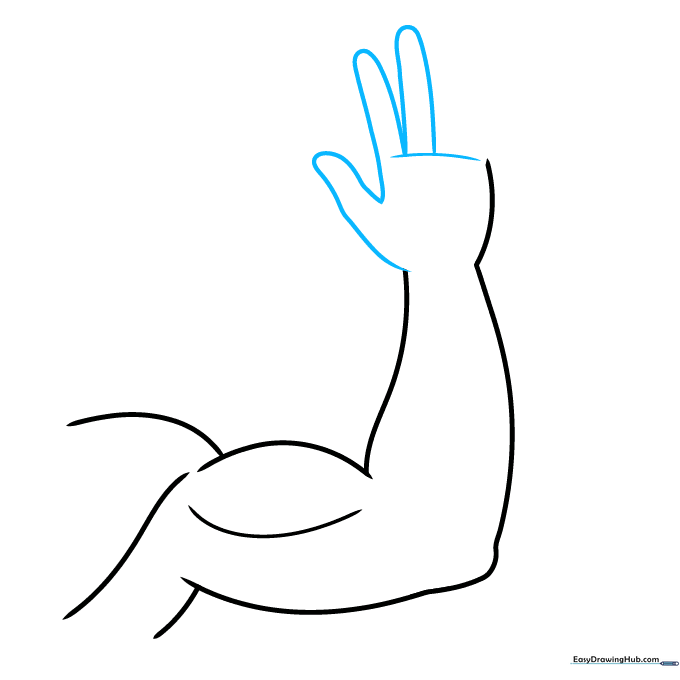
Defining the Forearm and Elbow

Extend the lines downward to create the elbow and the forearm. Add a subtle curve to show the muscle contour. Teacher's Tip: Think of the elbow as a gentle 'hinge'—keep the line smooth rather than sharp.
Drafting the Thumb and Palm
Sketch the thumb and fingers using 'U' shapes that double back. Add a horizontal line across the palm. Teacher's Tip: Use your own hand as a reference to see how the thumb sits lower than the fingers.
Adding the Remaining Fingers
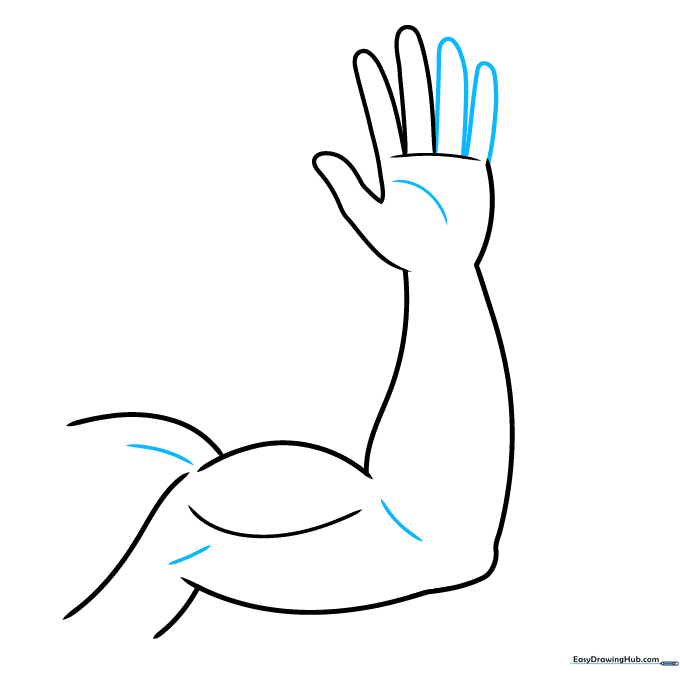
Complete the hand by drawing the final two fingers. Add small curved lines to define the palm muscles. Teacher's Tip: Vary the length of the fingers slightly to make the hand look more natural.
Detailing Joints and Starting the Second Hand
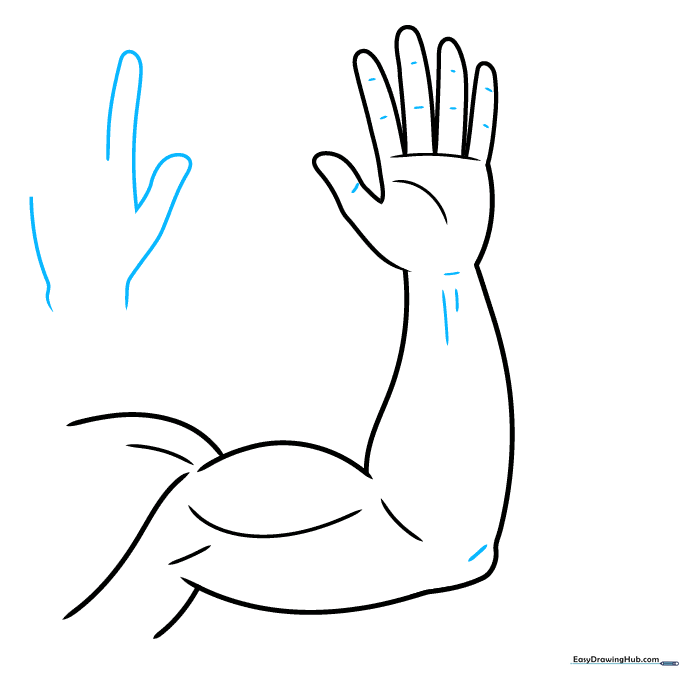
Add small lines at the wrist and knuckles for detail. Begin sketching a second hand positioned above the shoulder. Teacher's Tip: Use short, quick strokes for joints to suggest movement.
Drawing the Back of the Hand
Draw the fingers for the second hand, this time showing the back of the hand. Add small rounded shapes for fingernails. Teacher's Tip: Notice how the fingernails are slightly curved to match the finger shape.
Refining Anatomy and Labels
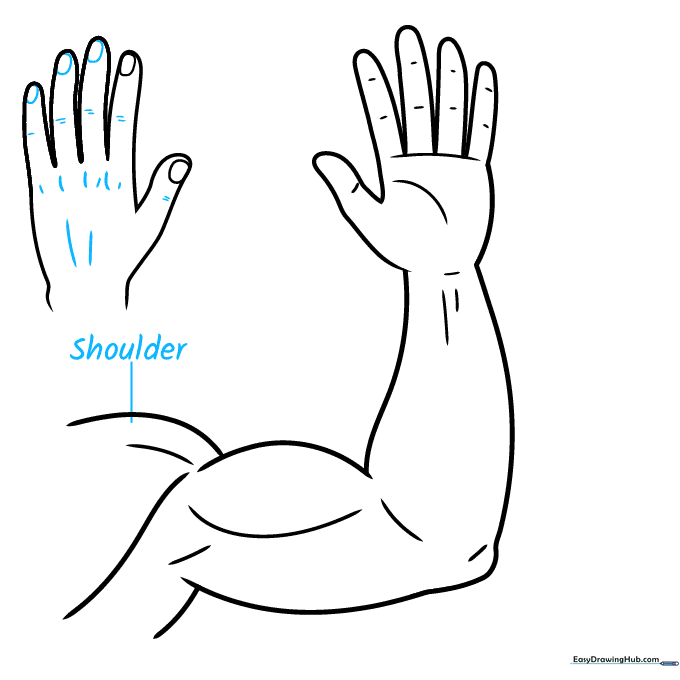
Finalize the fingernails and add contour lines for the knuckles. Draw a line from the shoulder to prepare for labeling. Teacher's Tip: Use a ruler for your label lines to keep the diagram looking professional.
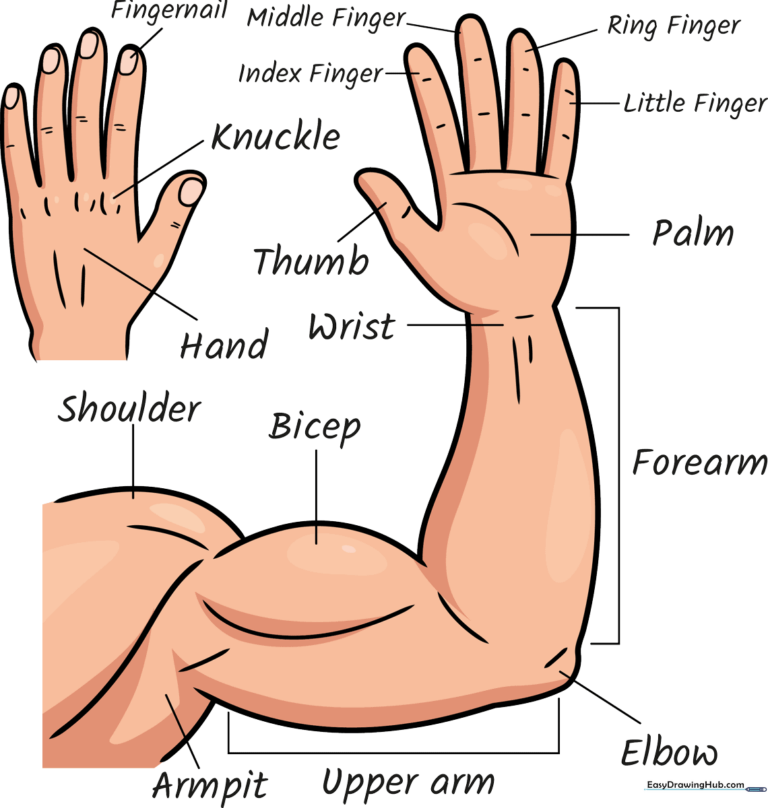
Labeling the Arm Anatomy
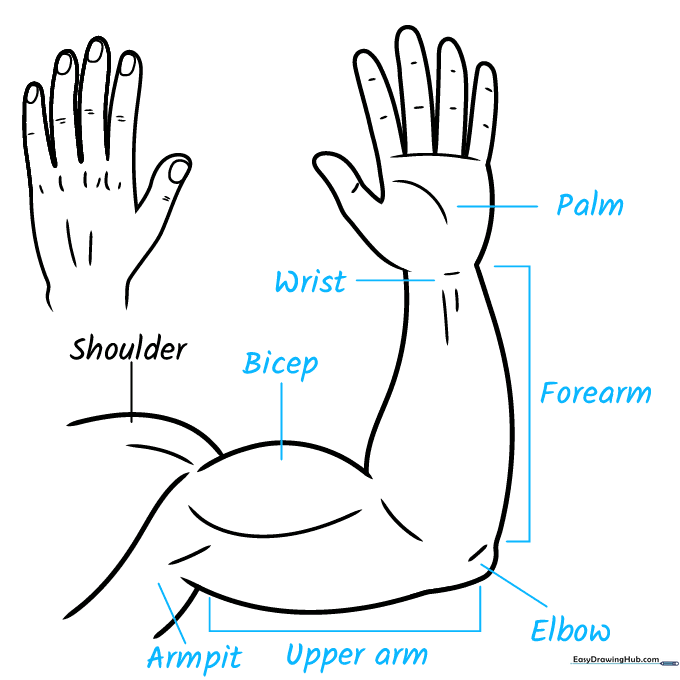
Label the bicep, wrist, palm, forearm, elbow, and upper arm. Use brackets to group the arm sections. Teacher's Tip: Print your labels clearly in capital letters for easy reading.
Labeling the Hand Anatomy
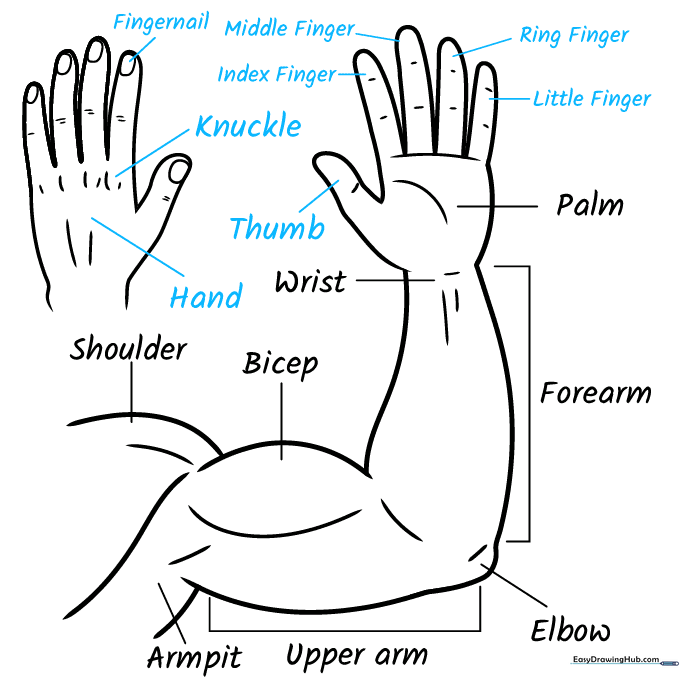
Complete your diagram by labeling the fingers, knuckles, and thumb. Ensure each line points precisely to the correct part. Teacher's Tip: Double-check your spelling—it's a great way to combine art and science!
Adding Color to Your Diagram
Bring your anatomy chart to life with color. Use soft skin tones or keep it clean with black and white. Teacher's Tip: Use colored pencils to shade the muscles—it helps show depth and volume.
More Tutorials


