How to Draw a Sneaker: Anatomy & Step-by-Step Guide
Ever wonder what makes up your favorite pair of sneakers? This lesson is perfect for young artists ages 7+ who want to combine technical labeling with creative design. All you need is a pencil, an eraser, and a piece of paper to start building your own custom shoe diagram.
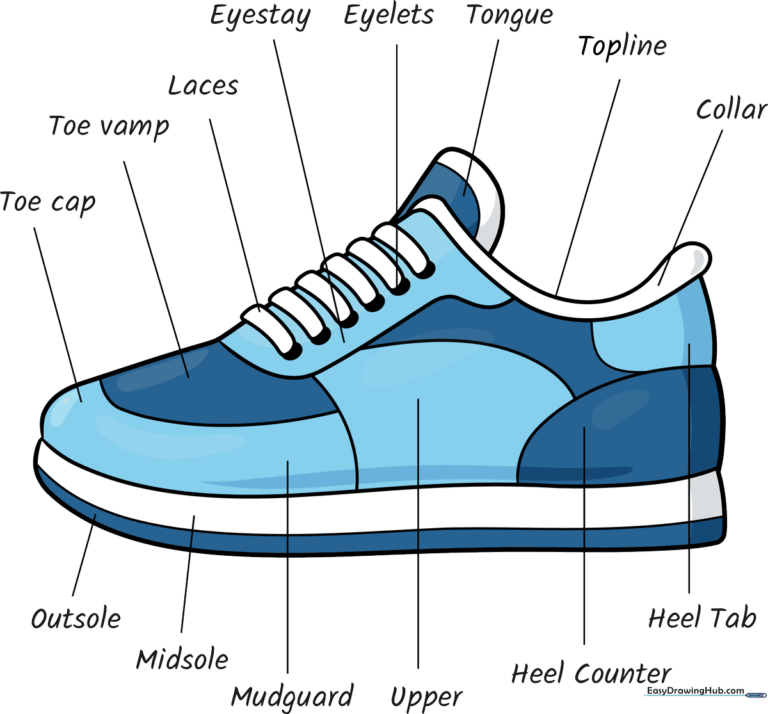
🎯 Final Result
Step-by-Step Instructions
Sketching the Outer Profile
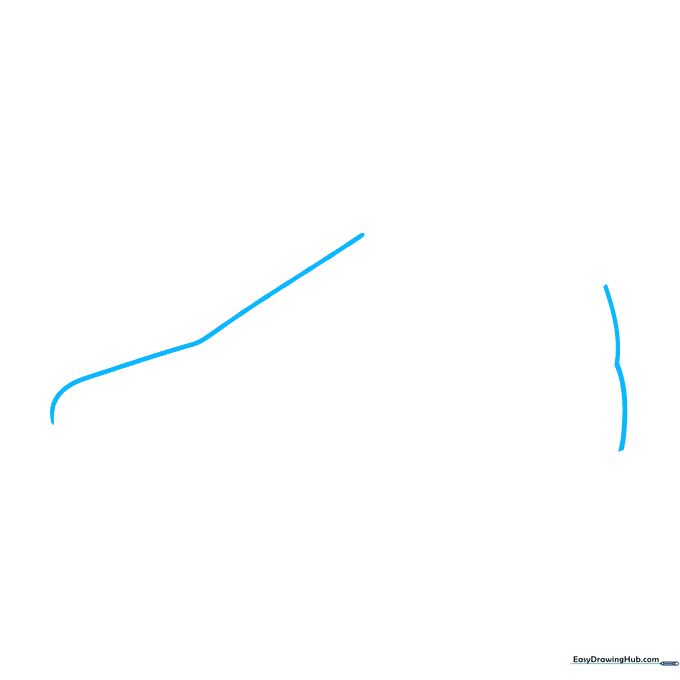
Start by drawing two smooth, curved lines to define the top and back of the shoe. Teacher's Tip: Keep your pencil pressure light so you can easily adjust the shape if it looks a bit too pointy or flat.
Defining the Collar and Base
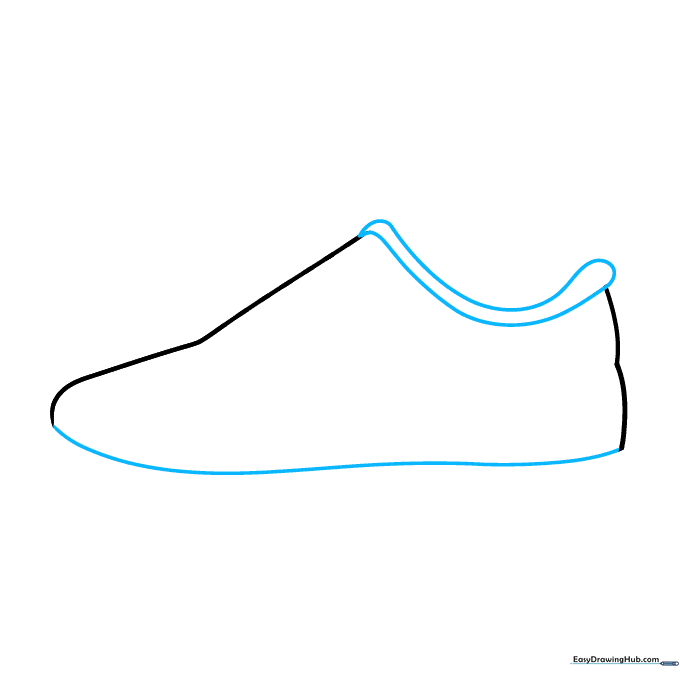
Draw a curved line between your first two lines, looping it back to form the ankle collar. At the bottom, add a long, sweeping curve to create the base. Teacher's Tip: Think of this as the 'cushion' area where your ankle rests.
Adding the Sole and Eyestay
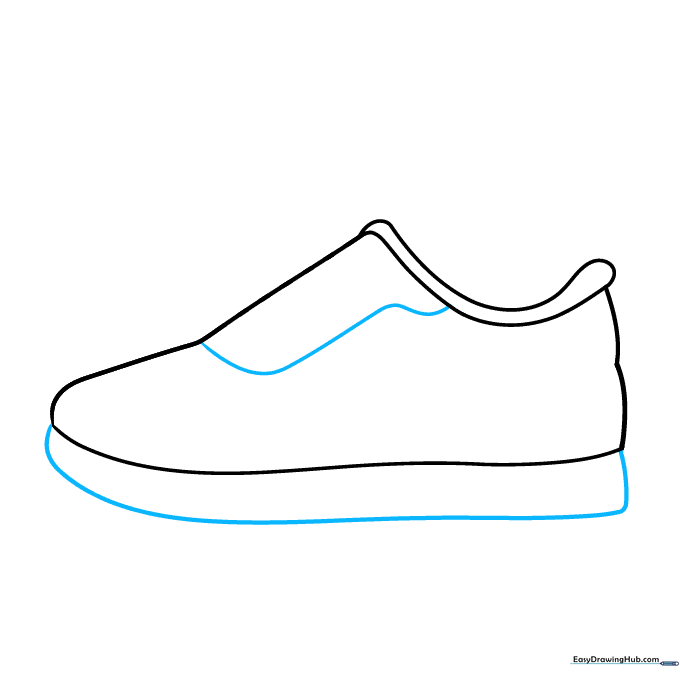
Connect the front and back with a long curve to enclose the sole. Then, draw a line from the top toward the collar to mark the 'eyestay'—the part that holds the laces. Teacher's Tip: Use a ruler if you want the eyestay to look extra sharp and professional.
Drawing Laces and Eyelets
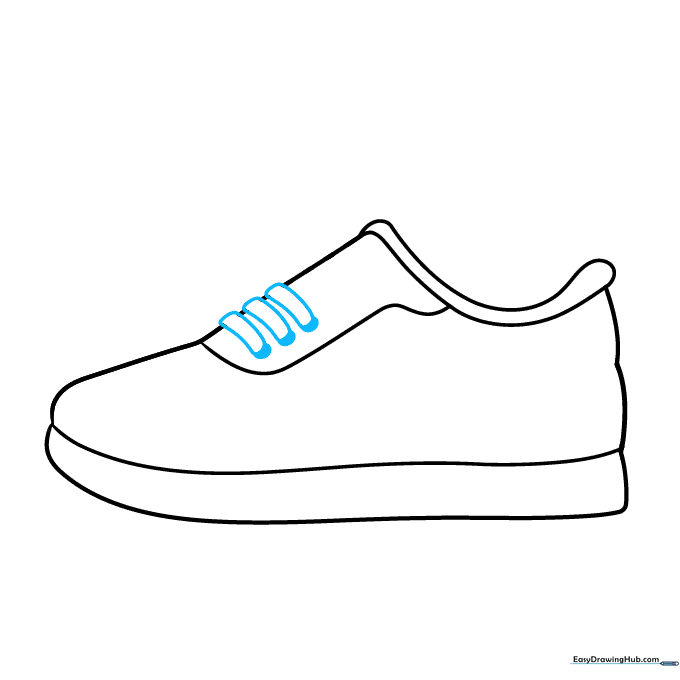
Sketch small curved rectangles across the eyestay for laces. Add tiny shaded ovals at the ends; these are your eyelets. Teacher's Tip: Make sure your eyelets are evenly spaced so the laces look symmetrical.
Continuing the Lacing Pattern
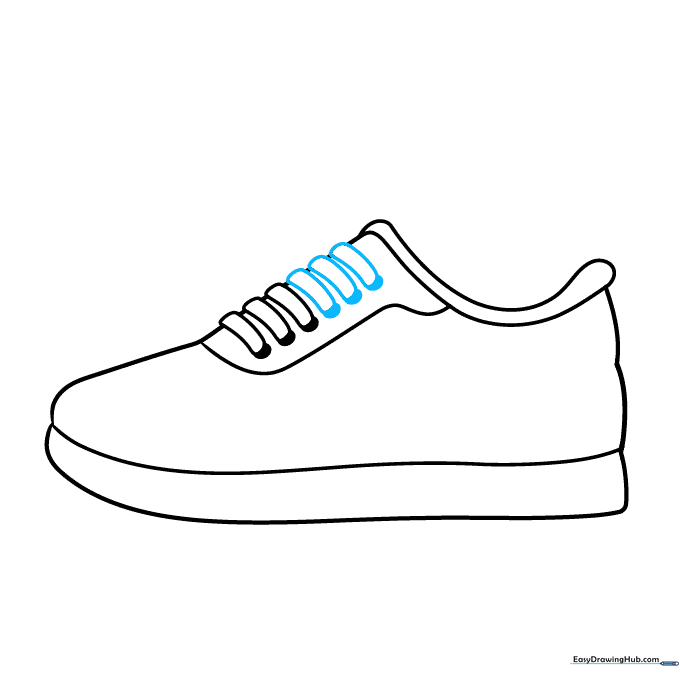
Repeat the process to add more laces and eyelets moving down the shoe. Teacher's Tip: Don't worry if they aren't perfect; real sneakers have messy laces too!
Adding the Tongue and Heel Details
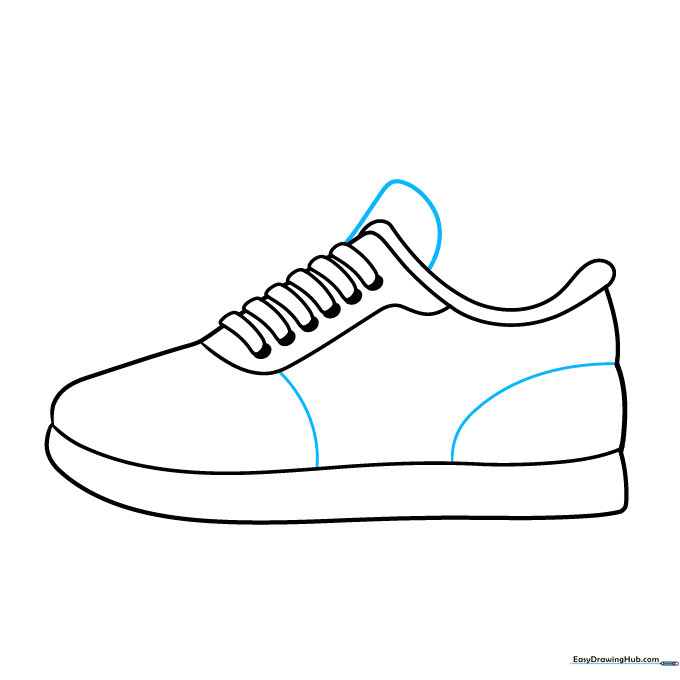
Extend a line above the collar to create the tongue. Add curved lines across the heel area to define the structure. Teacher's Tip: The tongue should look like it's peeking out from behind the laces.
Refining the Panels
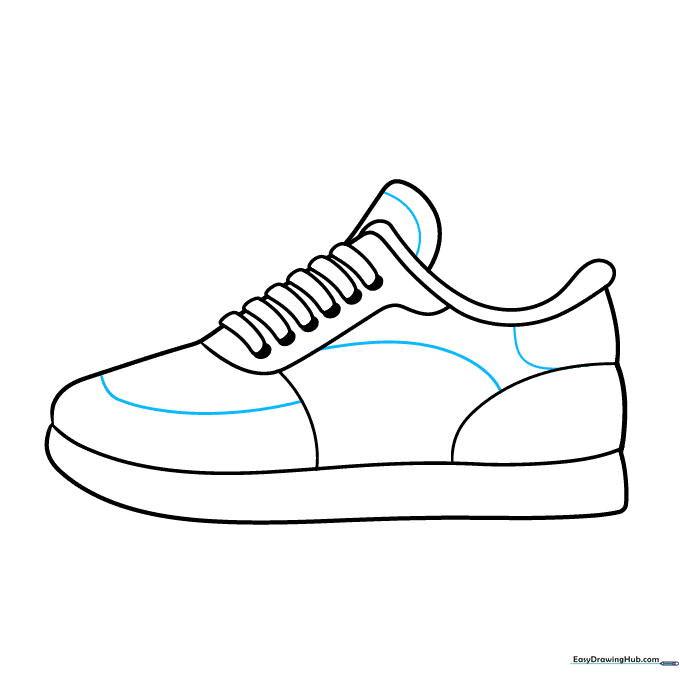
Add curved lines across the tongue and front toe area to show where the different fabric panels connect. Teacher's Tip: This is where you can start to see the shoe really take shape as a 3D object.
Labeling Your Masterpiece (Part 1)
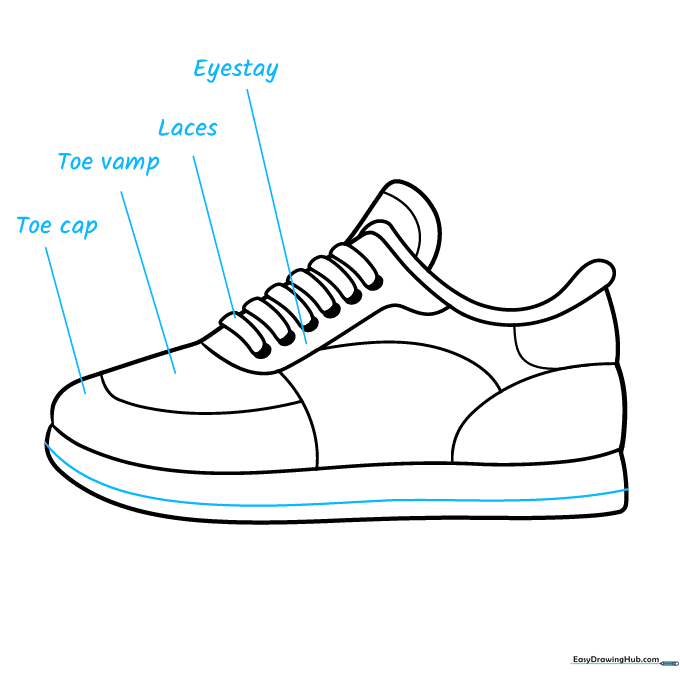
Draw a line across the sole for extra detail. Now, start labeling your drawing! Draw straight lines from the toe cap, vamp, laces, and eyestay to their names. Teacher's Tip: Use a ruler for your label lines to keep the diagram looking clean and scientific.
Labeling Your Masterpiece (Part 2)
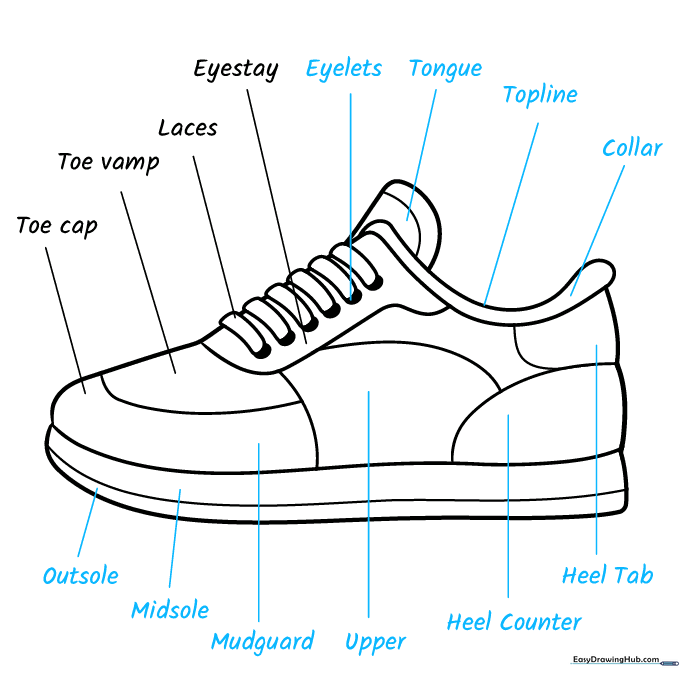
Finish your diagram by labeling the remaining parts: eyelets, tongue, topline, collar, heel tab, heel counter, upper, mudguard, midsole, and outsole. Teacher's Tip: This is a great way to learn new vocabulary while you draw!
Bring Your Sneaker to Life
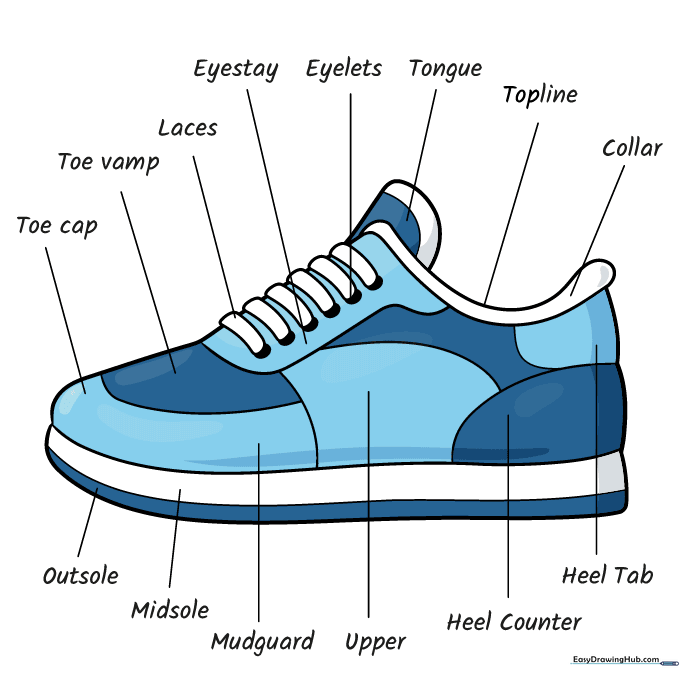
Your technical diagram is done! Now, grab your markers or colored pencils. You can color it to match your favorite pair of sneakers or invent a wild, futuristic design. Teacher's Tip: Try using two different shades of the same color to create a shadow effect on the sole.
More Tutorials


