How to Draw Parts of a Plant: Easy Science Diagram Guide
Looking for a fun way to help your child visualize plant biology? This guide is perfect for students ages 6+ to create an accurate, labeled botanical diagram. You only need a pencil, paper, and an eraser to turn this science lesson into a creative masterpiece.
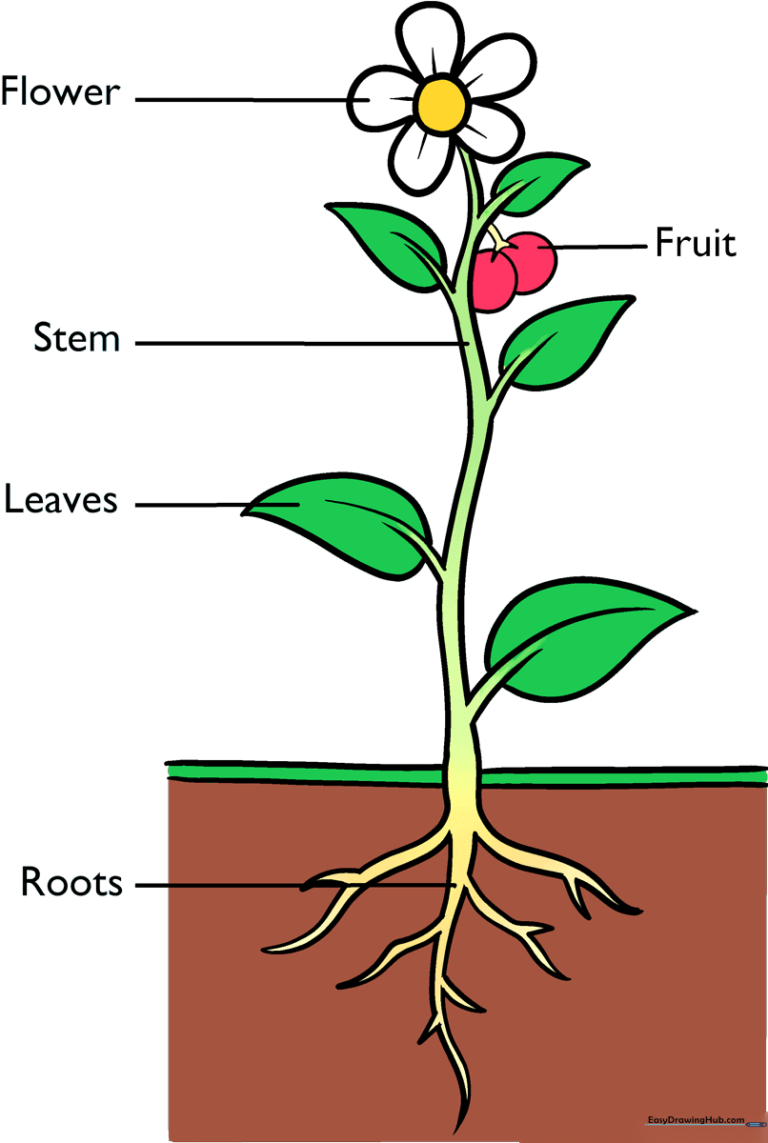
🎯 Final Result
Step-by-Step Instructions
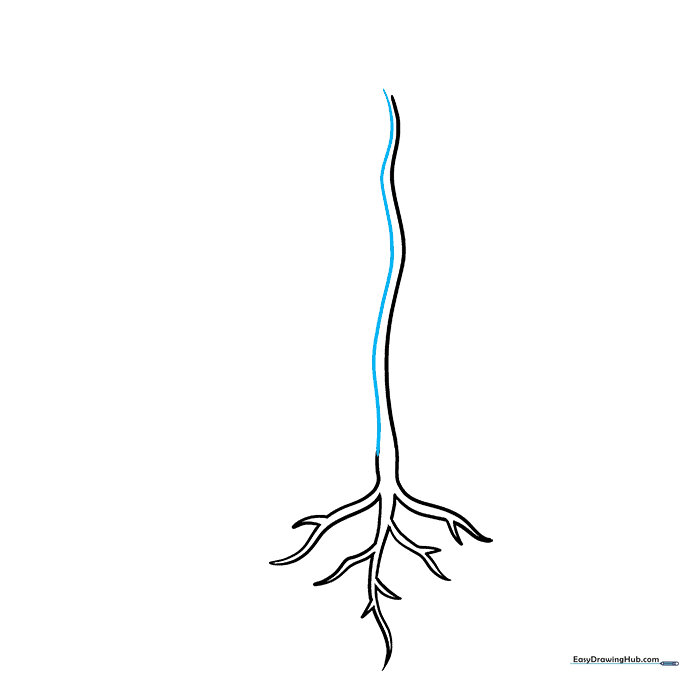
Step 1: Sketching the Roots
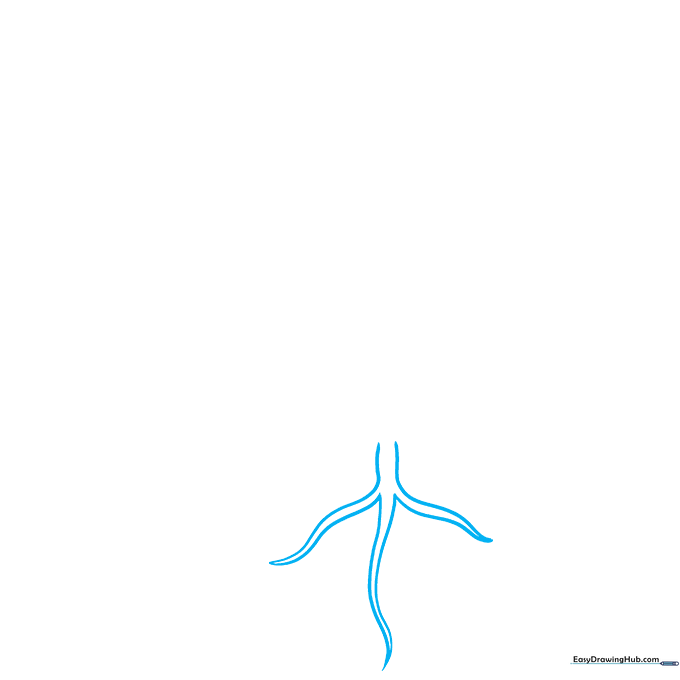
Start by drawing the roots at the bottom of your page. Use long, flowing curved lines that taper to sharp points. Teacher’s Tip: Roots aren't perfectly straight, so don't be afraid to let your hand wiggle a bit to make them look natural!
Step 2: Adding Secondary Roots
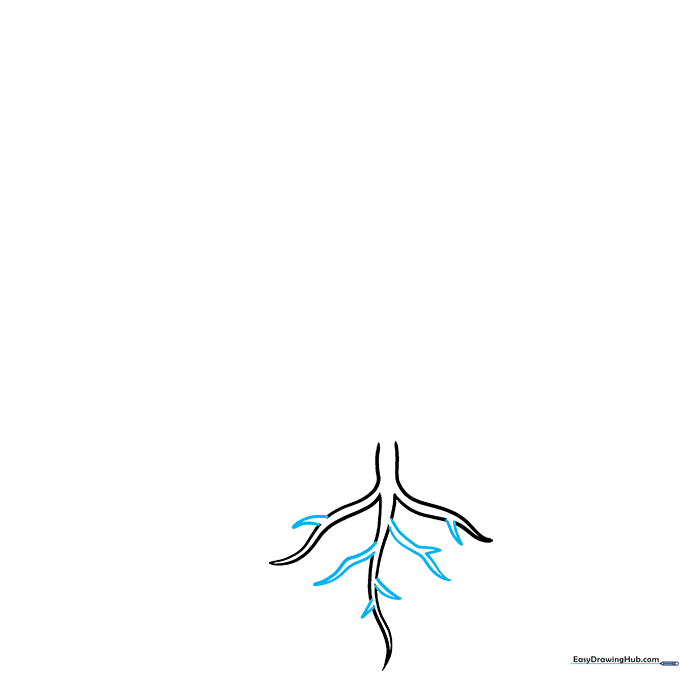
Add smaller side roots branching off the main ones using 'Y' or 'V' shaped lines. Teacher’s Tip: Keep your pencil pressure light here; if you make a mistake, it’s much easier to clean up with an eraser before you add the stem.
Step 3: Starting the Main Stem
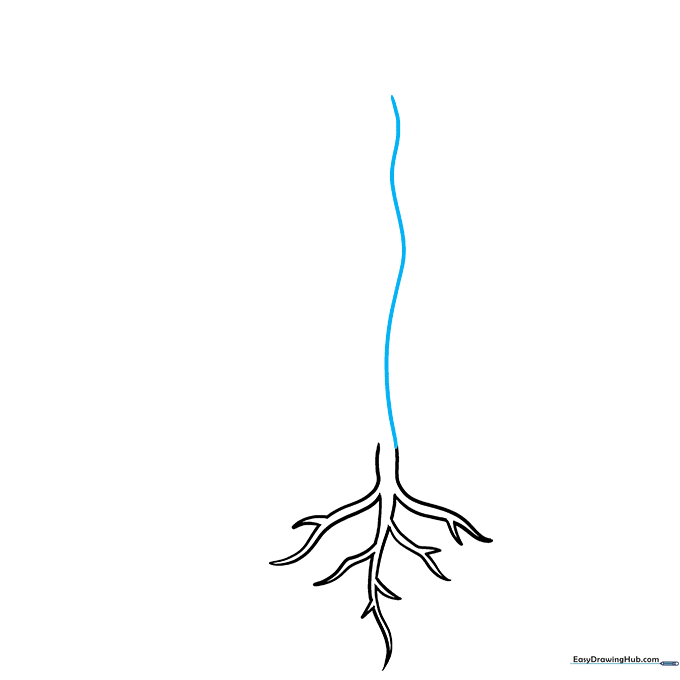
Extend a long, graceful curved line upward from the center of your roots. This will serve as the primary support for your plant. Teacher’s Tip: Imagine the stem is reaching toward the sun—keep the curve gentle and fluid.
Step 4: Defining the Stem Thickness
Draw a second curved line parallel to the first to complete the stem. Teacher’s Tip: Try to keep the space between the lines consistent so the stem looks sturdy and healthy.
Step 5: Adding Large Leaves
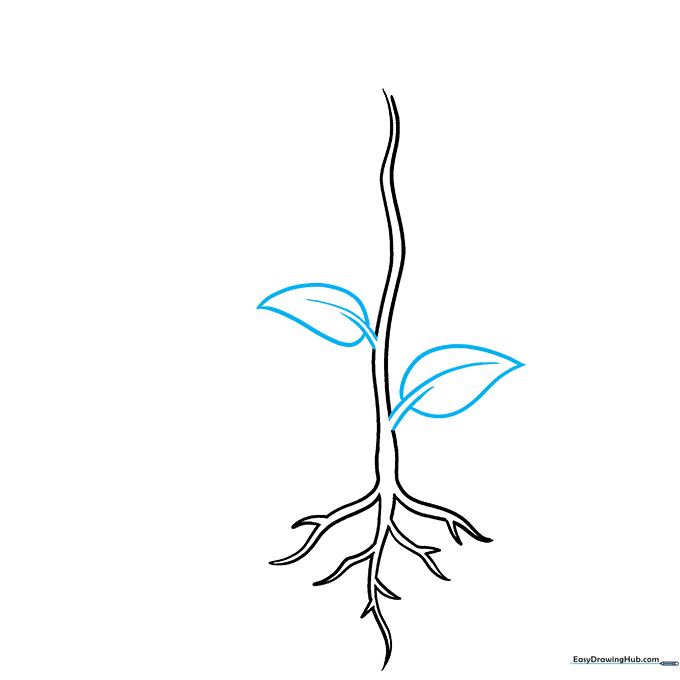
Draw teardrop-shaped leaves on the sides of the stem. Use two curved lines for the leaf veins first, then enclose them with the leaf shape. Teacher’s Tip: Leaves are rarely perfectly symmetrical, so feel free to vary the sizes slightly.
Step 6: Adding Smaller Leaves
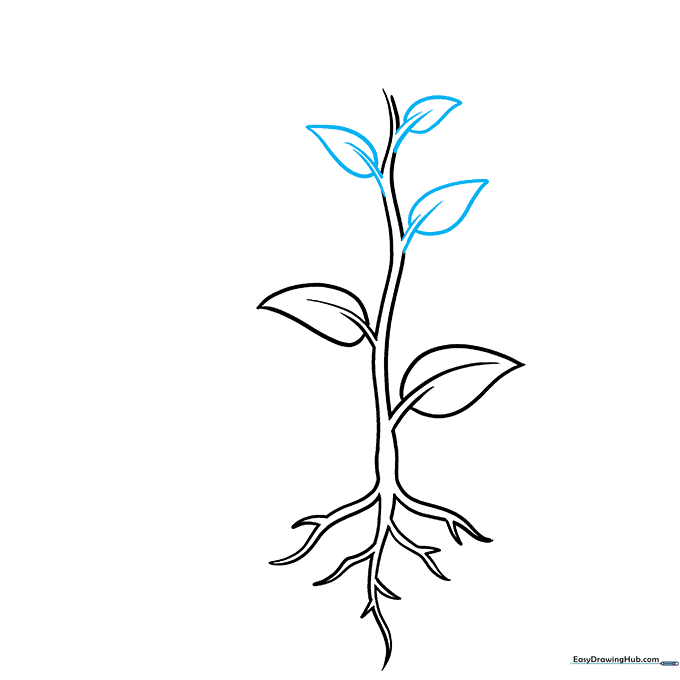
Add smaller leaves near the top of the stem to show growth. Teacher’s Tip: Smaller leaves near the top indicate new growth, which is a great detail to point out when explaining plant life cycles to kids.
Step 7: Drawing the Flower
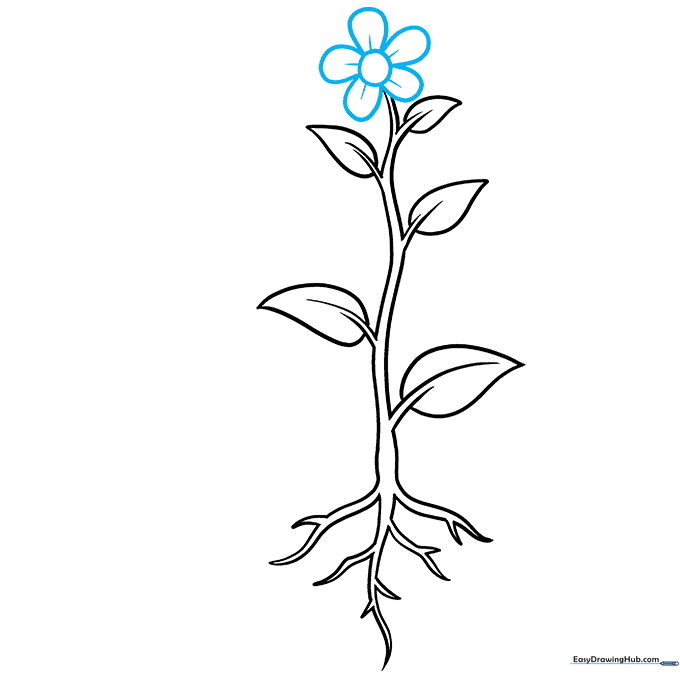
Draw a circle at the top for the center, then add 'U' shaped petals around it. Add a small curved line on each petal for texture. Teacher’s Tip: Use a light touch to make the petals look soft and delicate.
Step 8: Adding Fruit and Soil Line
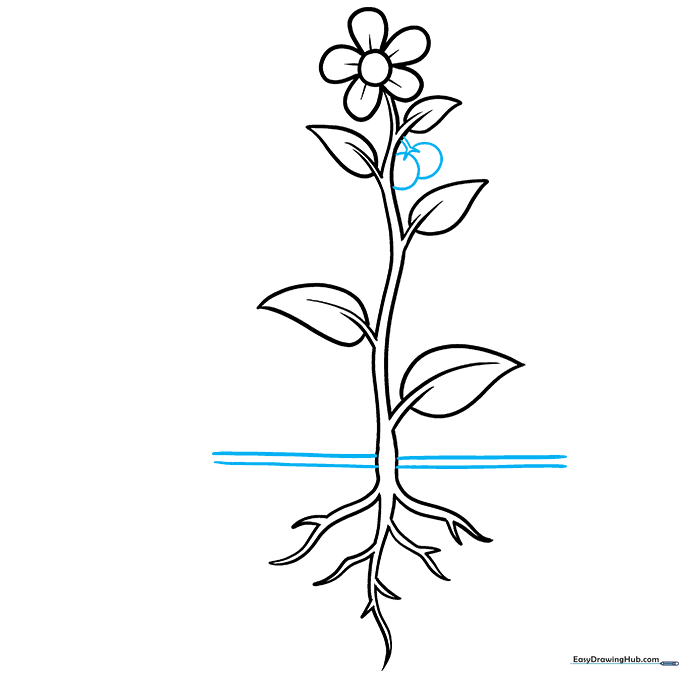
Draw a small cluster of berries on a side stem. Then, draw a horizontal line across the roots to represent the soil surface. Teacher’s Tip: The soil line helps kids understand the difference between the root system (underground) and the shoot system (above ground).
Step 9: Labeling the Anatomy
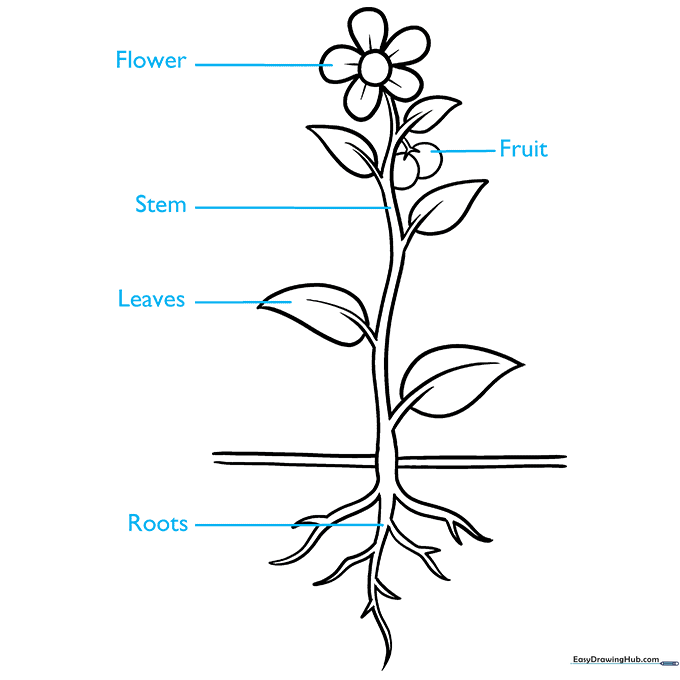
Draw straight lines from each part of the plant and write the labels: Roots, Leaves, Stem, Flower, and Fruit. Teacher’s Tip: Use a ruler to make the label lines look neat and professional for a school project.
Step 10: Adding Color
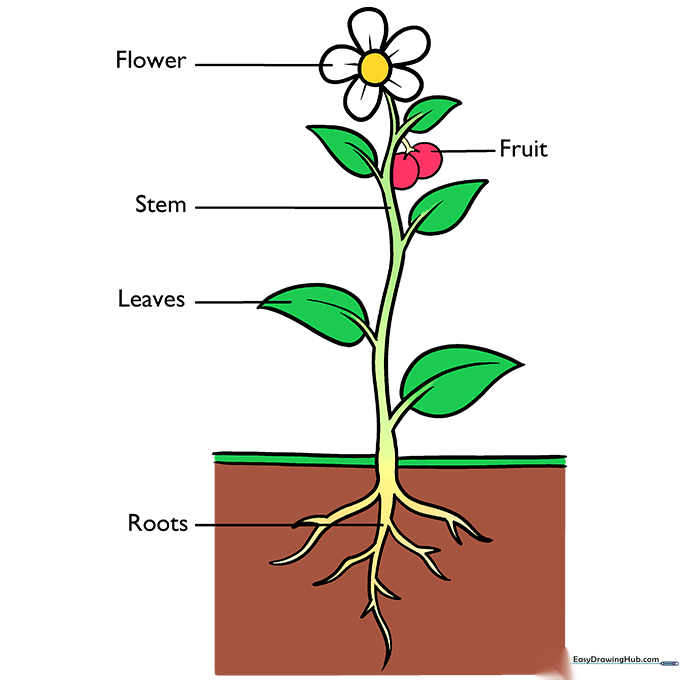
Bring your diagram to life with color! Use vibrant greens for the leaves and stem, and choose your favorite colors for the flower and fruit. Teacher’s Tip: Use colored pencils to shade the leaves darker near the veins for a realistic effect.
More Tutorials


