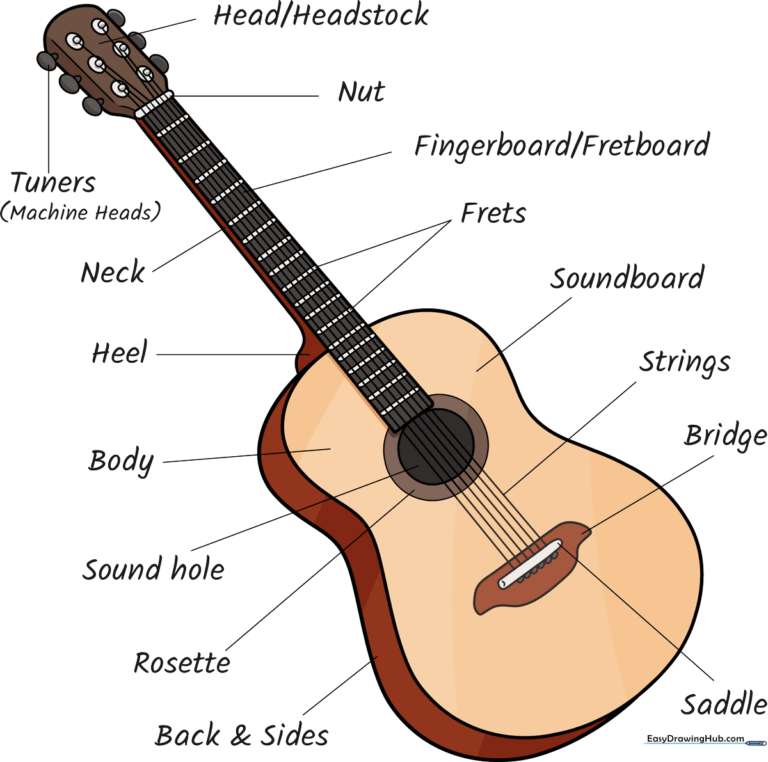
How to Draw a Guitar: Anatomy Guide for Young Artists
Perfect for young musicians and budding artists ages 6+, this guide breaks down the anatomy of an acoustic guitar into simple, manageable shapes. You will need a pencil, an eraser, and a piece of paper to get started. By the end, you'll have a labeled diagram that helps you understand exactly how this beautiful instrument is built.
🎯 Final Result
Step-by-Step Instructions
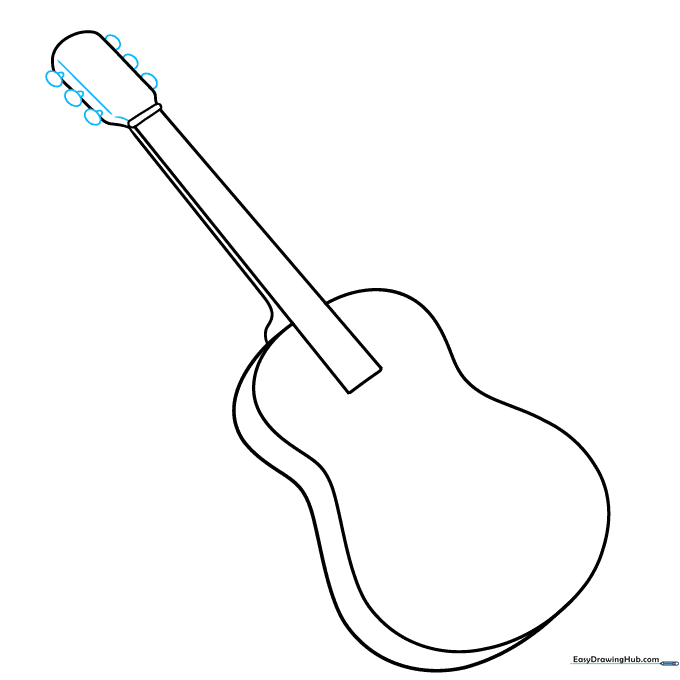
Step 1: Sketching the Body
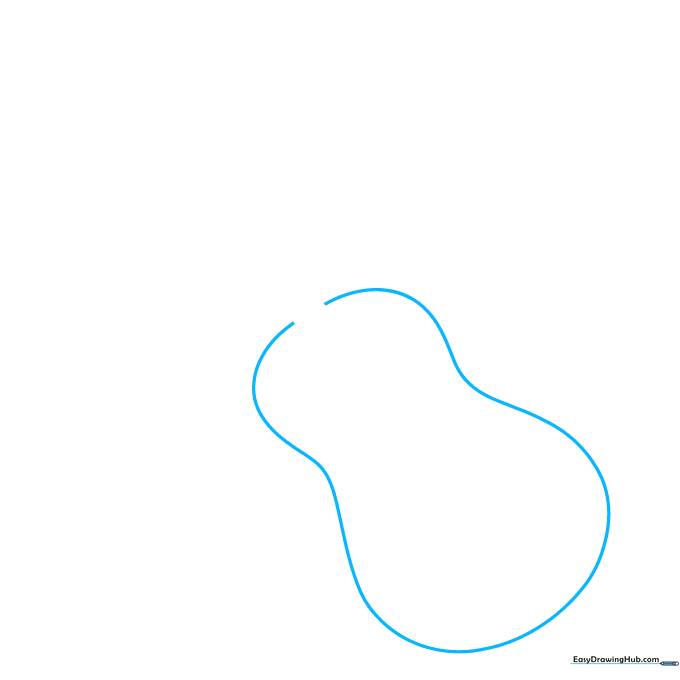
Use light, sweeping curved lines to trace the classic peanut-like shape of the guitar body. Teacher's Tip: Keep your pencil grip loose so you can create smooth curves without pressing too hard.
Step 2: Adding the Neck
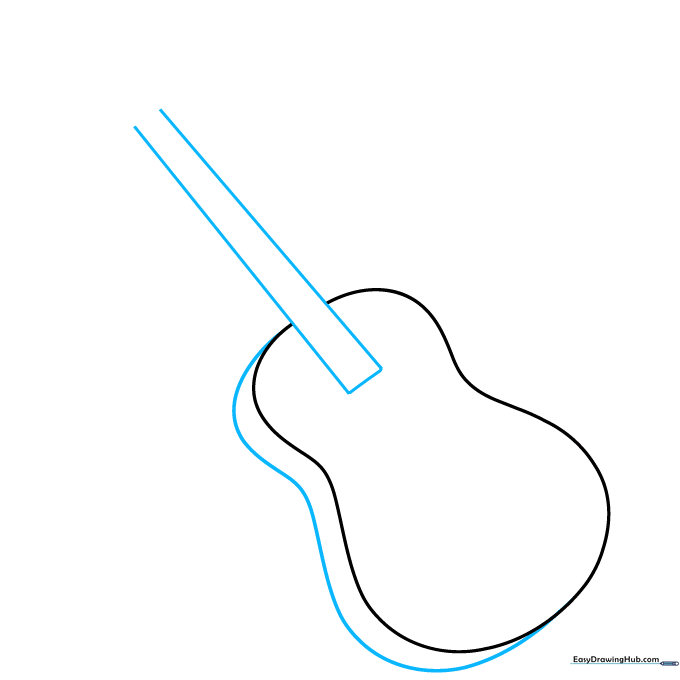
Draw a curved line along the side to give the body depth. Then, extend two long lines upward to form the neck. Tip: Use a ruler if you want the neck to look perfectly straight, but freehand is great for a natural look!
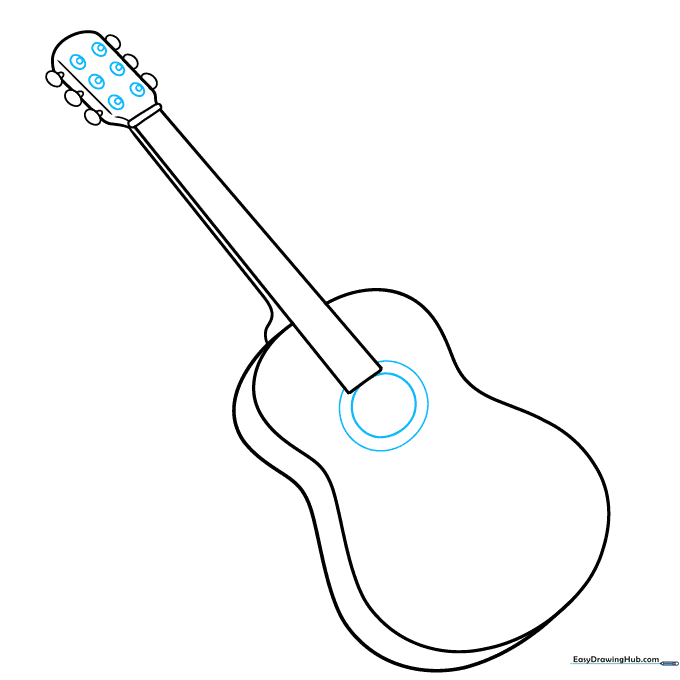
Step 3: Shaping the Headstock
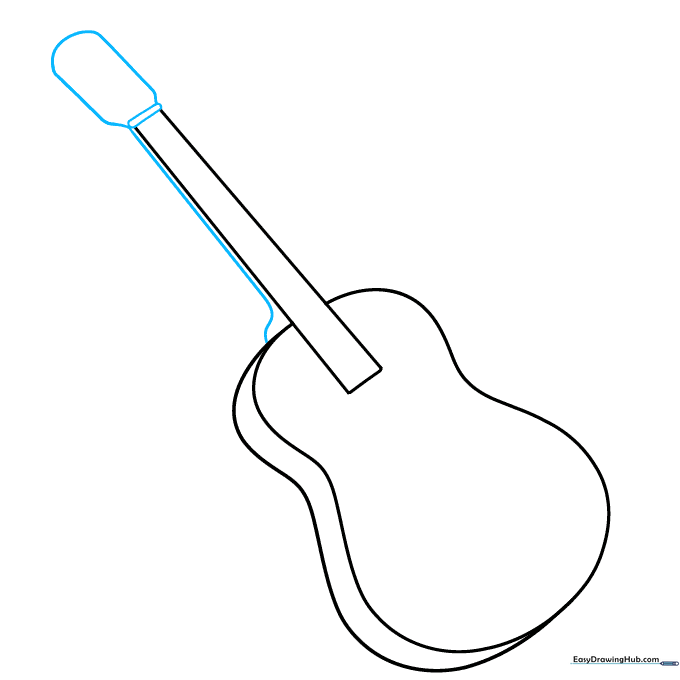
Draw a parallel line to the neck, then cap it with a rounded rectangle. This is the headstock where the tuning happens. Tip: Make the headstock slightly wider than the neck to match a real guitar's proportions.
Step 4: Adding Tuning Knobs
Sketch small ovals along the sides of the headstock. These are the tuning pegs. Tip: If you make a mistake, use your eraser to gently lift the graphite before moving on.
Step 5: Details on Head and Body
Draw six small circles on the headstock for the tuning mechanisms, and a large circle on the body for the sound hole. Tip: Use a circular object like a coin to trace the sound hole if you want it perfectly round.
Step 6: Frets and Bridge
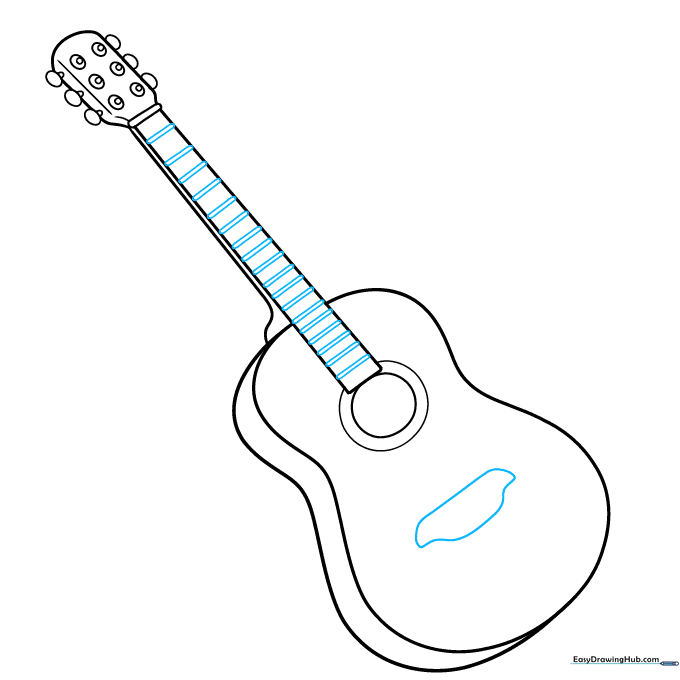
Draw horizontal lines across the neck to represent the frets, spacing them wider at the top. Add a small bridge shape at the bottom of the body. Tip: The frets get closer together as you move down the neck toward the body.
Step 7: Adding Strings
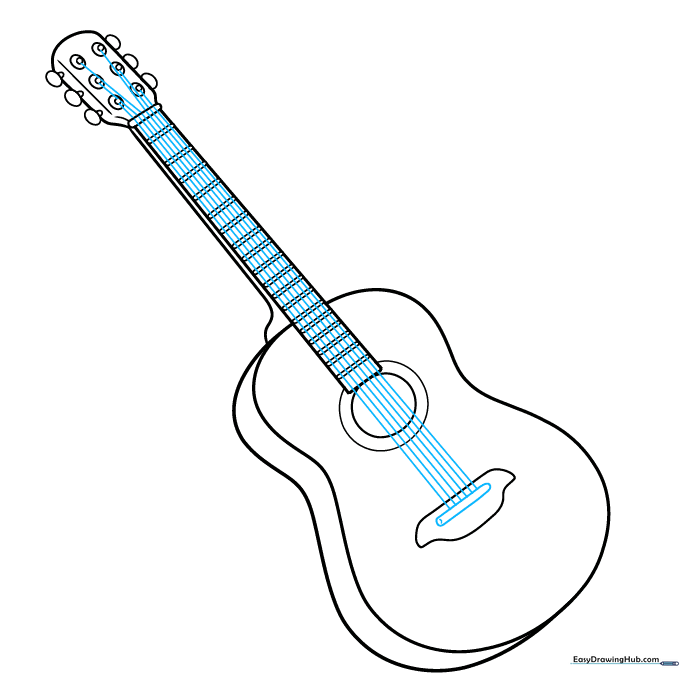
Carefully draw six straight lines running from the bridge up to the headstock. Tip: Try to keep your lines parallel so the guitar looks professional and balanced.
Step 8: Labeling the Top Parts
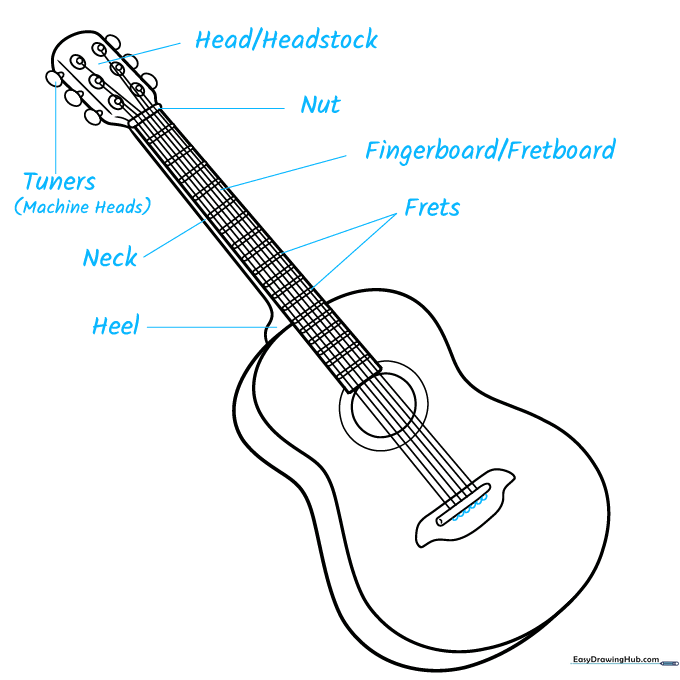
Draw lines pointing to the heel, neck, tuners, headstock, nut, and frets. Write the names clearly next to each part. Tip: Use a fine-liner pen for the labels to make them stand out against your pencil drawing.
Step 9: Labeling the Body Parts
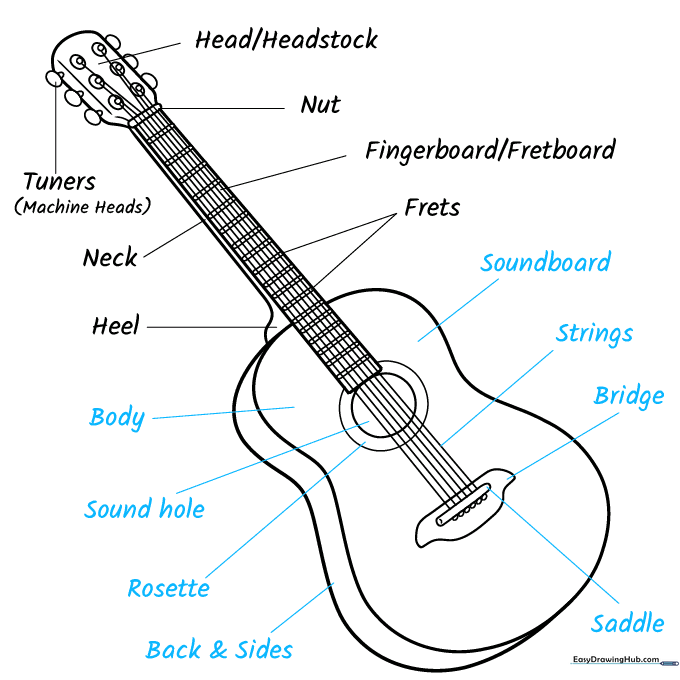
Finish your diagram by labeling the soundboard, strings, bridge, saddle, sound hole, and body. Tip: Double-check your spelling as you write—this makes a great study guide for music class!
Step 10: Adding Color
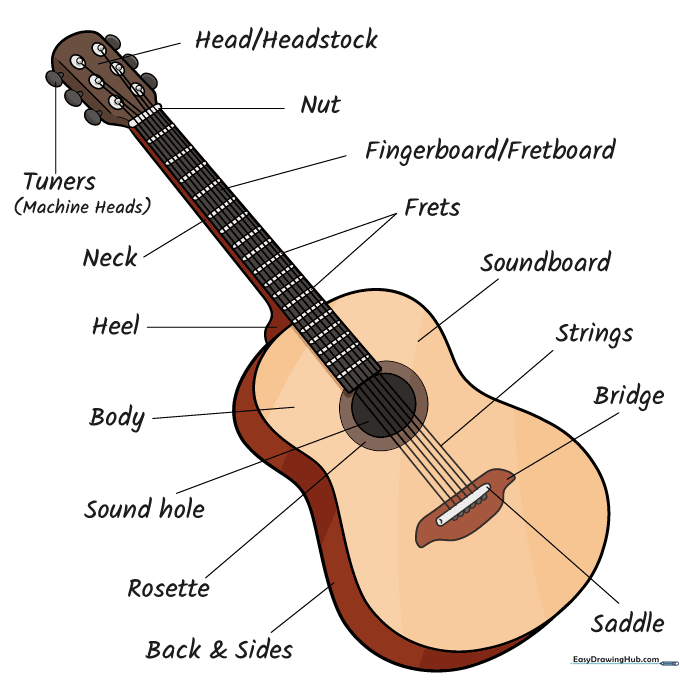
Bring your guitar to life with color! Use warm browns and tans for a classic acoustic look, or get creative with your favorite colors. Tip: Use light pressure with your colored pencils to create a wood-grain texture.
More Tutorials


