How to Draw Owl Babies: Easy 9-Step Guide for Kids
Looking for a fun, screen-free activity? This guide is perfect for children ages 5 and up to practice their shapes and fine motor control. Grab a pencil, an eraser, and a piece of paper to bring these two fluffy owlets to life in just a few simple steps.
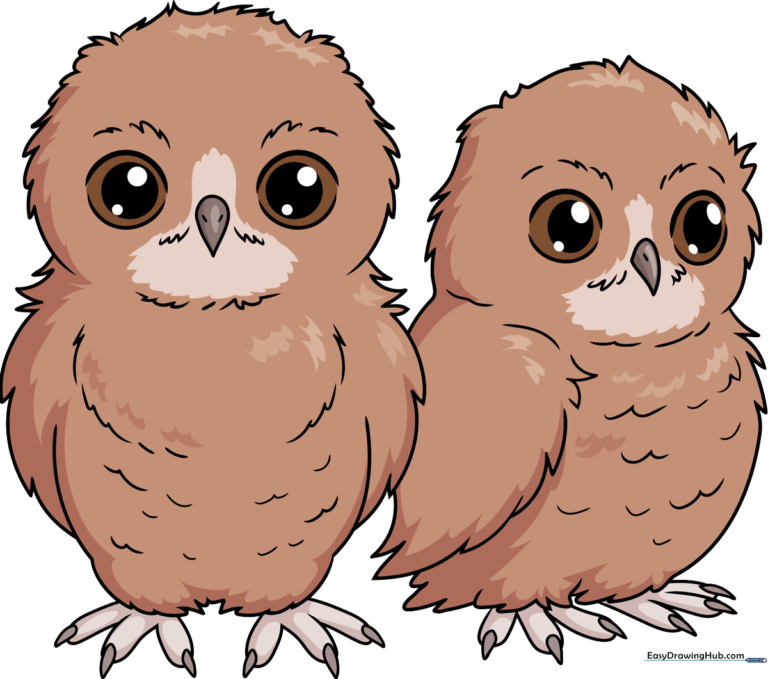
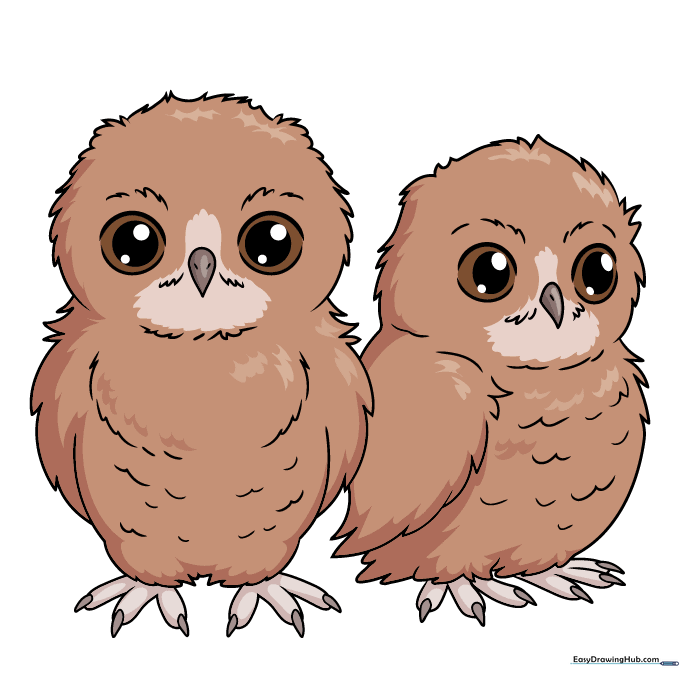
🎯 Final Result
Step-by-Step Instructions
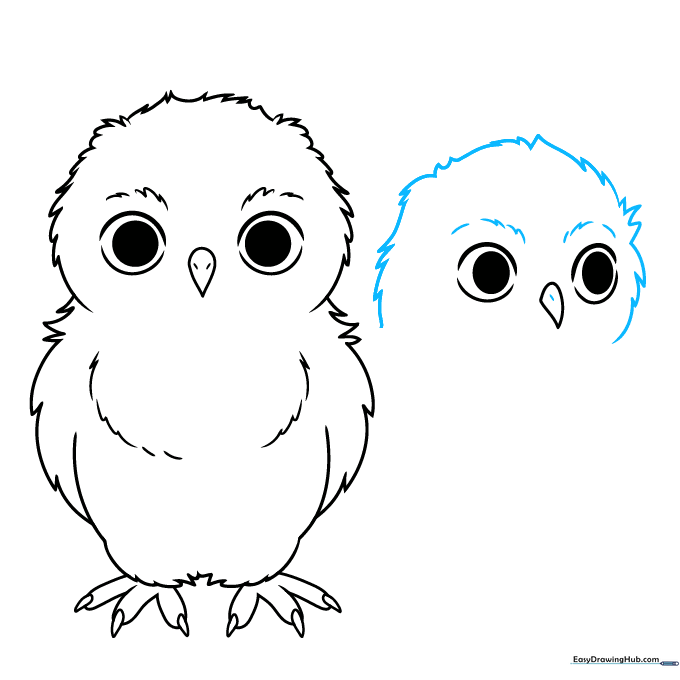
Step 1: Sketching the Big Eyes

Start by drawing two large, round circles for the eyes. Inside each, add a dark, solid pupil. Between the eyes, sketch an inverted teardrop shape for the beak. Teacher's Tip: Keep the eyes symmetrical to give your owls that classic 'cute' look!
Step 2: Defining the Face
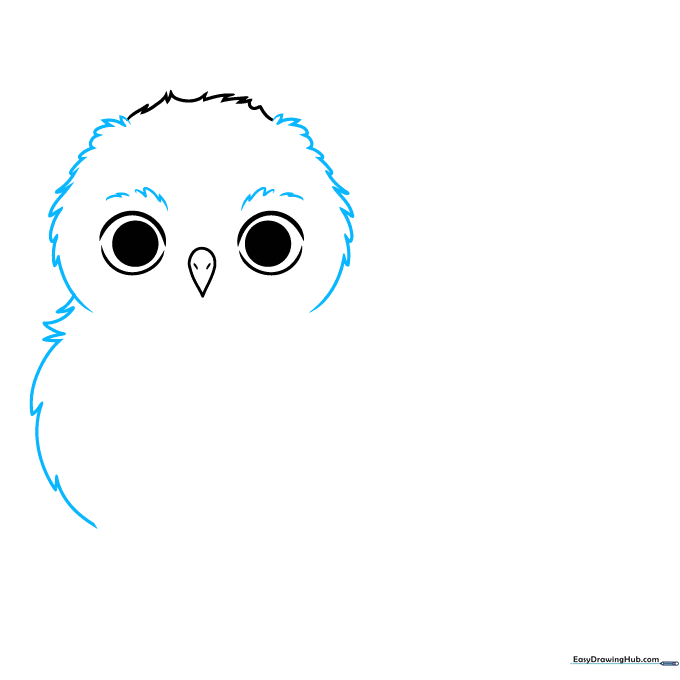
Add small, curved 'tuft' lines above the eyes to represent feathers. Then, draw a rounded shape around the face to frame it. Teacher's Tip: Use short, quick strokes to make the edges look soft and fluffy rather than perfectly smooth.
Step 3: Shaping the Body
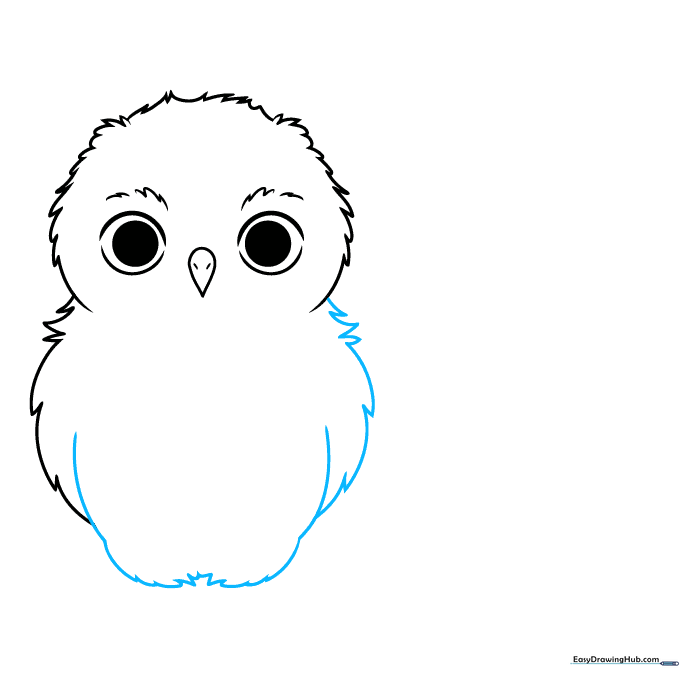
Continue the jagged, fluffy lines down to form the sides of the owl's round body. Add two simple lines at the bottom for the legs. Teacher's Tip: Think of the body as a soft, round pillow shape.
Step 4: Adding Chest Feathers and Claws
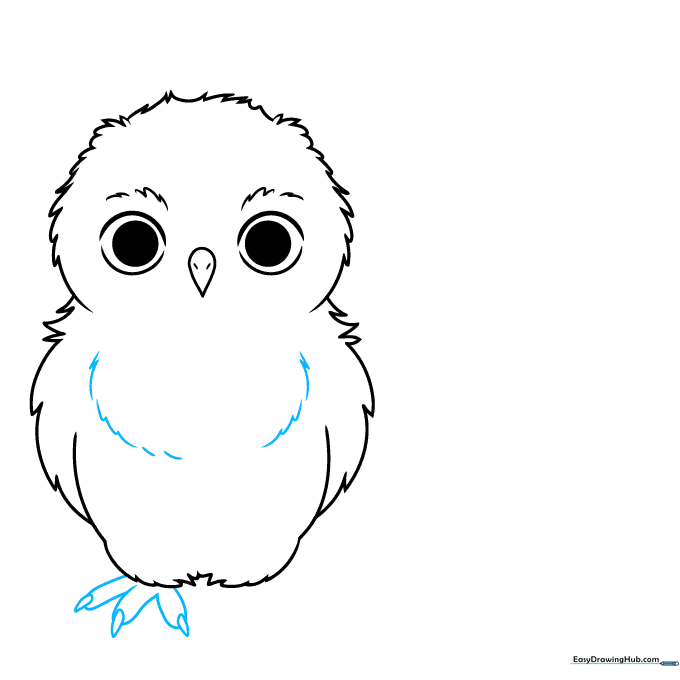
Add small 'U' shapes on the chest to suggest fluffy feathers. At the bottom of the legs, draw three small teardrop shapes for the talons. Teacher's Tip: Keep the talons small so the owl looks like a baby, not a predator!
Step 5: Starting the Second Owl

Repeat the process for the second owl by drawing two more eyes and a beak next to the first one. Teacher's Tip: Vary the size slightly to make the second owl look like a sibling.
Step 6: Outlining the Second Owl
Draw the head and face for the second owl using the same jagged, feathery lines. Teacher's Tip: Ensure the head shape is slightly different from the first to give your characters personality.
Step 7: Adding Wings and Body
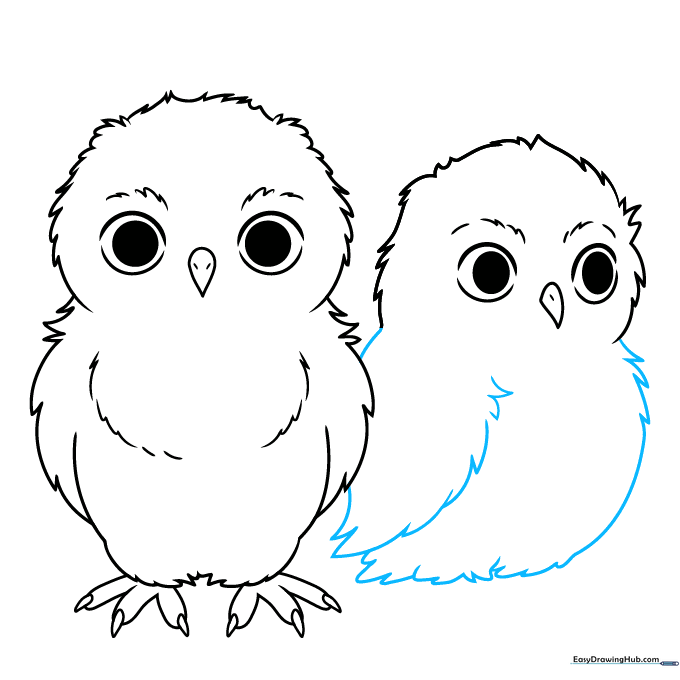
Sketch the wing and belly for the second owl using curved, jagged lines. Teacher's Tip: Make the wing look tucked in to keep the owl looking cozy.
Step 8: Finishing the Feet
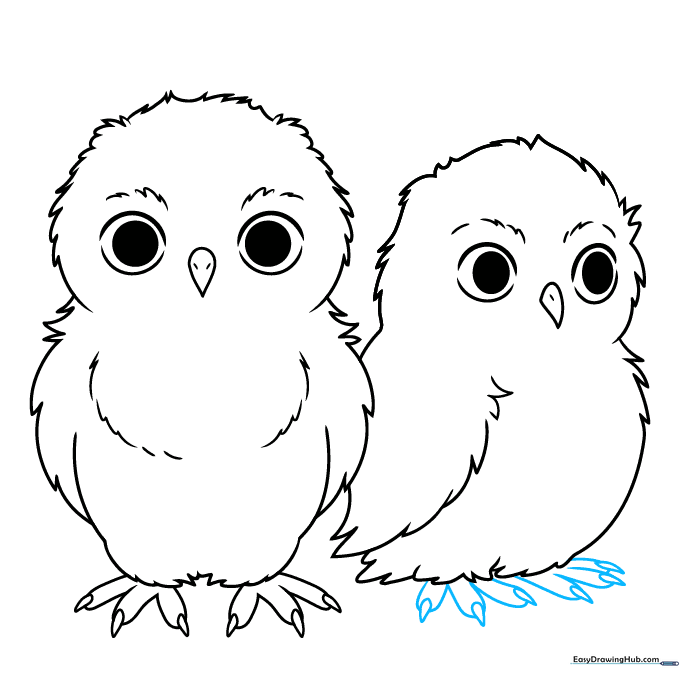
Draw the talons and toes for the second owl. Teacher's Tip: If the talons are tricky, just draw small 'V' shapes—they look just as good!
Step 9: Adding Final Texture
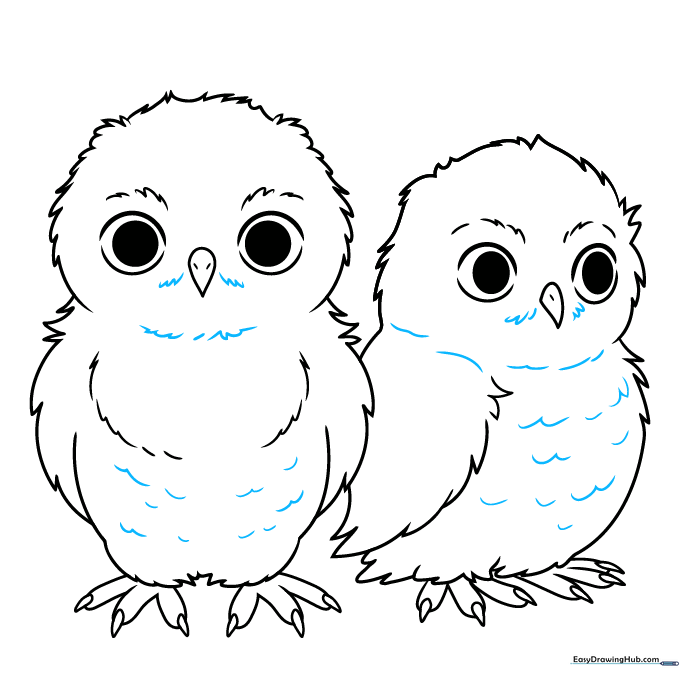
Add a few extra curved lines to the chest and neck area to enhance the fluffy texture. Teacher's Tip: Don't overdo it—a few well-placed lines are better than too many!
Step 10: Coloring Your Masterpiece
Time to color! Use soft browns, grays, or even creative colors like blue or purple. Teacher's Tip: Use light pressure with your colored pencils to create a soft, blended look.
More Tutorials


