How to Draw Nick Wilde: Easy 10-Step Zootopia Guide
Ready to bring Zootopia's cleverest fox to life? This tutorial is perfect for young artists ages 6+ who want to master cartoon character proportions. Grab a pencil, an eraser, and some paper, and follow these simple steps to capture Nick's signature sly grin.
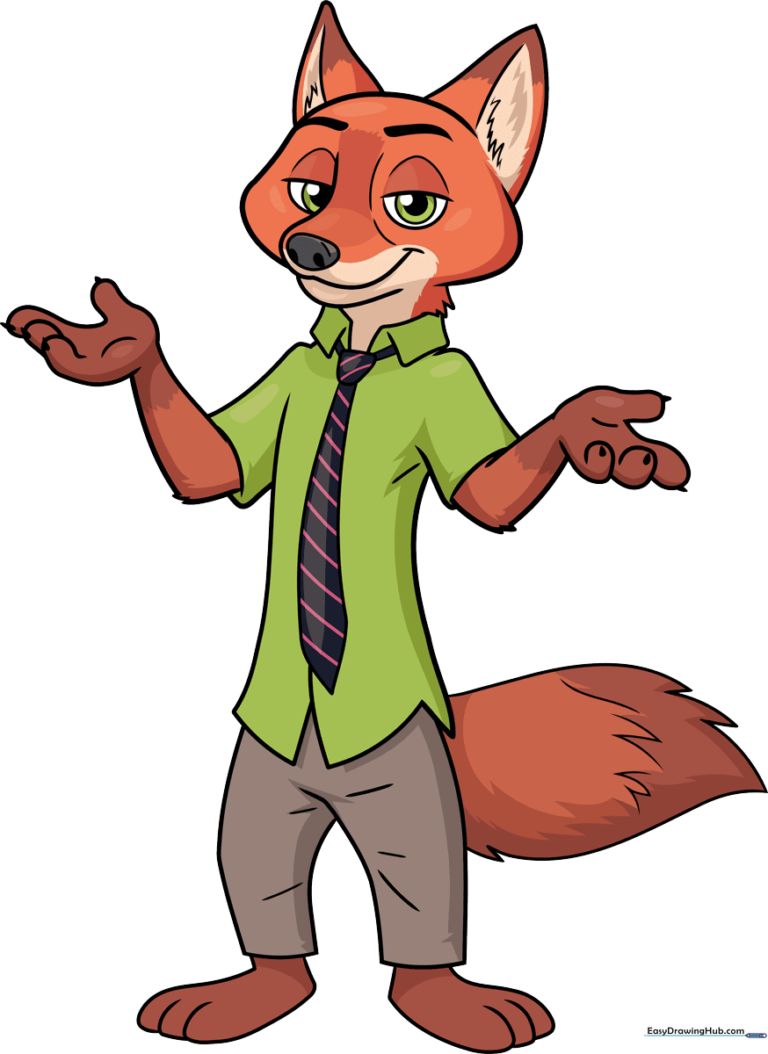
🎯 Final Result
Step-by-Step Instructions
Step 1: Sketching the Eyes
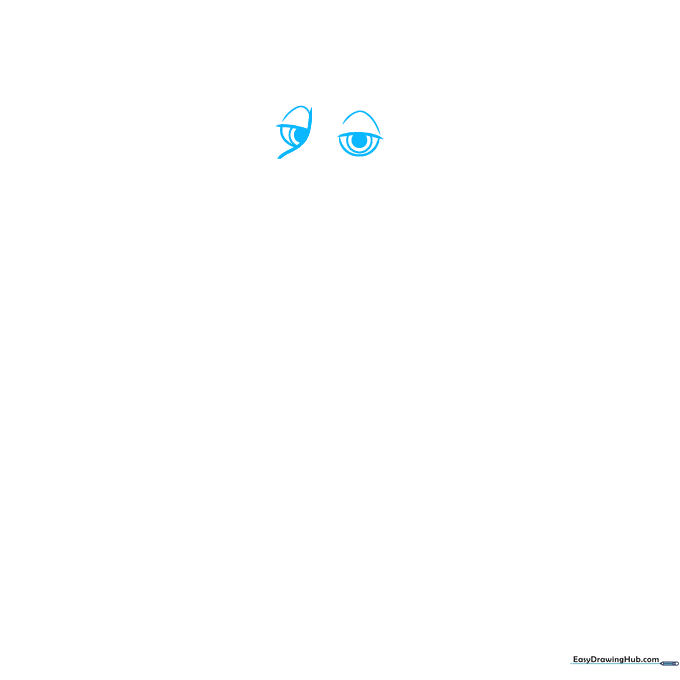
Draw two egg-shaped ovals for the eyes, then add the lids crossing through the center. Teacher's Tip: Keep your pencil pressure light here so you can easily adjust the shape if the eyes look uneven.
Step 2: Defining the Face
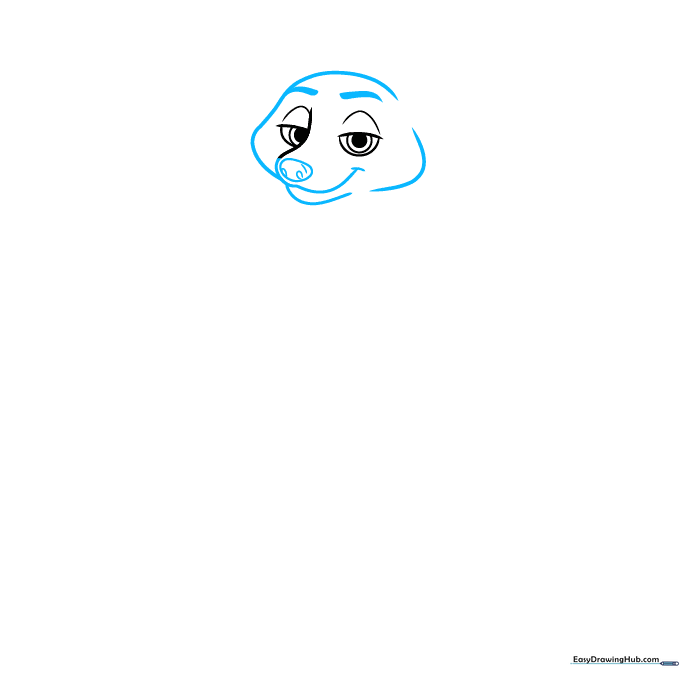
Add the nose between the eyes and outline the head using curved lines. Don't forget to shade in thick, expressive eyebrows. Teacher's Tip: Nick is a fox, so make his snout slightly pointed to give him that classic 'sly' look.
Step 3: Ears and Collar
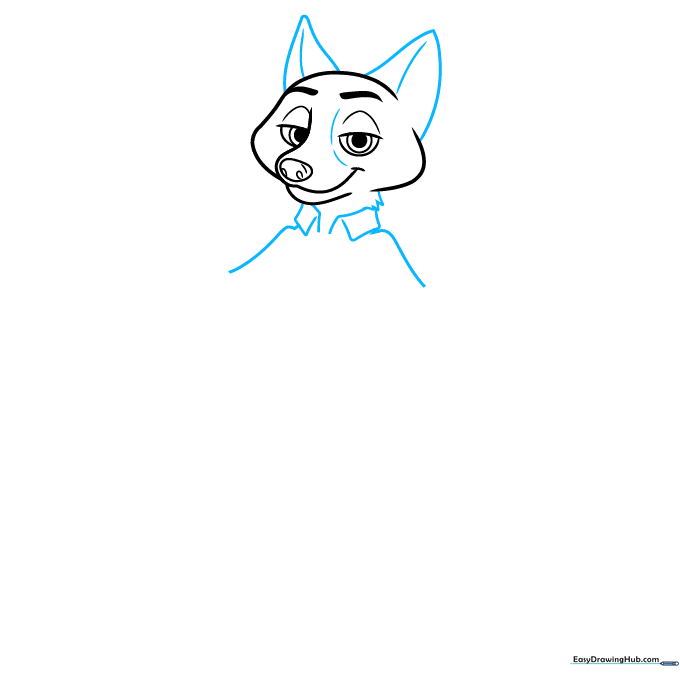
Sketch two large, triangular ears and add fur texture around the neck and collar. Teacher's Tip: Use short, quick strokes for the fur to make it look soft and fluffy rather than stiff.
Step 4: Arms and Hands
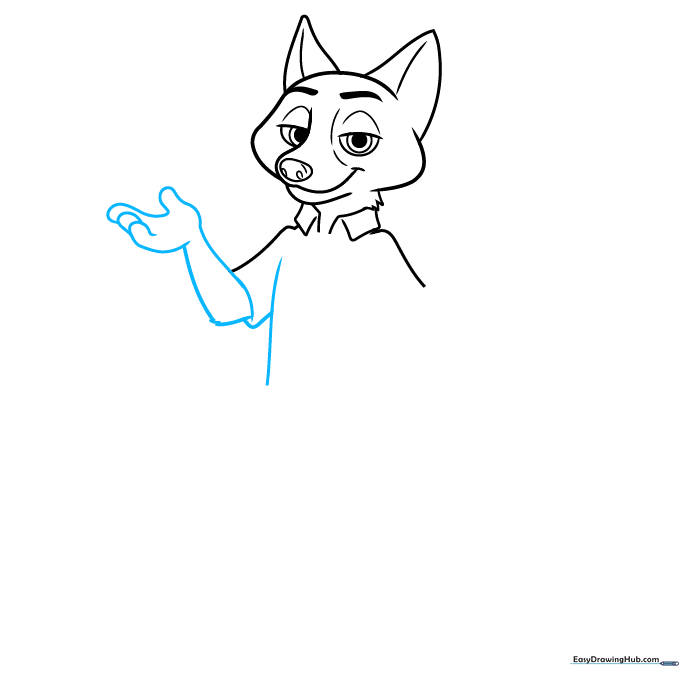
Draw the front of his shirt and his arm, ending with an upturned hand. Teacher's Tip: Keep the hand simple—focus on the curve of the palm before worrying about individual fingers.
Step 5: Completing the Torso
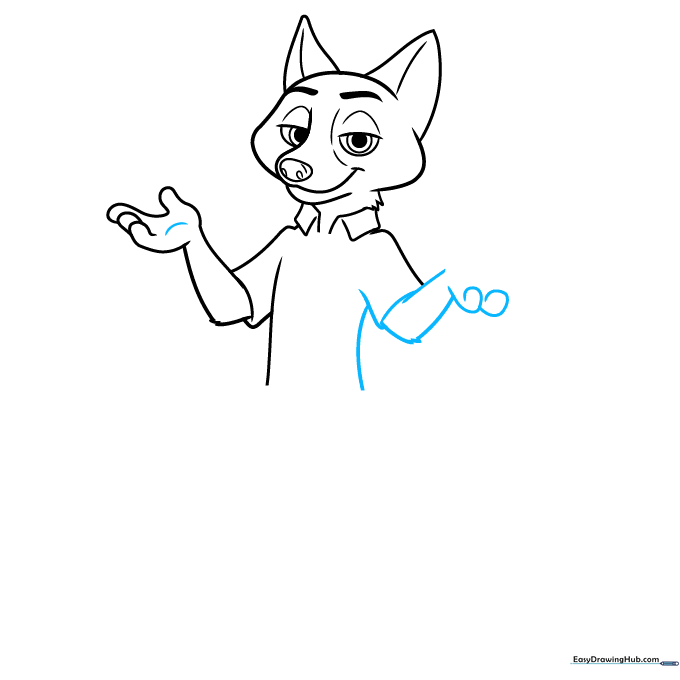
Contour the hand and draw the other side of his torso and arm. Teacher's Tip: Ensure the arms are symmetrical in length to keep the character looking balanced.
Step 6: Adding the Necktie
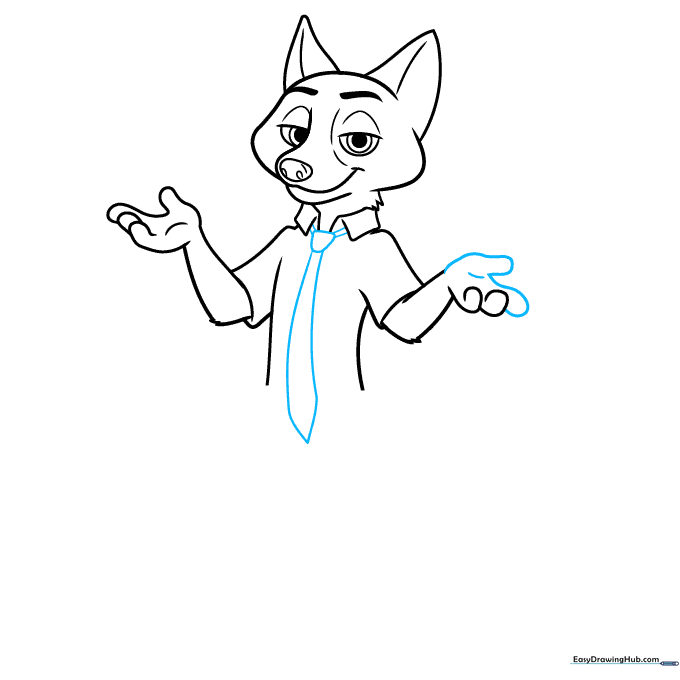
Finish the hand details and draw his signature necktie. Teacher's Tip: A tie is just a simple triangle shape—don't overthink the knot!
Step 7: Drawing the Pants
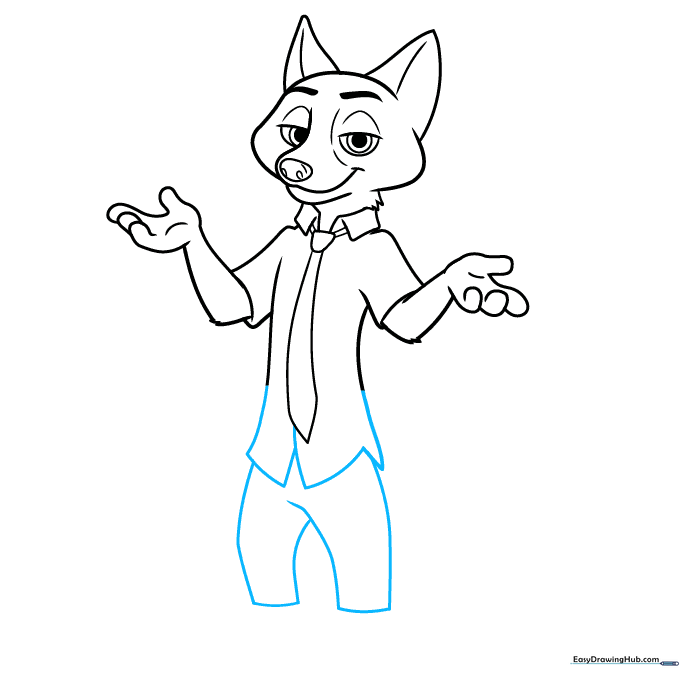
Use zig-zag lines for the bottom of the shirt and sketch the outline of his pants. Teacher's Tip: The zig-zag lines help show the hem of his shirt, making it look more realistic.
Step 8: Tail and Feet
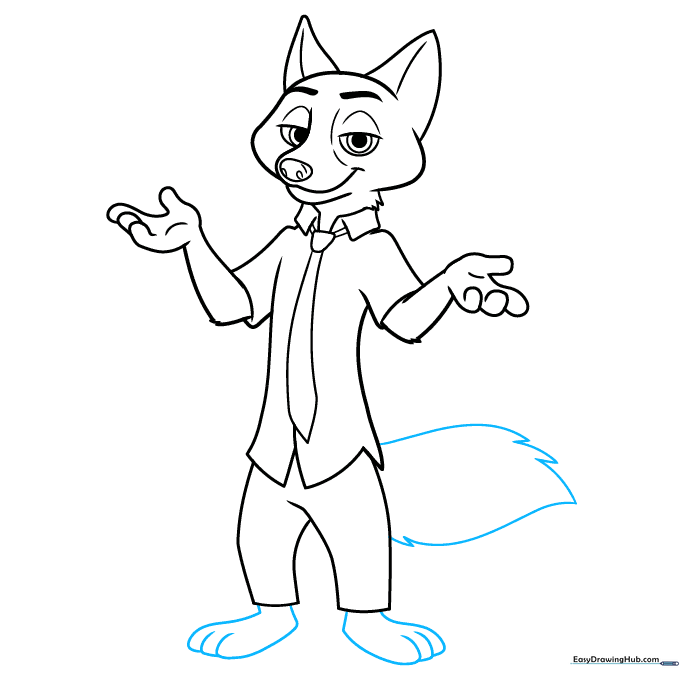
Draw a large, bushy tail and complete the feet. Teacher's Tip: Make the tail look 'fluffy' by using long, sweeping curved lines that meet at points.
Step 9: Adding Final Details
Add texture lines to the ears, fabric folds to the shirt, and claws to the fingers. Teacher's Tip: Less is more! A few small lines go a long way in adding character detail.
Step 10: Color Your Masterpiece
Time to bring Nick to life! Use reddish-orange for his fur, a bright green for his shirt, and brown for his pants. Teacher's Tip: Use light pressure with your colored pencils to create smooth, even layers.
More Tutorials


