How to Draw Mount Rushmore: Easy 10-Step Guide for Kids
Bring history to life with this step-by-step Mount Rushmore drawing lesson, designed specifically for ages 7 and up. You will only need a pencil, an eraser, and some paper to capture these four iconic presidents. By the end of this session, you’ll have a completed landscape sketch that builds confidence in drawing facial proportions and natural textures.
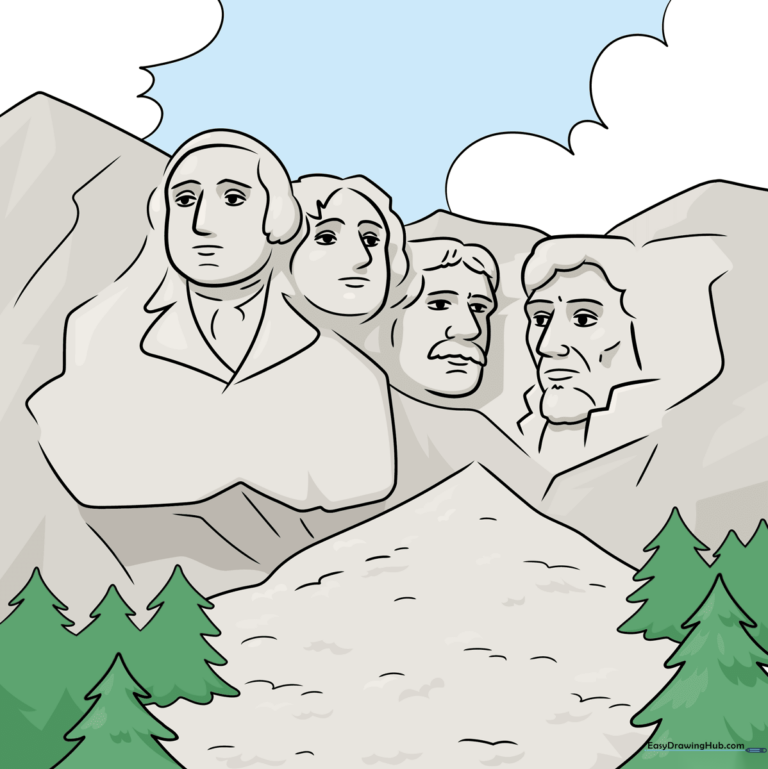
🎯 Final Result
Step-by-Step Instructions
Step 1: Sketching George Washington
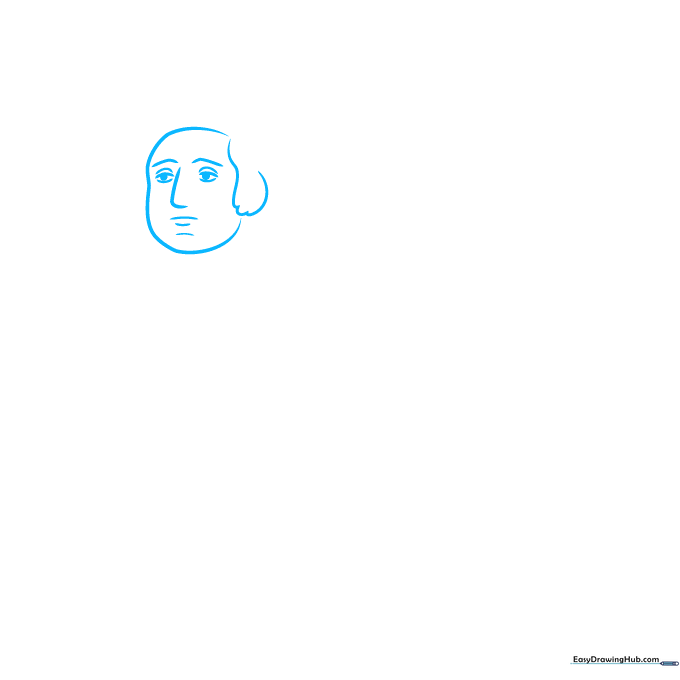
Start by drawing the profile of George Washington. Use soft, curved lines to outline his hair, nose, and jawline. Teacher's Tip: Keep your pencil pressure light so you can easily adjust the shape if the nose looks a bit too long or short.
Step 2: Adding Details and Jefferson
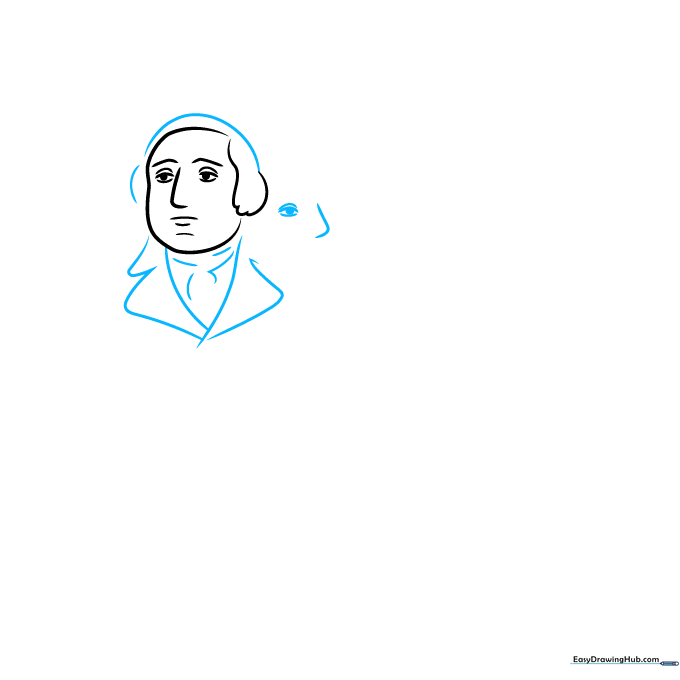
Add the lapels of Washington's coat, then begin sketching Thomas Jefferson’s profile facing the opposite direction. Teacher's Tip: Use the 'mirror' technique—since they face away from each other, think of their noses as the center point of the mountain.
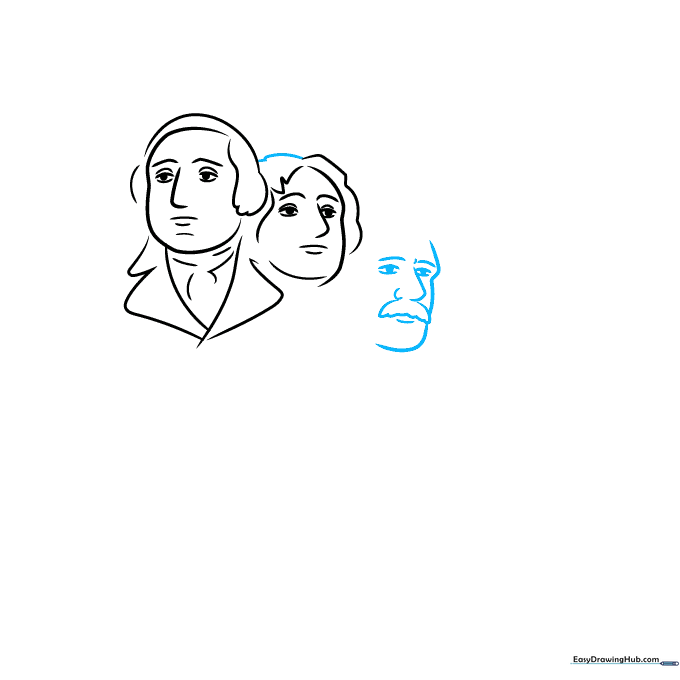
Step 3: Refining Jefferson

Complete Jefferson’s facial features, including his hair and brow line. Teacher's Tip: Use short, quick strokes for the hair to give it a rugged, stone-like texture rather than a smooth, cartoonish look.
Step 4: Sketching Theodore Roosevelt
Draw Theodore Roosevelt’s face, focusing on his signature mustache and strong brow. Teacher's Tip: Roosevelt’s glasses are a key identifier; draw them as two small, slightly tilted ovals.
Step 5: Finishing Roosevelt and Starting Lincoln
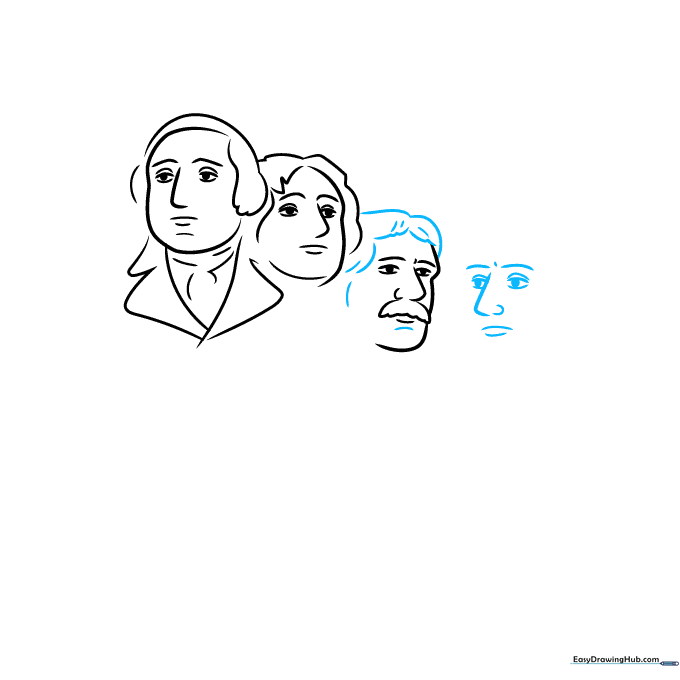
Add texture to Roosevelt's hair, then begin Abraham Lincoln’s profile. Teacher's Tip: Lincoln has a very distinct, sharp jawline. Use a straight, firm line to capture his serious expression.
Step 6: Detailing Lincoln and the Cliff
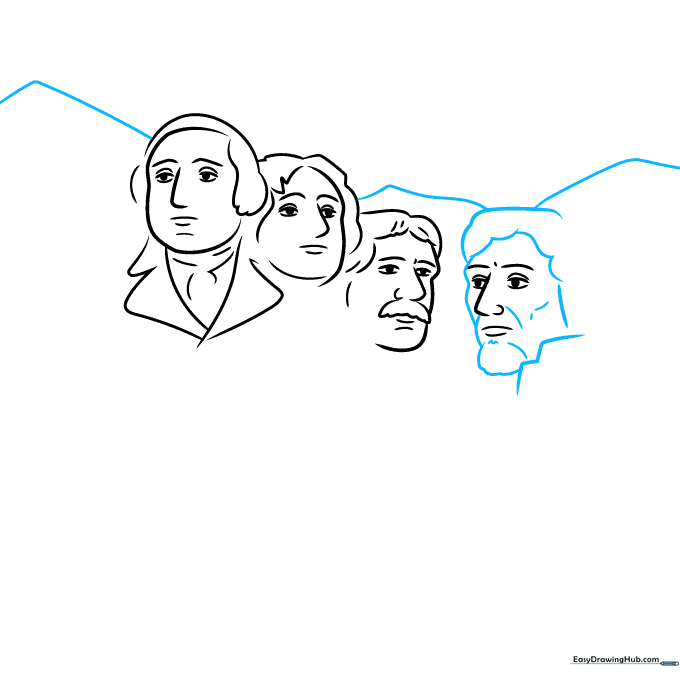
Outline Lincoln’s beard and hair, then draw the jagged cliff face behind him. Teacher's Tip: Don't make the cliff lines too perfect; mountains are naturally uneven, so let your hand be a little shaky!
Step 7: Adding Mountain Texture and Trees
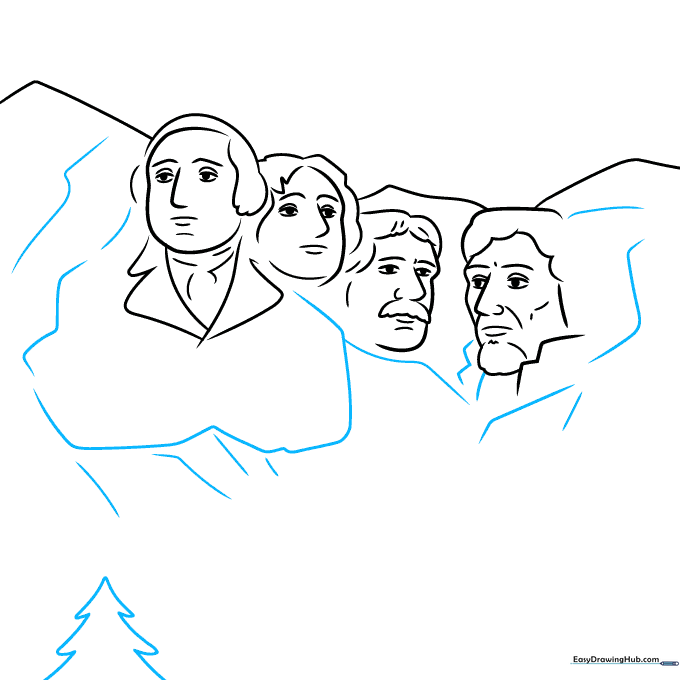
Add texture lines to the mountain and start drawing the evergreen trees at the base. Teacher's Tip: Use a 'zigzag' motion for the tree branches to create that classic pine tree look.
Step 8: Filling in the Forest
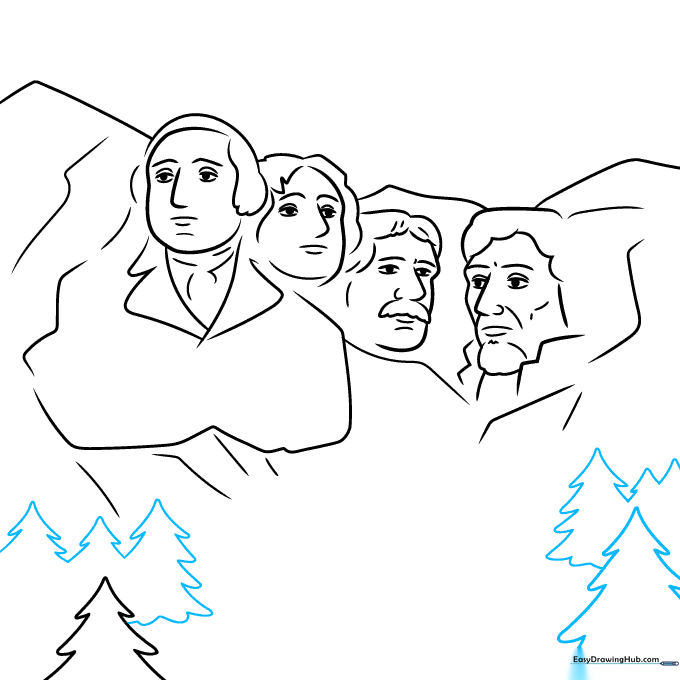
Add more pine trees at the base, varying their sizes to show depth. Teacher's Tip: Draw the trees closer to the bottom of the page larger to make the mountain look further away.
Step 9: Adding Final Details
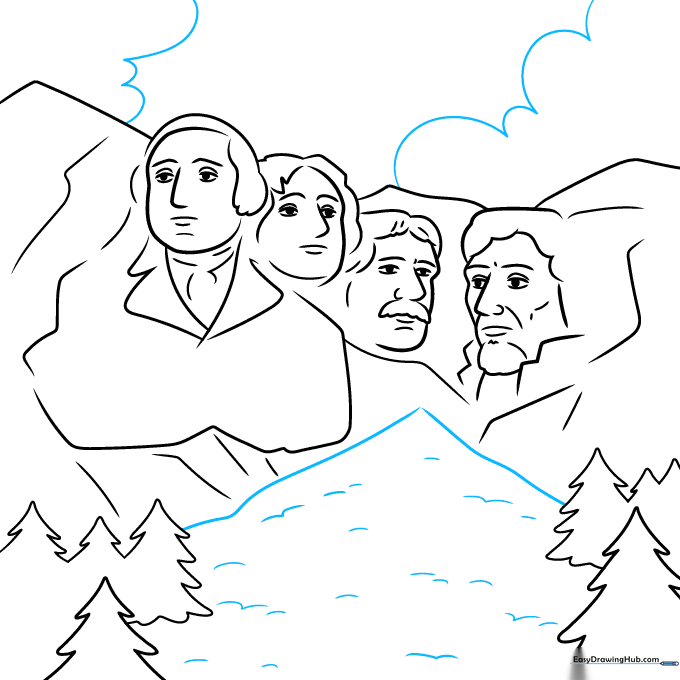
Draw the rocky debris at the base and add fluffy clouds in the sky. Teacher's Tip: Use 'U' shaped lines for the clouds to keep them looking soft and light against the hard, jagged mountain.
Step 10: Coloring Your Masterpiece
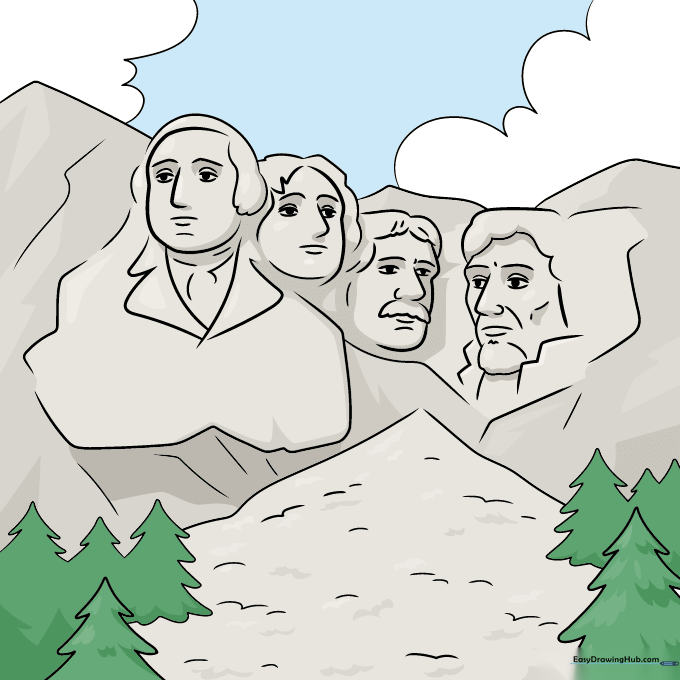
Now it's time to color! Use shades of gray and brown for the stone, and vibrant greens for the trees. Teacher's Tip: Try using a darker gray on the side of the faces to create a shadow, making the carvings look 3D.
More Tutorials


