How to Draw Marshall from PAW Patrol: Easy Step-by-Step Guide
Ready to draw everyone's favorite clumsy firefighter pup? This tutorial is designed for young artists ages 5+ to practice basic shapes and character proportions. Grab a pencil, an eraser, and some paper, and let’s bring Marshall to life together.
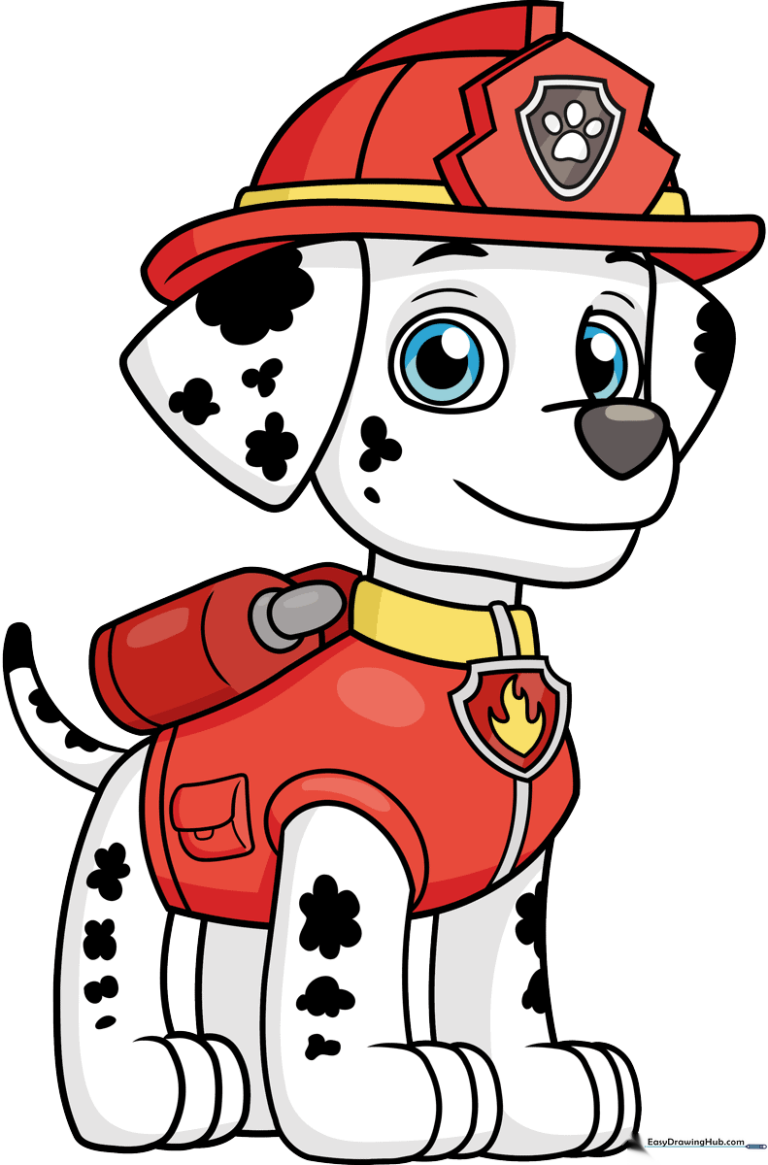
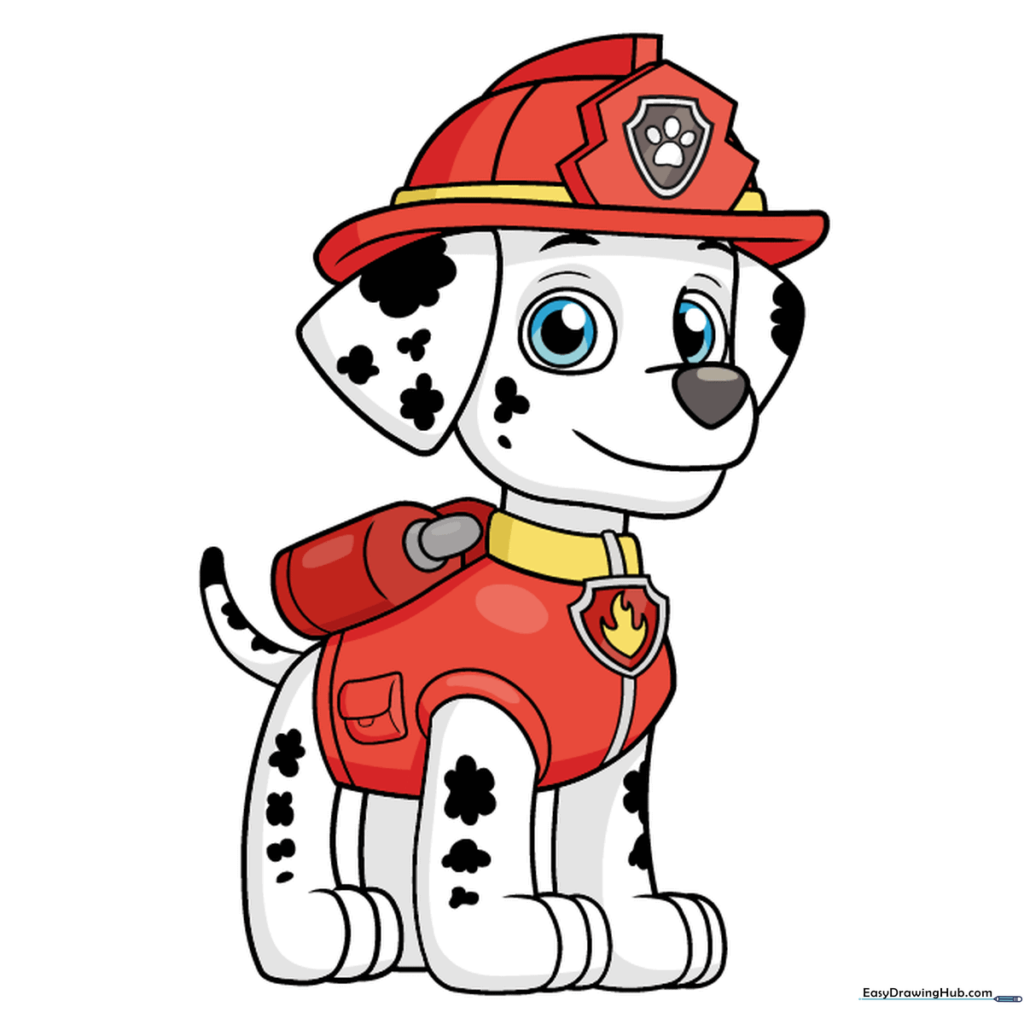
🎯 Final Result
Step-by-Step Instructions
Step 1: Sketching the Snout and Eye
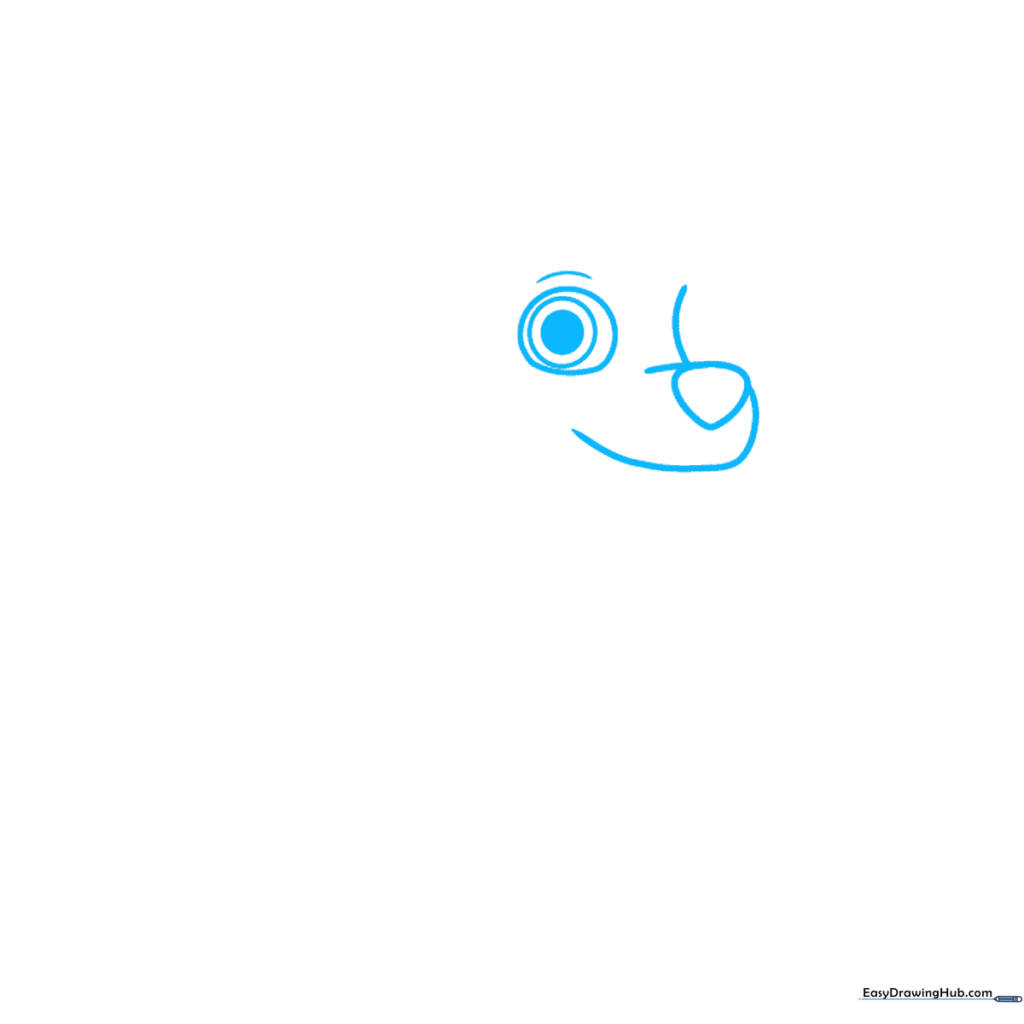
Start by drawing two overlapping curved lines to form the bridge of the nose and the snout. Add a rounded triangle for the nose tip. For the eye, draw three small circles, one inside the other, and shade the center one. Teacher's Tip: Keep your pencil lines very light here so you can easily erase any overlapping lines later.
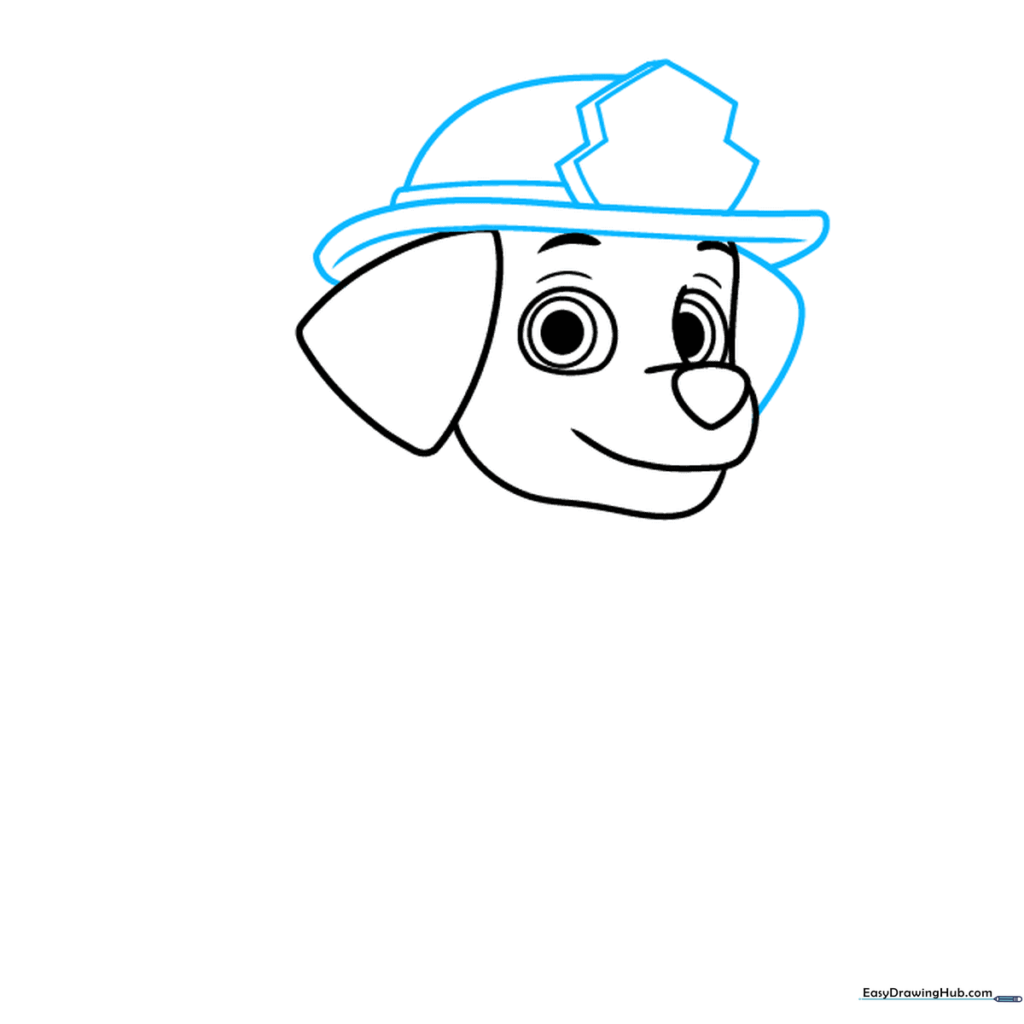
Step 2: Defining the Face and Ears

Draw a rounded triangle for the ear and use soft, curved lines to define the jawline. On the other side of the nose, repeat the eye-drawing process with three nested ovals. Add thick, expressive eyebrows to give Marshall his signature happy look. Teacher's Tip: Don't worry if the lines aren't perfect; Marshall is a playful character, so a little bit of 'wiggle' in your lines adds personality!
Step 3: Adding the Firefighter Hat
Draw the second ear, then sketch the brim of his firefighter hat using long, sweeping curved lines. Add the nine-sided badge on the front. Teacher's Tip: Use parallel lines on the badge to create a 3D effect, making it look like it’s popping off his hat.
Step 4: Neck and Collar Badge
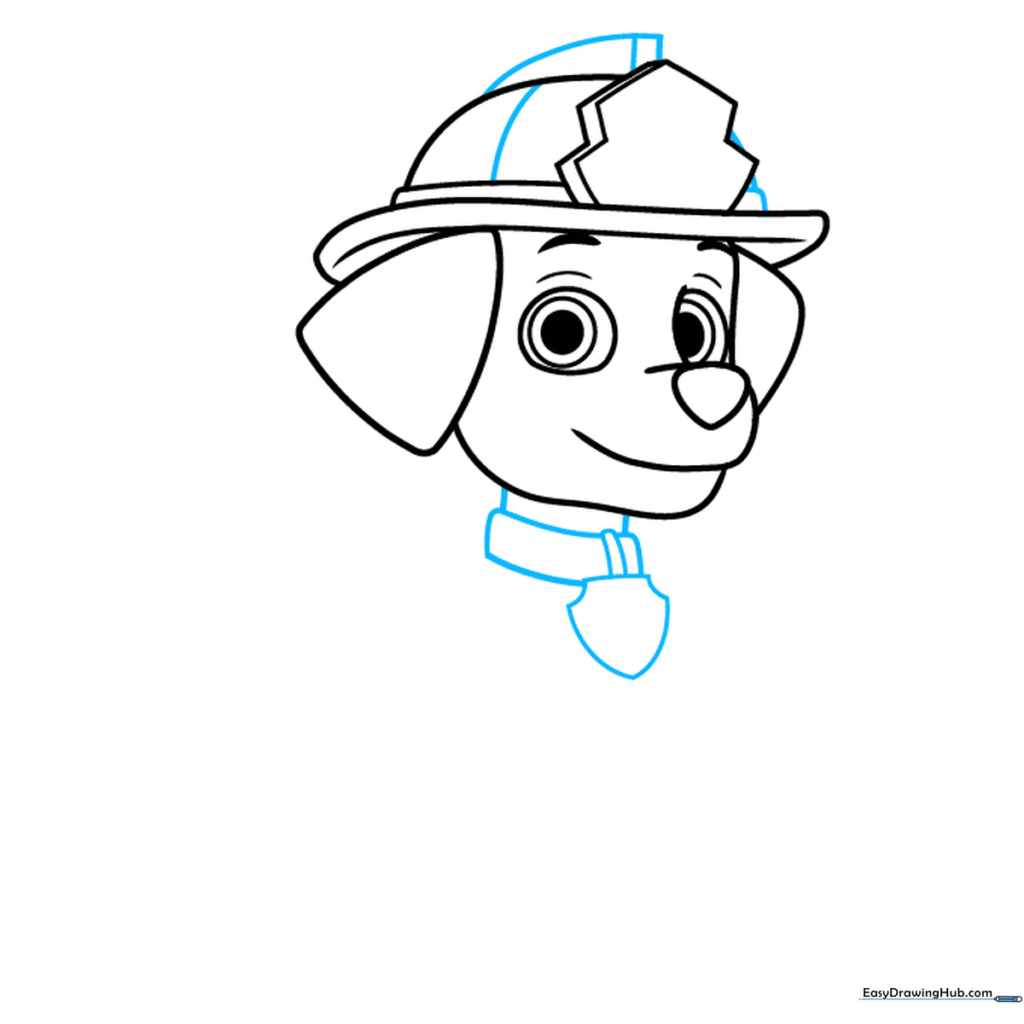
Add the top of the hat, then draw two short lines down for the neck. Create the collar using three curved rectangles and add his shield-shaped collar tag in the center. Teacher's Tip: Ensure the collar sits snugly against the neck to keep the proportions balanced.
Step 5: Front Leg and Torso

Use overlapping curved lines to draw the front leg and paw. Connect this to the torso, ensuring the lines flow naturally from the collar. Teacher's Tip: Focus on the 'C' shapes for the toes to make them look soft and rounded.
Step 6: Back Legs and Tail
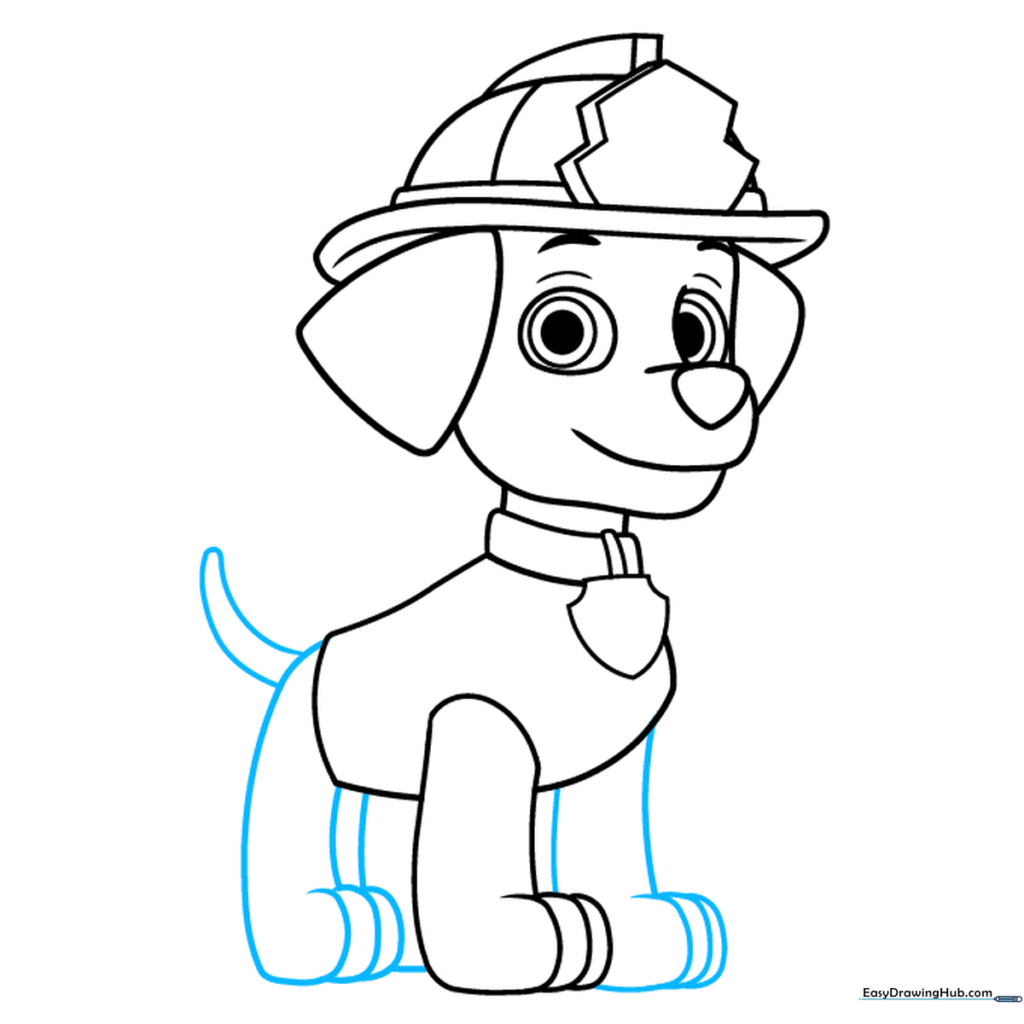
Draw the remaining legs using overlapping curves to show depth. Add the tail by drawing a curved line that doubles back on itself. Teacher's Tip: Make the tail look waggy by keeping the curve soft and fluid.
Step 7: The Pup Pack
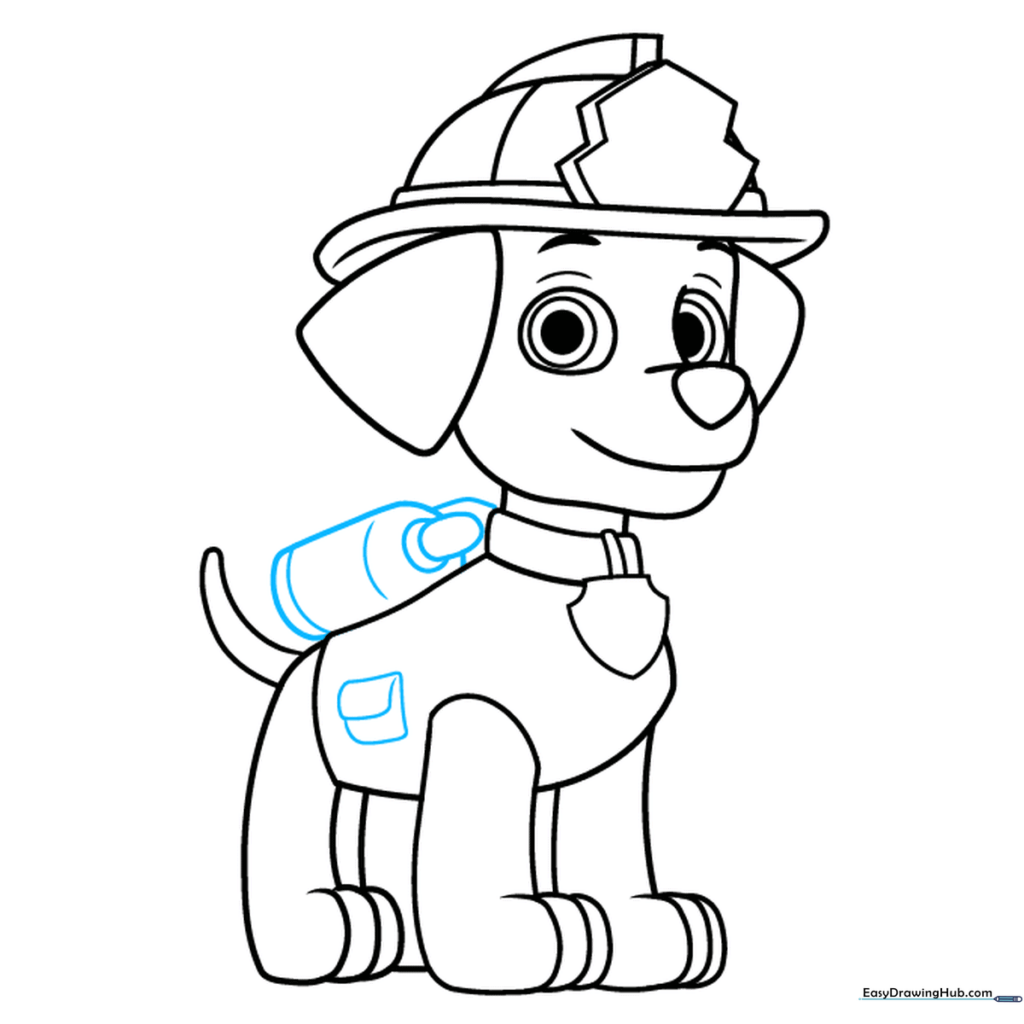
Draw the firefighter Pup Pack on his back using a cylinder shape. Add details for the tanks and a small pocket on the side of his vest. Teacher's Tip: Use simple geometric shapes like rectangles and ovals to keep the Pup Pack looking neat.
Step 8: Final Details
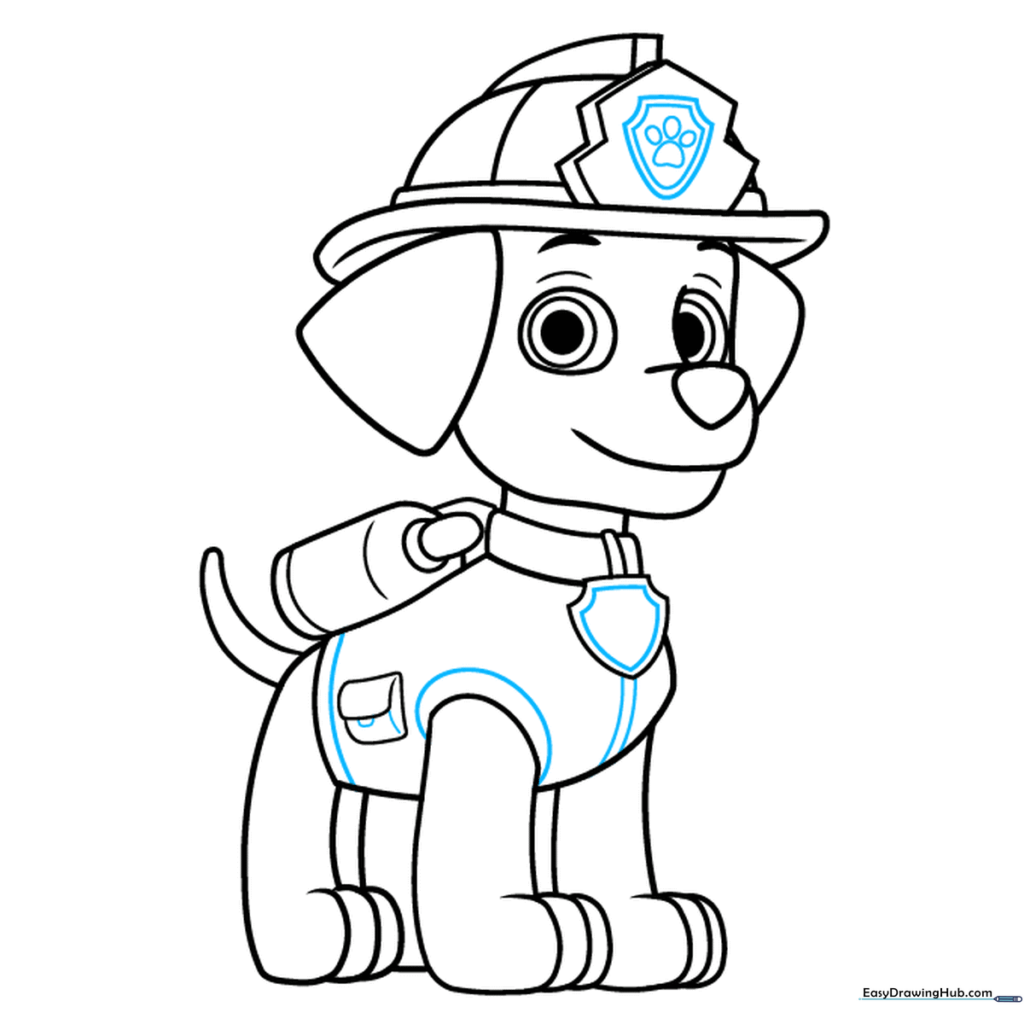
Add the finishing touches: shield shapes on the hat and collar, and a paw print inside the hat badge. Teacher's Tip: Take your time with the paw print—it's a small detail that really makes the character look authentic!
Step 9: Adding Spots
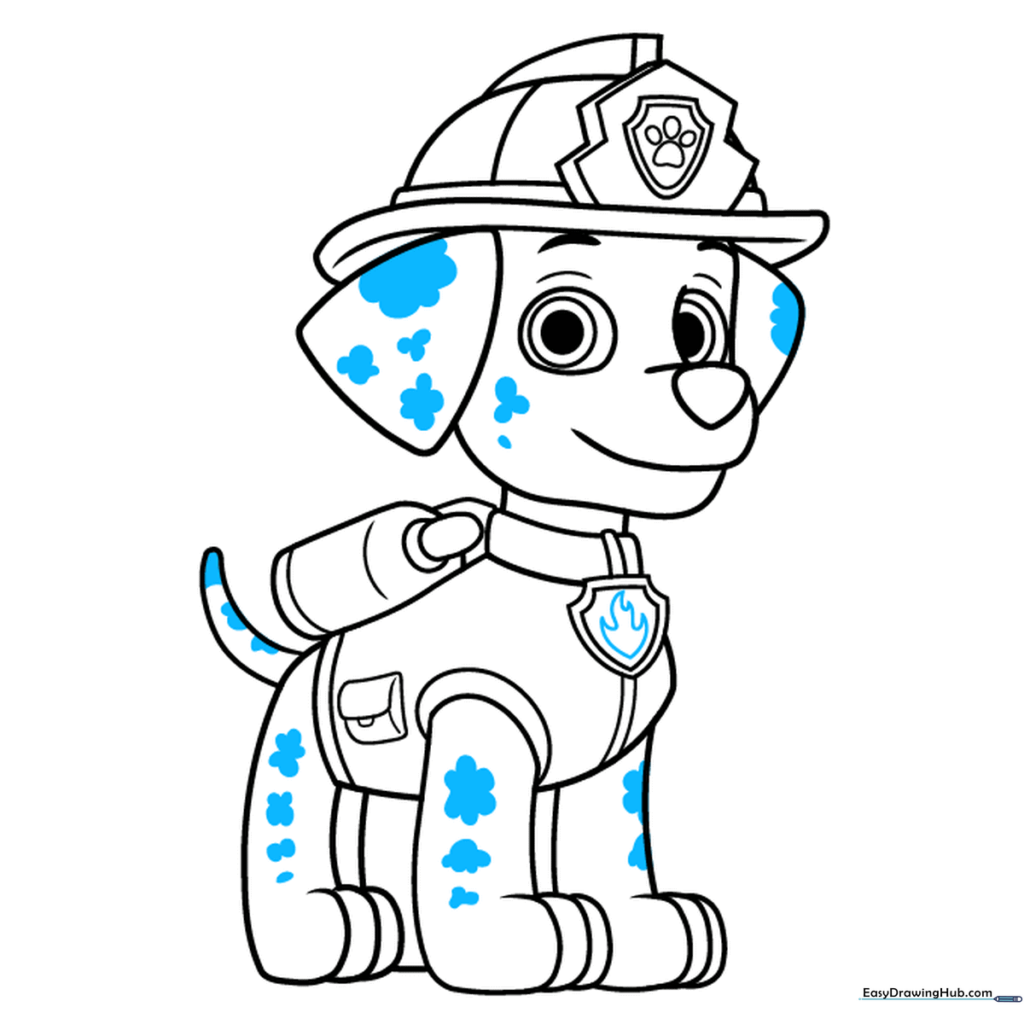
Marshall is a Dalmatian, so add his signature flower-shaped spots across his face, ears, and body. Don't forget the small flame icon on his collar tag! Teacher's Tip: Vary the size of the spots to make them look natural rather than perfectly uniform.
Step 10: Bring Marshall to Life with Color
Time to color! Use white for his fur, black for his spots, and bright red and yellow for his firefighter uniform. Teacher's Tip: Use light pressure with your crayons or markers to keep the colors vibrant and smooth.
More Tutorials


