How to Draw Marilyn Monroe: Easy Portrait Guide
Capture the classic glamour of Hollywood’s icon with this beginner-friendly portrait tutorial. Designed for ages 8+, this lesson focuses on facial symmetry and expressive features. All you need is a pencil, an eraser, and a sheet of paper to begin your artistic tribute.
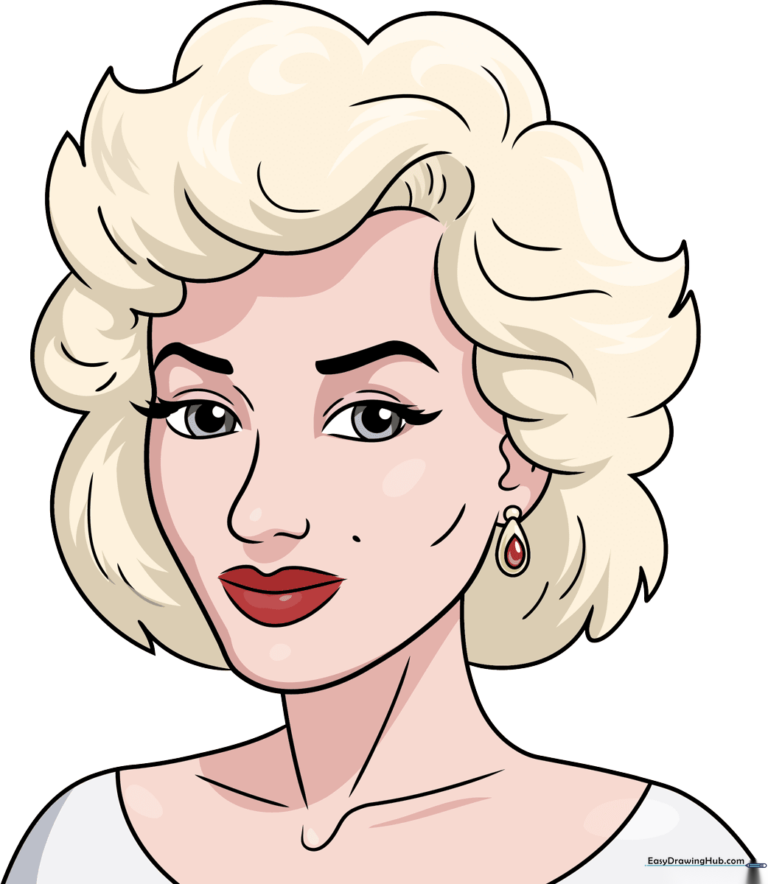
🎯 Final Result
Step-by-Step Instructions
Step 1: Sketching the Eyes
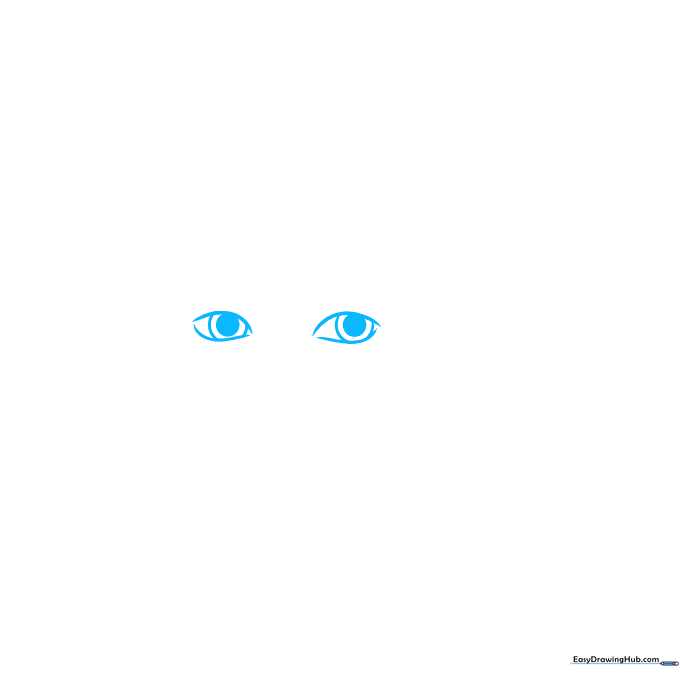
Outline each eye using two gentle curved lines that don't quite touch at the corners. Add two circles inside for the pupils and shade them in. Teacher's Tip: Keep your pencil pressure light here so you can easily adjust the shape later if needed.
Step 2: Defining Eyelids and Brows
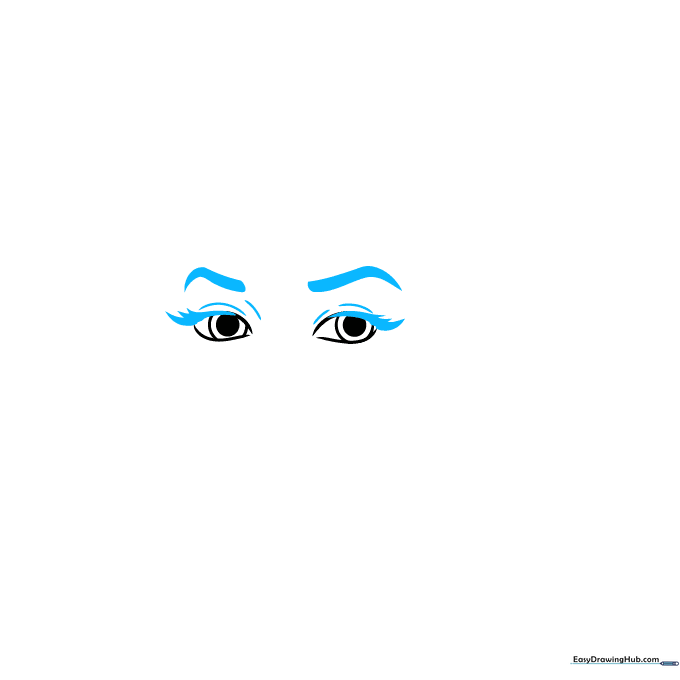
Add curved lines above the eyes for eyelids, then draw thick, bold strokes for the eyelashes and eyebrows. Teacher's Tip: Marilyn is known for her expressive gaze, so don't be afraid to make those lashes dark and dramatic!
Step 3: Sketching the Nose and Lips
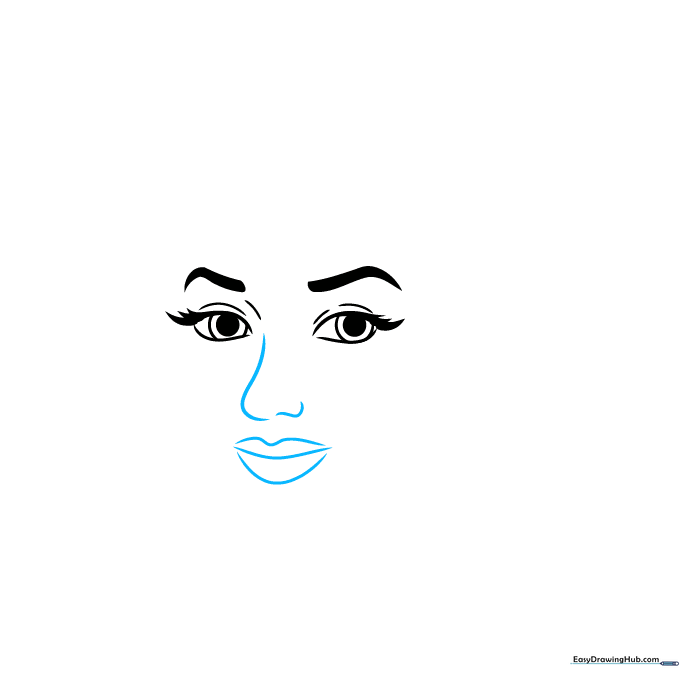
Use delicate curved lines to form the nose, nostril, and her signature full lips. Teacher's Tip: Keep the lines for the nose subtle; you want to suggest the shape rather than outline every single edge.
Step 4: Outlining the Face and Hairline
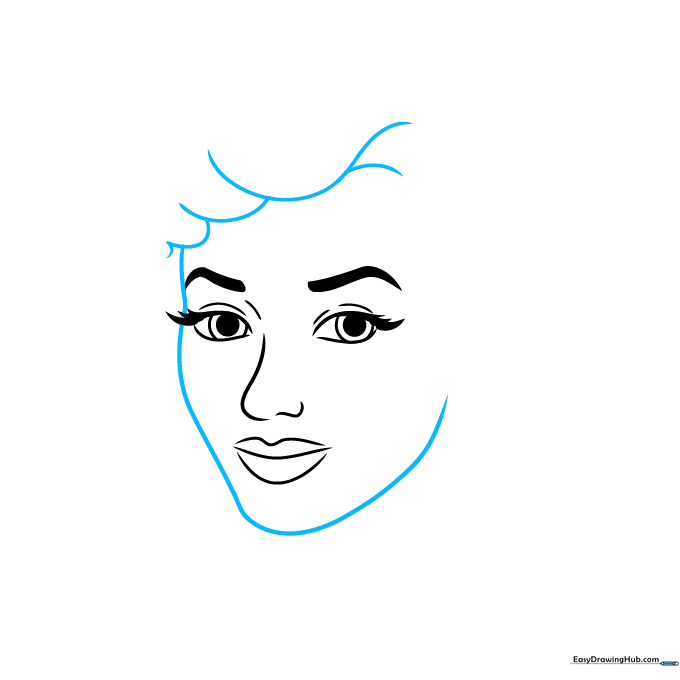
Draw a long, smooth curved line to define the side of her face, then add shorter, overlapping strokes to start the hair. Teacher's Tip: Use a 'flicking' motion with your pencil to make the hair look natural and soft.
Step 5: Adding Hair and Earrings
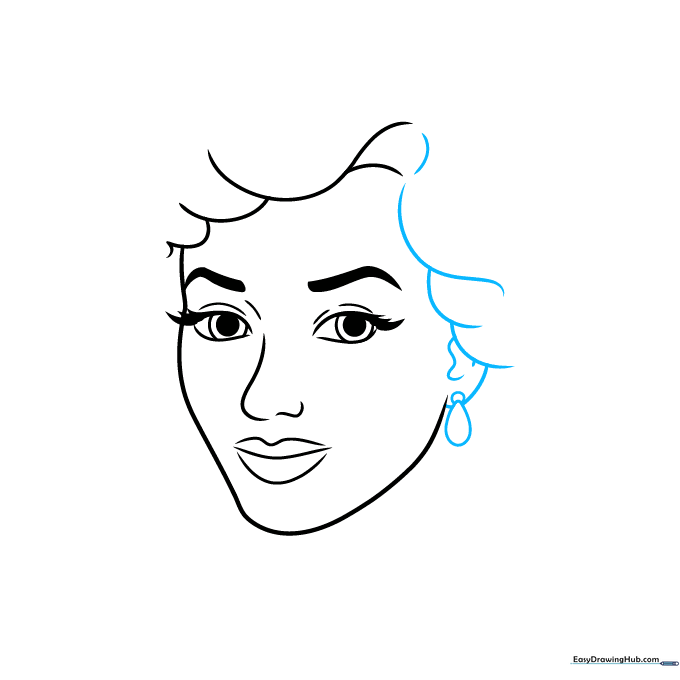
Continue the hair with overlapping curves, then draw the ear with a simple contour. Add a small circle and a teardrop shape on the lobe for her earring. Teacher's Tip: The earring adds a touch of elegance—keep the teardrop shape clean and symmetrical.
Step 6: Styling the Hair
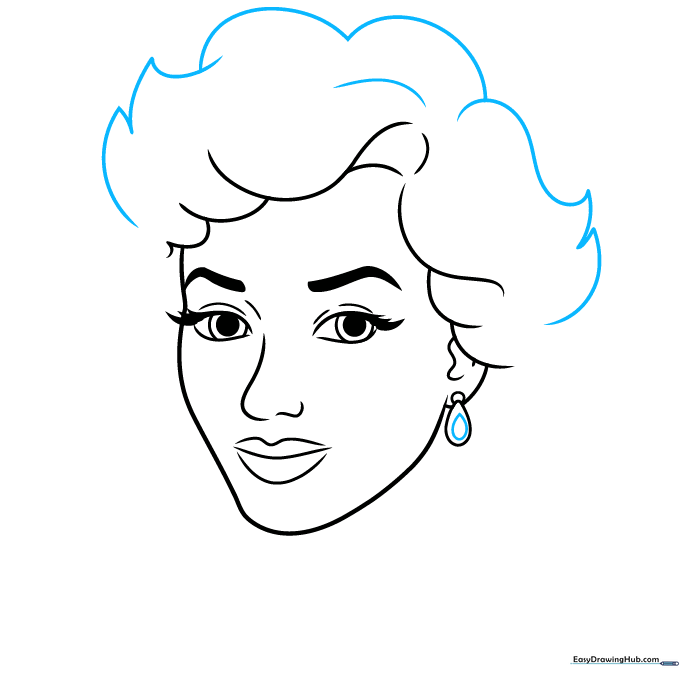
Use overlapping curves to build the top of her iconic hairstyle. Add a smaller teardrop inside the earring for extra detail. Teacher's Tip: Think of the hair as large, soft waves rather than individual strands.
Step 7: Drawing the Neck and Hairline
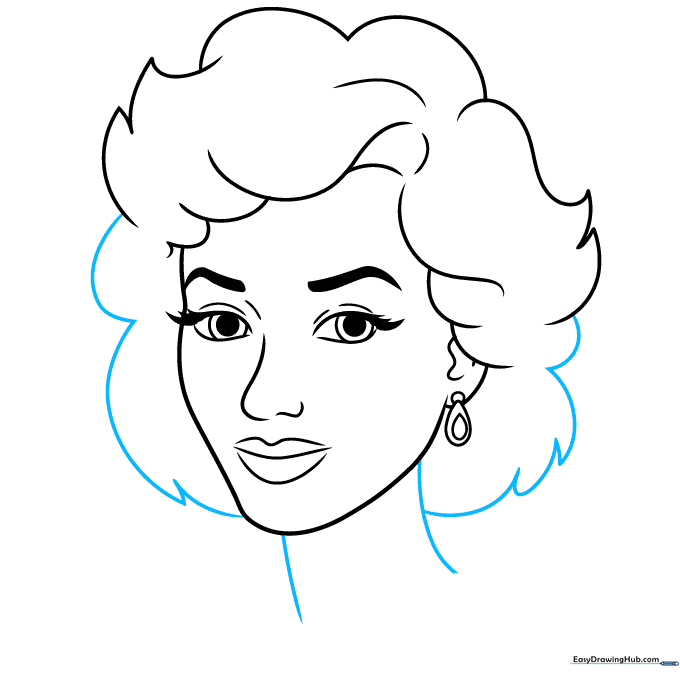
Extend two curved lines downward for the neck. Use jagged, overlapping lines to finish the hair framing her face. Teacher's Tip: The jagged points help create the illusion of hair texture and movement.
Step 8: Shoulders and Collarbone
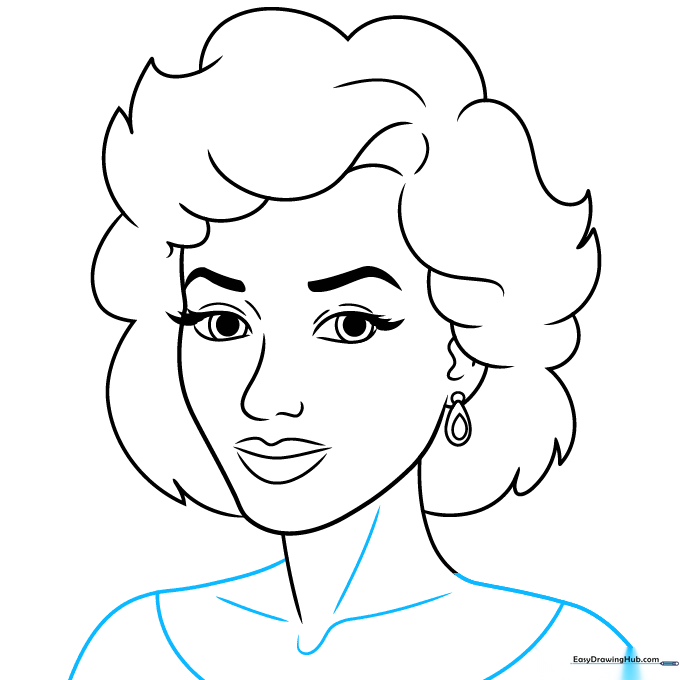
Extend the neck lines to form the shoulders. Add subtle curved lines to contour the collarbone and the top of her blouse. Teacher's Tip: Keep these lines smooth to maintain the graceful, elegant look of the portrait.
Step 9: Final Details

Add texture to the hair with curved lines and contour the cheekbone. Finally, shade a small oval between the nose and mouth for her famous beauty mark. Teacher's Tip: The beauty mark is a key detail—place it carefully to capture her likeness!
Step 10: Bring It to Life with Color
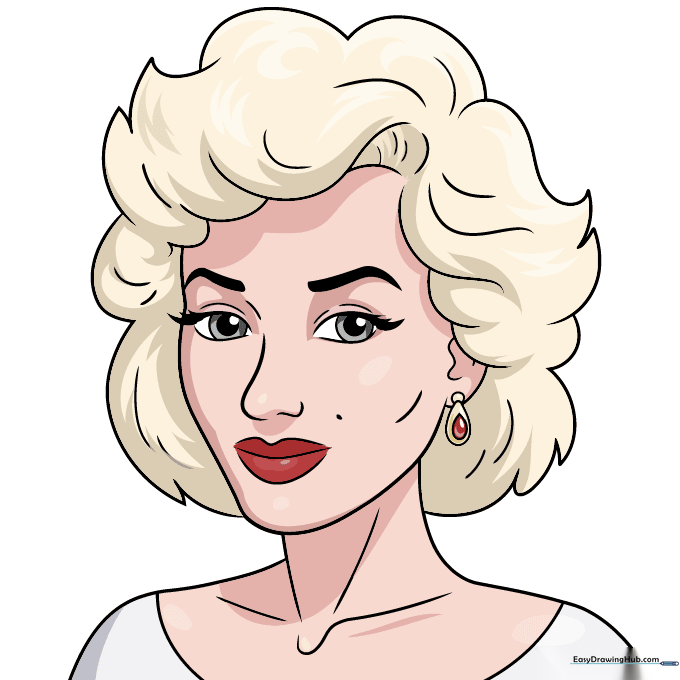
Your portrait is ready for color! Use bright blonde for the hair, a bold red for the lips, and a crisp white for her dress. Did you know? While she's famous for her platinum hair, Marilyn was actually a brunette naturally!
More Tutorials


