How to Draw Little Twin Stars: Easy Step-by-Step Guide
Bring Kiki and Lala to life with this beginner-friendly drawing tutorial! Designed for young artists, this guide uses basic shapes to build confidence. Grab your pencil, eraser, and paper to create your own magical Sanrio scene.
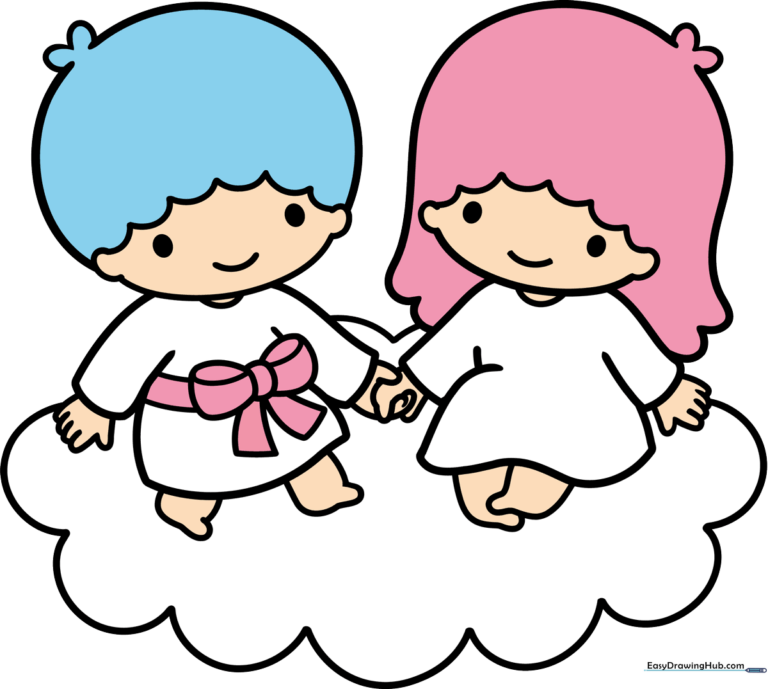
🎯 Final Result
Step-by-Step Instructions
Step 1: Sketching Lala’s Face
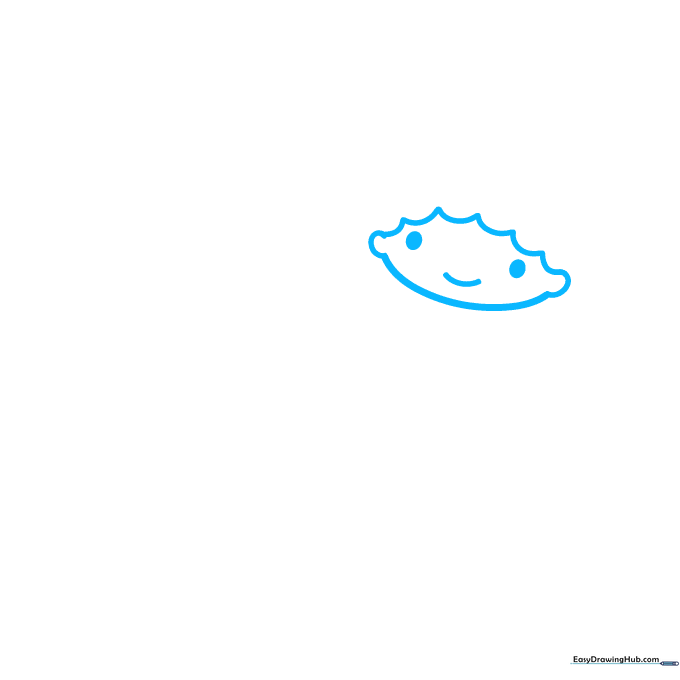
Start by drawing a soft, rounded shape for Lala’s face. Add a scalloped pattern for her hair and two small, simple ovals for her eyes. Teacher's Tip: Keep the face shape wide and gentle to maintain that classic 'chibi' aesthetic.
Step 2: Defining the Hair
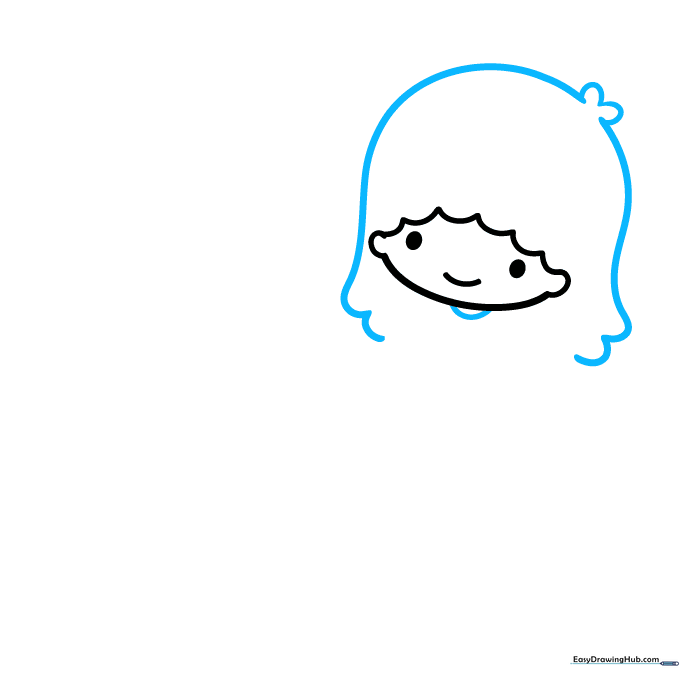
Use long, sweeping curved lines to frame Lala’s face with her signature long hair. Add a short, simple curve for her neck. Teacher's Tip: Use smooth, continuous strokes to make the hair look soft and flowing.
Step 3: Drawing the Gown
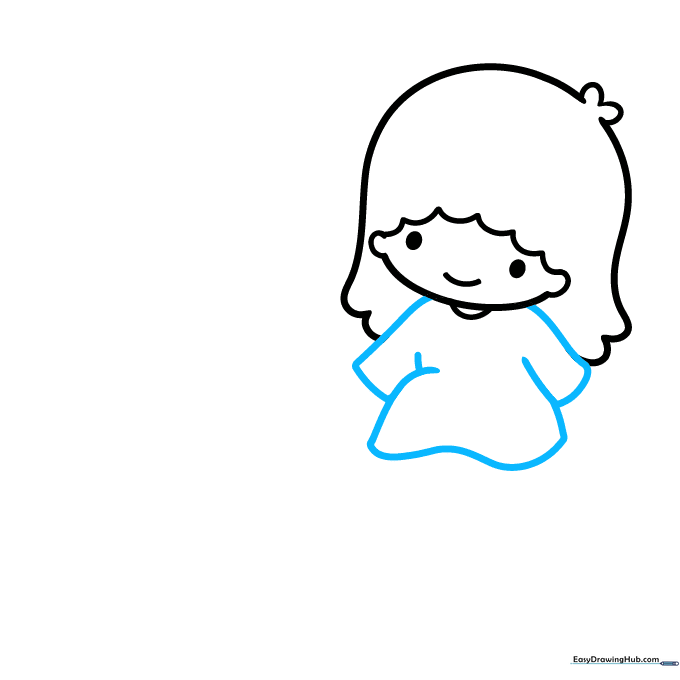
Sketch the outline of the gown using overlapping curved lines for the sleeves and the body. Teacher's Tip: Imagine the gown is made of soft fabric; keep your lines rounded rather than sharp or angular.
Step 4: Adding Hands and Feet
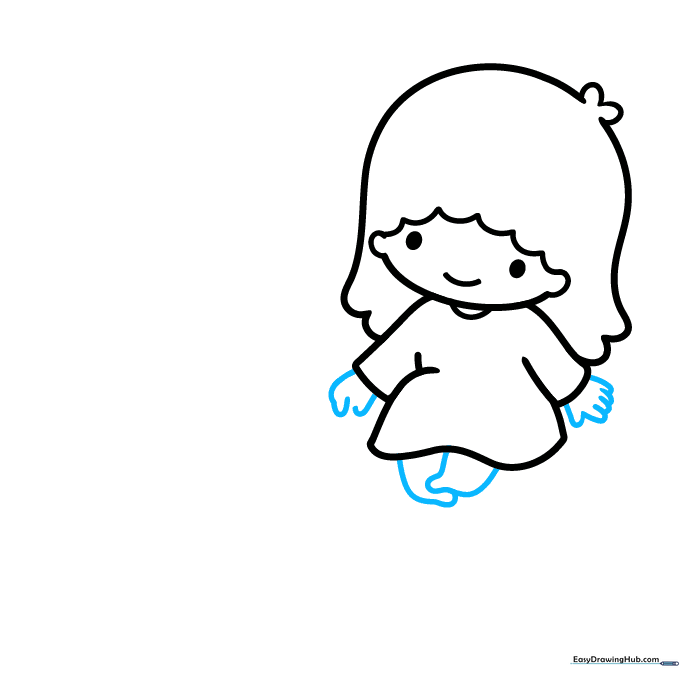
Draw the feet crossed over each other and add simple shapes for the hands. Teacher's Tip: Crossing the feet adds a sense of movement and personality to your character.
Step 5: Sketching Kiki
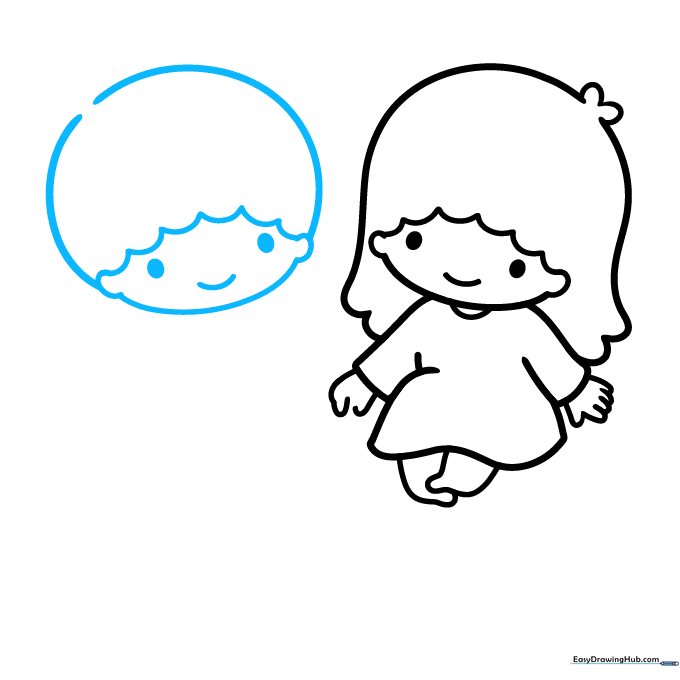
Now, draw Kiki’s face and hair next to Lala’s. Use a smiling mouth and two small ovals for his eyes. Teacher's Tip: Try to match the size of Kiki's eyes to Lala's so they look like a balanced pair.
Step 6: Completing Kiki’s Outline

Add a small tuft of hair on the back of Kiki's head and sketch his gown. Teacher's Tip: Use light, quick strokes to create the hair tuft to give it a natural, fluffy look.
Step 7: Connecting the Characters
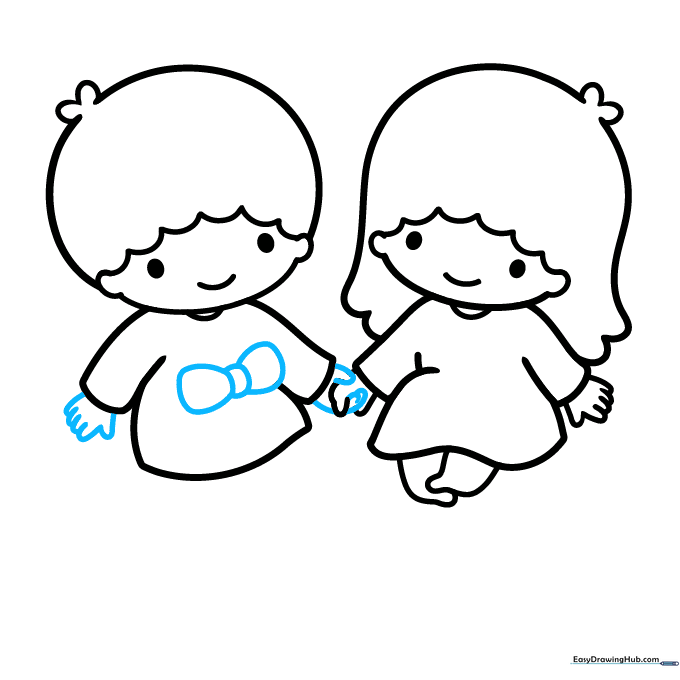
Draw the bow on Kiki's gown and show him holding Lala's hand. Teacher's Tip: Ensure the hand connection looks natural by overlapping the lines slightly where they touch.
Step 8: Refining Details
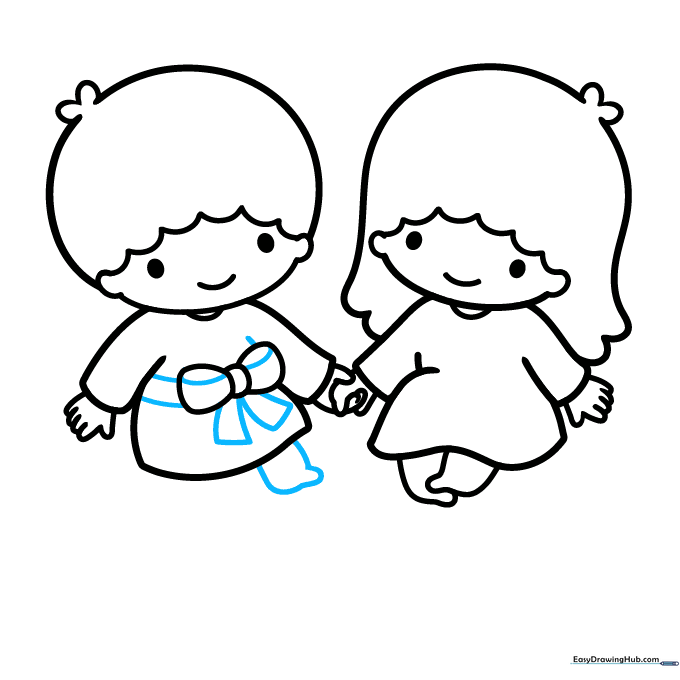
Finish the bow details and start sketching the feet. Teacher's Tip: Take your time with the ribbon—it adds a lovely decorative touch to the drawing.
Step 9: Adding the Cloud
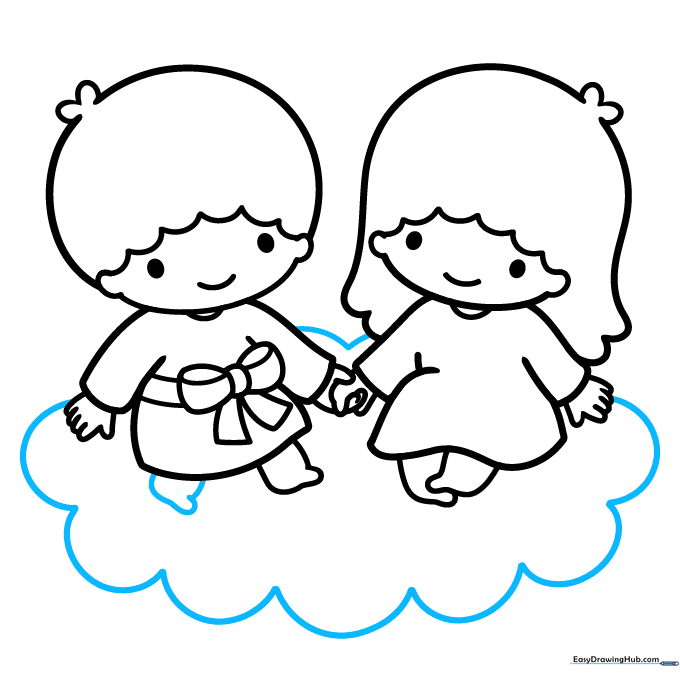
Draw Kiki's remaining foot and sketch a fluffy cloud around them. Teacher's Tip: Use irregular, bumpy lines for the cloud to make it look soft and airy.
Step 10: Color Your Masterpiece
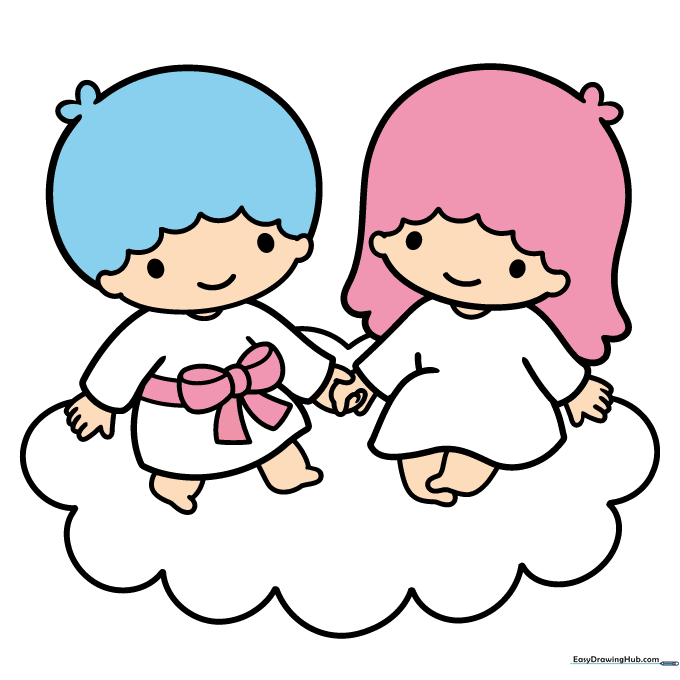
Time to color! Use soft pastels for their hair—blue or brown for Kiki, and pink or blonde for Lala. Keep their gowns white with a pink ribbon. Teacher's Tip: Use light pressure with your colored pencils to achieve that dreamy, Sanrio-inspired look.
More Tutorials


