How to Draw Kylian Mbappé: Easy 9-Step Portrait Guide
Capture the likeness of soccer superstar Kylian Mbappé with this beginner-friendly portrait guide. Designed for young artists ages 7+, this activity requires only a pencil, eraser, and paper to build confidence in facial proportions. Follow along to master his iconic features and jersey style in just a few simple steps.
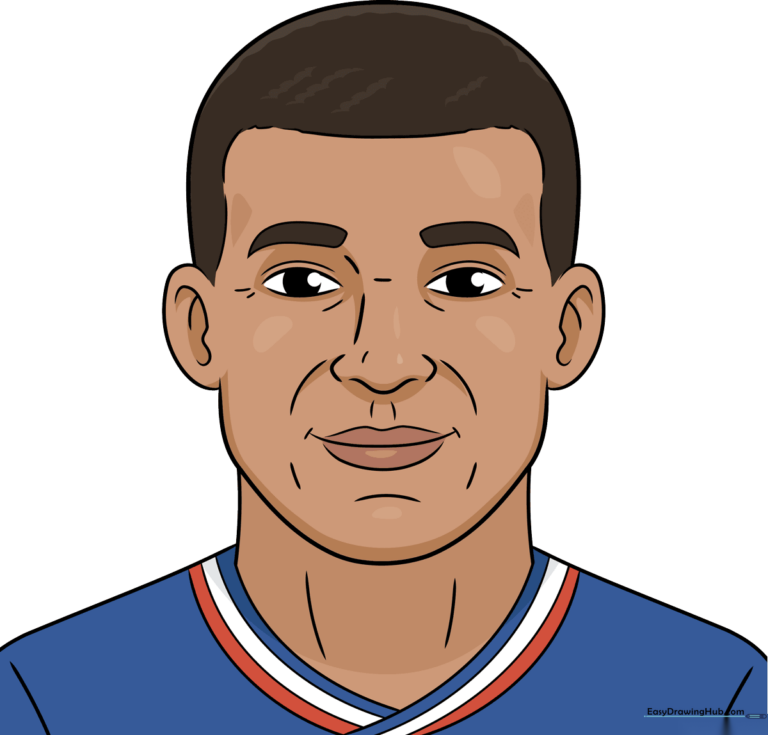
🎯 Final Result
Step-by-Step Instructions
Step 1: Sketching the Eyes
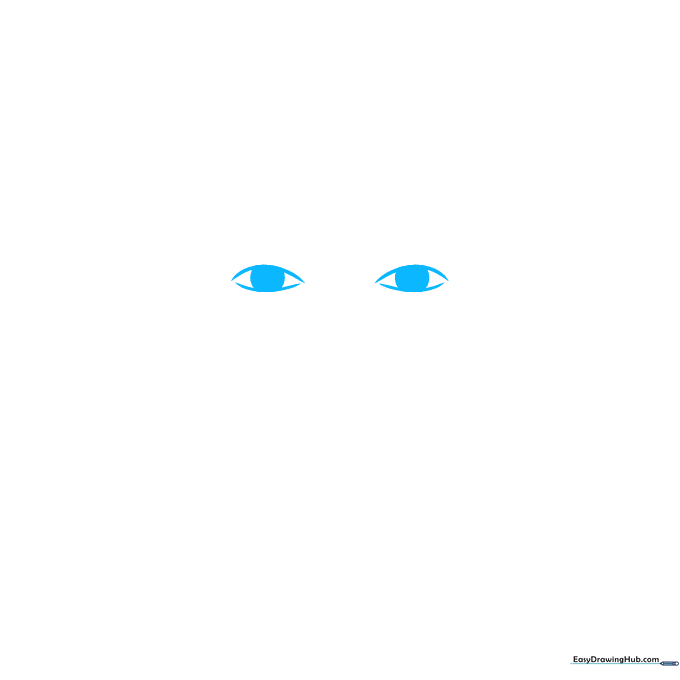
Start by drawing two curved lines that don't quite meet at the corners to form the shape of the eyes. Add a dark, round pupil inside each. Teacher's Tip: Keep your pencil pressure light here so you can easily adjust the symmetry if needed.
Step 2: Defining Brows and Nose Bridge
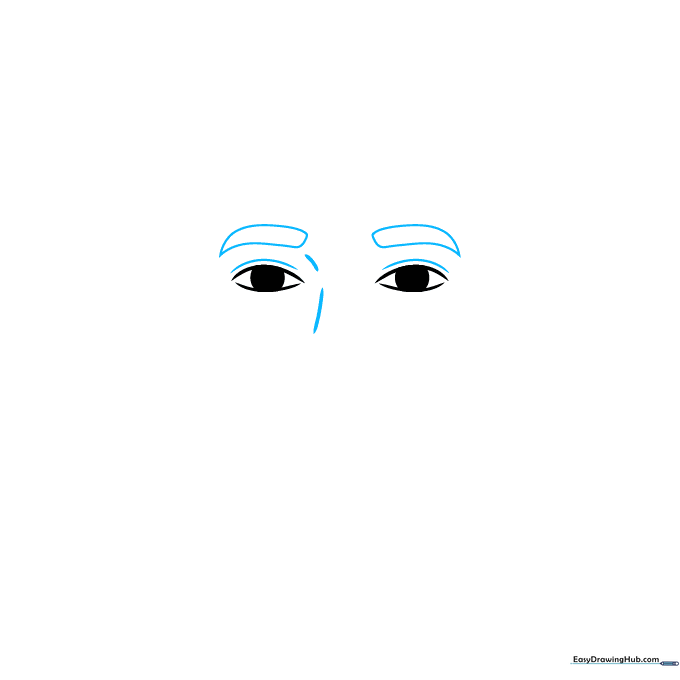
Draw a small curved line between the eyes to suggest the bridge of the nose, then add thick, teardrop-shaped eyebrows above each eye. Teacher's Tip: The eyebrows are key to capturing his expression—keep them angled slightly downward for a focused look.
Step 3: Shaping the Nose and Mouth
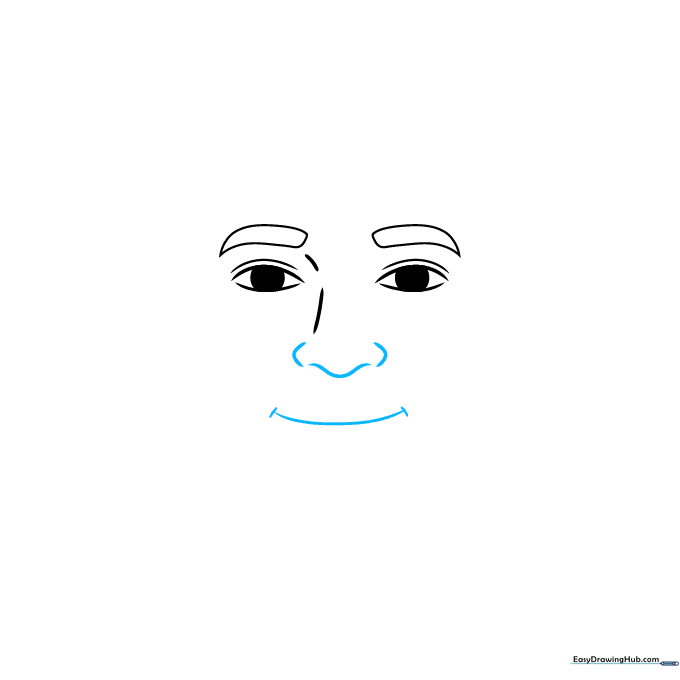
Sketch the sides and tip of the nose using soft curves, then draw a gentle, smiling mouth below. Add short lines at the corners of the mouth to give it depth. Teacher's Tip: Use very faint lines for the mouth to keep the expression natural rather than cartoonish.
Step 4: Outlining the Jaw and Ears
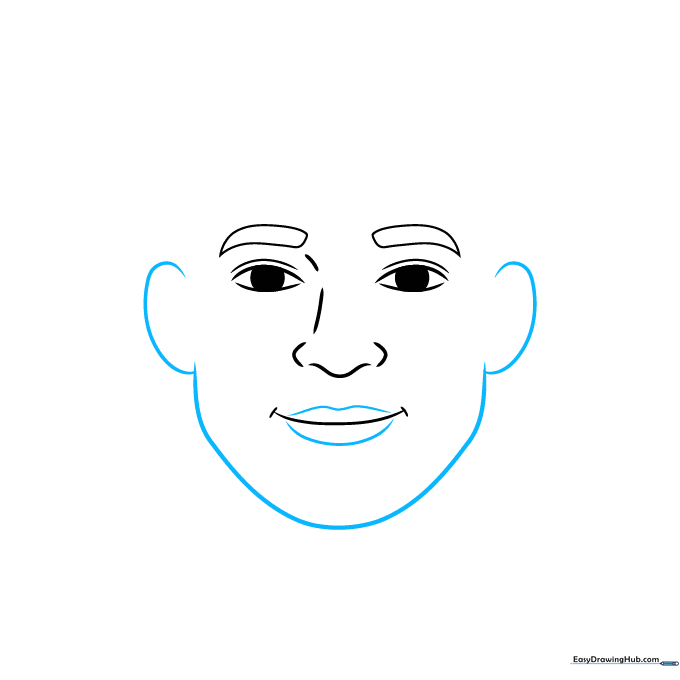
Enclose the lips with curved lines. Draw a long, smooth line for the chin and cheeks, and add 'C' shaped lines on the sides for the ears. Teacher's Tip: Ensure the ears align roughly with the top of the eyes and the bottom of the nose for correct proportions.
Step 5: Drawing the Hairline
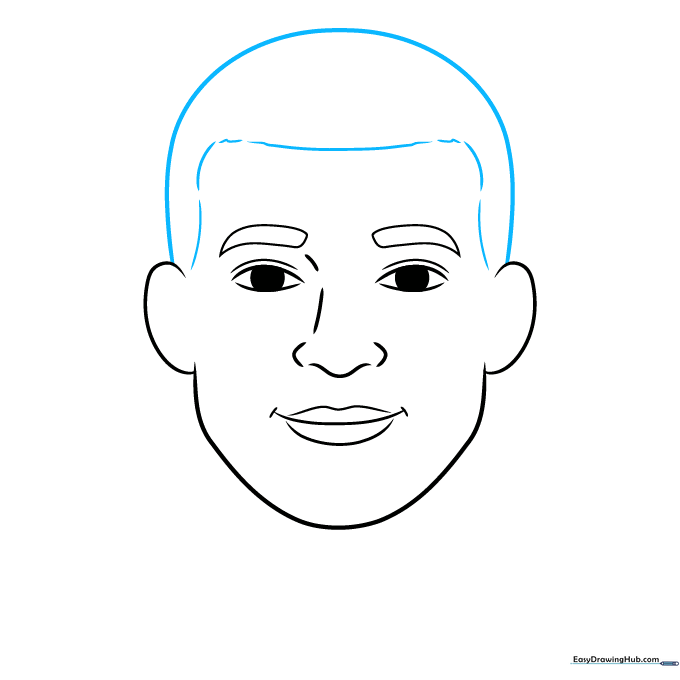
Connect the ears with a long curved line to form the top of the head. Use a series of short, choppy lines to create the hairline across the forehead. Teacher's Tip: Vary the length of your strokes to make the hairline look more realistic and less like a solid block.
Step 6: Adding Neck and Ear Detail
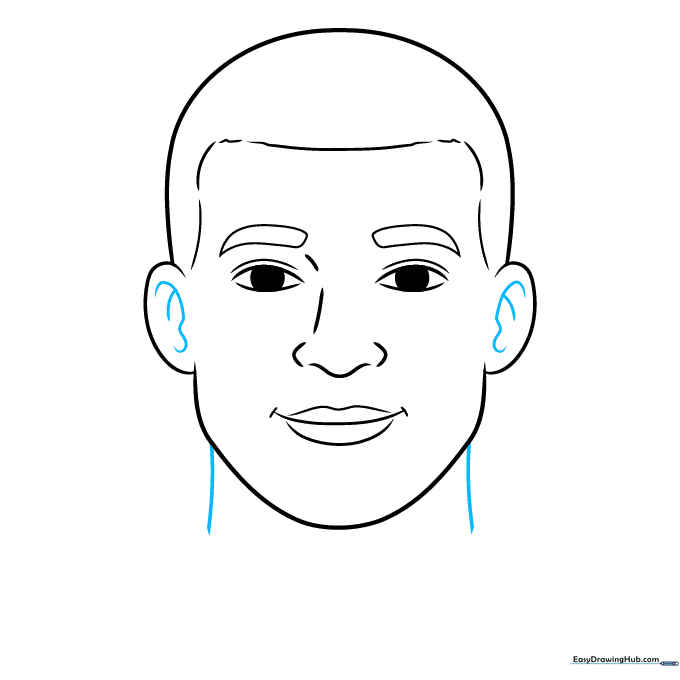
Add small, overlapping curves inside the ears for detail. Extend two parallel curved lines downward from the jaw to form the neck. Teacher's Tip: Keep the neck lines slightly curved to show the natural structure of the muscles.
Step 7: Sketching the Jersey
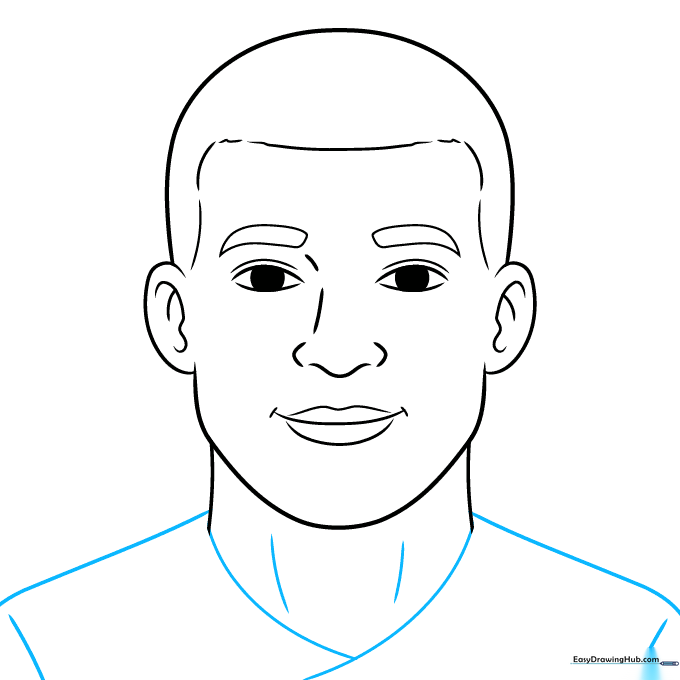
Extend lines from the neck to create the shoulders. Use a wide 'Y' shape to draw the collar of the soccer jersey. Teacher's Tip: Make the collar lines bold to help the jersey stand out from the neck.
Step 8: Refining the Jersey
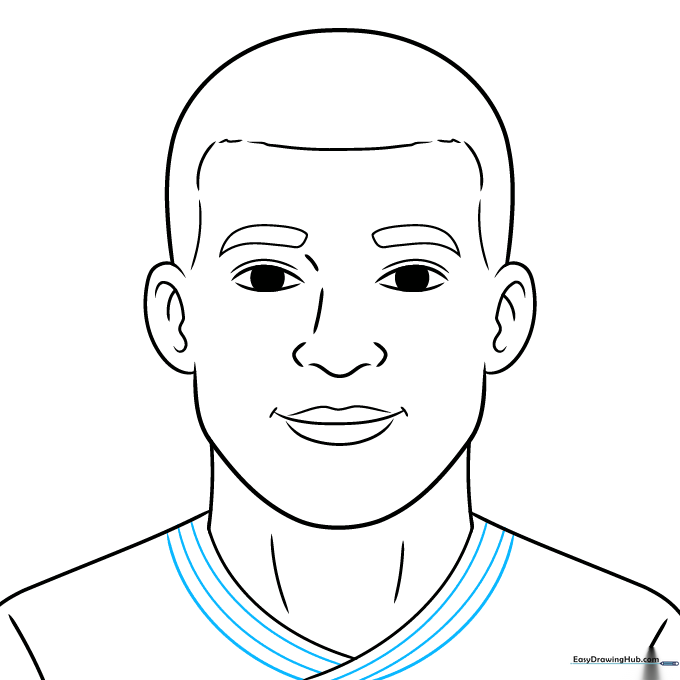
Add three curved lines parallel to each side of the collar to represent jersey trim. Teacher's Tip: Keep these lines consistent in width to make the jersey look professional.
Step 9: Final Facial Contours
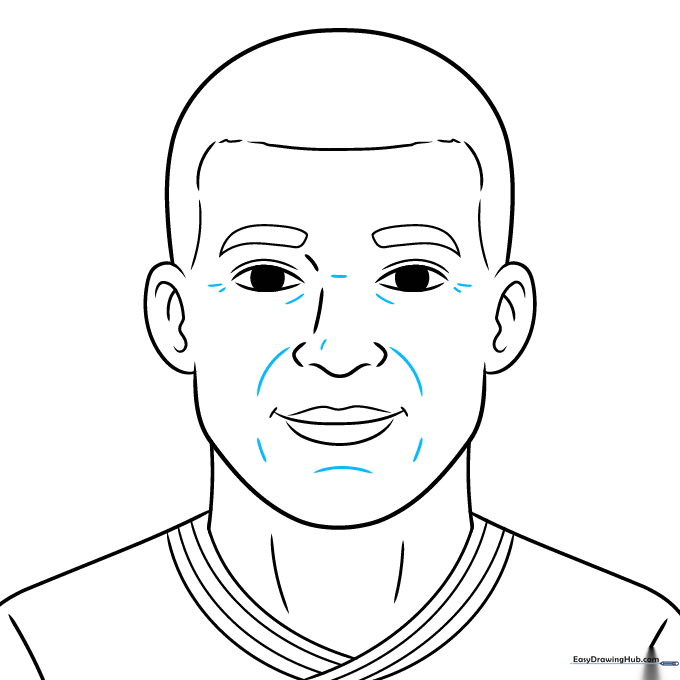
Add subtle, short curved lines around the eyes, nose, and mouth to define the facial structure. Teacher's Tip: Use these lines sparingly—they are meant to suggest shadows, not to outline every feature.
Step 10: Bringing it to Life with Color
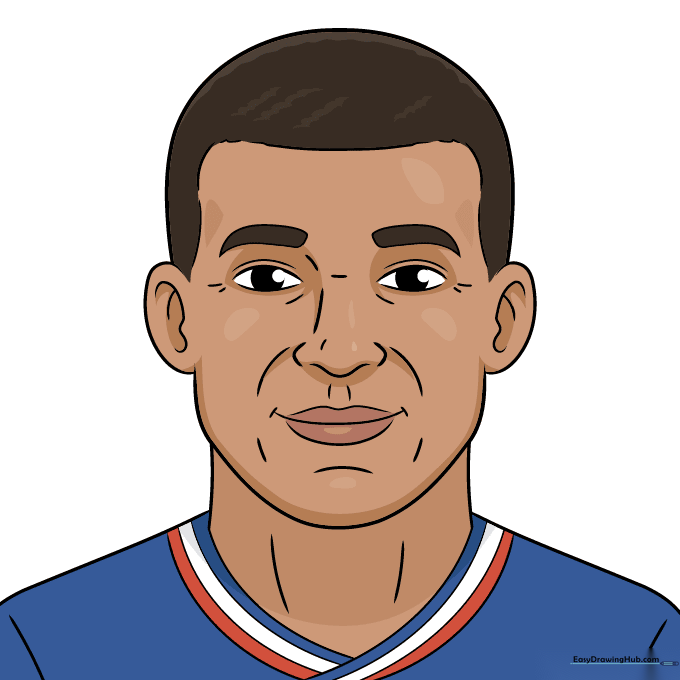
Your outline is complete! Use warm tan tones for the skin and dark shades for the hair. Pick your favorite team colors for the jersey to make the drawing uniquely yours. Teacher's Tip: Use a blending stump or your finger to soften the skin tones for a smoother finish.
More Tutorials


