How to Draw Kuromi: Easy 10-Step Sanrio Tutorial
Bring Sanrio's mischievous Kuromi to life with this beginner-friendly drawing guide. Designed for ages 6 and up, this activity requires only a pencil, paper, and an eraser. Follow these steps to master her iconic jester style and expressive features.
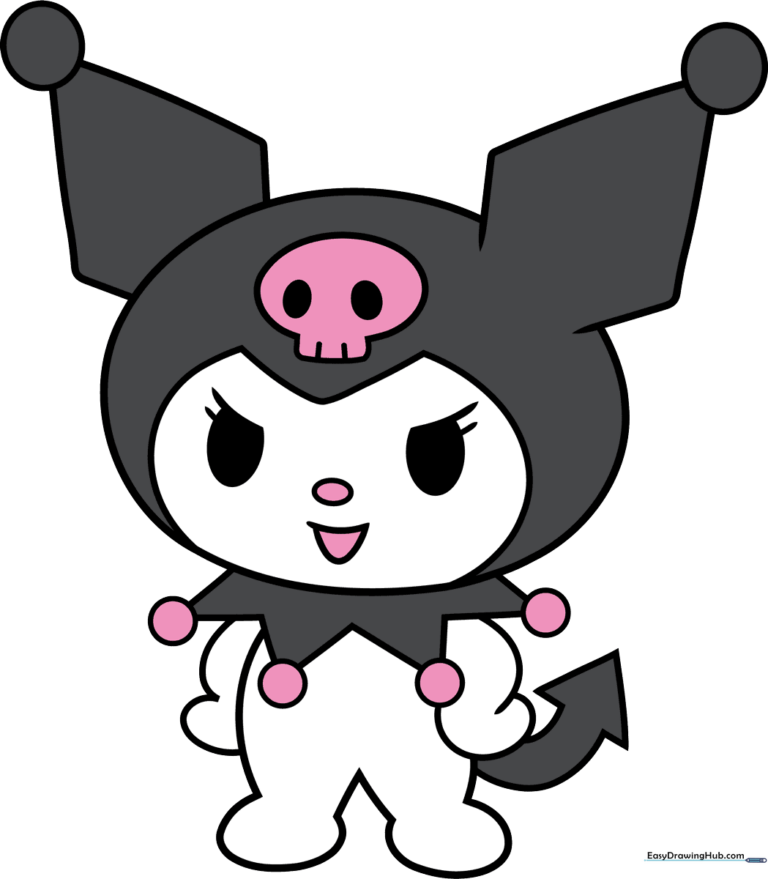
🎯 Final Result
Step-by-Step Instructions
Sketching the Eyes and Nose
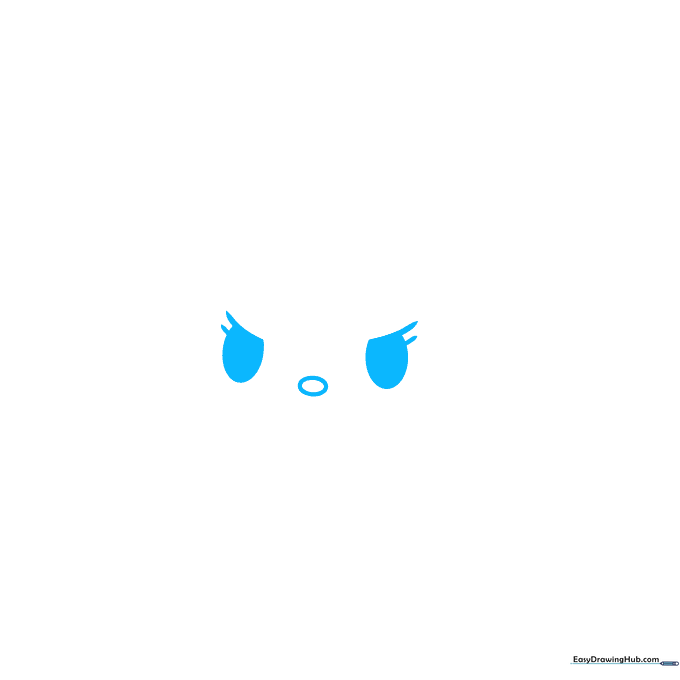
Start by drawing two curved lines for the eyes, then add a partial oval beneath each and shade them in. Place a small oval between the eyes for her nose. Teacher's Tip: Keep your pencil lines light so you can easily adjust the spacing if the eyes look a bit lopsided.
Defining the Face and First Ear
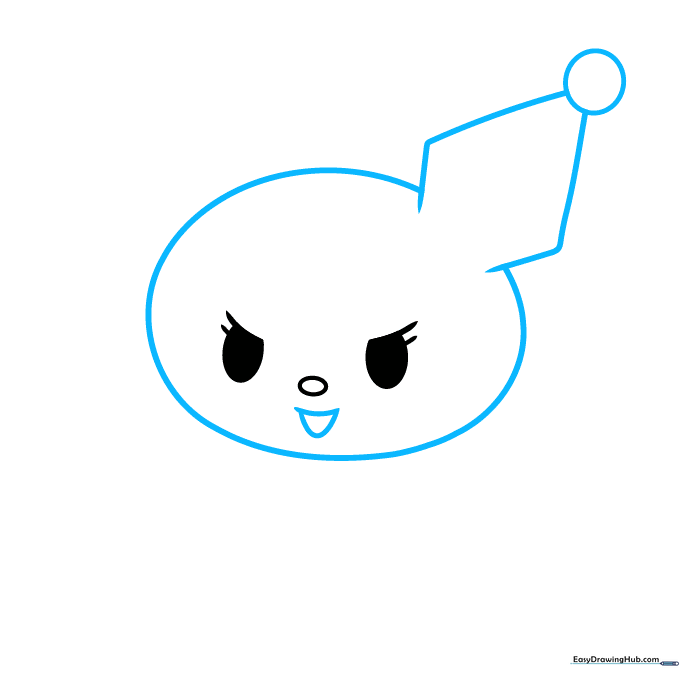
Draw two curved lines for her mouth, then outline the face with a large oval, leaving a gap at the top. Use four straight lines to form a diamond shape for her ear, topped with a small circle. Teacher's Tip: The diamond shape is the base of her jester hat, so keep it sharp and angular.
Adding the Second Ear
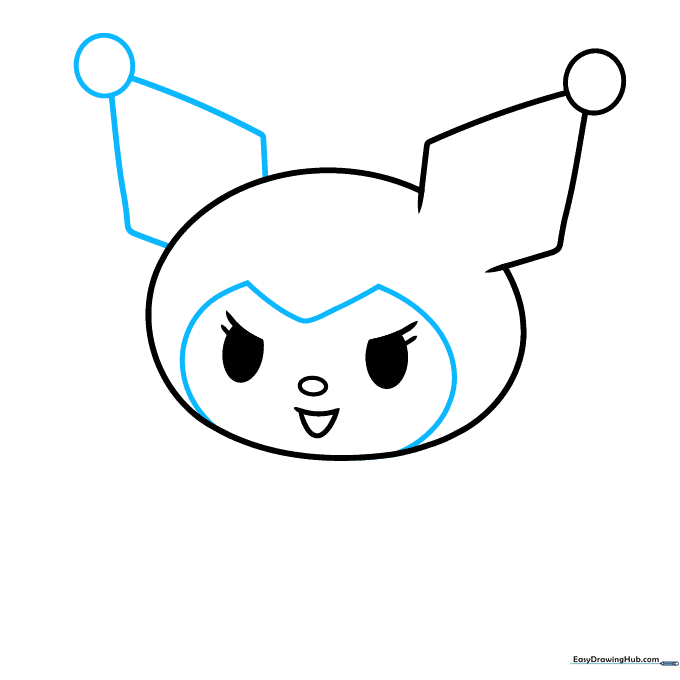
Mirror the first ear on the other side using straight lines and a circle. Connect them with a wide, curved 'M' shape across the forehead. Teacher's Tip: Make sure the 'M' curve is symmetrical to give her that classic Sanrio balance.
Drawing the Skull Emblem
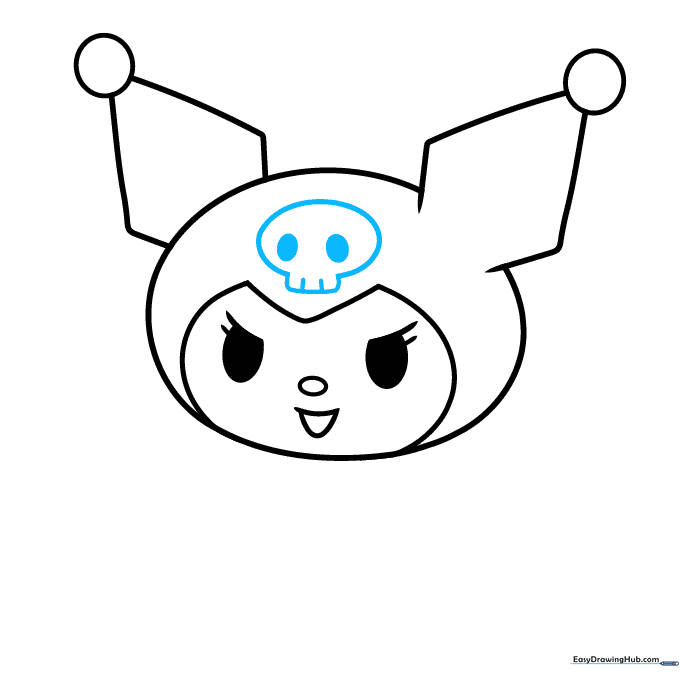
Draw a small skull on the front of her cap using a partial oval and curved lines. Add two small ovals for the skull's eyes. Teacher's Tip: Don't worry about perfection here; a slightly wobbly skull just adds to the hand-drawn charm!
Creating the Collar
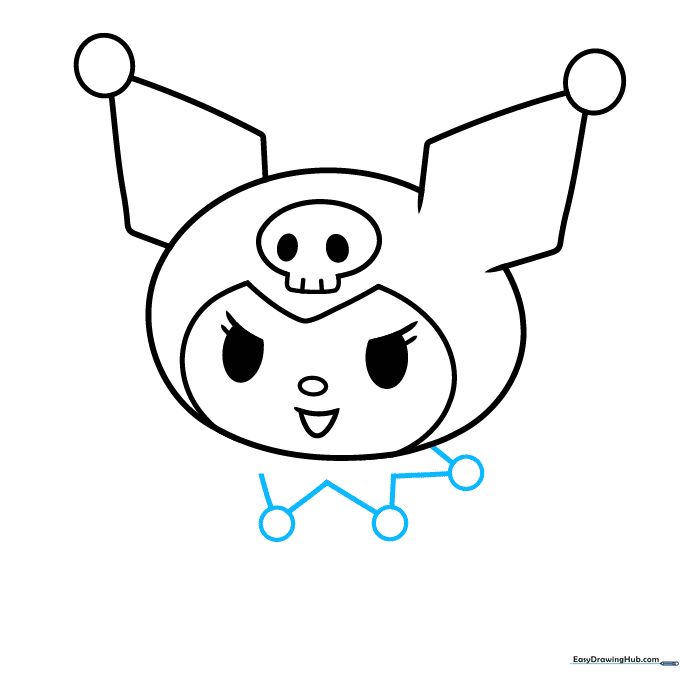
Sketch the jester ruff around her neck by drawing a series of small circles connected by 'V' shaped lines. Teacher's Tip: Keep the circles uniform in size to make the collar look neat and professional.
Adding the First Arm
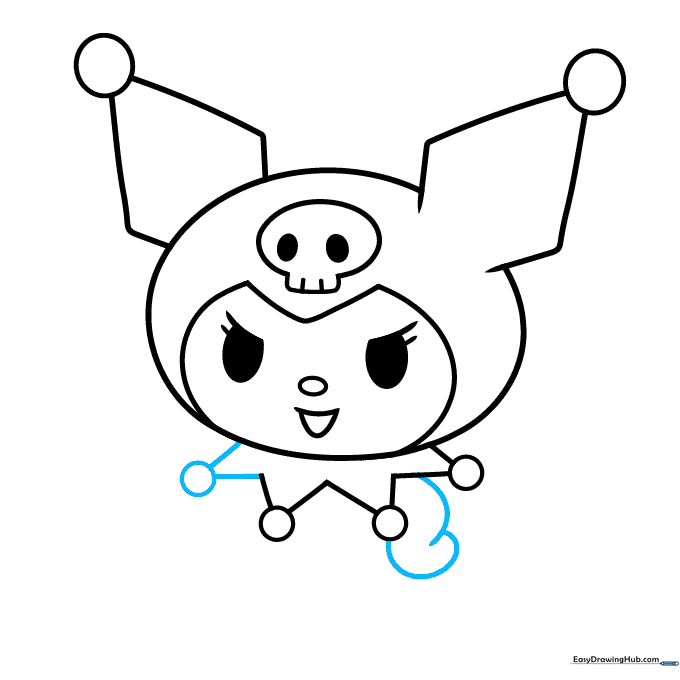
Complete the collar and draw the first arm, positioning the hand on her hip with overlapping curved lines. Teacher's Tip: Use a 'C' shape for the hand to suggest a thumb and fingers without needing complex detail.
Sketching the Torso and Second Arm
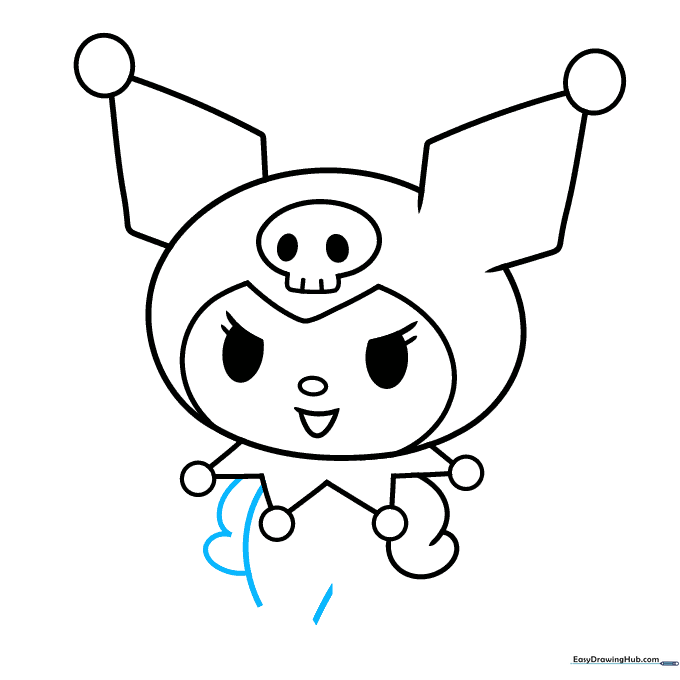
Use curved lines to define the side of the torso and the second arm, also resting on her hip. Teacher's Tip: Ensure the arms are roughly the same length to keep the character's proportions consistent.
Drawing the Feet
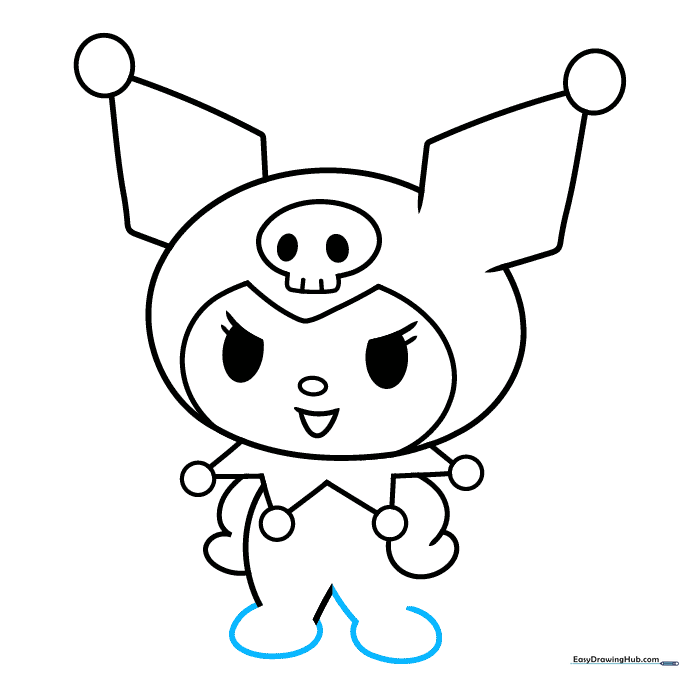
Use simple curved lines to enclose the oval-shaped feet at the bottom of the torso. Teacher's Tip: Keep the feet small to maintain Kuromi's cute, chibi-style aesthetic.
Adding the Tail
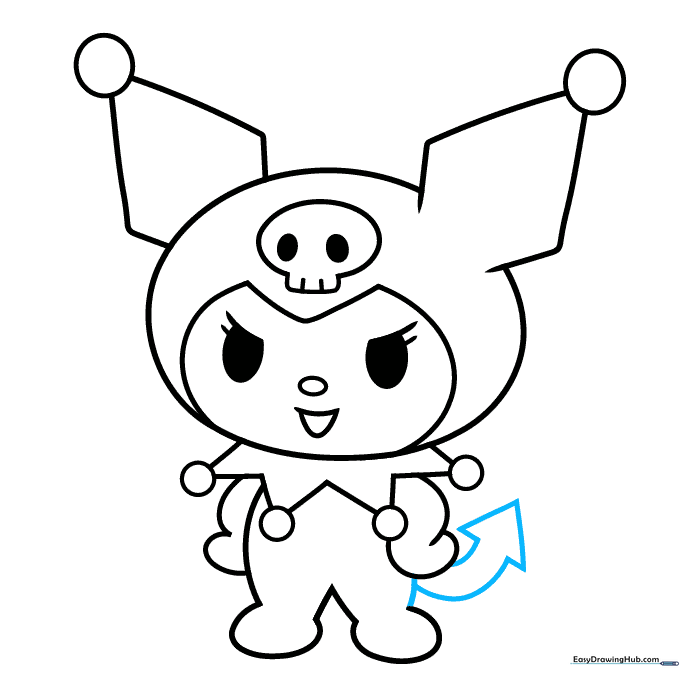
Draw an arrow-shaped tail using a combination of straight and curved lines. Teacher's Tip: Make the arrow point sharp to emphasize her mischievous personality.
Coloring Your Kuromi
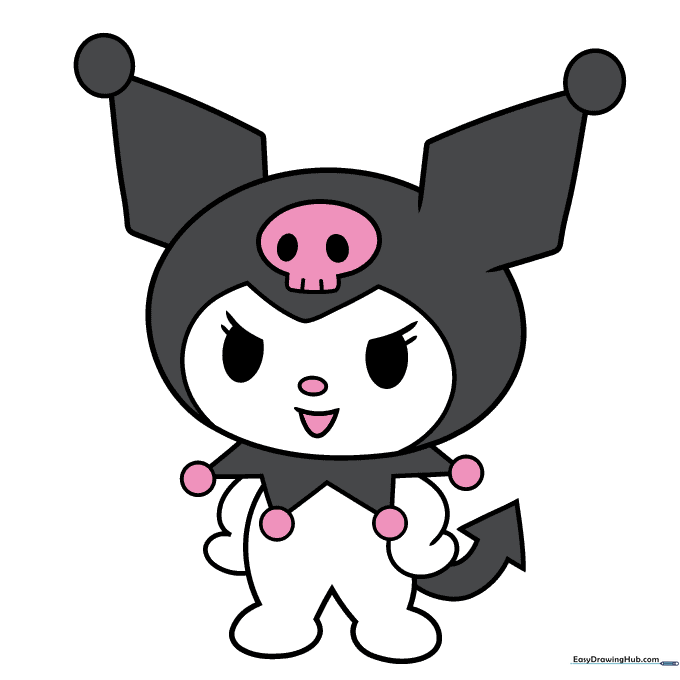
Your outline is complete! Now, bring her to life with color. We used white for her fur, black for her cap and tail, and pops of pink for her ornaments. Teacher's Tip: Use light, circular motions with your colored pencils to get an even, smooth fill.
More Tutorials


