How to Draw a Karate Fighter: Easy 9-Step Guide
Ready to capture the energy of a martial artist? This tutorial is perfect for young artists ages 6+ who want to learn how to draw a person in motion. All you need is a pencil, an eraser, and a sheet of paper to get started on this action-packed character design.
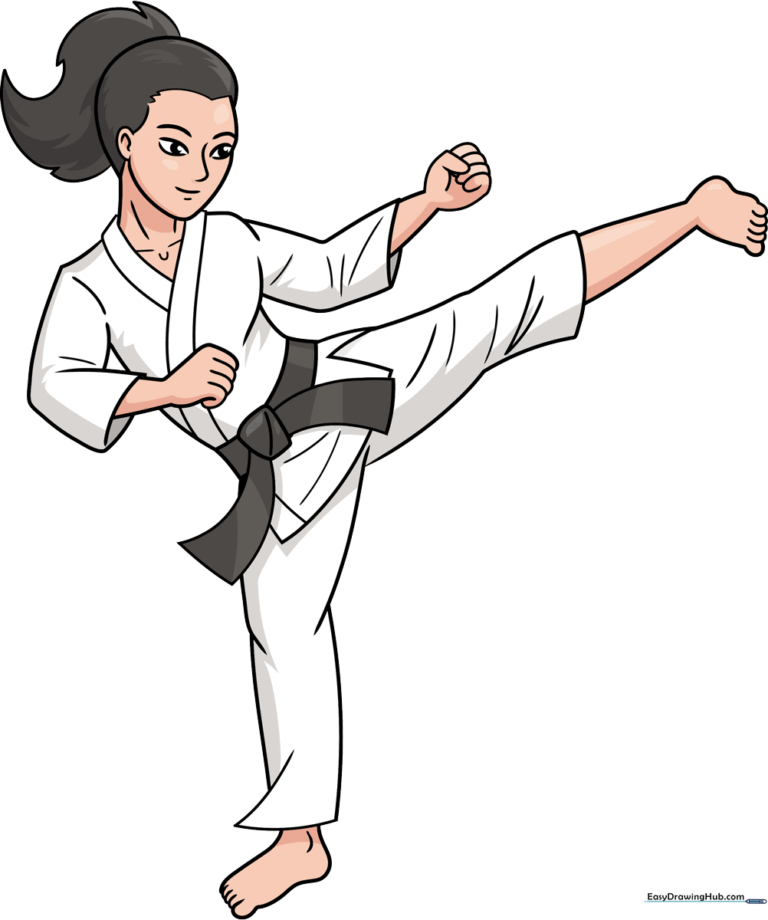
🎯 Final Result
Step-by-Step Instructions
Step 1: Sketching the Face and Head
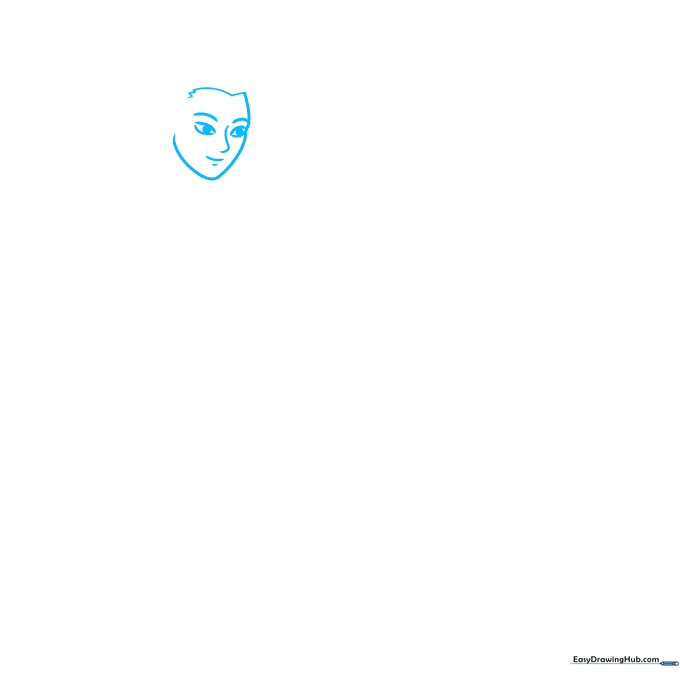
Start by sketching two light lemon shapes for the eyes with circles inside. Add a small backward L-shape for the nose and curves for the brow. Tip: Keep your pencil pressure light here so you can easily erase the construction lines later.
Step 2: Defining the Hair and Neck
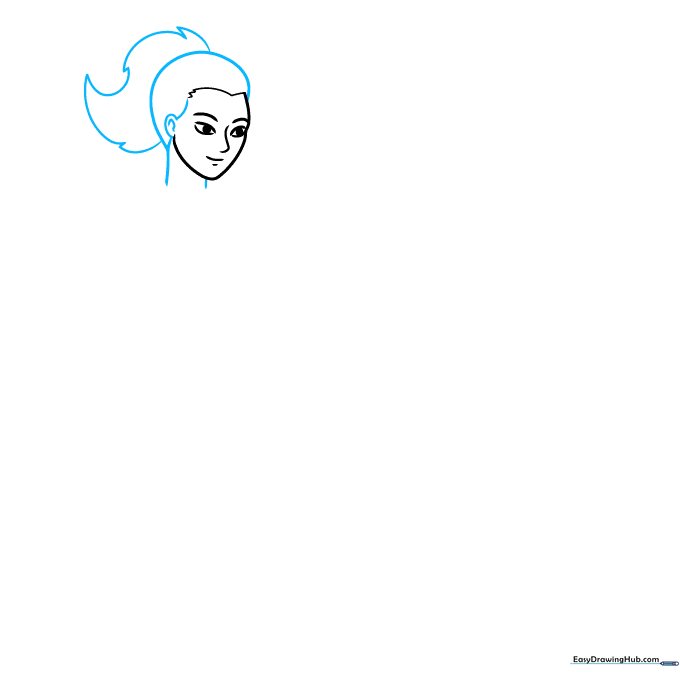
Draw a dome shape around the head and define the hair with small triangles and swooping curves. Add two vertical lines for the neck. Tip: Use quick, confident strokes for the hair to give it a sense of movement.
Step 3: Positioning the Arms
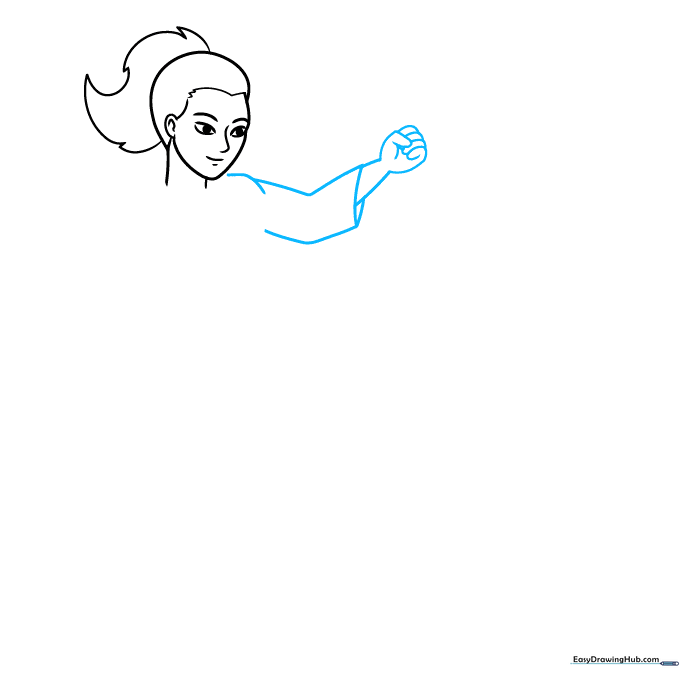
Sketch a curve for the shoulder and use V-shapes to map out the arm. Connect these with vertical lines and use small ovals for the fingers. Tip: Think of the arm as a series of connected tubes to help keep the proportions balanced.
Step 4: Building the Karate Uniform
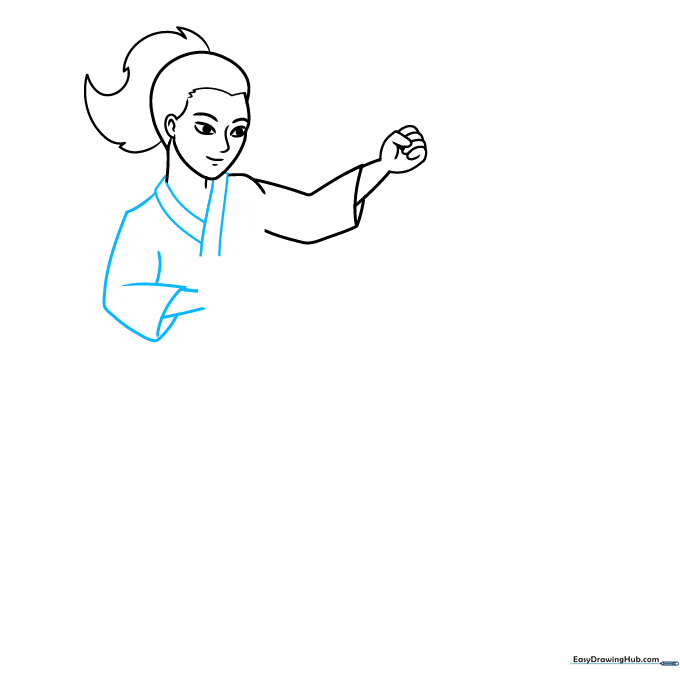
Draw two rectangles below the neck to form the V-neck of the gi. Add the shoulder curve and extend the arm lines. Tip: Keep the lines for the uniform slightly loose to show the fabric is comfortable and ready for action.
Step 5: Refining the Hands
Sketch the left hand using small ovals for the fingers and diagonal lines for the wrist. Add curves behind the arm to show the sleeve. Tip: If the fingers look too long, remember that they are usually about the same length as the palm.
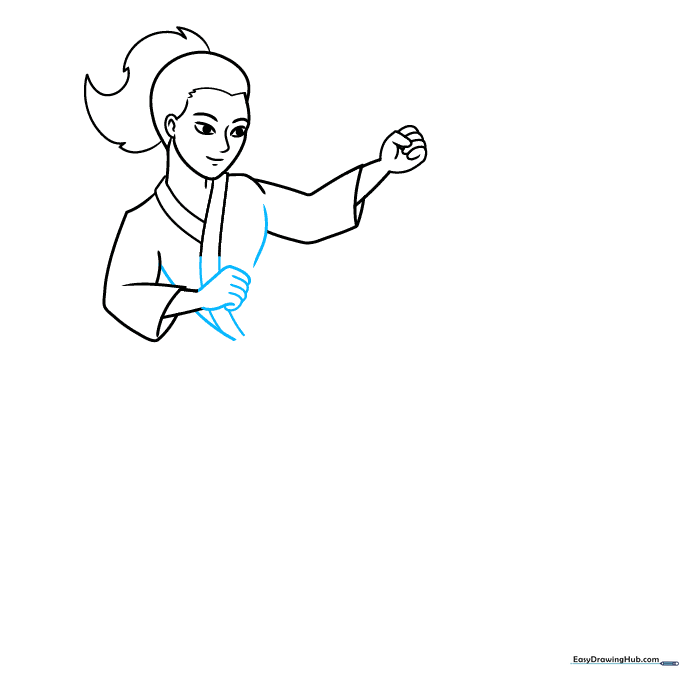
Step 6: Drawing the Torso
Draw an uneven square for the midsection with curvy rectangles attached for the belt area. Complete the torso with a smooth curve. Tip: The belt is the center of the uniform, so make sure it looks like it's wrapping around the waist.
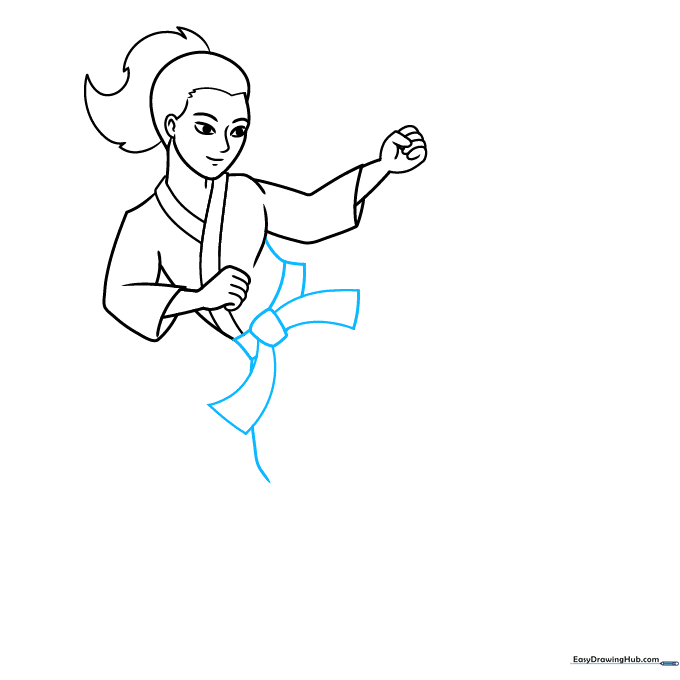
Step 7: Adding the Legs
Complete the left leg using vertical lines and a triangle for the foot. Add small ovals for the toes. Tip: Use wavy lines to represent the fabric of the pants, which helps show that the character is moving.
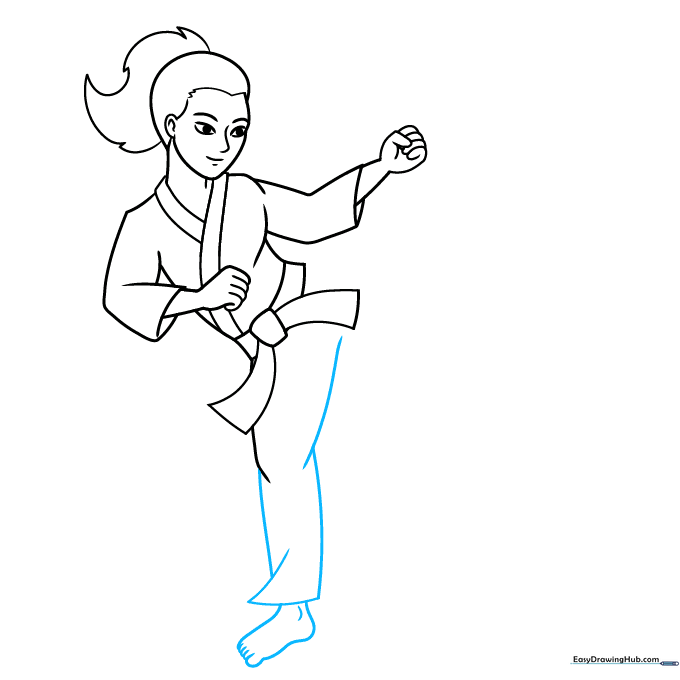
Step 8: Finalizing the Stance
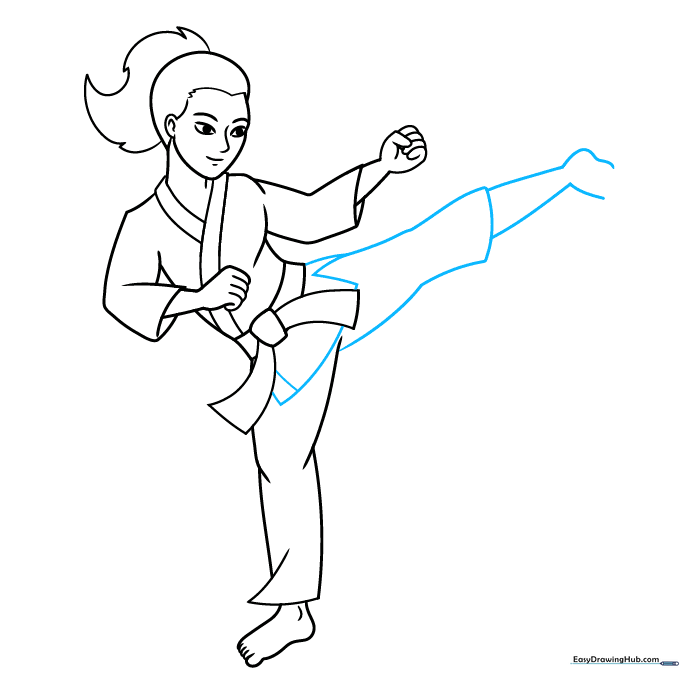
Draw the right leg with wavy lines and add triangles on the hip to show the belt knot. Tip: Adding these small details makes your drawing look much more professional and realistic.
Step 9: Outlining and Finishing Touches
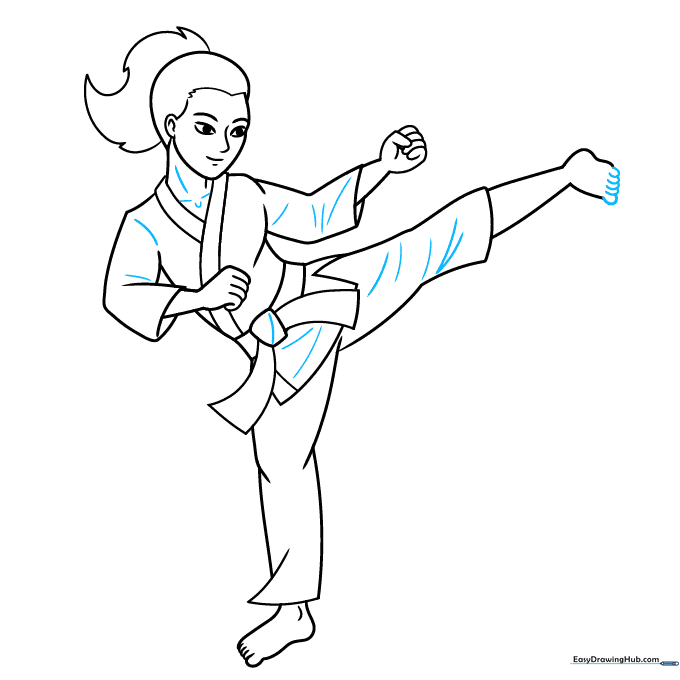
Sketch the toes and add small dashes inside the clothing to show folds. Once you're happy with the sketch, go over your lines with a black ink pen. Tip: Take your time with the ink; slow, steady lines look much cleaner than fast, shaky ones.
Step 10: Adding Color
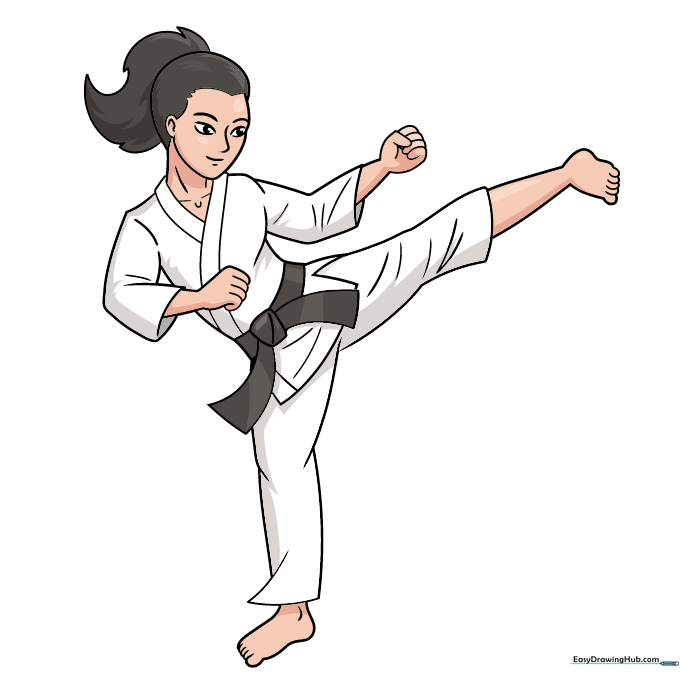
Bring your character to life! Use your favorite colors for the hair and skin. Keep the uniform white with light grey shadows to show depth. Tip: Use a darker grey for the shadows under the belt to make it pop!
More Tutorials


