How to Draw Jinx from Arcane: Easy 10-Step Guide
Ready to bring the chaotic energy of Jinx from Arcane to your sketchbook? This tutorial is designed for intermediate artists looking to capture her iconic look using basic geometric shapes. You will need a pencil, eraser, and fine-liner to complete this character study.
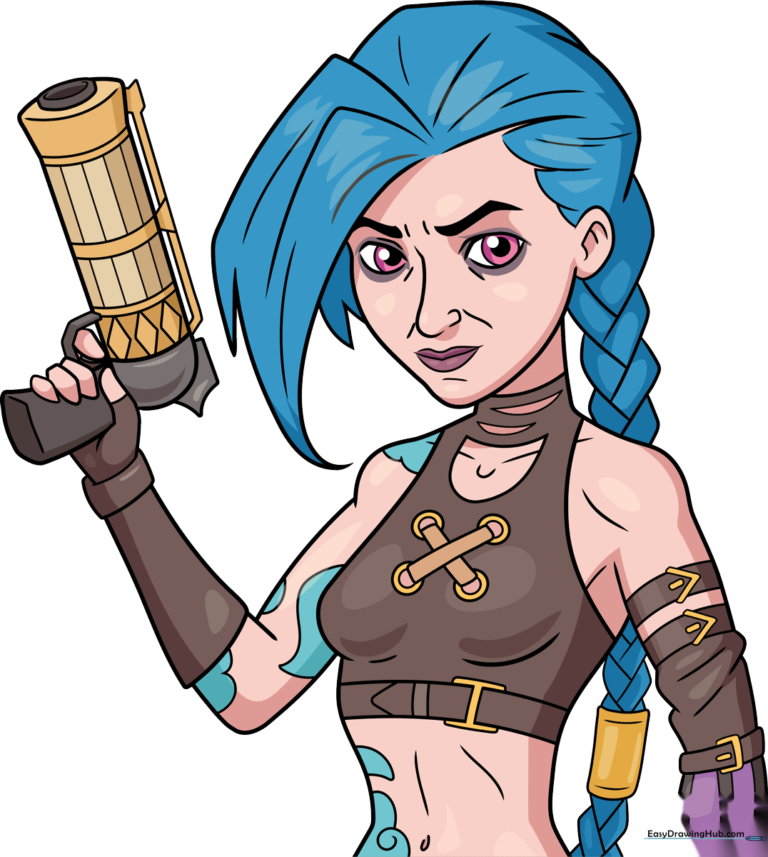
🎯 Final Result
Step-by-Step Instructions
Step 1: Establishing Facial Features
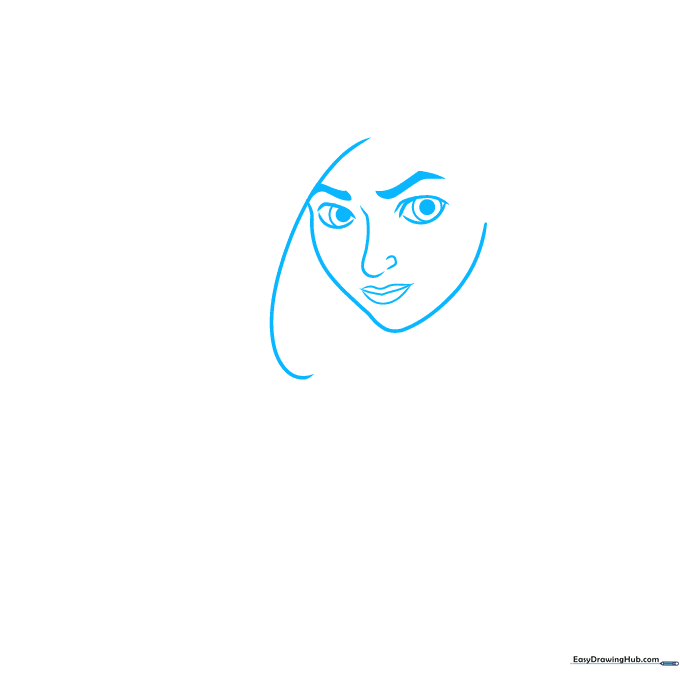
Draw two lemon-shaped outlines for the eyes with circles inside for the pupils. Add thick, arched lines for her intense eyebrows. Sketch a small hook for the nose and a wide 'W' shape for her mouth. Teacher's Tip: Keep the eyes symmetrical to maintain her focused expression.
Step 2: Framing the Hair and Ears
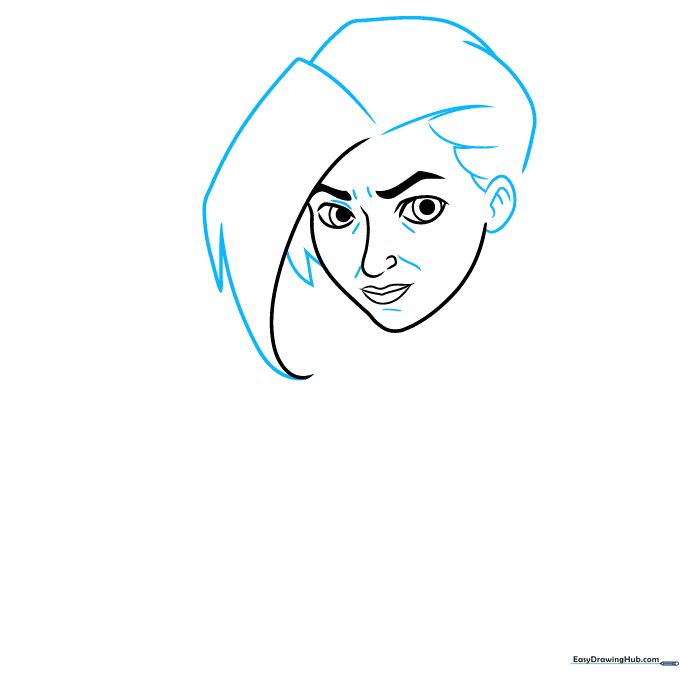
Sketch a rectangle with triangular ends on the left to represent her hair strands. Add loose, sketchy lines for the hairline and an oval for the ear. Teacher's Tip: Use light, flicking motions with your pencil to mimic the texture of messy hair.
Step 3: Neck and Shoulders
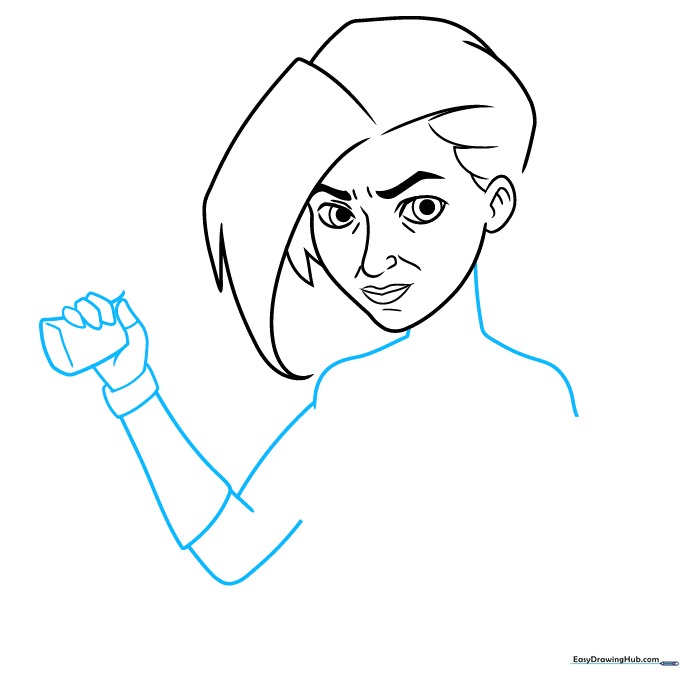
Outline the neck with two vertical lines and add soft curves for the shoulders. For the left arm, use two V-shapes and oblong rectangles for the armband. Teacher's Tip: Ensure the neck isn't too thick to keep the proportions balanced.
Step 4: Constructing the Weapon
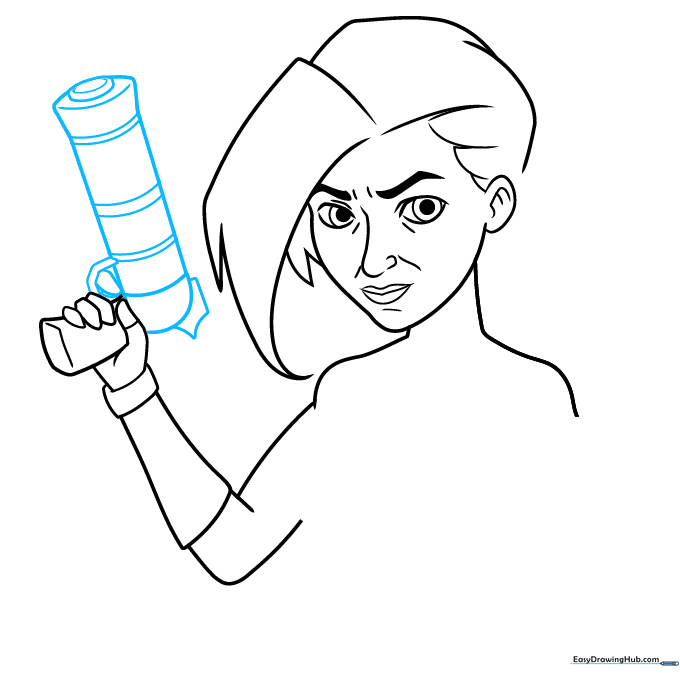
Draw a large cylinder for the main body of the gun, adding an oval at the end. Use a spiky shape at the bottom for detail. Teacher's Tip: Use a ruler if you struggle with the cylinder, but try freehand for a more organic look.
Step 5: Adding Fabric Details
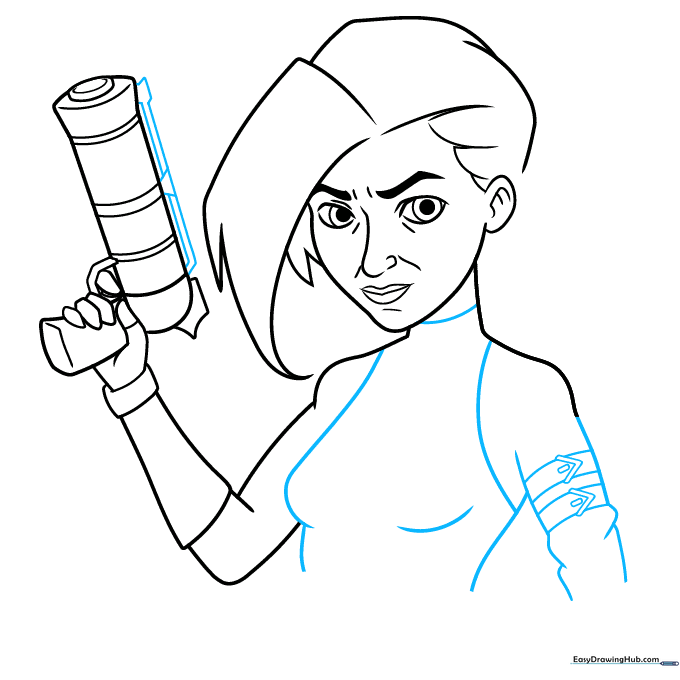
Add triangles and a narrow rectangle to the top of the gun. Use curved lines on the chest and right arm to suggest wrinkled fabric. Teacher's Tip: Wrinkles are just small 'V' shapes—don't overcomplicate them!
Step 6: Refining Accessories
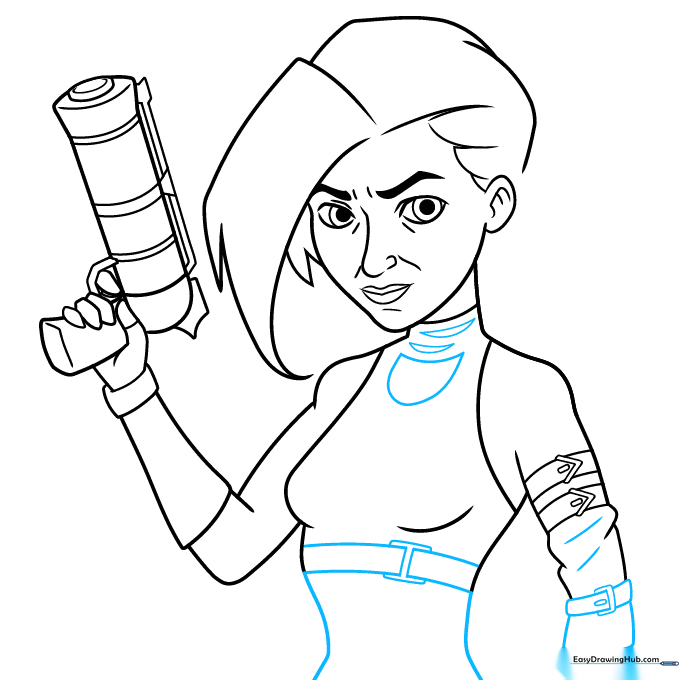
Sketch belts and rectangular details on the right arm. Add small squares and curves to the chest area. Teacher's Tip: Keep these details small to maintain the focus on the face.
Step 7: Drawing the Braid
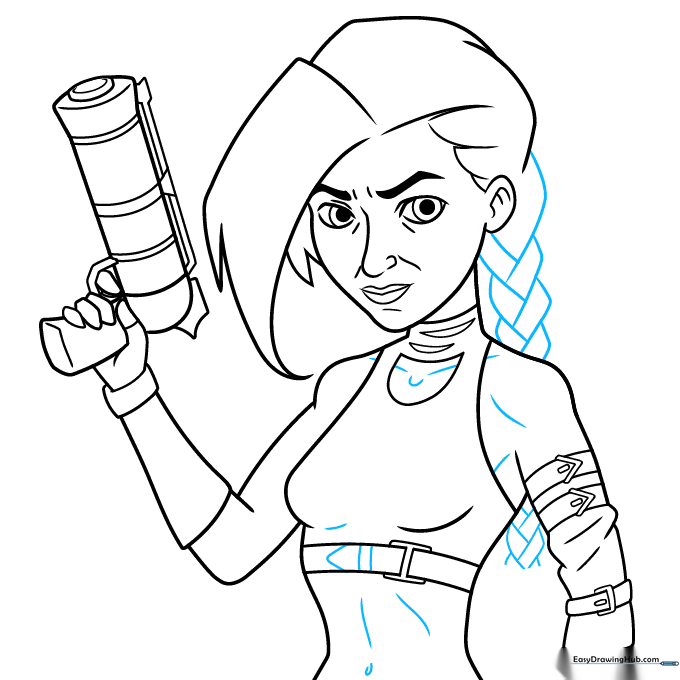
Sketch the long braid using alternating curvy rectangles. Teacher's Tip: Think of the braid as a series of overlapping 'U' shapes to get that woven look.
Step 8: Adding Final Textures

Add small lines throughout the body to indicate seams and texture. Teacher's Tip: Less is more—don't clutter the drawing with too many lines.
Step 9: Inking the Outline
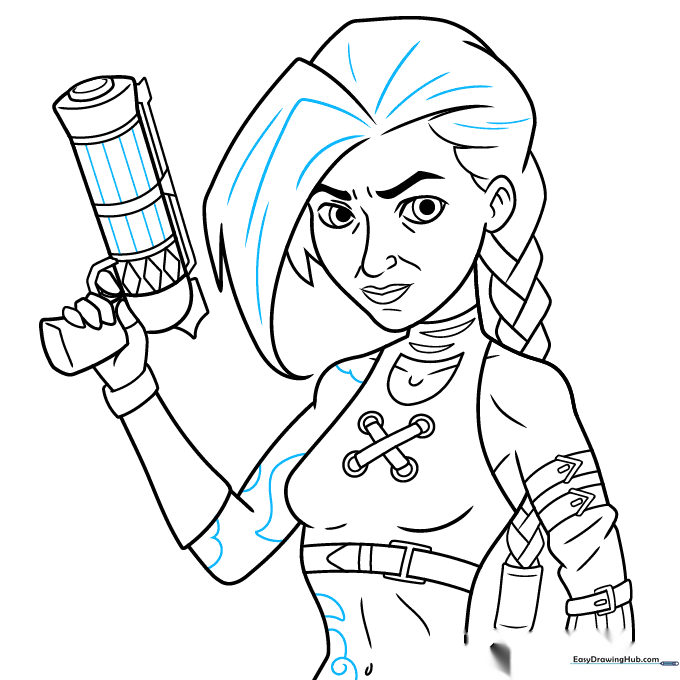
Go over your pencil lines with a fine-liner. Erase any stray pencil marks once the ink is dry. Teacher's Tip: Use a steady hand and take your time on the curves.
Step 10: Bringing Jinx to Life with Color
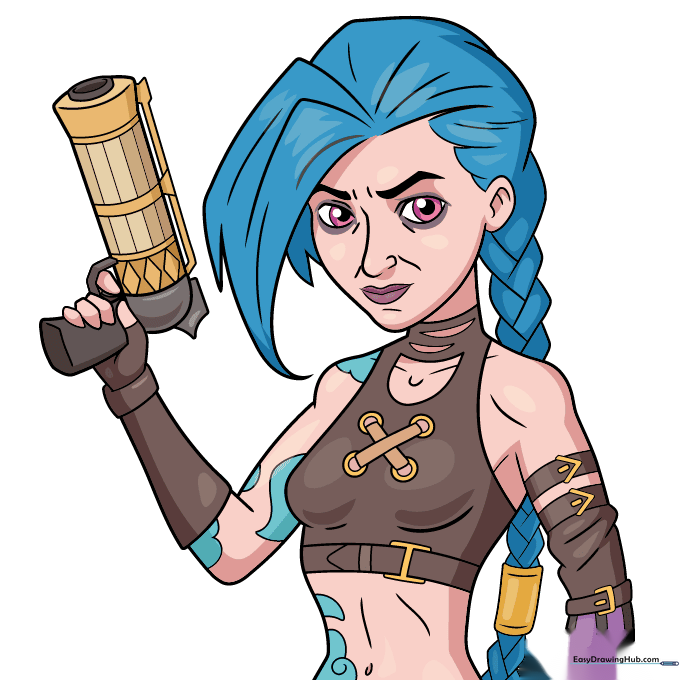
Use pale skin tones, vibrant blue for her hair, and pink for her eyes. Add gold and grey to the weapon. Teacher's Tip: Use a light blue pencil to add a soft glow to her tattoos.
More Tutorials


