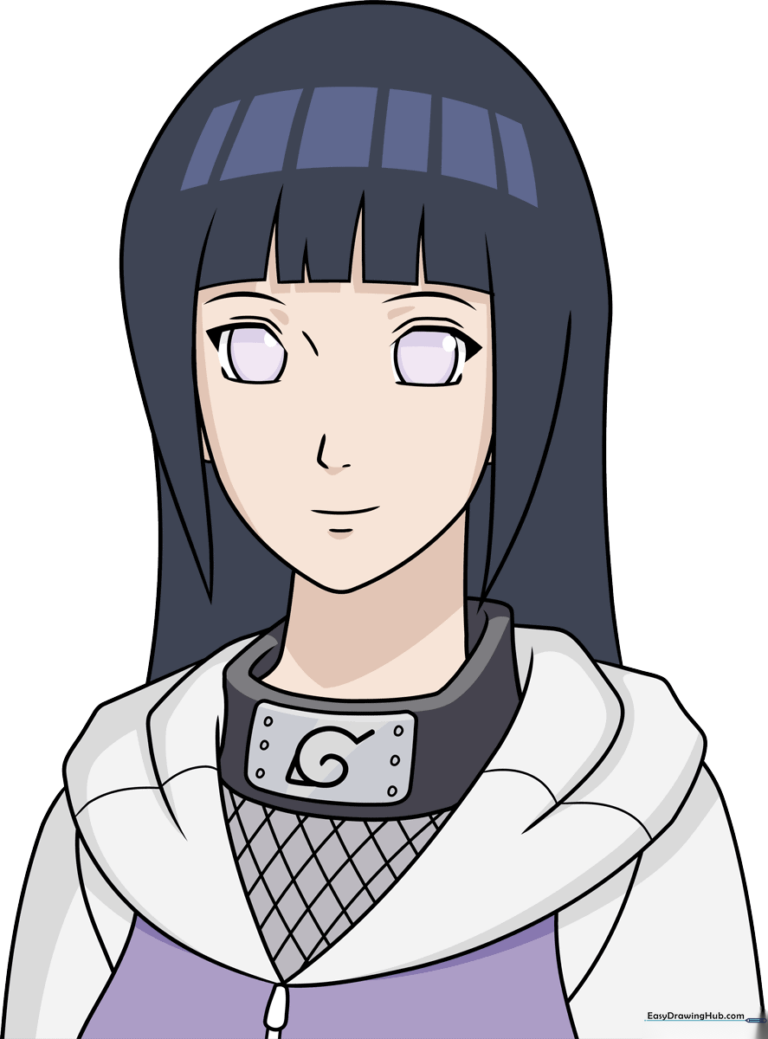
How to Draw Hinata Hyuga: Easy Step-by-Step Anime Guide
Bring the gentle ninja of the Leaf Village to life with this beginner-friendly drawing guide. Designed for artists ages 7 and up, this tutorial breaks down Hinata’s iconic look into manageable shapes. Grab your pencil, eraser, and paper to master her signature style in just a few minutes.
🎯 Final Result
Step-by-Step Instructions
Step 1: Sketching the Expressive Eyes

Start by sketching Hinata's signature anime eyes. Use thick, bold lines for the upper and lower lids, leaving the sides open. Add a soft, curved line above each eye to define the eyelid. Teacher’s Tip: Keep the eyes symmetrical to give her that calm, focused expression.
Step 2: Defining the Face Shape
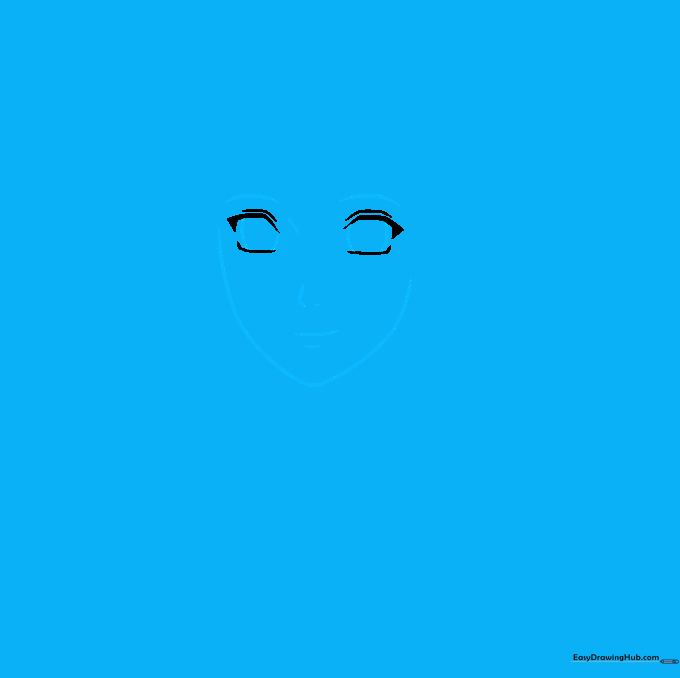
Draw a curved line above each eye for the brows, then add a partial circle inside each eye for the iris. Outline the face with a smooth, tapered line that comes to a soft point at the chin. Add a tiny dash for the nose and a small curve for the mouth. Tip: Keep the chin narrow to maintain that classic anime aesthetic.
Step 3: Framing the Face with Hair
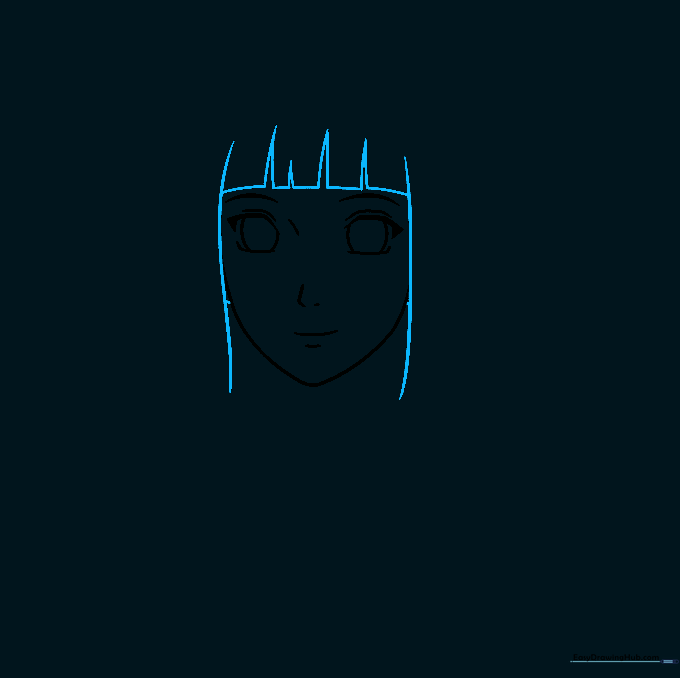
Begin Hinata's hair by drawing long, sweeping curved lines that frame the sides of her face. Add small lines near the ears to show where the hair tucks back. For the bangs, draw narrow, inverted 'V' shapes connected by short, straight lines. Tip: Use fluid, confident strokes to make the hair look natural and flowing.
Step 4: Completing the Head and Neck
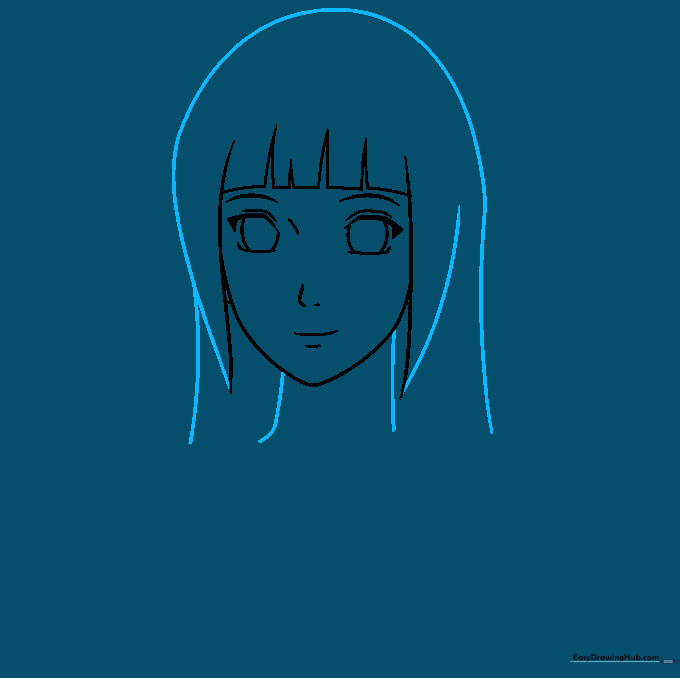
Add volume to the top of her hair using long, sweeping curves that meet at sharp points. Finally, draw two simple curved lines to form the neck. Tip: Ensure the neck lines connect smoothly to the jawline to keep the proportions balanced.
Step 5: Sketching the Garment
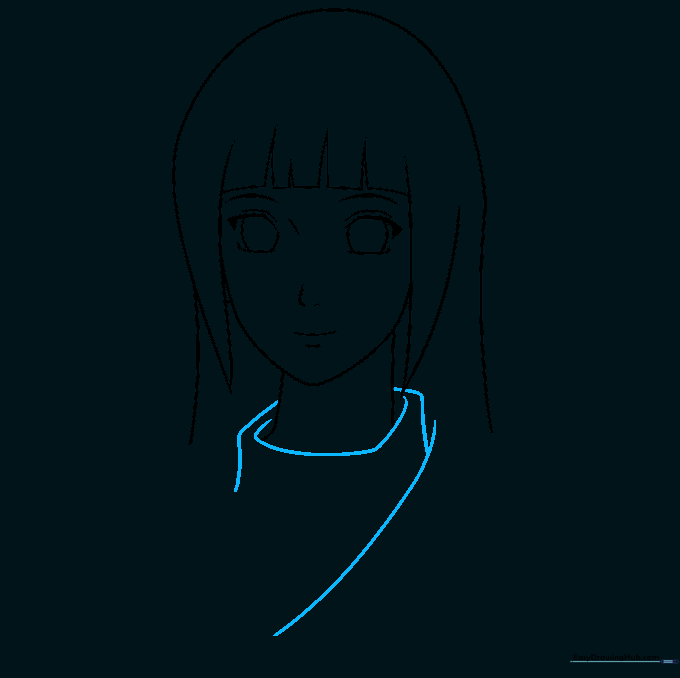
Start the neckline of her outfit using overlapping curved lines. Draw one for the collar opening and two for the sides of her turtleneck. Tip: Overlapping lines create the illusion of fabric folds, making your drawing look more professional.
Step 6: Adding Fabric Dimension
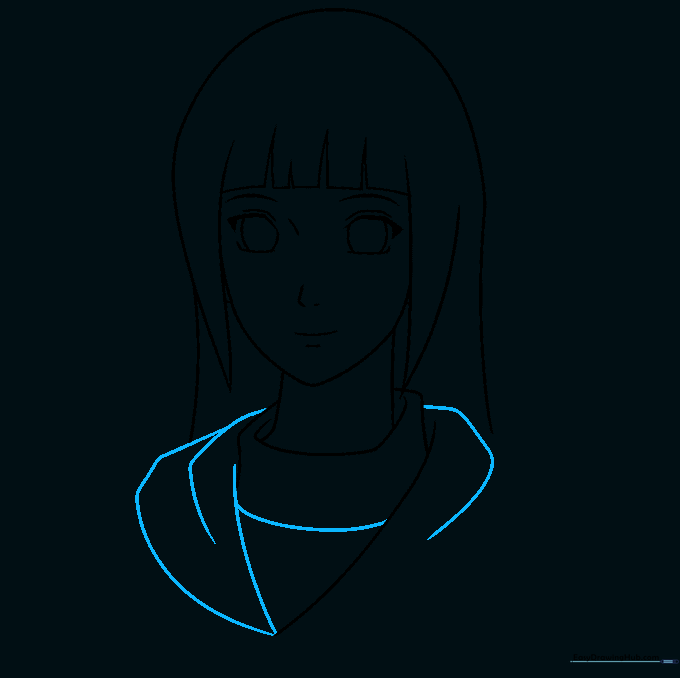
Continue adding lines to the garment to show the structure of her ninja gear. Use overlapping strokes to suggest the weight of the fabric. Tip: Focus on where the fabric bunches near the neck to add realism.
Step 7: Drawing the Shoulders and Arms
Draw a rounded rectangle on the neck area for her gear. Then, extend curved lines outward to define the shoulders and arms. Tip: Keep the shoulder lines soft to match the character's gentle personality.
Step 8: Adding the Leaf Village Symbol
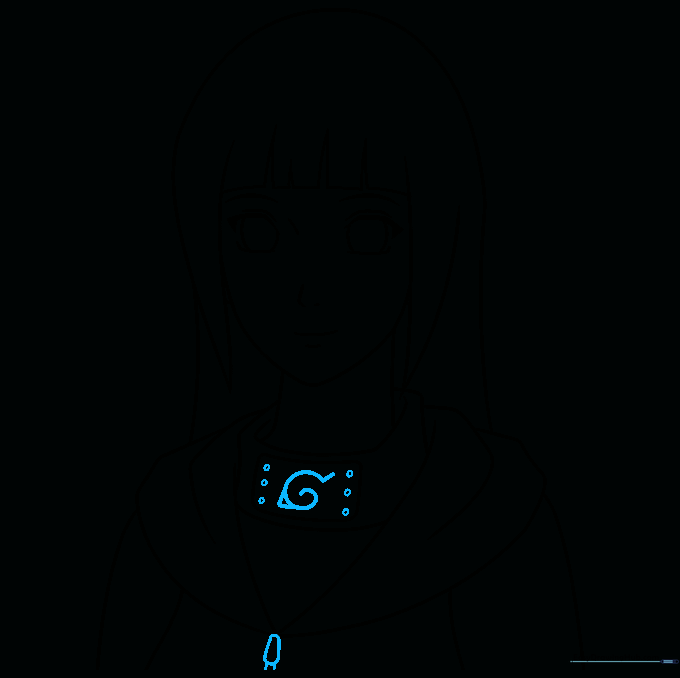
Detail the metal forehead protector. Draw the Leaf Village spiral symbol in the center, flanked by three small circles on each side. Add a small oval shape to the front of the garment. Tip: Take your time with the spiral; it's the most recognizable part of the emblem!
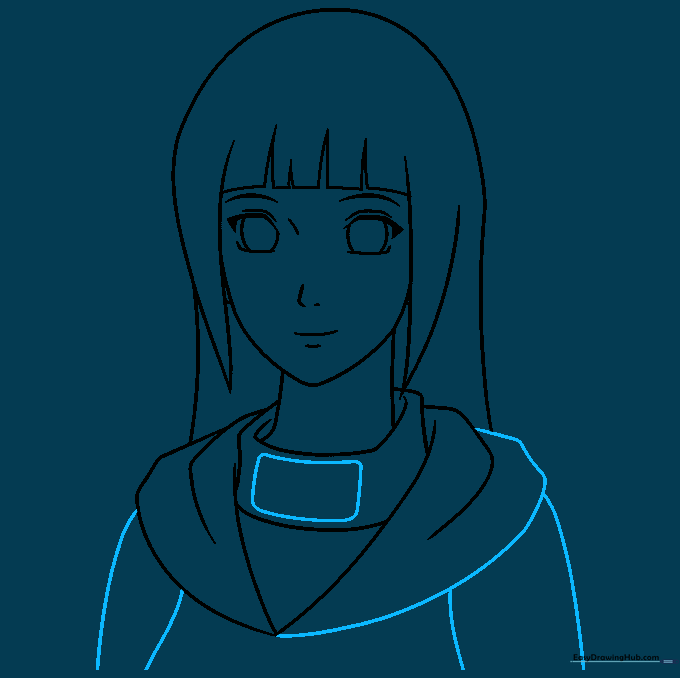
Step 9: Final Garment Details
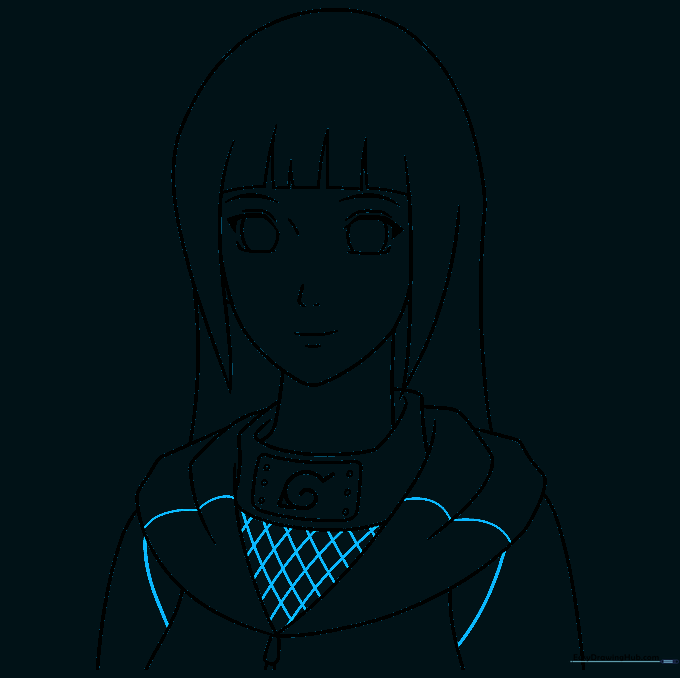
Finish the outfit by adding a cross-hatch pattern near the V-neck and curved lines across the shoulders and arms to represent seams. Tip: Keep your cross-hatch lines light so they don't overpower the rest of the drawing.
Step 10: Bring Hinata to Life with Color
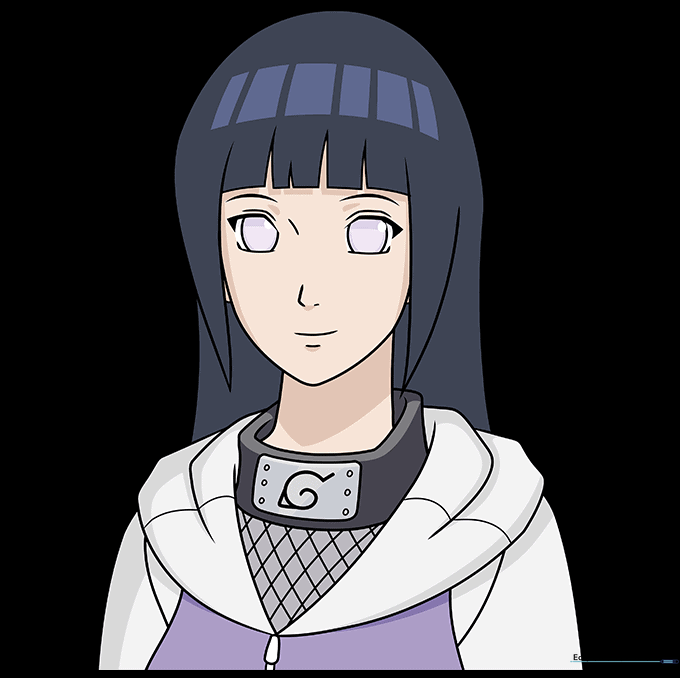
Now for the fun part—coloring! Use soft purples, blues, and skin tones to match Hinata's classic look. Tip: Use a light touch with your coloring tools to create smooth gradients in her hair.
More Tutorials


